It’s been a while since we caught up with Naomi Findlay’s progress on her Carrington House reno, but we can assure you it’s been worth the wait because today we have this knockout before and after of the exterior to walk you through. I mean, really?! It’s off the charts! It’s a brave woman who takes on a project like this one, but if anyone can…


Over to you, Naomi…
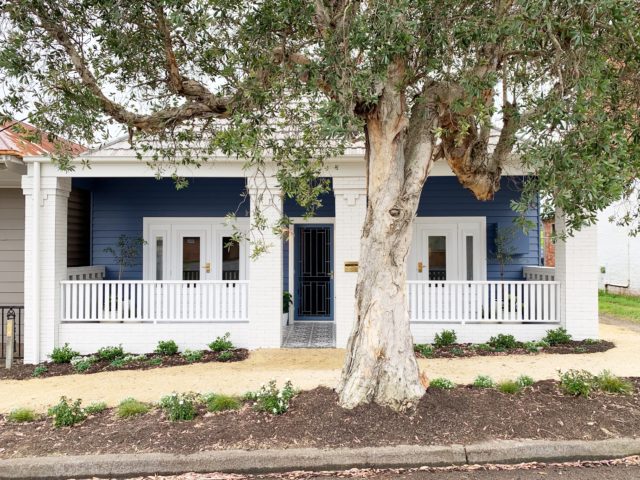
Today we’re taking you outside! Tackling the facade has transformed this once old brick house into an eye-catching home with a breathtaking streetscape.
We didn’t have much appealing to start with so we had a lot of work to do here! We had balustrades that were cracked due to the beautiful trees, ceilings full of asbestos and a leaky roof. In other words, it was about time that we did something about it!

STAGE ONE
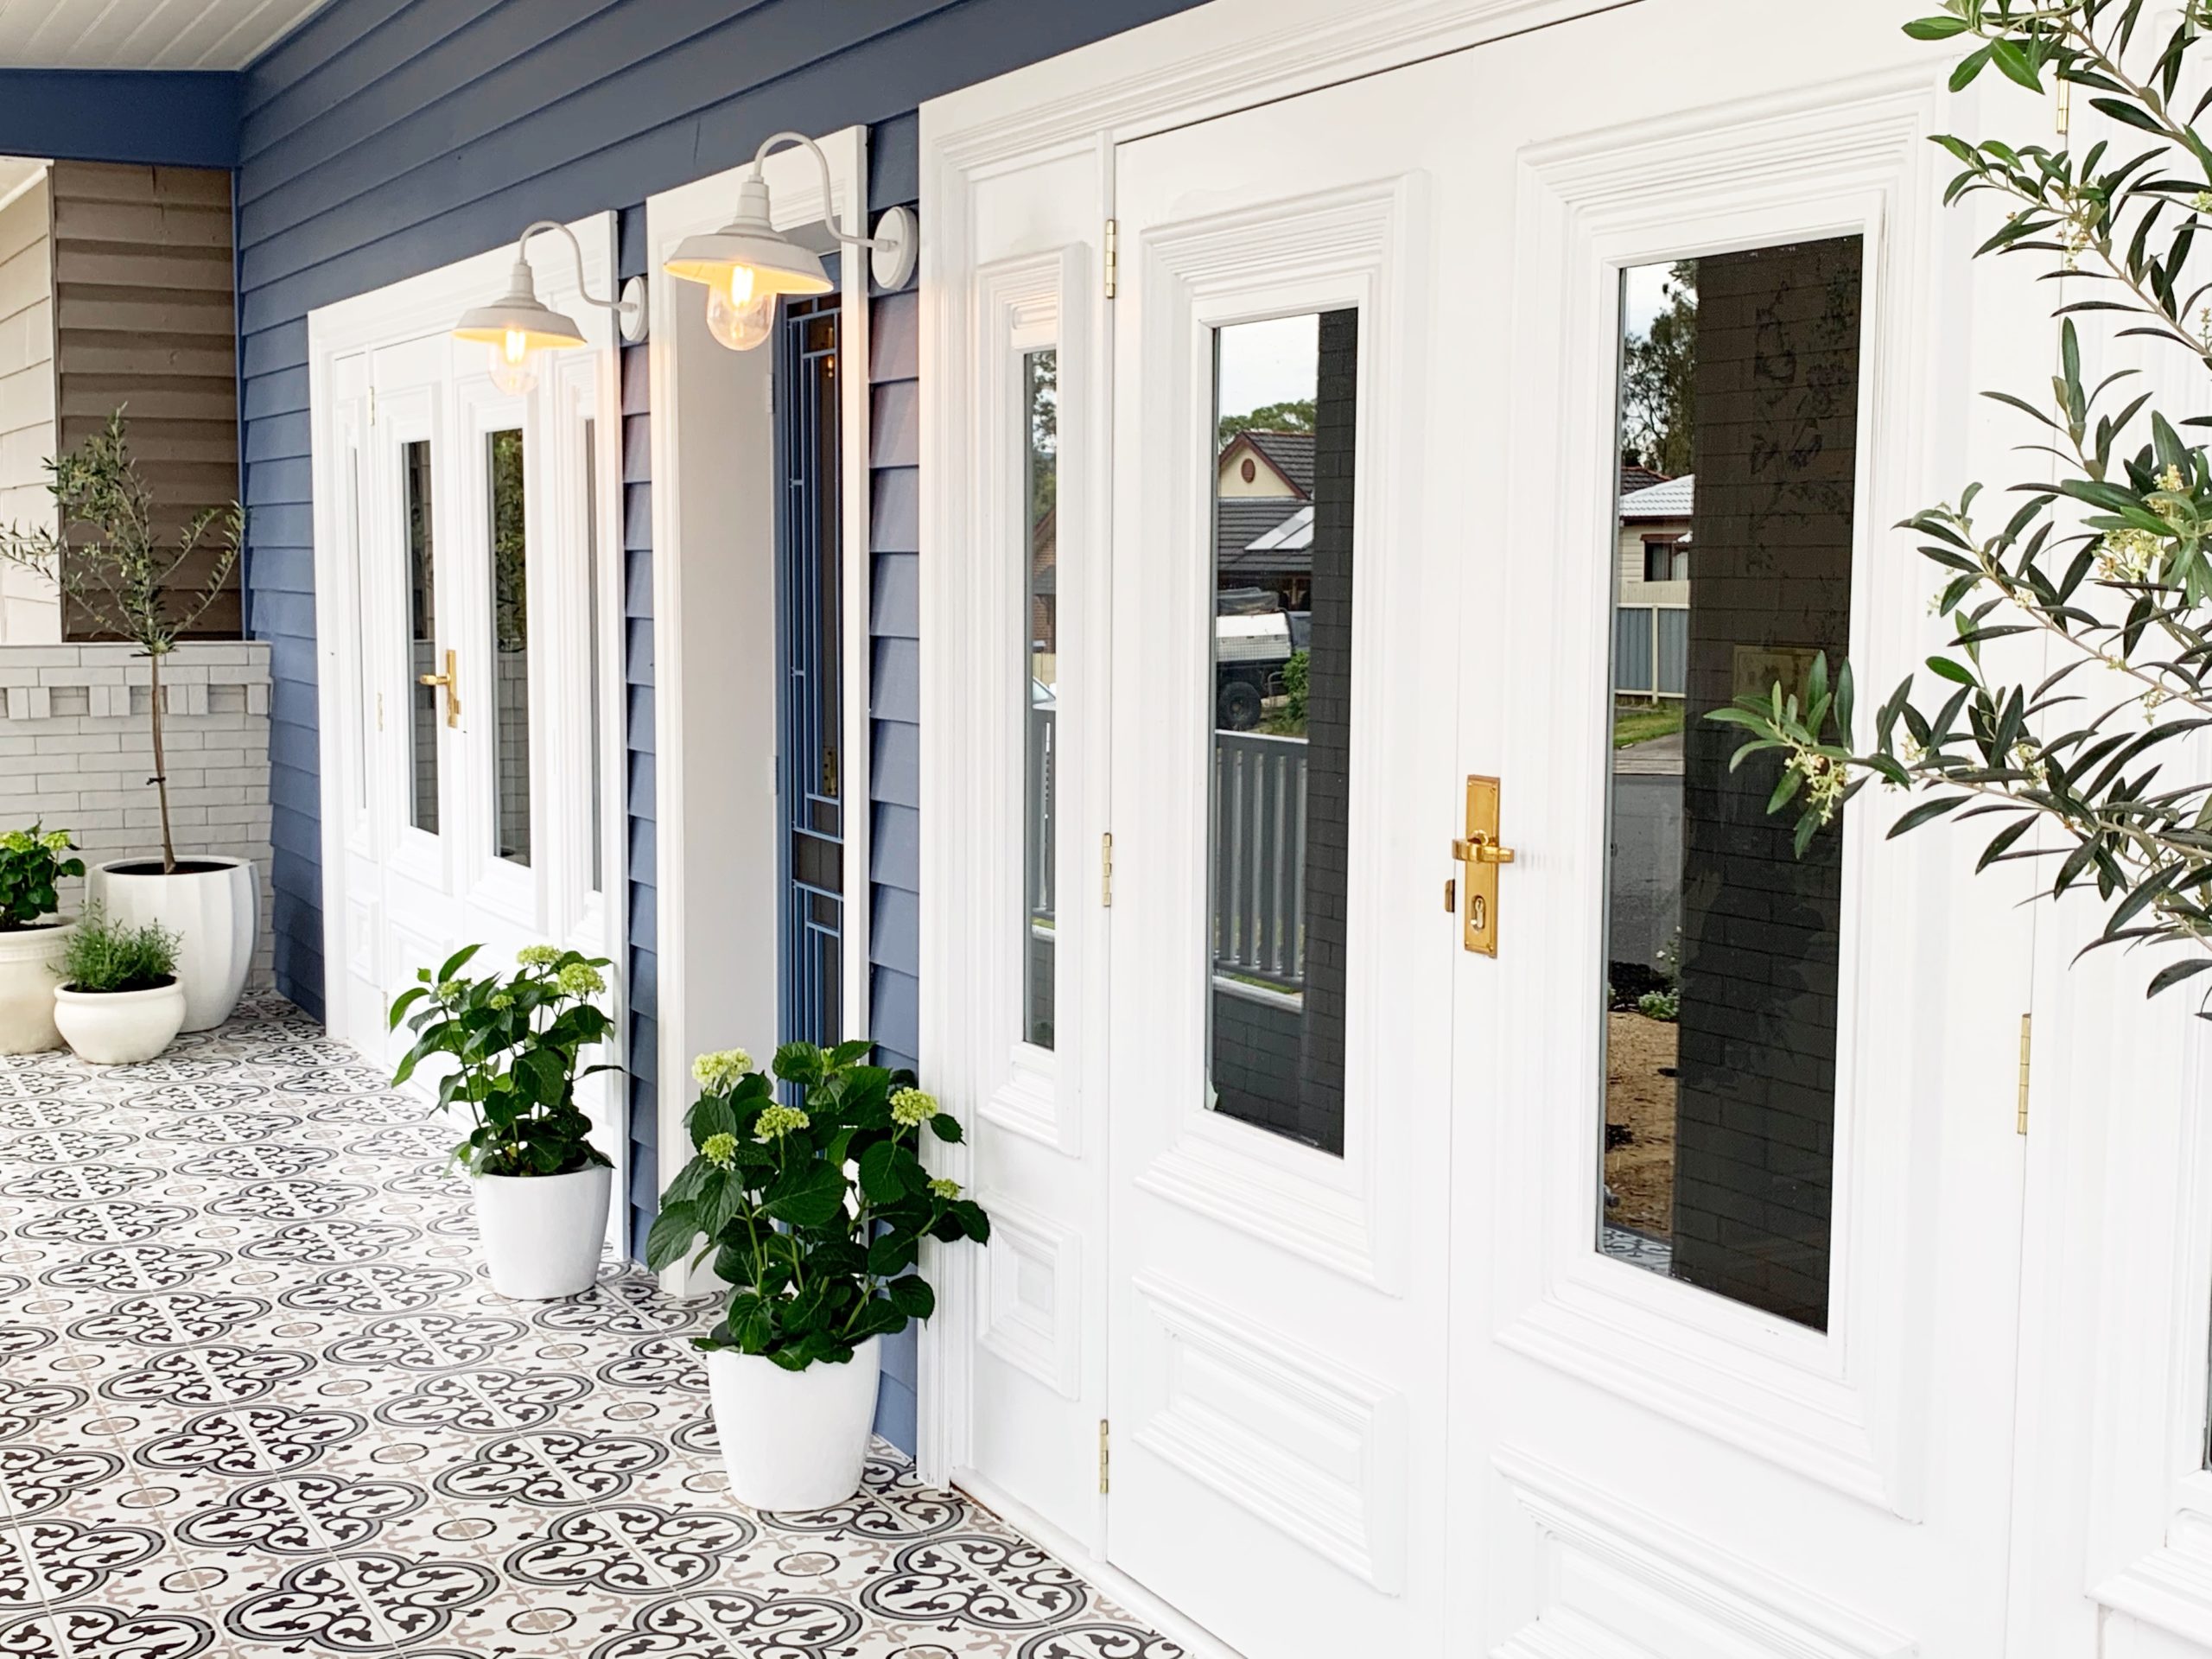
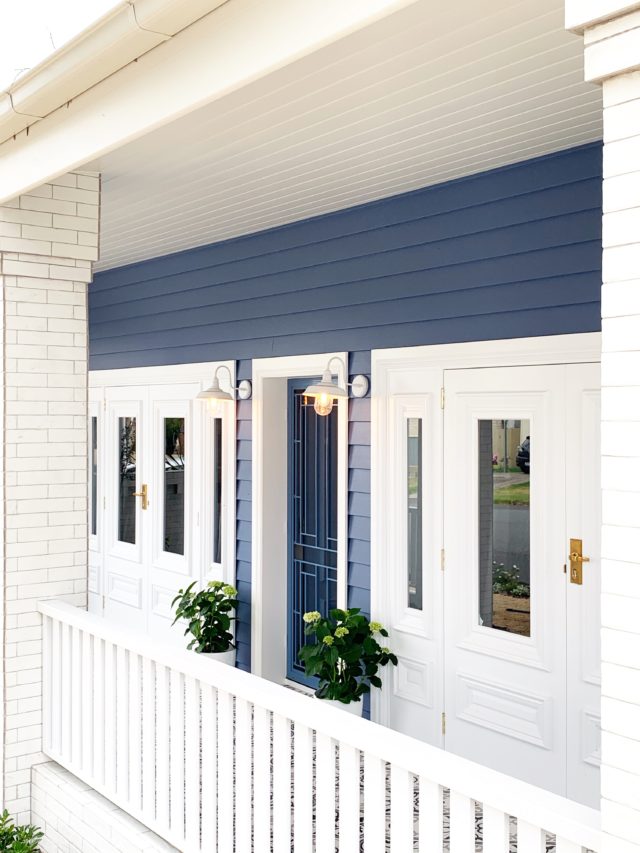
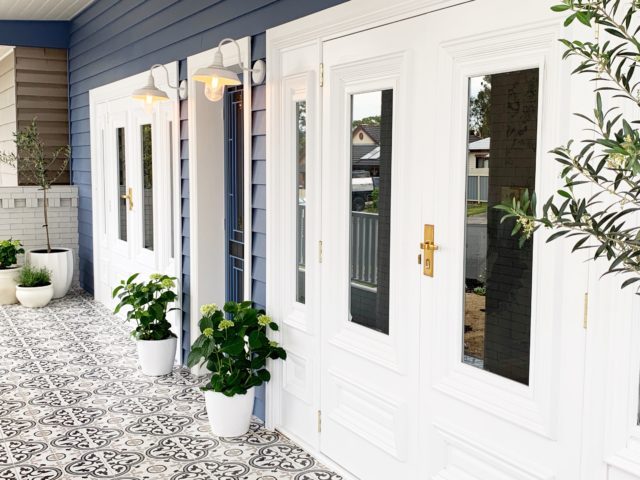
The first step was grabbing the sledgehammer and knocking down the cracked balustrades. To balance the symmetry of the house, we decided to install two beautiful French doors on either side of the rooms.
Next, it was time to remove the asbestos and the roof with sadly, a complete rebuild.
STAGE TWO
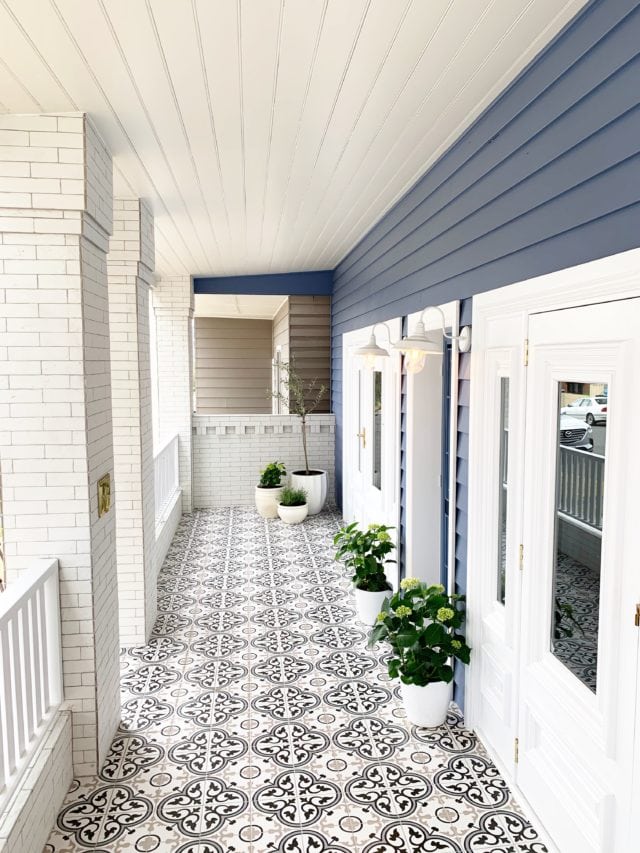
Pachira Tiling came to screed the porch floor, giving it falls so when it rains, the water simply runs away. Then Andrew tiled away the balustrades of the front porch with some beautiful white brick balustrade tiles.
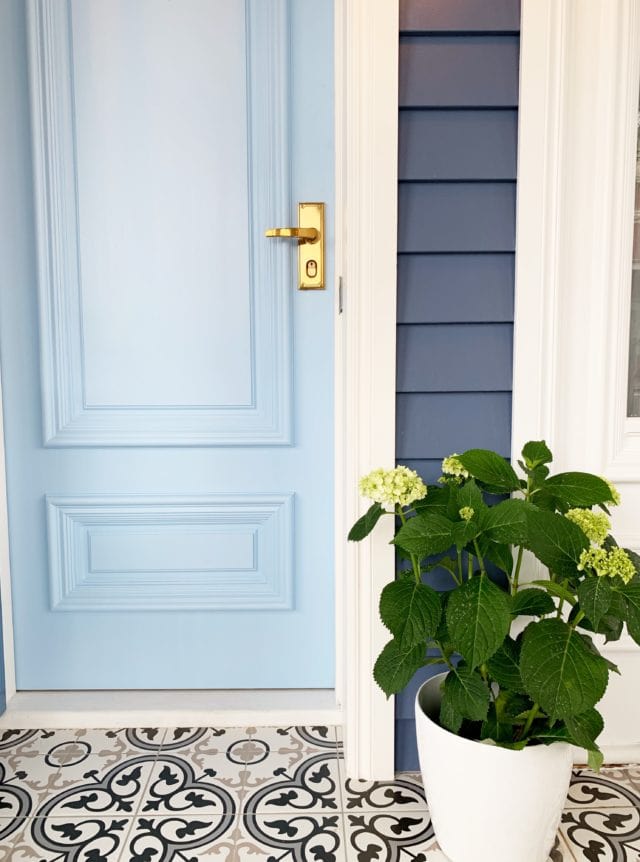
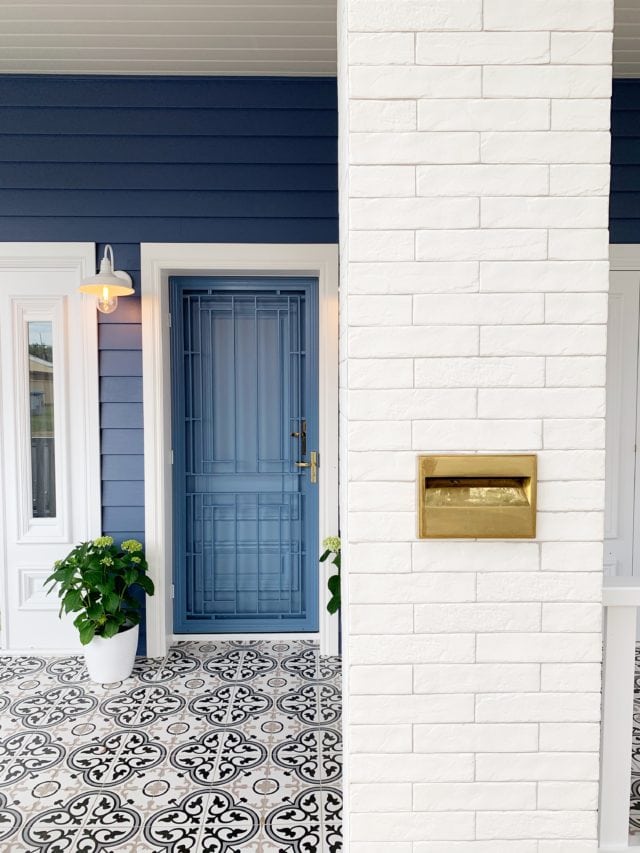
For a completely different but traditional look, we decided to go with a beautiful cast panel custom colour front screen door. The team from Cotton’s Glass came in to install the door to sit in front of our main door.
STAGE THREE
With doors in and tilling begun, it was time to start cladding the front facade of the house! Team Ferris come in to first help set up the string lines, batten the front facade and then accept the deliveries.
Then we were ready to add some colour! We went with a cape blue from Taubmans, and spray painted our beautiful french doors white. We kept it super simple for these balustrades and rails with a simple, clean and classic look.
STAGE FOUR
With all the construction and work done, it was time to tile the floor, and don’t we have a showstopper tile for you?! Andrew came in to help tile the floor in this beautiful grey patterned floor tile from Beaumont Tiles. And with the tiles all in, that wrapped up our transformation of the front facade.
What do you think?
Here’s a few more detail shots…
Read about everything used for the facade
Want to learn from the best? Check out Naomi’s free online renovation masterclass.

Stone cottage renovation that’ll blow your mind!

Depressing kids’ room becomes nurturing, dreamy space.

IKEA hacks Australia: DIY built-in HEMNES cabinetry how-to
