Categories
Architecture Design Outdoor & Exteriors RENO ADDICT Reno Products Reno Trends

The new look bricks and how to use them in your contemporary home

Whether it’s the sleek modern look or a nod to Australia’s brick architectural heritage, contemporary brick homes are increasing in popularity, matching the design desires of architects, designers and homeowners alike.

Ebony brick – Perimeter house

Once associated with older homes, the humble brick has gotten a makeover. It provides flexibility with on-trend colours, elegant finishing and textural options for interiors and exteriors. “Concrete face bricks can make a statement with stunning design elements,” says Nathan Martyn from Adbri, Australia’s leading masonry manufacturer. Adbri’s concrete bricks are Australian made, making them a good option for building or renovating projects. Their newest series of coloured concrete brick products are 100% colour-through to reduce chipping and increase longevity.

Bricks are versatile and can be used to create a number of innovative looks from mid-century to contemporary. Homeowners trying to achieve a fluid design in their exteriors can choose anything from shapely furnishings, softly curved walls, round windows to arched doorways and stairways. Curved architectural detailing like this promotes a sense of calm and beauty to the home.

Used internally, exposed face bricks can embed a sense of permeance, security and style. Adbri has multi-design options so you can personalise by introducing speciality laying patterns. Reflect your inner aesthetic by creating a feature wall, a fireplace or highlighting an entry point. Utilising the material within the exterior and interior design of the home creates a cohesive, modern look throughout.

Ivory brick – Carwoola house.

With new colours ranging from stunning white to moody dark greys and blacks, as well as a made-to-order option, there’s a colour to suit all styles of houses from the clean lines of contemporary minimalist to the relaxed style of modern coastal.

A smooth, rendered finish suits a modern contemporary home, a lightly textured shot-blast finish is perfect for a raw and natural finish, or a highly detailed exposed aggregate honed finish that offers a luxurious crushed stone appearance can completely change the look and feel of a wall.

Ebony brick – Perimeter house.

The bricks are also energy-efficient, durable and require little to no maintenance. Their strength helps guard against a range of environmental elements that homes face today and provides a stunning curbside appeal.

Ebony brick – Clinker house. Rory Gardiner photography.

For more on Adbri Masonry

Categories
Before & Afters DIY Outdoor & Exteriors Real Renos RENO ADDICT

Single mum achieves amazing home makeover on a budget

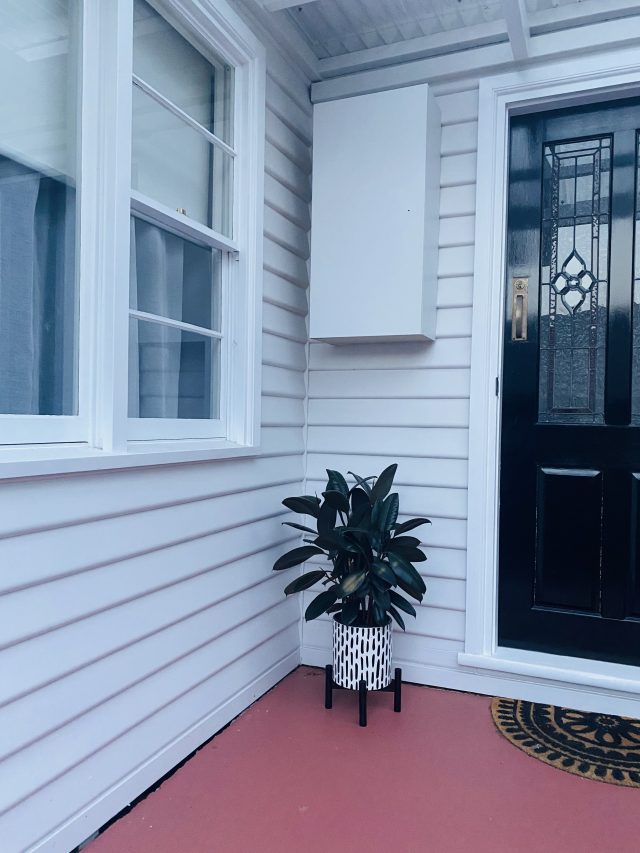
They say first impressions count and we were so blown away with the difference Kat Marshall made to her entry recently for well under $1,000, we just had to share the inspiration.

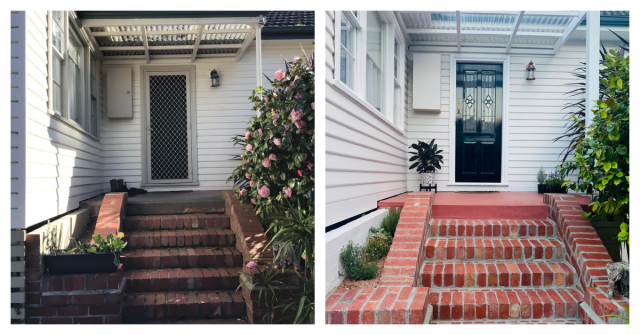
Before and after

“I was pretty embarrassed about it when people came over,” said Kat, who lives in Gippsland VIC and is single mum to a three-year-old “tornado” Patrick. She’d already started painting her weatherboard house white and as with all renos, one job leads to another! “It looked great but highlighted how shabby the rest was!”

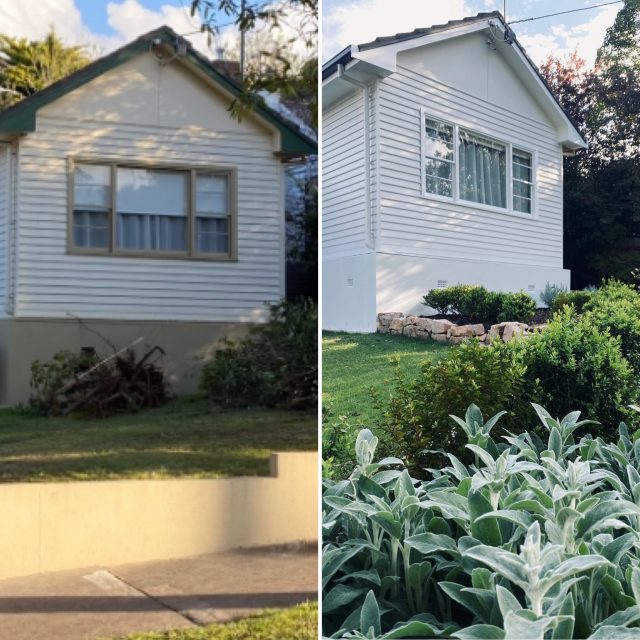
Kat started by painting the exterior and one thing led to another

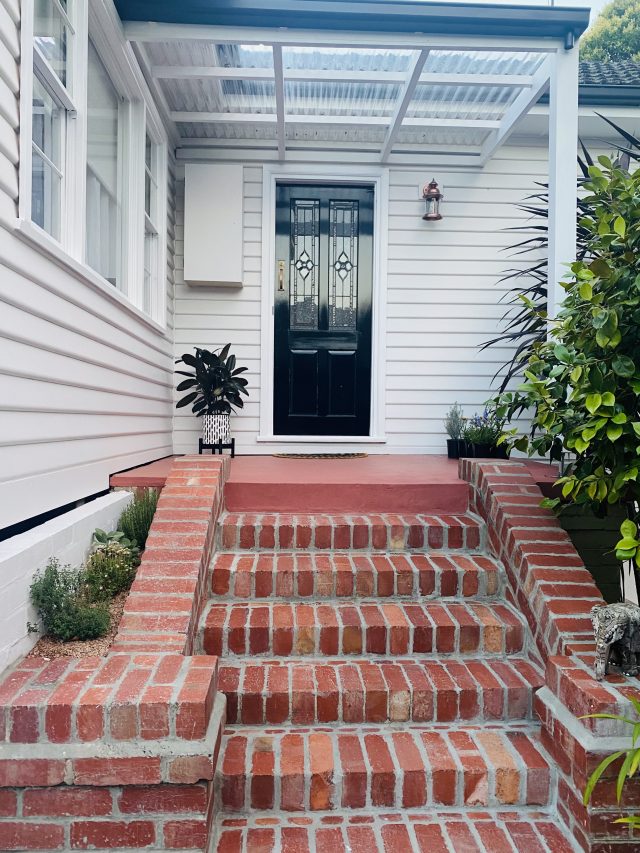
The first thing the 38-year-old did was replace the roofing and the fascia of the verandah. “That was a little beyond my comfort zone and I was able to get a local apprentice builder I knew to do that. I had the awful steel pipe post replaced with a nice timber one, painted it all and it still looked shabby! So I watched a few YouTube videos on how to regrout bricks, went to Bunnings, got a $10 bag of mortar mix and got started. That was the longest task, taking about three days, but was surprisingly relaxing to do!”

Next, Kat got some Haymes paving paint to complement the colour of the bricks, and painted the concrete at the top of the steps, outside the front door. 

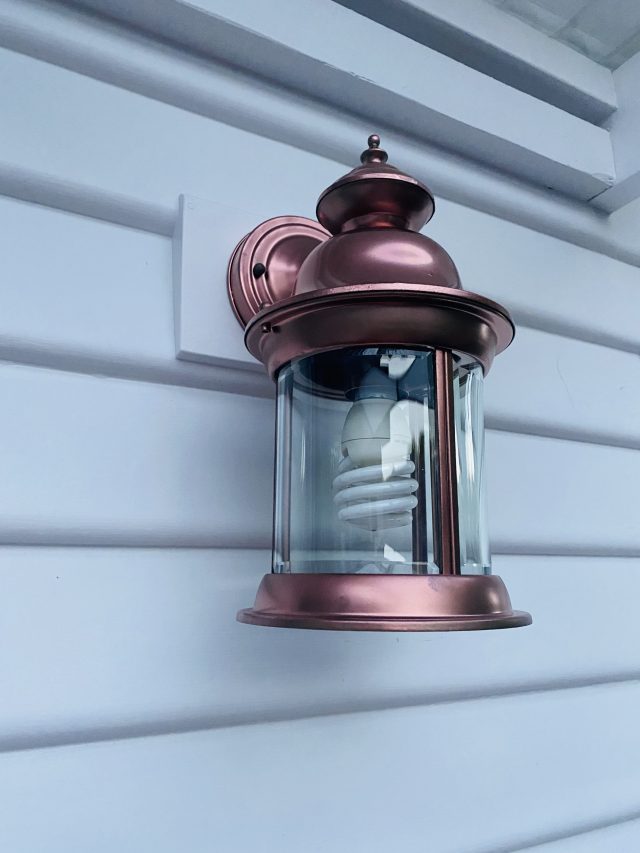
“The wall light was a fun little project, and a colour that I thought might look a bit gawdy, but I surprised myself! I pulled it apart, gave it a light sand and washed it, then sprayed with etch primer first, followed by a Dulux spray paint – Duramax in Copper Rose.

The spray painted light looks brand new

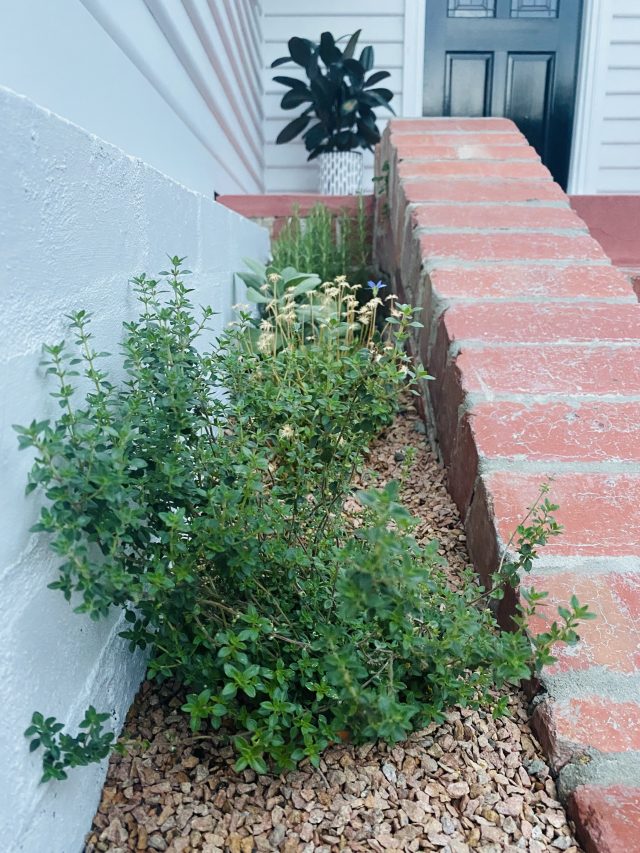
“I got some plants from Bunnings and it all came together, leaving me feeling proud as punch of my little project. It made such a huge difference and cost well under $1,000.”

Kat says providing a nice home for herself and her son is really important to her. “I purchased this house whilst pregnant and had others move me in about three weeks before I had my little Patrick.

“I have done so many projects since I’ve been here. I got so much done when I was on maternity leave. I was never the mum that slept when the baby slept, I was more of a work my butt off until baby wakes type of person! Honestly, I had a lot going on and I think I used house projects as a distraction.”

As well as working full-time, Kat has a side hustle creating custom art, using the extra money she makes to pay for her DIY projects. “I’m independent to a fault and will always try doing something myself before getting someone in, mainly because I know that my finances would never stretch far enough to achieve what I want to, and also because I am a practical person and I enjoy doing the work!”

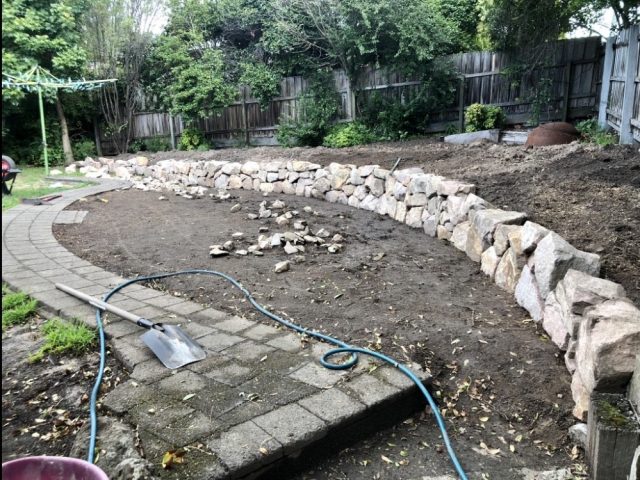
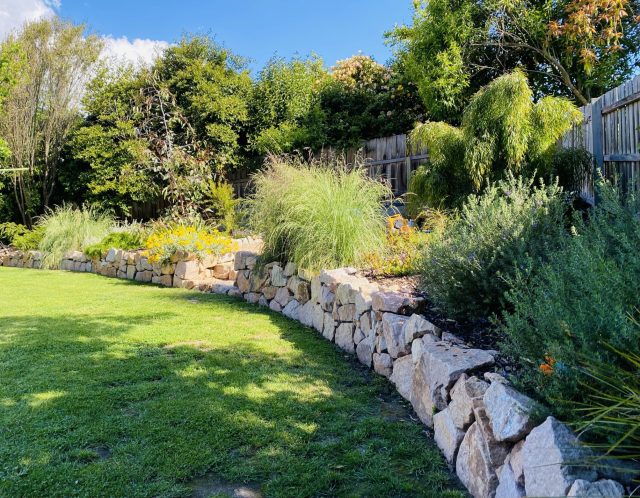
To date, she’s repainted the interior, got new flooring throughout and landscaped the yard! “That was pretty major! I hand dug everything and carried every single rock in from the front as there is no vehicle access.”

Landscaping in progress!
The end result!

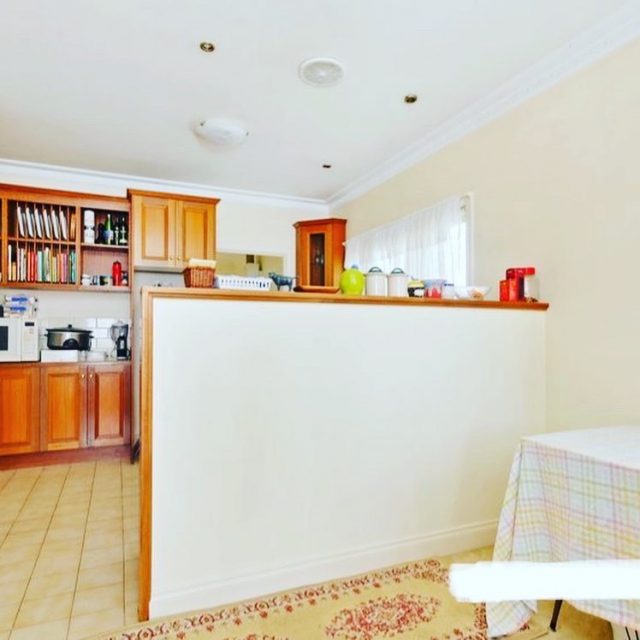
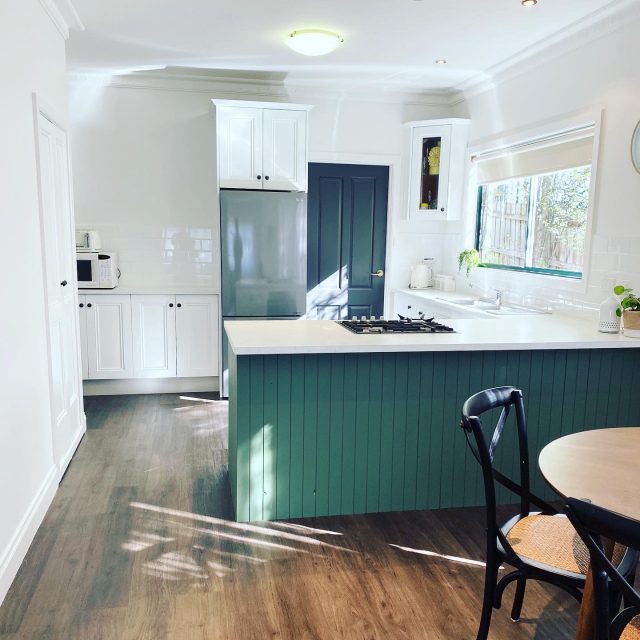
She also revamped the kitchen on a budget, doing everything herself except for the installation of new gas appliances and bench tops.

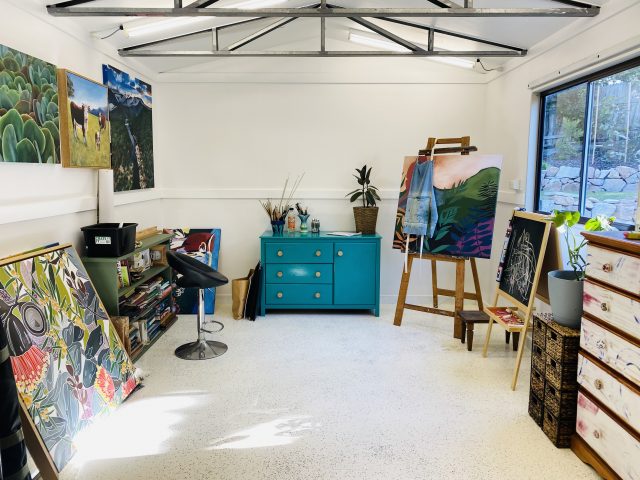
And last but not least, Kat converted her garage into an art studio.

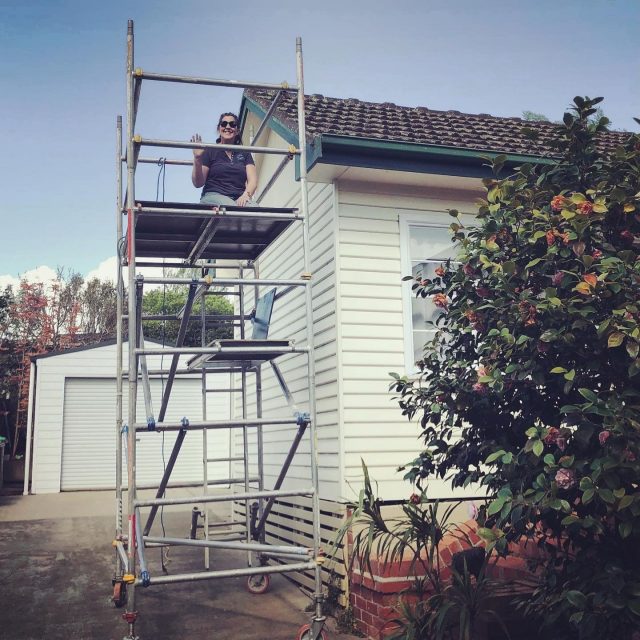
Meanwhile, she continues to paint the exterior of the house.

Kat in action

“My Patty boy can be a great help. I get him involved in all of the projects and he always tells me that he’s going to build me a new house tomorrow so who knows, I might be influencing his career choice from an early age!  

Kat’s little apprentice, son Patrick!

“I do a lot of the work on weekends and after work and occasionally take some leave from work to get through bigger tasks that I can’t do with Patty around. At the end of the day, I’ve had to accept that my projects will always take longer than they would if I had someone around and I’m totally okay with that because the satisfaction that I get when I complete one of the projects is enormous.”

Got a reno project to share? Contact us.

Categories
Expert Tips Outdoor & Exteriors RENO ADDICT

Renovate a rental property on a budget: a case study

The makeover of this investment rental property by Rachael Turner of Front Porch Properties is anything but basic. We absolutely love all the clever tricks, flatpack hacks and floorplan tweaks she has used to create a unique and high end look without overcapitalising. It definitely pays to have a good carpenter on your speed dial, that’s for sure!

AFTER

BEFORE

You can watch Rachael’s video below, but here we’ve highlighted what we love best about what she did in this project.

Street appeal:

Rachel added gorgeous Hamptons-esque timber balustrading to the veranda and stencilled the deck to make it look so much like tiles we can’t believe it isn’t! The original door was simply painted blue to give it a pop of colour.

First impressions:

The pokey living/dining/kitchen area was opened up and became open plan. A new IKEA kitchen is given the bespoke look with some custom panelling along the back and a custom bench top. Clever! An affordable  charcoal-painted barn door looks fantastic but is also practical.

That stencilled concrete deck has blown our minds! And the original door is transformed with a lick of blue paint!

Bedrooms and bathrooms:

The spare bedroom becomes the new master bedroom with the addition of an ensuite, making it a two-bedroom home. IKEA wardrobes have been ‘built-in’ for a more expensive look on a budget. One wall of feature blue tiles and a marble-topped vanity in the en suite take it from basic to luxe without spending too much. In the main bathroom, the doorway was moved across so a better layout could be created. The original master became the second bedroom. Money was saved by keeping the original built-ins but adding trim and new handles and painting them, as well as adding a bit of custom carpentry in the way of a window seat in the bay window.

A basic IKEA laundry and a store cupboard with shelves behind the kitchen make great use of the remaining space which was previously a “weird and creepy” shower!

And find out how she stencilled that concrete deck here:

Rachael’s great IKEA hack kitchen.

See Jen’s flatpack kitchen.