Categories
Before & Afters Designers DIY Interiors Addict Interviews Real Renos RENO ADDICT

How to do a stylish coastal kitchen makeover for just $500!

When British ex-pat Keeley Menz purchased her home an hour south of Perth last year, she loved everything about it except for the kitchen. “It is a beautiful home, but the original kitchen just wasn’t my style as it was too dark and brown. My first instinct was to paint the walls but I felt that if I lifted the kitchen it would make the whole space feel brighter and lighter.”

She set about transforming the space with chalk paint, stick-on stone tiles and new handles. Incredibly, the circa-2008 kitchen has been transformed into a breezy, coastal-inspired space and the whole makeover only set Keeley back $500!

BEFORE
AFTER

Having just spent over $10,000 on moving to Western Australia from the eastern states, Keeley was looking for a cost-effective solution to update the kitchen cupboards, when she came upon Frenchic Paint. “I’ve done a lot of DIY and makeovers in my time, and I’ve painted a kitchen before, but this product was amazing. It didn’t drip at all, and the paint’s self-levelling aspect really works,” says Keeley who, incredibly, worked on the kitchen during the day (with her two-year-old son running around) and at night when light conditions weren’t the best.

BEFORE
AFTER

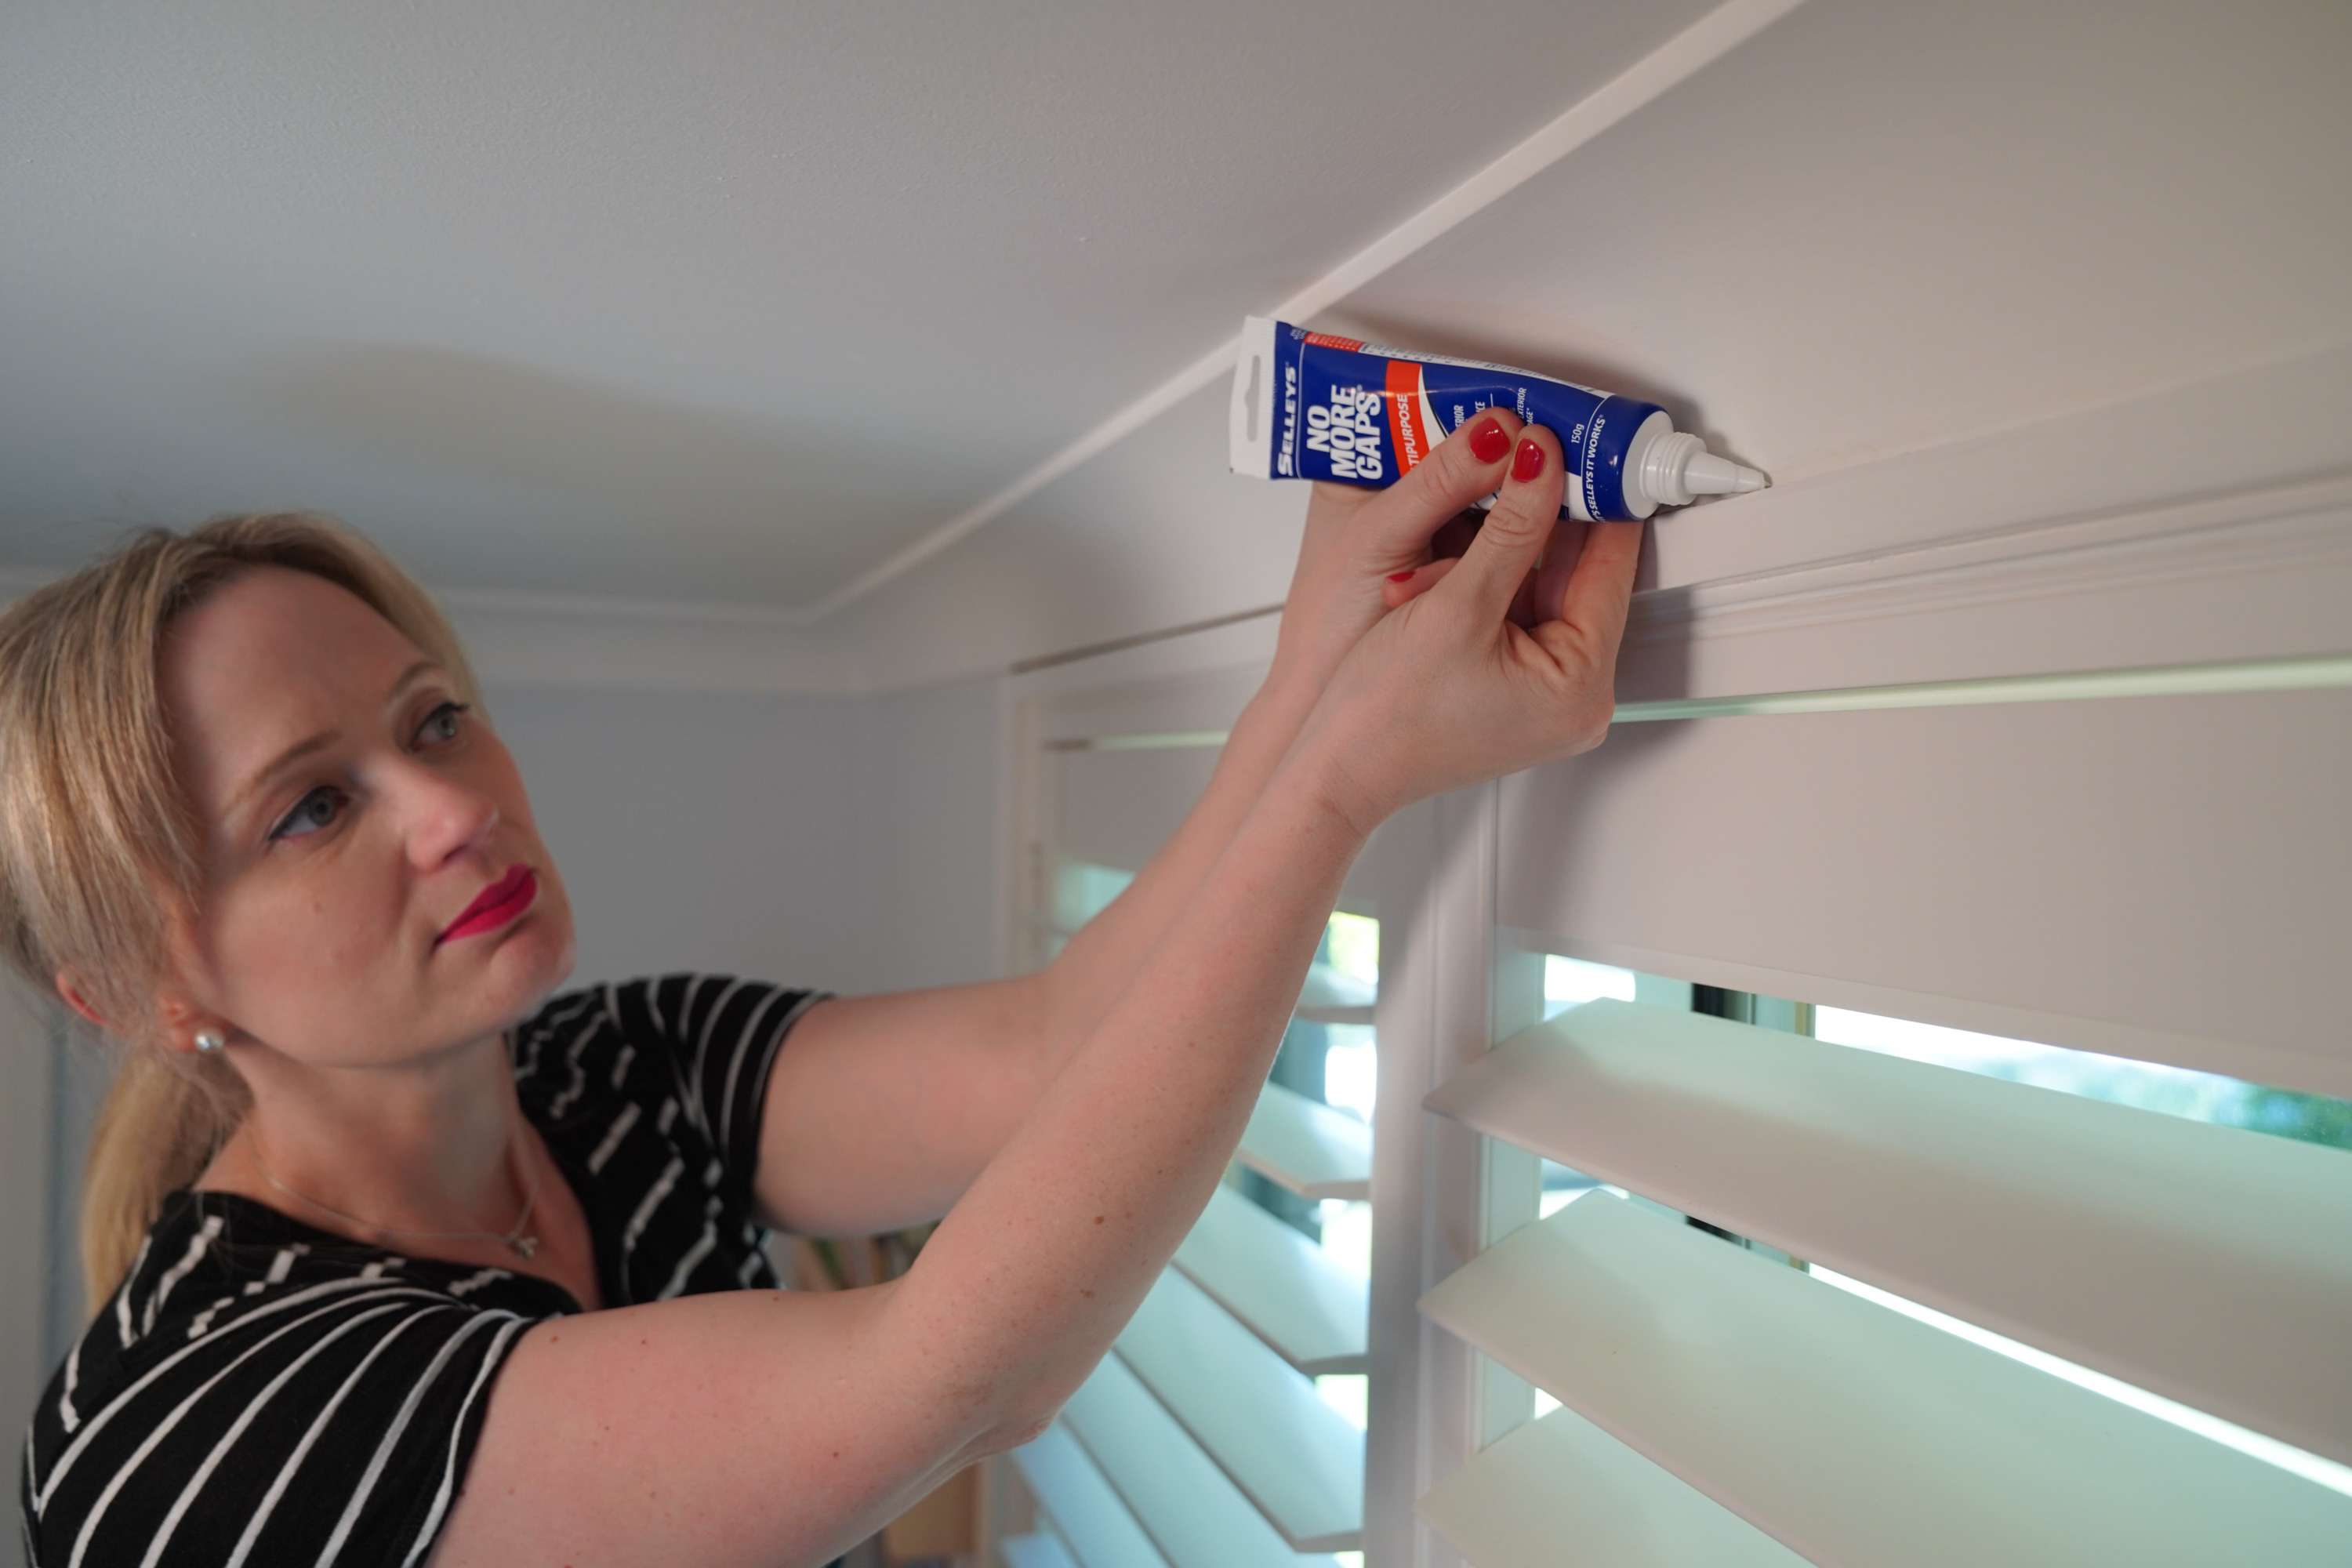
“Obviously, it would have been better to have done all the painting under natural light, but it wasn’t always possible. I remember being amazed when I woke in the morning because I was sure I’d have to go over the cupboards again but there were no drips or streaks,” says Keeley, who cleaned and lightly sanded the cupboard fronts before applying around three coats of Frenchic’s Dazzle Me. “I did a lot of coats because the cupboards were so dark and I wanted to make sure they were completely white. I’d describe the finish as matte and easy to keep clean,” says Keeley.

AFTER

Paint aside, Keeley used self-adhesive, heat-resistant, waterproof stone tiles from Tic Tac Tiles to update the kitchen’s functional yet dated glass splash back. The real stone tiles have adhesive backing and are easy to install on any clean surface.

The kitchen was put through its paces recently when Keeley’s family arrived from the UK for a long holiday over Christmas; with a full house for six weeks, Keeley says the kitchen withstood the onslaught. “I had my mum, dad, sister, husband and then three toddlers smashing into the cupboards with their toys, but the wear and tear was fine!”

Chalk and mineral paint Frenchic was founded in the UK in 2014, fast gaining a loyal fanbase and a Facebook group of more than half a million DIYers sharing their projects. It has been available in Australia since 2021, through independent stockists and online.

Get a free Frenchic colour chart sent to you

Categories
Design Designers DIY Expert Tips Interiors Addict Outdoor & Exteriors

How to choose your outdoor paving pattern: 5 options

Summer means most homeowners will be using their backyards more at the moment. To add more value to your home, you may want to create an outdoor paved area, and you may be surprised how DIY-friendly a project it is!

Four-time Melbourne International Flower and Garden Show (MIFGS) gold medallist and TV personality Jason Hodges, explains the many options in laying patterns and shares his top tips for creating the ultimate paved outdoor area for your home.

Jason suggests to first look at your backyard and make an assessment of the lay of the land. An important consideration when creating a backyard is the addition of colour and texture, as it sets the scene for the entire area. “Consider which paving colour will best compliment your existing space by matching them with roof tiles, guttering, bricks or render,” he advises.

Many homeowners choose pavers as they’re easy to install and make great DIY projects. Pavers allow you to get creative with different patterns producing unique focus points for your backyard without breaking the bank. “For variety, style and impact for your home, the flexibility that pavers provide is hard to beat. With any one paver, you can create four to six different paving pattern styles allowing you to find the right match for your home,” explains Jason.

How to pick your paving pattern

The most important element for those looking to DIY their own paving project is that some areas and paving patterns require half pavers to fill gaps, and this involves cutting. “Some paving patterns will require cuts via the use of a brick saw which can be hired from a local hire shop. While the hiring is easy, the operation of the saw requires caution and all of the required safety gear, so take your time or better still, engage the help of a tradesman,” says Jason.

Hot tipIf you are using pavers that will need to be cut, Jason suggests running a border around all of the pavers so that you don’t end up with little pavers on the edge.

1. Stretcher bond

Stretcher bond is the most common paving pattern as it’s super DIY friendly, requires minimal cutting, and leaves little wastage. A traditional pattern that replicates the classic look of brickwork, stretcher bond can also easily hide imperfections in the laying pattern.

2. Stack bond

Stack bond is an excellent choice when paving feature sections such as entertaining areas and patios, where the finished product sets the atmosphere of the space. Stack bond is a great paving pattern choice for large format pavers and can make smaller layouts appear bigger – a great design hack. This pattern is simple to install; however, it can become fiddly as you must lay each paver down by one corner, making sure that all four corners align for a straight stack look.

3. Herringbone

The herringbone pattern is a savvy design choice and is on the rise of making a stylish comeback. To achieve this look, take a smaller-sized paver and interlock the pavers on a 90-degree or 45-degree angle. Herringbone is an eye-catching pattern that will make a great first impression on any space.

4. Basket weave

The basket weave pattern is a design that adds character and dimension while complementing the existing brick surfaces of your home. When picking a paver to style a basket weave, take a close look at the aggregates (exposed coloured stones in your current brickwork), and choose a paver that is complimentary to the aggregate colours. To create a basket weave pattern, simply lay two rectangular pavers the same way each time, swapping in the direction of every “set” of two pavers, and repeat.

5. Mixing colours

Mixing paver colours is a hot new trend. Pavers of different colours and sizes create a modern paved look and also have the bonus ability to hide stains as the colour varies throughout the pattern, making it a fantastic choice for families. 

Watch Jason show you how it’s done!

Jason Hodges is an ambassador for Adbri, one of Australia’s pioneering construction materials and industrial mineral manufacturing companies.

Categories
DIY Expert Tips Interiors Addict RENO ADDICT

Average cost to fix a botched DIY job is $1500

Research from Australia’s largest online tradie marketplace, hipages, shows $1,500 is the average cost to repair a botched DIY job. 

With Aussies around the country on a summer break and planning home renovations or refreshers, hipages chief customer officer Stuart Tucker, shares his top tips to help homeowners looking to get on top of their DIY projects. 

Know when to call in an expert for help

For many Aussies, it can be tempting to try and undertake a summer job yourself with more than 23% of Aussie homeowners believing that they can fix most things around their home. However, nobody knows this better than Aussie tradies who say half (48%) of their customers underestimate the complexity of a job, and that 10-to-20% of repair jobs could have been avoided if they had been attended to by an expert sooner.

Avoid making a more costly problem, or putting your safety at risk. Know when to put down the tools, pick up the phone and call in an expert. Some common jobs where you should engage a licensed trade include:

  • Roof repair (missing roof tiles, roof punctures or cracks)
  • Outdoor landscaping (including tree maintenance, retaining walls, water features and shade structures) 
  • Gutter repair (leakage, dents, sagging, corrosion)
  • Electrical work (loose or broken wires).
Stuart Tucker from hipages

Communicate the issue as best as you can

Once you’ve determined what your renovation project is or what you are looking to get refreshed, I recommend reaching out to an expert to get started. In the consultation, provide as much detail in writing and through photos to help you book the right licensed tradie for the job. 

Helpful questions to ask yourself and share with your tradie include: 

  • What room or area are you looking to get fixed or refreshed?
  • Where in your home will the DIY project take place (outdoors, indoors,  floor level etc)
  • Roughly, how big is the area or renovation in mind? 
  • What materials would you need and overall budget? 
  • What timeframe can this be completed in?

Hire a trusted tradie

More than 20% of Aussie homeowners admit they’ve had a DIY go wrong. This Summer season, if you’re looking to get some jobs done around the house and they’re a bit beyond your skill set, consult an experienced tradie to avoid a DIY disaster. 

Use the hipages platform to reach out to a trusted tradie, focusing on those with the appropriate licences where required. Here, you can hire an experienced or verified tradie and view photography and reviews from their past jobs as a proof point of their work.

To connect with a trusted tradie today, check out https://hipages.com.au/

Categories
DIY Expert Tips Interiors Addict

5 tips for first time painters: it’s all in the prep!

The thought of painting walls and ceilings yourself can be a daunting. Nobody wants to make what seem like permanent mistakes whilst painting for everyone to see. That is why British Paints has shared their top tips that all first time painters need to know.

Check for damage on walls

The first important step when starting a new paint project is to check walls for damages and marks, in order to determine exactly what paint and tools are needed. Are there any leaks? Is there pre-existing mould or stains? Are there any cracks? If these aren’t attended to before painting, it will impact the final result. Water stains, oil based stains, ceiling mould, gaps, holes or cracks are all common types of damage. Such issues can be solved with specialist paint products.

*Tip: Use oil-based products for water stains and water-based products for oil-based stains!

Set up with the right tools

Having the right tools is essential for tackling a paint project. Pairing the right paint to the right brush/roller is key to ensuring the finished product is faultless. Brushes are perfect for small areas, trims and edges, while a roller is great for a large painting area, such as a wall or ceiling.

Along with the correct pairing, add the following to the shopping list: frame, ladder, roller tray, roller pole, drop sheets, painter’s tape, filing blades, gap filler, rags, sandpaper, sugar soap.

How to know when to use a primer

Although similar, primers and undercoats both serve quite different functions. Primers act as a foundation for paint to stick to, while undercoats create a flat and level base for topcoats. An easy way to remember when to use a primer is if a surface is new and hasn’t been painted before.

If a surface is painted and in good condition, but in need of a refresh, a regular paint without a primer can be used. Ensure the wall has had a good clean, with sugar soap, then use British Paints Clean & Protect Low Sheen to give the wall a refresh. Clean & Protect is guaranteed to protect from mould, it’s easy to apply, allows for a smooth flow and an even finish.

Choosing the right paint

Paints are designed for different purposes and it’s important to look for a paint specific to the project at hand. When painting a ceiling, for example, the aim is for a lower gloss paint, to create a flat finish. Whereas, if painting exterior surfaces, use a paint that can protect against seasonal demands.

Once the purpose of the paint is decided, it’s time to choose the colour! To assist with the hardest decision of all, Aussies can visit British Paints’ online colour wall assistant tool to work out the best colour for the project and how much paint is needed.

Give it a go!

The best way to get started on a painting project, is to just give it a go! Painting is supposed to be fun, particularly for painting novices setting out to DIY homes. Because of this, British Paints has the Good Job Guarantee which gives painters piece of mind by offering paint replacement for any mishaps or mistakes that happen along the way – so there’s no reason not to give it a go!

Click here for all paints and more help with painting

Categories
Bathrooms DIY Interiors Addict Real Renos RENO ADDICT Reno Products

Selleys bring out the perfect addition for matt bathrooms

Sponsored by Selleys

Matt bathroom finishes are definitely trending, with a move towards more textured, brushed and flat surfaces and materials in this room. We’re seeing more and more matt tile options and concrete (or concrete look) vanity tops. Shiny is no longer the be all and end all, with perfectly imperfect also a firm favourite!

They’ve created the ideal finishing touch with Selleys’ first Wet Area Matt silicone, as an alternative to the usual glossy finish version, for a softer look when finishing off your bathroom, kitchen or laundry.

As we’re always saying, it’s the sum of the seemingly little details in interiors which make all the difference and lead to a cohesive look. I wanted to try out this product for you in my own three-year-old bathroom, replacing some silicone which had turned yellow (it looked much worse in reality than the photos capture!) around my bath and some that had started to peel away on the floor.

You can easily DIY this yourself. You just need a caulking gun, a knife/blade to cut away the old silicone and a silicone applicator/scraper/spatula (or an ice cream stick!) to get that smooth finish. My friend and I managed it quickly and easily and it was actually quite satisfying! The non-corrosive, neutral cure formula (it takes 72 hours to cure completely) meant it didn’t stink either!

You can either spray detergent on the silicone or dip your spatula in it before you tool it for a smooth finish. Working in small sections makes for an easier and less rushed job!

Dip the silicone tool in detergent

I feel like by bathroom’s looking its best again due to this little change!

My bathroom back to spotless with fresh white silicone!

Selleys Wet Area Matt is a 100% neutral cure, mould resistant silicone sealant, specially designed to create a long-lasting waterproof seal that will not shrink, crack, or peel away. It comes with a 25-year guarantee*against shrinking, cracking and peeling.

Find Selleys Wet Area Matt at Bunnings

For more on Selleys products and to watch useful videos on their YouTube

00

Categories
DIY Expert Tips Interiors Addict Interviews

How to create a mudroom in a hallway or alcove

A mainstay in American homes, we’ve seen the mudroom concept surge in popularity in Australia over the last few years. A practical space at the entrance of your home, used to store all your household belongings, a mudroom is the perfect place to house shoes, hang up your bag, keys, dog leads and more.

These spaces are beginning to become popular DIY projects, as people crave functionality within the home and embark on a spring-cleaning refresh. And you don’t need a dedicated space to create a mudroom – a hallway, nook or alcove will suffice.  Wendy Rennie from Haymes Paint has some great tips to share.

Colour is everything when creating a mudroom
The first and most essential step of creating a DIY mudroom is differentiating the space from the rest of the house through the use of colour.

The great thing about a mudroom is that you can create one out of nothing. Often, these handy little spaces can be used to fill up an entryway or transform a hallway, inviting guests to take a moment to kick off their shoes or hang up their jacket as they enter your home. But to make this space feel like its own, colour is required.

“Since the mudroom is the entrance to the home, it is key to select a colour theme that is consistent with the rest of the house, but still creates impact. You want the impact of the first impression to flow harmoniously throughout the entire home,” says Haymes Paint colour and concept manager Wendy Rennie.

Haymes mudroom

“I recommend using a darker shade to differentiate the mudroom from the rest of the house, especially if you do have an alcove or separate entryway to use. If your mudroom is simply an extension of your hallway then a lighter neutral, complemented by accents of a darker tone that may feature elsewhere in the home is a nice introduction for your guests of what is to come,” says Wendy.

You can choose any colour theme you desire, as long as you steer clear from bright primary colours. Reds, yellows or even blues will be too overwhelming when first entering the house.

Bring it to the next level with furniture
Not everyone has a dedicated room or nook that they can designate for this space, and the good thing is you don’t actually need one. You’d be amazed at what you can create with simply the right colour themes and a few simple pieces of furniture.

A set of hooks you can drill into the wall, a hall table and a cute wooden shoe rack is all you need to create a ‘mudroom vibe’ without requiring a designated room. The best part about these furniture pieces is that they are practical but also aesthetic, adding character and style to a hall or entryway.

Haymes mudroom
This mudroom features the Haymes Paint Artisan Surface Industrial finish on the walls

Accessorise!
Once you have selected the furniture you can inject your personality into the mudroom through the accessories you choose.

To warm up the mudroom, Wendy suggests laying down a rug to add a pop of colour and act as an entryway for your guests. Potted plants by the door and in the corners will also enliven the mudroom with the freshness of greenery, acting as the perfect transition from the outdoors to the indoors.

Photography: Martina Gemmola

For more on Haymes Paint

Categories
Before & Afters DIY Interiors Addict Interviews RENO ADDICT

DIY: Powder room and laundry makeover for under $500!

While interior designer and stylist Melissa Rettore’s Melbourne home is only six years old, boredom had set in. “The home is relatively new but all the colours that were in six years ago are no longer trending and I just felt like changing things up!” She overhauled both the powder room and laundry recently for just under $500! And when you consider that both rooms were completed over one week, during her daughter’s three hour daily nap times, the end result is all the more impressive!

BEFORE powder room
BEFORE powder room
AFTER powder room
AFTER powder room

Melissa teaches interior decoration at Design School, and it was while researching topics for her students that she came up with the idea. “I was teaching about what was trending and DIY is certainly going off. I’d seen reels with people turning furniture into terrazzo pieces and that’s where the inspiration came from,” she says.

Powder room before
Melissa started by painting the tiles with Dulux Renovation paint

Starting in the powder room, Melissa used ‘Nutmilk’ paint in half strength from the Dulux Renovation range to paint over the charcoal floor tiles before adding $10 Kmart Decor and Furniture Paint Chips and a sealer.

Part of Kmart’s new DIY range, Melissa warns that Dulux doesn’t recommend combining the paint chips with their product; mainly because they haven’t tried and tested the process. “That said, all the people I follow on Instagram had tested the combination over many months in showers and wet areas and it had held up. I’ve also tried to scrape the tiles and, so far, they seem very durable,” says Melissa.

Dulux Decor and Furniture Paint chips gave the floor a terrazzo look
$10 Dulux Decor and Furniture Paint chips gave the freshly painted powder room floor a terrazzo look

Melissa used the same paint on the cupboard fronts and spray painted the cupboard handles with $5 black spray paint. She then added a Target mirror and decorative wall sconce that was inspired by the the viral Kmart wall planter hack. She repeated the paint and paint chip process that she carried out on the floor tiles, hung the wall sconce on the wall and added a remote control Puck light inside, sourced from Bunnings. “It was so great not having to get an electrician involved to create that light,” says Melissa.

Melissa’s DIY wall sconce

It was while waiting for the paint to dry in the powder room that Melissa decided to overhaul the laundry too. She repeated the process in there and added a retro door sourced for $100 from Facebook Marketplace and hung by her carpenter husband.

LAUNDRY before
BEFORE laundry
AFTER laundry

Melissa is especially happy with herself for having completed the makeovers without needing a tradie. “It’s so hard to get a tradie now and they are so expensive. I love that I didn’t have to pay for new tiles or a tiler to lay them, but I’ve ended up with a whole new look!”

Laundry after
AFTER Melissa in her ‘new’ laundry

Photography: Melissa Rettore and Laura May Grogan

For more on Melissa

Categories
Decorating 101 Design DIY Interiors Addict

DIY interior design kits delivered to your doorstep

We have talked extensively about the impact of COVID on our homes. With more people working from home, suddenly they wanted to improve their surrounds and thus the renovation industry has exploded because of the pandemic. According to the ABS, Australians spent about $12.3 billion renovating their homes in 2021 – a figure that was up 33 percent on the previous year. Tapping into this trend is colour specialist Michal Goodman who has just launched Styl Studio – a business intended to support the DIY renovation industry through its unique style kits.

“I created Styl Studio in an effort to bridge the gap between professional interior designers who charged a premium for their services, and home renovators interested in DIY design, but not really sure how they could actually bring their creative visions to life,” says Michal who offers end-to-end design kits (Styl Sets) for DIY designers and home renovators.

Styl Studio creator Michal Goodman

With five options to choose from, each of Michal’s Styl Sets includes a curated collection of surface samples including engineered timber and vinyl flooring options, carpet samples (twist pile and loop), tiles for wet areas (floor, wall and feature), splashback and stone options as well as a full interior paint colour scheme. And if you’ve ever been down a Pinterest rabbit-hole (ahem, guilty as charged!) you’ll know how easy it is to become totally confused by the number of options out there. This is where the Styl Studio kits remove the guesswork for you.

Styl Studio box
Each scheme comes packaged in this chic box and is delivered straight to your door

The schemes range from the Hamptons-inspired ‘Midnight Mood’ to ‘Bare Beauty’ which is a Scandi-inspired look. There’s the delicate Tuscan vibe of ‘Subtle Blush,’ the deep, moody and modern ‘Grounded’ and the monochromatic and timeless ‘Mono Magic.’

The Subtle Blush sample set
The ‘Subtle Blush’ Styl Set
'Subtle Blush'
A kitchen featuring the ‘Subtle Blush’ palette

An e-book accompanies each scheme, and it includes styling tips, a specification guide with step-by-step instructions on product features, price points and ordering details. There’s also detailed 3D renders so that you can visualise the outcome as well as ‘shop the look’ links for furniture and exclusive discounts to save you money.

E-book
The Styl Studio e-books are full of information to support your renovation

“Styl Sets arm those interested in renovating their own homes, with the tools to help them overcome ‘option overwhelm’. They allow you to see how the textures and surfaces of your design elements will work together and complement each other before you commit to making a costly financial decision or, even worse, a mistake!”

For more

Categories
DIY Interiors Addict Laundry Styling

Fuse function and style in the home’s unsung hero

Unfortunately the laundry can be under-appreciated, overlooked and filled with clutter, making it the unsung hero of the home. However, with a few simple design changes, you may even enjoy doing the laundry (you never know!).

Gaston pulldown sink mixer

Andry Grigor, head of design and innovation at Methven, shares his advice for a laundry makeover.

Storage is key

Making use of small spaces has been a hot topic in recent years, particularly as Australians are increasingly living in smaller homes and apartments. Storage solutions are central to a functional laundry space and are key to ensuring an efficient laundry system. Incorporate as much cabinetry as possible for extra storage space. Add a utility cart to provide additional storage and movability, or a range of baskets and hampers, for an organised and practical laundry system, or try mounting the iron on the wall for added floor space. A sink mixer with a longer neck allows for more room in the sink area, for improved cleaning and washing.

Think about fittings and tapware

By simply replacing your tapware you can drastically improve the look of a space. In modern homes, laundries are an extension of the bathroom and kitchen. To create a seamless flow throughout the home, add fixtures and fittings with the same range of colours and styles to help create a sense of unison. Consider how you want your finished space to look and feel. How will it fit in with the rest of your home?

Urban pullout sink mixer

Tiles can make a big difference

A change of tiles can transform the overall style and feel of your laundry. For a timeless and simple design, stick to the ever-popular white tile in either a square shape for a classic look, or try something new such as the slender finger-like kitkat tiles which look gorgeous as a splashback. If you’re after a unique feel, try adding block-coloured tiles or experimenting with patterns. If updating to new tiles is not attainable due to budget restraints, try giving them a refresh by regrouting. This will brighten the space up, as discolouration can show a room’s age.

Kiri sink mixer

Layout matters

Often, when undertaking renovations, we tend to reconfigure the entire layout of a room. Whilst changing the location of certain features can transform a room, others can be unnecessary and not cost-effective. If possible, try to work with the current plumbing layout. Changing the location of the faucet will result in more work and a higher cost. Also, consider the placement of the washing machine chosen suits the layout of the room. For example, avoid placing a front loader near a door or a top loader near desired bench space. To complete your laundry space, add design accents that soften the space and add a personal touch, such as plants or a mirror. These will enhance the room and make it feel lighter and more spacious.

For more on Methven

Categories
Design DIY Expert Tips Interiors Addict RENO ADDICT Reno Products

Mouldings: essential design element for layering modern homes

Sponsored by Intrim

When we think of wainscoting and decorative mouldings it’s often in the context of a traditional or Hamptons style home, but these days the options for contemporary homes are seriously game changing too!

Intrim’s Cavetto Wall used in this GJ Gardner display home bedroom

A modern home doesn’t have to be bland and lacking in details; in fact, it can be quite the opposite, and these examples prove just that! In our opinion, layering in interiors is important for every style of home.

Veronica King of NSW builder King Homes (also known as @builderswife on her popular Instagram), says: “Mouldings can turn a boring white room into a contemporary room with texture. In our recent project, we opted for a light and airy media room by keep a white and grey colour palette.

Intrim’s WB01 wall batten transforms this King Homes media room

“Adding Intrim mouldings to the white walls added texture and interest, creating a really inviting space. It’s an easy way to transform a living area or even a bedroom.”

Veronica loves the many options Intrim offer for King Homes’ builds. “I really love the look of using wall battens spaced about 30cm apart to create a really modern look. I also love the concave mouldings which add great interest to a modern room.”

Veronica likes spacing wall battens 30cm apart in contemporary homes

She adds: “Although colour palette might be different in a modern home, it’s still important to introduce layers of texture with floor coverings, wall mouldings and furnishings to create beautiful interior spaces.”

Intrim’s CC50 concave wall paneling in this King Homes bedroom

Intrim products provide that something special for builders’ clients looking for a contemporary home. Their exclusive shadowline skirting and a range of wall panelling styles like Cavetto Wall and concave mouldings are popular choices.

The curved concave wall in this Modco Developments display suite makes a real statement.

This curved wall was created with Intrim’s CC60 panelling

Intrim’s Cavetto wall is an increasingly popular choice for bedroom feature walls, in many cases removing the need for a bedhead!

In this Liverpool display home by GJ Gardner, it’s also been used in the home office to great effect in a contrasting dark colour.

Whether it’s full-wall panelling or the more subtle, but altogether effective shadowline-like skirting used in the below bedroom for Binet Homes, it’s the sum of all the little design details that add up to a cohesive, impressive and layered interior.

Intrim’s SK399 skirting board and architrave make this bedroom, and the open plan area below, sing

Key profiles

Click any of the below profile images for more information on them:

Veronica King from King Homes takes you on a tour of this contemporary style home


Find out more about Intrim and if you’re building a new home, don’t forget to ask your builder for Intrim.

Categories
DIY Expert Tips Furniture Interiors Addict

A DIY abstract cabinet hack from Bunnings

The latest research from Bunnings has revealed that more and more Aussies are turning to upcycling to help their dollar stretch further and to create something that nobody else owns. According to Bunnings, 59% of Aussies have turned to upcycling and in doing so have saved themselves an average of $576 by breathing new life into old furniture. 

We’ve long celebrated the virtues of upcycling and today’s cabinet hack, by Jaharn Quinn, is another fabulous DIY project that you could tackle in a weekend. Combining a storage cube unit with MDF, glue and paint, here is Jaharn’s step by step guide to help you create a one-of-a-kind sideboard.

Jaharn Quinn’s super fun Bunnings cabinet hack

Materials

I used a drill with different sized multi-purpose drill bits, hammer, jigsaw, clamps, screw driver, rollers, paint tray, paint brushes and sander for this project.

How-to


1. Begin by assembling the cube storage – this should take about 10 to 15 minutes. If you click on the product link above you’ll find assembly instructions. Next, measure the width and height of the cabinet, and divide this into two to get the measurements for the two cabinet doors.

The assembled Bunnings storage cube

2. Head to Bunnings, pick up your melamine white MDF panel and premium plywood pine, and get the cabinet doors and the melamine MDF cut to size.

3. When you get home, attach the melamine MDF (white side facing in) to the back of the storage cube using the staple gun. Paint the cabinet doors and when they are dry, lift the storage cube onto your work surface and place it onto its side.

Attaching the MDF
The storage cube with MDF backing in place

4. Attach the hinges to the storage cube and cabinet doors using these instructions from Bunnings. The only difference is that the cabinet doors in this video already have a hole cut out in them, so you will need to do this yourself. Use a pencil to mark where you need to cut a hole. Use a drill to make lots of small holes and then use a hammer to bang the plywood out. If this is a little confusing, head over to my Instagram to see how I did it. Use a screwdriver to lift or drop the doors down, or to pull them left or right. The Kaboodle hinges are incredible, and you will now have a fully fledged cabinet!

Attaching the hinges

5. Attach the furniture legs onto the underside of your new cabinet using a drill. If you find the legs are a little loose, use Selley’s Liquid Nails and let it dry overnight.

The legs

6. Using a pen, draw the outline of a range of various abstract shapes and cut them out using a jigsaw. Smooth the edges down using a sander. Position the abstract shapes onto the cabinet and glue them down using Selley’s Liquid Nails. The shapes may slip on the sides of the cabinet so use painter’s tape to hold them into place, and let the glue dry overnight. When the glue has dried, paint the furniture legs before standing the cabinet upright.

7. Now it’s time to paint the cabinet doors! You will need to apply several coats to fully hide the MDF. While the paint is drying, apply one coat of Zinsser B-I-N Primer Sealer to the sides and top of the cabinet. Once dried (and it dries quickly), apply a couple of coats of white paint and set aside to dry. And your abstract cabinet is finished!

DIY Bunnings hack
Voila!

For more

Categories
DIY Expert Tips Interiors Addict

DIY: How to build your own marble effect plinth

Bunnings partnered with Jaharn Quinn of Smor Home to bring us this guide on how to build your own marble effect plinth that you can use for displays at home.

Before you start this project, if you don’t have a mitre saw at home, which will help you cut perfectly straight lines through your MDF panels, experts at hardware stores are able to cut the panels for you. You could cut the MDF panel using a jigsaw but it wouldn’t create the perfectly straight edges you need for this plinth.

Materials

  • 2 x MDF panel 1200mm x 600mm cut into 4 sides and 1 top (there are more details on this below). Preferably 12mm thick or more.
  • Measuring tape
  • Chipboard countersunk screws
  • Multipurpose filler
  • Microfibre roller
  • Paint tray
  • Black gloss exterior paint
  • Dulux DuraMax Marble Effect Spray Paint (or similar paint of choice)

You will need a sander, and a drill with a Phillips head bit and a multi-purpose drill bit for drilling into the MDF panels.

Measurements

  • 4 x 600mm x 300mm
  • For the top of the plinth, you will need to mock assemble the four sides and take your measurement. The sides of the top of the plinth won’t all be equal or a perfect square, rather e.g. 2 x sides 300mm and 2 x sides 310mm.

How To

  1. The first thing you need to do is build the plinth. Drill three pilot holes along the length of one piece of MDF.
  1. Prop this piece and another piece of MDF together at a 90 degree angle. Make sure the ends are lined up perfectly (or as best you can). Holding it together (it’s a bit awkward but as soon as you get this done the rest is a bit easier), drill through the existing pilot holes and keep going so you drill further pilot holes into the second piece of MDF. Then you will switch to a phillip head drill bit, and drill a countersunk screw into each pilot hole. You will now have two pieces of MDF joined together at a 90 degree angle. Keep working your way around until you have created a plinth (without the top). Your goal is to drill the nails in so they are flush with the surface of the plinth. You may drill the screws too deep into the MDF, don’t worry as we will fill these holes/gaps in with filler later on. You may not quite be able to drill the screws flush with the surface – keep trying and if all else fails, bang them a few times with a hammer.
  1. Repeat the pilot hole process followed by drilling in the screws for the top of the plinth. You will now have a plinth!
  1. Fill in the screws and any deeper gaps using multipurpose filler. Set aside to dry for at least 3 hours, or less if the day is hot and dry. Sand the multipurpose filler so it’s flush with the surface.
  1. Paint the plinth with black gloss paint. Apply at least 2 to 3 coats. When the paint has dried, apply the marble effect spray paint as per the instructions. I recommend practicing on leftover MDF, and make sure the MDF piece is vertical when you spray as this will emulate how you will apply it onto the plinth. I found soft sprays and letting the air settle the marble effect spray paint really helped. Don’t apply it straight on, too close or directly. Instead lightly spray it on from a good distance. if you find some of the marble effect hanging (you’ll know when I mean when you use it), carefully lift it and let it drop naturally and organically. Try not to over spray otherwise it won’t look natural.  The spray paint dries really quickly too so after a few minutes, you’ll have a beautiful DIY Marble Effect Plinth!

More from Bunnings

More from Jaharn Quinn

Categories
DIY Expert Tips Interiors Addict

Three quick DIY paint projects for the winter

A winter weekend is the ideal opportunity to take on a DIY project, allowing you to stay  cosy at home and update your space. To help you pick the perfect project, British Paints has shared their top three options that can be completed in just 48 hours.

1. Give an old piece of furniture a new life

Transforming an old piece of furniture is a great way to save money and help the environment. While it might seem like a challenging task, with the right paint and equipment, it can be done in just a few days.

To get started, you’ll need to remove any hardware and give your piece a good sand. Next wipe down the surface with a  damp cloth then apply an undercoat.

Once your undercoat is dry, give your piece of furniture another light sand before adding your topcoat.

You’ll need to add two coats but wait until the first is fully dry before adding the second. Now, all that’s left to do is reattach your hardware and your freshly painted piece is ready to enjoy!  

2. Make a great first impression with a fresh front door  

A coat of paint on your front door can instantly transform the look and feel of your home. It’s an easy project to complete in a day, so the perfect one to try this weekend!

To get started, you’ll need to take the door off its hinge and lay it flat across a couple of sawhorses, chairs or even a table. Next it is time to prep! Start by removing any hardware, then sanding and wiping down with a damp cloth.

If you’re painting over a dark colour, paint that is both an undercoat and topcoat in one is handy. Only two coats are needed for full coverage, and you can paint over a water or oil based paint, so you don’t need to worry if you don’t know what type of paint was previously on your door.

Once you’ve finished painting, it’s time to re-attach your door and watch as your guests are wowed as they enter your home!

3. Add some style to your space with a feature wall  

Feature walls add impact to any space. They’re quick and easy to complete and a great way to start building up confidence in your painting skills.  

Remember, you don’t need to paint the entire wall to create a stylish statement. Consider quirky and unique options like  painting half the wall, a painted bedhead or arch.

Before you start painting move all your furniture away from the wall, lay a drop sheet to protect your flooring and mask up any skirting boards or electrical switches.

Next, clean your surface with sugar soap. Then it’s time to start painting! For the best results, you’ll need to use a paint roller to paint your feature wall. Make sure your roller has been cleaned well before you start, to ensure a smooth paint finish.

Once you’re ready to roll, place your feet towards the wall and grip the roller with firm but relaxed hands. You’ll need to  start at one side of the wall and work towards the other, never starting in the middle, as this can result in an uneven finish.

Finally, as you let your roller work its magic, remember to always paint in a W pattern for best results.

More from British Paints

Categories
DIY Interiors Addict RENO ADDICT Reno Products

Chalk paint queen Annie Sloan introduces new wall specific paints

Annie Sloan has launched a new collection of wall-specific paints. There are 32 colours of the water-based matt emulsion paints including 15 existing Chalk Paint favourites and 17 new hues to complement the palette.

Living room in Bright Green

Each shade is inspired by colours found in iconic architecture and homes throughout history, from the neoclassical Charlottenh of Villa to the terracotta houses of Morocco. The wall paints are launching in Australia and available in 120ml and 2.5 litre tins.

Dining in Old White

While the existing Chalk Paint can already be used on walls, especially those needing a breathable paint, its very thick and viscous consistency make it a furniture paint first and foremost. It’s ideal for wood, metal, glass and laminate. On walls in high traffic areas, it would also require a coat of wax or lacquer to protect it. This extra step led Annie to create her new one-step solution wall paint collection after years of experimentation.

“It’s quick-drying, wipeable, durable, live in-able, and made with the highest quality ingredients. I am thrilled with the depth and clarity of colour. You can really trust these paints to give beautiful results and survive the wear and tear of a busy, happy, lived-in home,” says Annie.

Bathroom in Carnaby Yellow

For more on Annie Sloan wall paint and to find your nearest stockist

Categories
Before & Afters DIY Interiors Addict Interviews RENO ADDICT

Serial renovators embark on 15th house and this one’s for keeps!

Claire O’Connell and her now husband Derek have been renovating for profit for the last decade after meeting as backpackers in Canada. She was in HR and he was an electrician and when the recession hit, they decided to move to the UK (he’s Irish and she has dual citizenship). 

When they arrived in the UK, they had next to no money as Claire’s bank account had been cleared out fraudulently. They started working traditional jobs but soon realised they shared a passion for property and were just able to buy an investment property. “The rent we were paying was less than the mortgage, so we rented out the first house and then bought our second fixer upper which we lived in during the renovations,” explains Claire.

“After turning a two-bed-one-bathroom Victorian house into a four-bed-two-bathroom, we had the opportunity to move to the US with my work, where Derek started renovating houses full-time. I stayed employed and then decided to take the plunge and leave my global role at eight months pregnant and join Derek renovating.”

Claire on the tools

Two years after they started flipping, they were able to pay off all their debt, including mortgages, and they’ve lived debt free ever since!

After continuing to flip houses full-time, fast forward five years and they’re back in Australia with three kids and three dogs. They’re now renovating their 15th property, a Queenslander, and plan to actually live in this one!

Derek and Claire with their kids

“This property we plan to keep, so we are going the extra mile from a design and floorplan perspective. We aim to DIY as much as we can physically (and that is allowed), and we are turning a two-bed-one-bath 100-year-old house into a seven-bedroom home. We are sensitive to the property’s age on the top floor and celebrate the Queenslander features throughout the old and the new extension. However, we are embracing an industrial design on the ground floor with some top secret projects that the kids will love!”

The latest project in Brisbane which they intend to keep

Before we talk more about the current project, here are some of Claire and Derek’s previous American ones (because we know how you love a good before and after!) to give you an idea of just what they’re capable of.

Edgewater

“This was a renovation for profit. It had been designed by an eccentric homeowner; the master bedroom had six levels! The layout was horrendous but we think it turned out beautifully.”

BEFORE exterior
AFTER exterior
BEFORE kitchen
AFTER kitchen
BEFORE master bedroom
AFTER master bedroom

Bayshore

“This house was a complete rebuild from the inside out due to termite damage. We were too far into the renovation to turn, back so forged ahead!”

BEFORE exterior
AFTER exterior
BEFORE kitchen
AFTER kitchen
BEFORE lounge
AFTER lounge

Kokomo beach house

“We bought this house as an Airbnb investment and it went from three-bed-two-bath to five-bed-4.5-bath and pool.”

BEFORE
AFTER with added pool!
BEFORE kitchen
AFTER kitchen

The current project

The Queenslander they’re currently transforming is in Brisbane’s western suburbs. After buying it a year ago, they started the planning process and commenced work, aiming to DIY as much as possible and going through the process of getting their owner builder license.

The house has been raised on stilts

“We worked hard to demo the existing ground floor before hiring in a company to raise the house and lay the new foundations. Since then, we have been framing ourselves. We have just completed the ground floor and brought a crew in for the top floor to tie the new roof into the old. I have my limits when it comes to heights,” Claire says.

“Next step is cladding and painting the exterior then we start to work on the internal spaces. We have a fairly advantageous plan as we intend to design and build all of the cabinetry and stairs ourselves as well as complete all the finishing work.”

As you can see, it was in pretty original condition!

We’ll be bringing you more on this reno as it evolves, as well as tips and advice from Claire and Derek, so watch this space!

Follow them on Instagram @renowayoflife

Check out their handy budget trackers, reno calculators and more for purchase


Categories
Bedrooms DIY Interiors Addict Jen's reno Kids Rooms

My DIY polkadot wall in the boys’ bedroom

I recently shared this DIY polkadot wall project I did in the boys’ new shared bedroom on socials but I thought I’d include here with a step by step too. It was so super easy and as a non-crafty/creative person, I was quite proud and smug with myself afterwards. If I can do it, anyone can!

Charlie and Seb loved it and thought Mum was really clever!

I do like to keep the boys’ bedrooms quite classic and calm as they have all the colour and all the toys in their playroom (where would this neat freak mum be without that?!) but I loved the idea of this fun paint feature on one wall, especially as it’s the one they see from their beds, and the one you don’t see as you’re walking down the hallway. Everyone wins!

All you need is some paper plates, a couple of big sponges (I got mine from Bunnings), scissors or a craft knife and as many sample pots of paint as you want different colours (I chose three).

Simply cut circles out of the sponge/s with scissors or use a craft knife. I drew around a glass with a Sharpie but you could choose anything from the kitchen that works for the size you want. It’s also up to you if you do all your circles the same size like I did, or mix it up!

I chose a white as one of my colours to contrast against the mid grey wall

The boys thought they were helping me choose colours at Bunnings but the truth is, I already had a pretty good idea of what we’d get (I’m keeping it real here, folks!).

I’m all for living life on the edge so I didn’t over think the placement of my spots. I took my time and did one colour at a time. Then at the end I stood back a lot, considered the wall as a whole and added extras here and there until it was just right!

These brass hooks for hanging school bags on are from Temple & Webster

I found carefully twisting back and forth with the sponge onto the wall helped with coverage. The edges of my circles were definitely not perfect but I think that looks deliberate and works well for a kids’ room. Another tip is to have a few paper plates available to experiment with how much to load the sponge up (or not) with paint.

The finished feature added some fun to the boys’ bedroom

I hope this easy DIY project inspires you to have a go yourself. I’d love to see what you create if you do! If you have any questions, pop them in the comments. And before you ask, the bunks are the Myer from B2C Furniture and we love them!

This idea came from British Paints and you check out their how-to here.

Categories
DIY Expert Tips Interiors Addict RENO ADDICT

How to pick the right paint colour: expert tips

To ensure your next project is easy and avoids wasting money on making bad colour choices (we’ve all been there!), the experts at British Paints share their guide to selecting the right shade.

Lean into your lighting

First, figure out which way the room you wish to paint is facing. This is crucial in understanding the natural lighting of the space and colours that can accentuate it.

In Australia, north-facing rooms tend to receive more natural sunlight. These rooms are well suited to cool colours like grey, blue, or green. If you go for white paints, stick to cool undertones, which will give you a crisp, modern look.


South-facing rooms, on the other hand, can be underlit. They will be well suited to warm colours like yellow, peach, pink and red. Adding warmth and cosy vibes while compensating for the lack of natural light. If you opt for a shade of white here, go for an option with a warm undertone.

Highlight your existing home

Remember to consider how the paint colour will work with existing elements in your home like the floorings, curtains, and furniture. Especially, as these can be pricey, difficult things to alter. Go for a wall colour that matches what’s already there. This can be a wonderful opportunity to hero a statement piece of furniture too. Whether it’s a beautiful velvet couch, bold piece of artwork or vintage desk.

If you’re feeling stuck and confused, neutral shades, like beige and taupe, are the most versatile. They make an excellent canvas for any style and don’t go out of style. It’s a smart choice for your existing home or if you are looking to sell in the future.

Get inspired by the unexpected

Inspiration can be found anywhere! “Bring the outside in” is a popular adage for colour schemes. Try looking outdoors and conceptualizing your local area within. Choosing colours such as Green Life or Blue Forge will foster a welcoming atmosphere for you to relax and unwind.

Alternatively, if you have a favourite piece of artwork on your wall or item of clothing in your wardrobe, look within for inspo. A fun colour idea is never far. Whether you decide to go bold with a shade like Red Alert or look on the bright side with a tone like Happy Home, you’ll appreciate the new hues daily.

A handy tool

If you’re then unsure of which exact colour to commit to, British Paints has also launched a free, online Colour Wall Assistant. Apps like this make settling on a specific choice much easier. It even suggests on-trend colour options to choose from!

Get sampling

Most of all, there is no such thing as too many sample pots. Once you have a few faves, pick up three or four different sample pots to test out in your space. Instead of painting directly onto the wall, paint a piece of white A4 paper and adhere to the preferred wall with blu-tack. Make sure to observe the colours at different times throughout the day so you can see how they appear in various lighting. Only when satisfied, start small on a feature wall or door. This gives you the freedom to see if you still like it or need to change course.

For more on British Paints

Categories
Decorating 101 DIY Interiors Addict RENO ADDICT

The most popular Facebook groups for interiors and reno addicts

If you’re a renovation or interiors enthusiast, it has never been easier to connect with like-minded individuals. Online design communities are seemingly infinite but we’ve done the research to bring you the most popular Australian Facebook groups in this space. From where to find the perfect tile to advice on flooring, landscaping, kitchens, bathrooms and more, these groups are a fabulous free resource for interiors and reno addicts.

The Reno Club

With almost 50k members, this home improvement group is a great forum for members to have discussions, ask for advice and inspiration with respect to all things construction and design. Popular discussion points include flooring and tiling conundrums and many members post fabulous before and afters of their handiwork.

Women who Design, Decorate, Renovate & Build

Set up by BuildHer Collective, as the name suggests, this group is designed to help women renovate and build. It’s a great adjunct to the BuildHer Collective business which runs a popular course designed to guide women through every step of the building journey, with the support of like-minded people.

The Hamptons Home Decorator AU

As the name suggests, this group is one for Hamptons-inspired home enthusiasts. The group’s 80k members regularly trade advice on a variety of topics including wainscoting, coastal-inspired paint colours and the final finishing Hamptons styling touches.

Renovating Mums – Sydney

Designed for Sydney-based women who are in the process of renovating, this 15k strong group offers support, knowledge and guidance within the space. “This is the place for any women currently renovating or thinking about it, to come together, ask questions, get ideas and find out top tips that have helped others,” says the group that also has a local recommended services directory as well as a supporting blog and resources. All trade recommendations have been referred by personal use or by fellow renovators.

The Profitable Designer Community

Created by Clare Le Roy of The Little Design Corner, this industry group was set up as a resource for interior designers, decorators, architects and landscape designers who are thinking about starting a design business.

This group is an adjunct to Clare’s courses that are designed to help designers and architects find more clients and grow professional and profitable businesses. The group also allows members the opportunity to connect and collaborate with other designers from around the world.

Interior Design & Decor

This very popular Sydney-based group has almost 164k design obsessed members who tune in for their daily dose of interiors and architectural inspiration. From a hotel in Asia to a fabulous commercial fit-out in South America, the wide ranging spaces originate from all corners of the globe.

Renovation Ideas and DIY Forum Australia

This is a group for people interested in renovating their property to share stories, ideas and photos. This group has a particular focus on DIY and there’s plenty of great before, progress and after shots of projects too.

Mums Who Build, Decorate & Renovate

Another large group (it has almost 132k members), this group was started by mums Rachael and Karlie who have built a community designed to help Aussie women get advice on a range of renovation topics. The large group is friendly and supportive and it’s a great platform for people to share and ask about all sorts of home building, renovating and decorating tasks.

Are there any other hidden treasures you’d add to our list? Please comment below!