Categories
DIY Expert Tips Interiors Addict

5 tips for first time painters: it’s all in the prep!

The thought of painting walls and ceilings yourself can be a daunting. Nobody wants to make what seem like permanent mistakes whilst painting for everyone to see. That is why British Paints has shared their top tips that all first time painters need to know.

Check for damage on walls

The first important step when starting a new paint project is to check walls for damages and marks, in order to determine exactly what paint and tools are needed. Are there any leaks? Is there pre-existing mould or stains? Are there any cracks? If these aren’t attended to before painting, it will impact the final result. Water stains, oil based stains, ceiling mould, gaps, holes or cracks are all common types of damage. Such issues can be solved with specialist paint products.

*Tip: Use oil-based products for water stains and water-based products for oil-based stains!

Set up with the right tools

Having the right tools is essential for tackling a paint project. Pairing the right paint to the right brush/roller is key to ensuring the finished product is faultless. Brushes are perfect for small areas, trims and edges, while a roller is great for a large painting area, such as a wall or ceiling.

Along with the correct pairing, add the following to the shopping list: frame, ladder, roller tray, roller pole, drop sheets, painter’s tape, filing blades, gap filler, rags, sandpaper, sugar soap.

How to know when to use a primer

Although similar, primers and undercoats both serve quite different functions. Primers act as a foundation for paint to stick to, while undercoats create a flat and level base for topcoats. An easy way to remember when to use a primer is if a surface is new and hasn’t been painted before.

If a surface is painted and in good condition, but in need of a refresh, a regular paint without a primer can be used. Ensure the wall has had a good clean, with sugar soap, then use British Paints Clean & Protect Low Sheen to give the wall a refresh. Clean & Protect is guaranteed to protect from mould, it’s easy to apply, allows for a smooth flow and an even finish.

Choosing the right paint

Paints are designed for different purposes and it’s important to look for a paint specific to the project at hand. When painting a ceiling, for example, the aim is for a lower gloss paint, to create a flat finish. Whereas, if painting exterior surfaces, use a paint that can protect against seasonal demands.

Once the purpose of the paint is decided, it’s time to choose the colour! To assist with the hardest decision of all, Aussies can visit British Paints’ online colour wall assistant tool to work out the best colour for the project and how much paint is needed.

Give it a go!

The best way to get started on a painting project, is to just give it a go! Painting is supposed to be fun, particularly for painting novices setting out to DIY homes. Because of this, British Paints has the Good Job Guarantee which gives painters piece of mind by offering paint replacement for any mishaps or mistakes that happen along the way – so there’s no reason not to give it a go!

Click here for all paints and more help with painting

Categories
DIY Expert Tips Interiors Addict Interviews

How to create a mudroom in a hallway or alcove

A mainstay in American homes, we’ve seen the mudroom concept surge in popularity in Australia over the last few years. A practical space at the entrance of your home, used to store all your household belongings, a mudroom is the perfect place to house shoes, hang up your bag, keys, dog leads and more.

These spaces are beginning to become popular DIY projects, as people crave functionality within the home and embark on a spring-cleaning refresh. And you don’t need a dedicated space to create a mudroom – a hallway, nook or alcove will suffice.  Wendy Rennie from Haymes Paint has some great tips to share.

Colour is everything when creating a mudroom
The first and most essential step of creating a DIY mudroom is differentiating the space from the rest of the house through the use of colour.

The great thing about a mudroom is that you can create one out of nothing. Often, these handy little spaces can be used to fill up an entryway or transform a hallway, inviting guests to take a moment to kick off their shoes or hang up their jacket as they enter your home. But to make this space feel like its own, colour is required.

“Since the mudroom is the entrance to the home, it is key to select a colour theme that is consistent with the rest of the house, but still creates impact. You want the impact of the first impression to flow harmoniously throughout the entire home,” says Haymes Paint colour and concept manager Wendy Rennie.

Haymes mudroom

“I recommend using a darker shade to differentiate the mudroom from the rest of the house, especially if you do have an alcove or separate entryway to use. If your mudroom is simply an extension of your hallway then a lighter neutral, complemented by accents of a darker tone that may feature elsewhere in the home is a nice introduction for your guests of what is to come,” says Wendy.

You can choose any colour theme you desire, as long as you steer clear from bright primary colours. Reds, yellows or even blues will be too overwhelming when first entering the house.

Bring it to the next level with furniture
Not everyone has a dedicated room or nook that they can designate for this space, and the good thing is you don’t actually need one. You’d be amazed at what you can create with simply the right colour themes and a few simple pieces of furniture.

A set of hooks you can drill into the wall, a hall table and a cute wooden shoe rack is all you need to create a ‘mudroom vibe’ without requiring a designated room. The best part about these furniture pieces is that they are practical but also aesthetic, adding character and style to a hall or entryway.

Haymes mudroom
This mudroom features the Haymes Paint Artisan Surface Industrial finish on the walls

Accessorise!
Once you have selected the furniture you can inject your personality into the mudroom through the accessories you choose.

To warm up the mudroom, Wendy suggests laying down a rug to add a pop of colour and act as an entryway for your guests. Potted plants by the door and in the corners will also enliven the mudroom with the freshness of greenery, acting as the perfect transition from the outdoors to the indoors.

Photography: Martina Gemmola

For more on Haymes Paint

Categories
Before & Afters DIY Interiors Addict Interviews RENO ADDICT

DIY: Powder room and laundry makeover for under $500!

While interior designer and stylist Melissa Rettore’s Melbourne home is only six years old, boredom had set in. “The home is relatively new but all the colours that were in six years ago are no longer trending and I just felt like changing things up!” She overhauled both the powder room and laundry recently for just under $500! And when you consider that both rooms were completed over one week, during her daughter’s three hour daily nap times, the end result is all the more impressive!

BEFORE powder room
BEFORE powder room
AFTER powder room
AFTER powder room

Melissa teaches interior decoration at Design School, and it was while researching topics for her students that she came up with the idea. “I was teaching about what was trending and DIY is certainly going off. I’d seen reels with people turning furniture into terrazzo pieces and that’s where the inspiration came from,” she says.

Powder room before
Melissa started by painting the tiles with Dulux Renovation paint

Starting in the powder room, Melissa used ‘Nutmilk’ paint in half strength from the Dulux Renovation range to paint over the charcoal floor tiles before adding $10 Kmart Decor and Furniture Paint Chips and a sealer.

Part of Kmart’s new DIY range, Melissa warns that Dulux doesn’t recommend combining the paint chips with their product; mainly because they haven’t tried and tested the process. “That said, all the people I follow on Instagram had tested the combination over many months in showers and wet areas and it had held up. I’ve also tried to scrape the tiles and, so far, they seem very durable,” says Melissa.

Dulux Decor and Furniture Paint chips gave the floor a terrazzo look
$10 Dulux Decor and Furniture Paint chips gave the freshly painted powder room floor a terrazzo look

Melissa used the same paint on the cupboard fronts and spray painted the cupboard handles with $5 black spray paint. She then added a Target mirror and decorative wall sconce that was inspired by the the viral Kmart wall planter hack. She repeated the paint and paint chip process that she carried out on the floor tiles, hung the wall sconce on the wall and added a remote control Puck light inside, sourced from Bunnings. “It was so great not having to get an electrician involved to create that light,” says Melissa.

Melissa’s DIY wall sconce

It was while waiting for the paint to dry in the powder room that Melissa decided to overhaul the laundry too. She repeated the process in there and added a retro door sourced for $100 from Facebook Marketplace and hung by her carpenter husband.

LAUNDRY before
BEFORE laundry
AFTER laundry

Melissa is especially happy with herself for having completed the makeovers without needing a tradie. “It’s so hard to get a tradie now and they are so expensive. I love that I didn’t have to pay for new tiles or a tiler to lay them, but I’ve ended up with a whole new look!”

Laundry after
AFTER Melissa in her ‘new’ laundry

Photography: Melissa Rettore and Laura May Grogan

For more on Melissa

Categories
Interiors Addict RENO ADDICT Reno Trends

Should I DIY a repair or call in a tradie?

New research reveals Aussies are savvy at safety-proofing their homes, but are prone to delaying repairs and underestimate the danger they could be in as a result.

Australian online tradie marketplace, hipages, has unveiled its Know Your Home report, revealing 40% of homeowners currently have repairs requiring tradie attention in their home. Almost half (46%) admit that they’re likely to delay a repair because it’s ‘liveable’, while nearly a quarter believe they can fix it themselves.

Out of these jobs, four in 10 (39%) homeowners believe they have repairs worth more than $5,000 in their household, 25% between $1,000-to-$5,000, and 22% believe their jobs are worth up to $1,000.

Since Aussies underestimate the skill and danger associated with home repair jobs, some homeowners may try to fix them themselves or delay the repair. However, according to licensed tradies, this could be costing them additional thousands. Additionally, there are some jobs that homeowners should never attempt, such as electrical work and most plumbing, in addition to dangerous jobs like climbing ladders onto roofs.

In fact, Aussie tradies say that half (48%) of customers underestimate the complexity of a job, and 10-to-20% of their repair jobs could have been avoided if the customer had called in an expert sooner, instead of trying to fix it themselves.

“We’re a nation of DIY-ers, so I understand the temptation to have a go at repairs yourself, but often this causes a bigger problem and costs more in the long run,” said plumber Justin Tanios. “Put down the tools to avoid a more expensive repair, and know when to call in a licensed tradie who you can trust.”

Justin Tanios

Stuart Tucker, hipages’ chief customer officer, is urging homeowners not to delay repairs. “Homeowner repairs never stop, but every year we see a spike during spring for renovation and repair jobs. During times of high demand it can be tempting to opt for the quickest or cheapest help. However this can create additional problems and wind up more costly than if a qualified tradie had been sought in the first instance.”

He adds “Working with a licensed and trusted tradie is important year-round, and something homeowners shouldn’t compromise on – even during busy periods. One way to ensure you’re not caught out is to book as far in advance as you can.”

More from hipages

Categories
DIY Expert Tips Furniture Interiors Addict

A DIY abstract cabinet hack from Bunnings

The latest research from Bunnings has revealed that more and more Aussies are turning to upcycling to help their dollar stretch further and to create something that nobody else owns. According to Bunnings, 59% of Aussies have turned to upcycling and in doing so have saved themselves an average of $576 by breathing new life into old furniture. 

We’ve long celebrated the virtues of upcycling and today’s cabinet hack, by Jaharn Quinn, is another fabulous DIY project that you could tackle in a weekend. Combining a storage cube unit with MDF, glue and paint, here is Jaharn’s step by step guide to help you create a one-of-a-kind sideboard.

Jaharn Quinn’s super fun Bunnings cabinet hack

Materials

I used a drill with different sized multi-purpose drill bits, hammer, jigsaw, clamps, screw driver, rollers, paint tray, paint brushes and sander for this project.

How-to


1. Begin by assembling the cube storage – this should take about 10 to 15 minutes. If you click on the product link above you’ll find assembly instructions. Next, measure the width and height of the cabinet, and divide this into two to get the measurements for the two cabinet doors.

The assembled Bunnings storage cube

2. Head to Bunnings, pick up your melamine white MDF panel and premium plywood pine, and get the cabinet doors and the melamine MDF cut to size.

3. When you get home, attach the melamine MDF (white side facing in) to the back of the storage cube using the staple gun. Paint the cabinet doors and when they are dry, lift the storage cube onto your work surface and place it onto its side.

Attaching the MDF
The storage cube with MDF backing in place

4. Attach the hinges to the storage cube and cabinet doors using these instructions from Bunnings. The only difference is that the cabinet doors in this video already have a hole cut out in them, so you will need to do this yourself. Use a pencil to mark where you need to cut a hole. Use a drill to make lots of small holes and then use a hammer to bang the plywood out. If this is a little confusing, head over to my Instagram to see how I did it. Use a screwdriver to lift or drop the doors down, or to pull them left or right. The Kaboodle hinges are incredible, and you will now have a fully fledged cabinet!

Attaching the hinges

5. Attach the furniture legs onto the underside of your new cabinet using a drill. If you find the legs are a little loose, use Selley’s Liquid Nails and let it dry overnight.

The legs

6. Using a pen, draw the outline of a range of various abstract shapes and cut them out using a jigsaw. Smooth the edges down using a sander. Position the abstract shapes onto the cabinet and glue them down using Selley’s Liquid Nails. The shapes may slip on the sides of the cabinet so use painter’s tape to hold them into place, and let the glue dry overnight. When the glue has dried, paint the furniture legs before standing the cabinet upright.

7. Now it’s time to paint the cabinet doors! You will need to apply several coats to fully hide the MDF. While the paint is drying, apply one coat of Zinsser B-I-N Primer Sealer to the sides and top of the cabinet. Once dried (and it dries quickly), apply a couple of coats of white paint and set aside to dry. And your abstract cabinet is finished!

DIY Bunnings hack
Voila!

For more

Categories
DIY Expert Tips Interiors Addict

Three quick DIY paint projects for the winter

A winter weekend is the ideal opportunity to take on a DIY project, allowing you to stay  cosy at home and update your space. To help you pick the perfect project, British Paints has shared their top three options that can be completed in just 48 hours.

1. Give an old piece of furniture a new life

Transforming an old piece of furniture is a great way to save money and help the environment. While it might seem like a challenging task, with the right paint and equipment, it can be done in just a few days.

To get started, you’ll need to remove any hardware and give your piece a good sand. Next wipe down the surface with a  damp cloth then apply an undercoat.

Once your undercoat is dry, give your piece of furniture another light sand before adding your topcoat.

You’ll need to add two coats but wait until the first is fully dry before adding the second. Now, all that’s left to do is reattach your hardware and your freshly painted piece is ready to enjoy!  

2. Make a great first impression with a fresh front door  

A coat of paint on your front door can instantly transform the look and feel of your home. It’s an easy project to complete in a day, so the perfect one to try this weekend!

To get started, you’ll need to take the door off its hinge and lay it flat across a couple of sawhorses, chairs or even a table. Next it is time to prep! Start by removing any hardware, then sanding and wiping down with a damp cloth.

If you’re painting over a dark colour, paint that is both an undercoat and topcoat in one is handy. Only two coats are needed for full coverage, and you can paint over a water or oil based paint, so you don’t need to worry if you don’t know what type of paint was previously on your door.

Once you’ve finished painting, it’s time to re-attach your door and watch as your guests are wowed as they enter your home!

3. Add some style to your space with a feature wall  

Feature walls add impact to any space. They’re quick and easy to complete and a great way to start building up confidence in your painting skills.  

Remember, you don’t need to paint the entire wall to create a stylish statement. Consider quirky and unique options like  painting half the wall, a painted bedhead or arch.

Before you start painting move all your furniture away from the wall, lay a drop sheet to protect your flooring and mask up any skirting boards or electrical switches.

Next, clean your surface with sugar soap. Then it’s time to start painting! For the best results, you’ll need to use a paint roller to paint your feature wall. Make sure your roller has been cleaned well before you start, to ensure a smooth paint finish.

Once you’re ready to roll, place your feet towards the wall and grip the roller with firm but relaxed hands. You’ll need to  start at one side of the wall and work towards the other, never starting in the middle, as this can result in an uneven finish.

Finally, as you let your roller work its magic, remember to always paint in a W pattern for best results.

More from British Paints

Categories
Expert Tips Interiors Addict Outdoor & Exteriors

Expert tips to build your own family-friendly fire pit

Backyard fire pits are fashionable, affordable and practical, and are becoming increasingly popular as we look to utilise the outdoor space in winter with functional landscaping features. Essentially, a fire pit is the new water feature; it’s a great addition to the backyard, transforming the outdoor area into a cosy and inviting space.

“The ambience a fire pit brings is worth the investment alone, providing an enjoyable feature for the garden and a natural gathering spot for socialising and entertaining. It’s a great focal point, I like to describe it as nature’s TV and people are naturally drawn to the campfire-like atmosphere,” explains landscape expert and Adbri Masonry brand ambassador, Jason Hodges.

Fire pits come in many shapes and sizes and they are not all created equal. If you’re looking to entertain and have children or pets, the best option is a “family-friendly” fire pit made with concrete barrier blocks. These fire pits look great and provide extra safety by creating an attractive barrier around the fire, keeping flames out of reach of children and pets.

Jason offers a simple step-by-step DIY guide to building your very own family-friendly fire pit:

Choose the right spot

It’s important to choose a spot that is far enough away from plants, fences, trees or anything flammable. Consider the wind and the direction it will blow smoke from the fire. You should also be able to walk around the fire with ease.

Start digging

Dig a circular hole for the base of the fire – a three-foot diameter creates enough space for a good-sized fire while keeping everyone close enough to be able to chat.

Prepare the base

Spread sand throughout the trench and level. You can use a mortar mix of 6 parts sand and 1 part dry cement for a stable base.

Start building

Use concrete blocks to start constructing the wall around the pit. Choose a block that enables circular walls or has specialty corner units to save you cutting the units. Jason’s first choice is Adbri Masonry’s Miniwall blocks. They are easy to stack in a circle and give a great finish. For square and rectangular pits, use Versawall. If you are on a tight budget, using garden wall blocks can save you money as they double as a seating area, so no extra furniture is required.

Build your fire

Construct a tepee by stacking wood and kindling in the centre of the pit. Light the fire and enjoy all year around!

Watch this video with Jason for more guidance:

More from Adbri Masonry

Categories
Expert Tips Interiors Addict RENO ADDICT

Re-paint your walls this winter in 5 simple steps

If you’re cooped up at home this winter and looking for a DIY project, painting your walls is a quick and affordable way to add some personality to your home.

To help you get started, British Paints has shared their 101 guide to transforming a room in just one week.

Step 1: Plan your creative edge

Sometimes the hardest step in a room transformation is finding inspiration. With so many directions to take and choices to make, this can be the most time-consuming part of the whole process!

To find the perfect colour for your space, start by sampling a few different colours. Head into your local store or warehouse and pick up a few sample pots of colours you love. When you get home, grab a few blank pieces of paper and add a bit of the chosen colour onto each sheet.

Next, tape these up against the wall so you can view your colours at different times of the day and night. Once you’ve chosen your favourite option, it’s time to purchase your paint and other tools.

Step 2: Select the right paint 

To simplify the planning stage and save time, you can calculate exactly how much paint you’ll need before you head with the British Paints online paint calculator. We always recommend a paint that combines an undercoat and a topcoat in one for convenience.

The right tools can make or break your DIY project. Add the following to your shopping list for a fast and easy experience: Brush, roller and frame, a ladder, roller tray, roller pole, drop sheets, masking tape, filing blades, gap filler, rags, sandpaper, sugar soap and of course, paint!

Step 3: Prepare the room

Before getting underway, make sure the room is cleared of anything you don’t want paint on! Move your furniture from the walls, remove any curtains or artwork. Then cover the floor with those drop sheets you purchased!

Begin to wash the walls using water and sugar soap: a necessity to ensure a smooth and even paint job.

If you’ve noticed any gaps or holes, fill these in using the gap filler and filler blade. Once dry, lightly sand these areas for a smooth surface. If you’re keeping any areas paint free, like skirting boards, light switches, or power points, remember to tape up these points to avoid getting paint anywhere it shouldn’t go.

Step 4: Get painting 

Now for the fun part – it’s time to get painting! Grab your paint. For perfect results, you’ll need to apply two coats, allowing the paint to dry in between.

When using a paint roller, you’ll work from one side of the wall to the other. Place your feet facing towards the wall and grip the roller with a firm but relaxed hand. Begin by working in sections, rolling in a large W pattern at first, then filling in the blanks of your W pattern with some extra zigzagging strokes. 

Once you’ve covered your first section of wall using the W pattern, finish by using a technique called laying off to ensure there’s no messy streaks and you achieve an even finish. It’s simple: just use long vertical strokes and light pressure to paint over the area you recently covered.  

Keep rolling with a combination of the W pattern and laying off until your entire wall is complete.

Step 5: Style

Get your room back into tip-top shape – remove the drop sheets, then proceed to vacuum and clean the windows so the room is looking completely refreshed and clean.

Move all the furniture back to position and think about any final touches to finish off the transformation. Perhaps select some house  plants or artwork to add some personality to the room!

Now take a step back and soak in the room transformation you just mastered!

More from British Paints

Categories
Before & Afters Design House Tours Interiors Addict Interviews Real Renos RENO ADDICT Styling

Before & after: Dated brick wall becomes star of 1980’s reno

Located in Perth, this two-bedroom, one-bathroom 1980s unit was renovated to sell recently by savvy owner, Deanna Banicek. “I wanted to create a stylish, quality pad that was still within a budget. The style was designed to suit most buyers, but I wanted the unit to have character,” says Deanna, who spent just $29,000 on the incredible transformation. She kept her overheads low by doing a lot of the work herself, sticking to a strict budget and making several low-cost changes that were big on impact.

BEFORE lounge
BEFORE lounge
AFTER lounge
AFTER lounge

The original, dated unit was overhauled with new flooring, lighting, paint, window treatments, tiling, door handles and more. The main living space is unrecognisable and that’s despite Deanna resisting the urge to gyprock, or paint, the exposed brick wall. Instead, she re-did the grout and while a painstaking job, it sure did pay off.

“I didn’t Gyprock it because it was not going to be cost effective. It would also have meant removing the cornicing and replacing it which would have created a lot more work. I felt like the apartment needed a feature and the grouted brick helped create an industrial vibe,” says Deanna who credits her mum and dad with helping her with the job that cost just $100 to complete.

BEFORE dining
BEFORE dining
AFTER dining
AFTER dining. The re-grouted bricks have serious impact!

The kitchen was overhauled with internal Kaboodle cabinetry from Bunnings combined with custom made cupboard fronts (Deanna worked in kitchen design for many years but now works in disability services). “I’m not a huge fan of the Kaboodle white options and they had stock shortages too. We wanted to utilise the space with as much storage as possible also,” says Deanna. The floor tiles, imitation polished concrete, were a bargain picked up from a local tile shop – large format, they were selected to make the narrow kitchen feel larger. Engineered stone bench tops were the kitchen’s biggest splurge.

BEFORE kitchen
BEFORE kitchen
AFTER kitchen
AFTER kitchen

The bathroom also underwent a fabulous transformation, courtesy of new terrazzo-look tiles, stylish brass tap ware and a new timber vanity. After an exhaustive search, Deanna found inexpensive terrazzo-look floor tiles for the bathroom floor and all the hardware was sourced from Highgrove Bathrooms.

BEFORE bathroom
BEFORE bathroom
AFTER bathroom
AFTER bathroom

When it came to the outside, lawn was laid instead of establishing an entire garden and Deanna also reused the existing outdoor patio slabs to keep costs down. When it came to selling the property, Deanna engaged The Perth Property Co to style and stage the property before sale – they provided a wonderful finishing touch.

BEFORE bedroom
BEFORE bedroom
AFTER bedroom
AFTER bedroom

Deanna’s top reno tips

  • It can be difficult at times because there are many beautiful, expensive items you see when you are shopping but you have to be practical – ultimately, you want to make a profit. You can get quality materials at affordable pricing; you just need to do the research.
  • Make sure to get a few quotes for trades such as plumbers and electricians because they can vary so much in price. 
  • DIY as much as possible, even if it means a bit of hard work such as tiling and painting. 
  • Reuse existing materials where possible. I reused the outdoor slab pavers because they were in great condition. I painted them with paving paint and there are many cool paver paint colours to choose from.
BEFORE backyard
BEFORE backyard
AFTER backyard
AFTER backyard

For more on Perth Property Co

Categories
Before & Afters DIY Outdoor & Exteriors Real Renos RENO ADDICT

Single mum achieves amazing home makeover on a budget

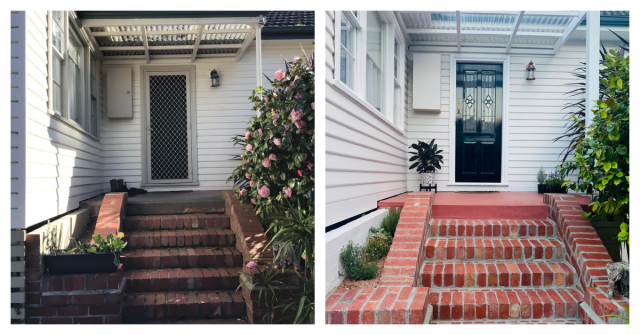
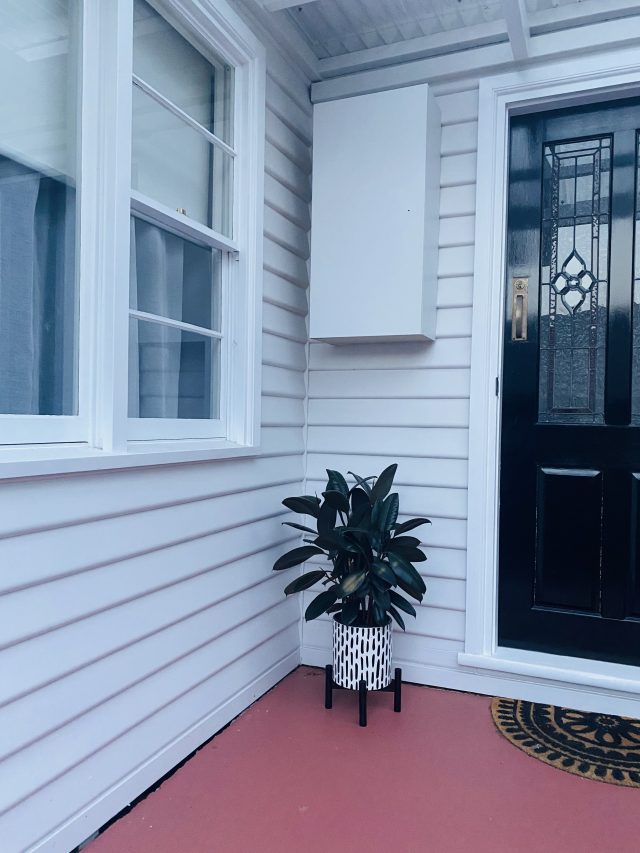
They say first impressions count and we were so blown away with the difference Kat Marshall made to her entry recently for well under $1,000, we just had to share the inspiration.

Before and after

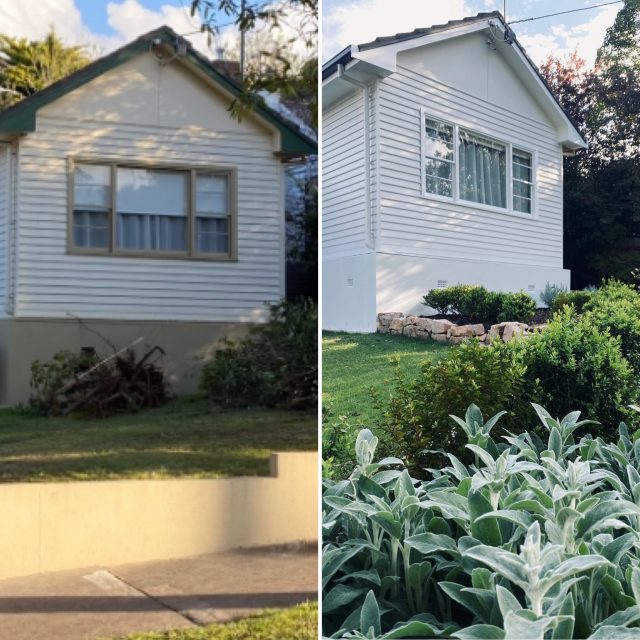
“I was pretty embarrassed about it when people came over,” said Kat, who lives in Gippsland VIC and is single mum to a three-year-old “tornado” Patrick. She’d already started painting her weatherboard house white and as with all renos, one job leads to another! “It looked great but highlighted how shabby the rest was!”

Kat started by painting the exterior and one thing led to another

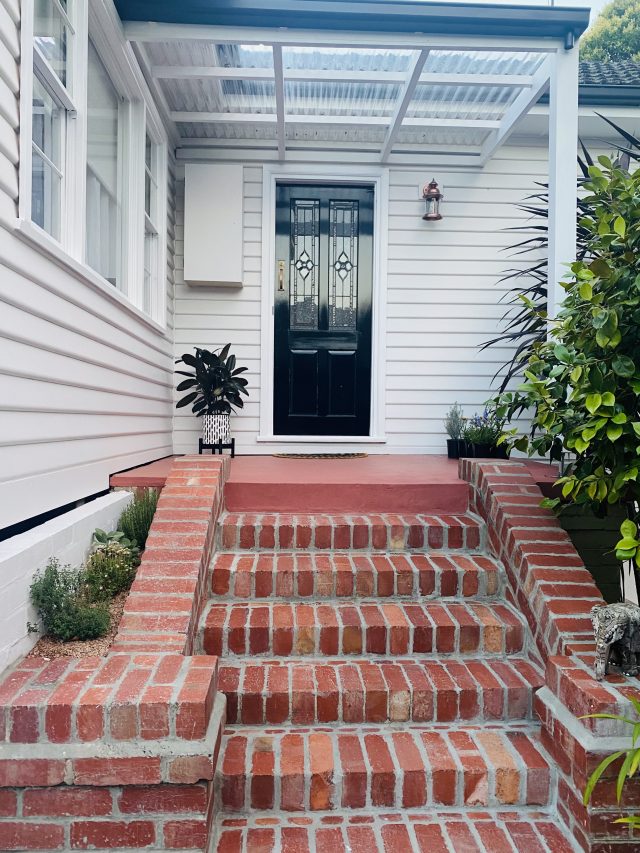
The first thing the 38-year-old did was replace the roofing and the fascia of the verandah. “That was a little beyond my comfort zone and I was able to get a local apprentice builder I knew to do that. I had the awful steel pipe post replaced with a nice timber one, painted it all and it still looked shabby! So I watched a few YouTube videos on how to regrout bricks, went to Bunnings, got a $10 bag of mortar mix and got started. That was the longest task, taking about three days, but was surprisingly relaxing to do!”

Next, Kat got some Haymes paving paint to complement the colour of the bricks, and painted the concrete at the top of the steps, outside the front door. 

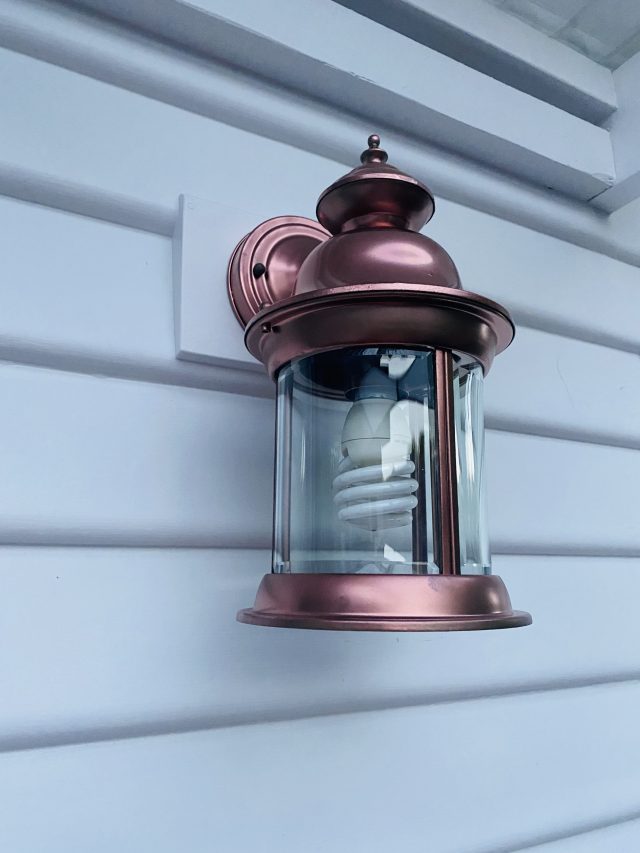
“The wall light was a fun little project, and a colour that I thought might look a bit gawdy, but I surprised myself! I pulled it apart, gave it a light sand and washed it, then sprayed with etch primer first, followed by a Dulux spray paint – Duramax in Copper Rose.

The spray painted light looks brand new

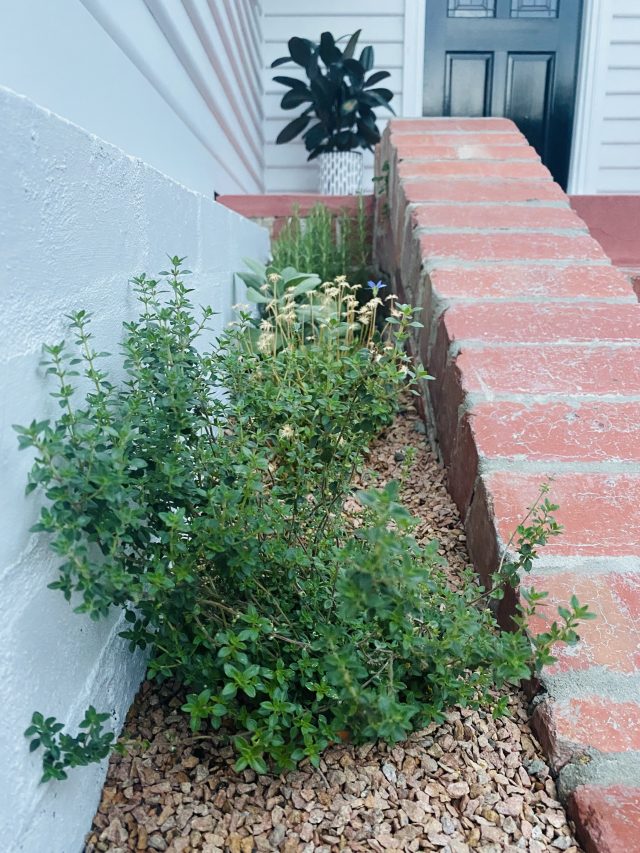
“I got some plants from Bunnings and it all came together, leaving me feeling proud as punch of my little project. It made such a huge difference and cost well under $1,000.”

Kat says providing a nice home for herself and her son is really important to her. “I purchased this house whilst pregnant and had others move me in about three weeks before I had my little Patrick.

“I have done so many projects since I’ve been here. I got so much done when I was on maternity leave. I was never the mum that slept when the baby slept, I was more of a work my butt off until baby wakes type of person! Honestly, I had a lot going on and I think I used house projects as a distraction.”

As well as working full-time, Kat has a side hustle creating custom art, using the extra money she makes to pay for her DIY projects. “I’m independent to a fault and will always try doing something myself before getting someone in, mainly because I know that my finances would never stretch far enough to achieve what I want to, and also because I am a practical person and I enjoy doing the work!”

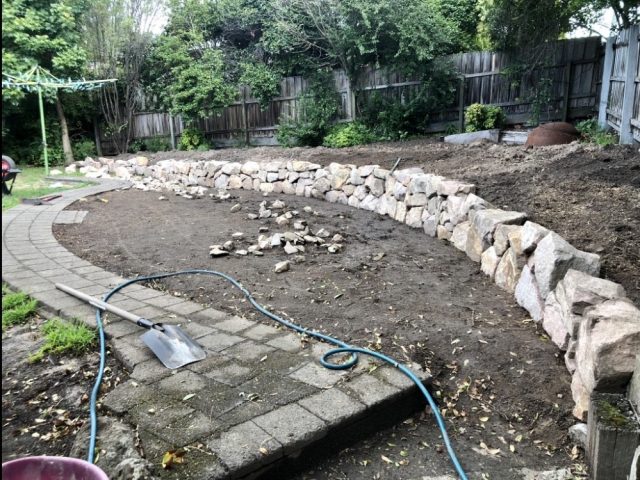
To date, she’s repainted the interior, got new flooring throughout and landscaped the yard! “That was pretty major! I hand dug everything and carried every single rock in from the front as there is no vehicle access.”

Landscaping in progress!
The end result!

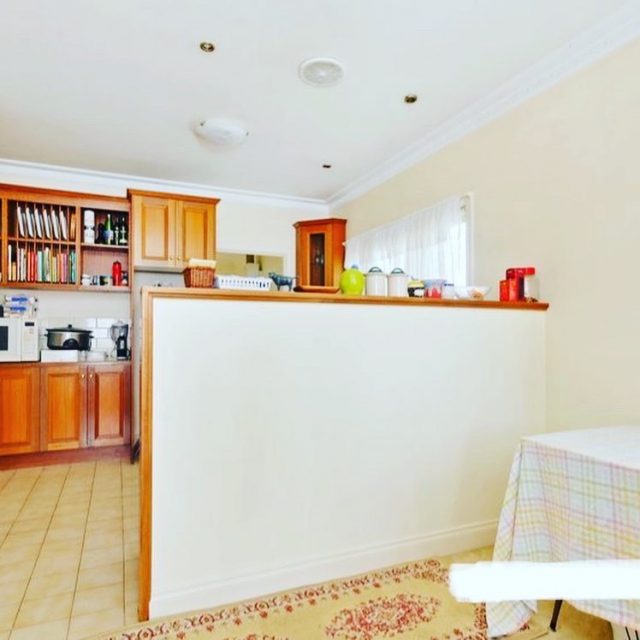
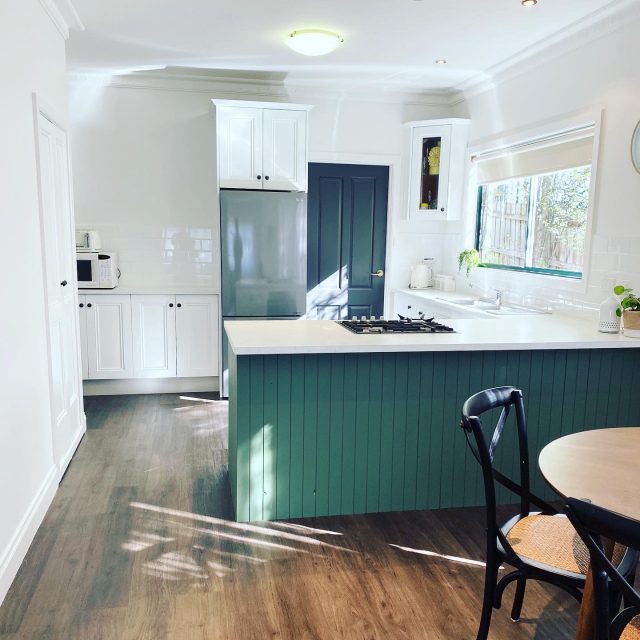
She also revamped the kitchen on a budget, doing everything herself except for the installation of new gas appliances and bench tops.

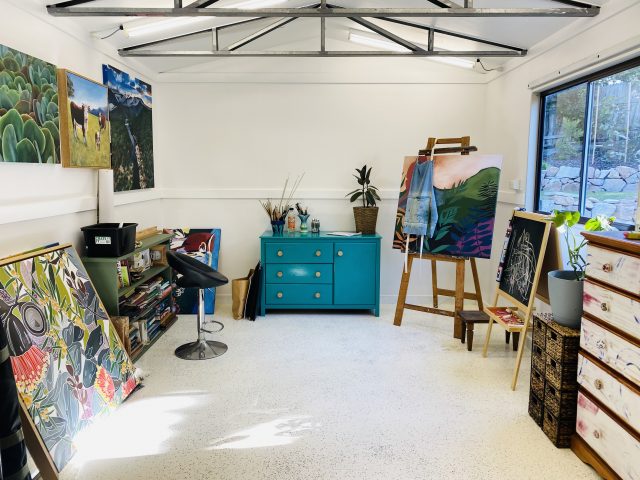
And last but not least, Kat converted her garage into an art studio.

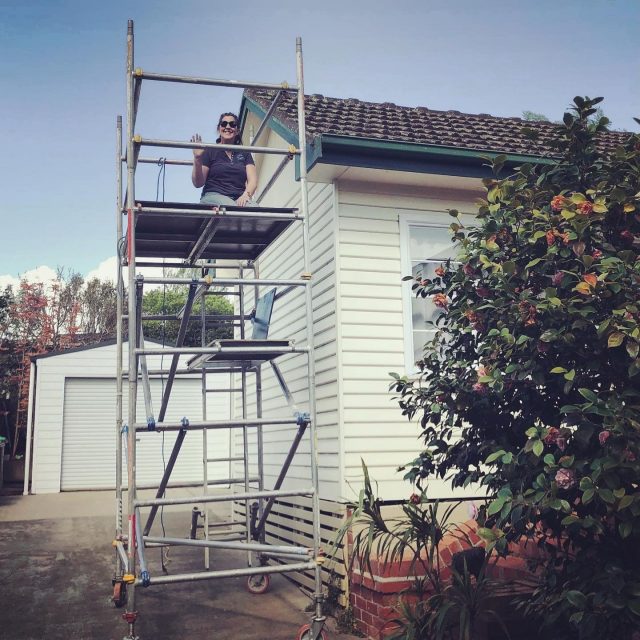
Meanwhile, she continues to paint the exterior of the house.

Kat in action

“My Patty boy can be a great help. I get him involved in all of the projects and he always tells me that he’s going to build me a new house tomorrow so who knows, I might be influencing his career choice from an early age!  

Kat’s little apprentice, son Patrick!

“I do a lot of the work on weekends and after work and occasionally take some leave from work to get through bigger tasks that I can’t do with Patty around. At the end of the day, I’ve had to accept that my projects will always take longer than they would if I had someone around and I’m totally okay with that because the satisfaction that I get when I complete one of the projects is enormous.”

Got a reno project to share? Contact us.

Categories
DIY Interviews Real Renos RENO ADDICT

Self-taught DIY queen gives tradies a run for their money

Growing up in a small town, Melbourne’s Nicole Herrick saw first-hand just how resourceful her mother had to be. “My mum can make or fix anything – we call her MacGyver. We didn’t have access to many stores so if we needed anything she just headed down to the shed and made it,” says Nicole who was clearly inspired by this impressive role modelling. When she left home for university, Nicole asked for a drill and basic tool set for Christmas and, since then has amassed over 40 power tools as well as 16k YouTube followers who tune in to see her inspiring DIY home decor projects.

Nicole Herrick
Nicole Herrick

A graphic designer by trade, Nicole worked in the architecture and interiors industry as an in-house graphic design manager for many years. She now works as a photographer by day and when it comes to DIY, is entirely self-taught. “I’ve been uploading little tips to YouTube for over 10 years and only started taking it seriously about three years ago when I realised my videos were helping a lot of people make and fix things. I also saw the potential to earn a side income,” says Nicole.

“We’ve been told all our lives that the men need to use the power tools for us because they’re ‘too dangerous’ but that is complete garbage. It’s incredibly empowering the first time I use a new tool. There’s nothing like the feeling of being able to create absolutely anything my mind can dream up, without having to ask for help,” says Nicole.

Nicole recently put her impressive skill set to use converting her friend Mitra’s garage into a fabulous art studio. For inspiration, she researched warehouse style art studios with a very simple style and set out to make the single car garage feel as spacious as possible. To this end, Nicole painted the garage’s dark brick walls white and added some warmth with plywood and pops of green.

Mitra's garage
BEFORE: Nicole recently converted her friend Mitra’s garage into an art studio
AFTER: The former garage is unrecognisable
AFTER: The former garage is unrecognisable!

“Initially my design didn’t include adding a wall or sliding door and windows but when I saw one for free on Facebook marketplace, I knew it would transform the space to become a ‘real’ room, not just a converted garage,” says Nicole. Incredibly, Nicole hadn’t ever built a wall and installed a sliding door before but a few YouTube videos showed her all that was required. “All I needed was a few studs, some insulation, plasterboard, external cladding, trim and caulking and the job was done!” says Nicole.

Studio storage was found on Facebook Marketplace and is comprised of second hand wardrobes and cabinets that Mitra painted in the evenings. To bring all the mismatched furniture together, Nicole made custom leather drawer pulls and handles. The studio workbench was built by Nicole (it features legs found for free on Facebook Marketplace) and a giant pegboard acts as a display board for Mitra’s work.

Nicole working on the studio's workbench
Nicole working on the studio’s workbench

“My Youtube channel is DIY focused and all about creating, building and fixing things. From how to fix a toilet to full room makeovers, pretty much everything I teach I’m doing for the first time, so they get all the info from a beginner’s perspective rather than an expert. My mother always said that a woman can do anything that a man can do, and that you shouldn’t let anyone tell you differently!”

Follow Nicole on YouTube | Follow Nicole on Instagram

Categories
Design DIY RENO ADDICT

Wall panelling: Laminex has an exciting new offering!

The latest wall panel solution to hit what is an ever-expanding scene, Surround by Laminex is a new range of profiles designed to help add texture and personality to your home. And with eight fabulous designs to choose from, we’re rather excited about the endless decorating opportunities that the range represents. And as a bonus, the collection of pre-primed MDF wall linings are easy to use, making them perfect for a weekend DIY project.

The Batten 25 wall panel design painted with Dulux Clay

From a gorgeous, scalloped design to a classic VJ or heritage profile, the ready made decorative surface panels are made for the indoors (ie. they’re not suitable for wet areas) and are a fabulous way to add depth and interest to a hallway, bedroom, mudroom, or main living area. Comprised of sustainably sourced timber and medium-density fibreboard, the panels are available in a standard sheet that can be painted the colour of your choosing, once installed. 

“When conceptualising Surround by Laminex, quality and ease of application were two key factors. The panels are durable and hardwearing, whilst still being easy to install. Surround by Laminex really is a product like no other,” says Sacha Leagh-Murray, general manager of sales and marketing.

'Scallop 45' and 'Scallop 22.5' look fabulous paired together. They are painted in Deluxe White Duck Quarter
Scallop 45 and Scallop 22.5 look fabulous paired together. They are painted in Dulux White Duck Quarter

Sustainably manufactured in Australia, the range is created with medium-density fibreboard (MDF), and the timbers of the collection are sustainably sourced too.

The Batten 100 design is a modern, masculine take on classic timber panelling that features defined boards separated by deep, straight-edged grooves. Similar, but much smaller in scale, Batten 25 is a statement narrow board that features defined edges and deeper routing.  

'Batten 100' painted in Dulux Maximus
Batten 100 painted in Dulux Maximus

The Classic VJ 100 is as it sounds – classic tongue and groove panelling offers a timeless look in just about any space and this design features linear boards separated by vertical joins (VJ). Heritage 150 is ideal for period homes and, with its wider boards defined by curved joints, it’s an update on the more traditional timber panels 

Scallop 45 has a uniquely rounded, undulating curved profile that creates a luxe statement, while Scallop 22.5 is similar but narrower in width. The Demi Round 40 is another softly curved profile that is well suited to both full and half-wall applications and its little sister, the Demi Round 20, features narrow curved rods.

Surround by Laminex
The Scallop 22.5 design painted in Dulux Winter Sea

For more

Categories
Decorating 101 DIY Furniture Interviews

Melbourne decoupage company in the IKEA spotlight

The art of decorating an object by gluing coloured paper to it, and finishing with special paint effects, decoupage has had a resurgence in popularity of late and Melbourne’s Michelle Tither has been front and centre. Launched in 2016, Mint by Michelle initially began as a furniture upcycling business but soon became so much more. 

“I had always been creative and wanted to explore that creativity professionally. I wanted to see whether I could make a living doing something that I loved to do and to see what I was capable of both artistically and in business,” says Michelle.

This decoupaged cupboard, by Joyita, was made with one of Michelle’s designs

And while Michelle started out simply upcycling furniture, it wasn’t long before she became known in the space and was overrun with commissioned work. “Ultimately, that lead to running workshops, stocking products, setting up a shop and manufacturing my own products. Since then, the world of furniture art has opened up and I find myself smack in the middle of it – a manufacturer, distributor, retailer and artist,” says Michelle.

Michelle Tither
Mint by Michelle founder Michelle Tither

In its current incarnation, Mint by Michelle is a one-stop shop for anybody who is interested in furniture flipping and upcycling with advice, products, practical hands-on experience, after care and free tutorials on offer. “Our courses and workshops are very well regarded and it’s not unusual for us to have people travel from interstate to attend,” says Michelle. Online shoppers can purchase everything from decoupage paper to brushes, Annie Sloan paints and finished furniture pieces by Michelle.

One of Michelle's pieces
One of Michelle’s pieces
Another of Michelle’s decoupaged furniture pieces

Part of Michelle’s success is that she was the first manufacturer to produce large-scale decoupage images suitable for furniture and since then, almost every other furniture art supply business has followed suit. “Our papers are still the best quality – we have set the bar with our secret ingredient specialty paper and printing method and ink. And we are very proud that our papers are made and manufactured in Australia which is no mean feat!” Incredibly, Michelle’s range is now sold through 300 stockists in more than 30 countries.

And it was through one of the brand’s European distributors, Belen in the Netherlands, that Mint by Michelle had worldwide exposure via IKEA recently. “Belen entered a competition with IKEA and was one of 12 artists chosen to showcase her work on the IKEA website and socials,” says Michelle.

Belen's IKEA piece that was decoupaged in Mint by Michelle's 'Balloons' paper
Belen’s IKEA piece was decoupaged in Mint by Michelle’s ‘Balloons’ paper

Belen painted and decoupaged an IKEA piece using the Mint by Michelle ‘balloons’ paper to great effect and it’s currently residing in a Netherlands IKEA store where it will remain for the next five weeks. “It’s a fabulous piece and we are so terribly excited to have Mint and Belen recognised by such an enormous company!”

For more

Categories
DIY RENO ADDICT Reno Products Reno Trends

The free online home renovation summit you don’t want to miss

Sponsored by Nine Yards Consulting

An exciting new renovating event for Australia and New Zealand is happening next month and in good news for everyone, including those in lockdown (hands up!), it’s online. And it’s free! And even better, it features some of our very favourite suppliers and speakers.

The Home Renovation Summit 2021 is going to be three jam-packed days of learning for anyone looking to renovate or build. If you’re feeling overwhelmed and you don’t know where to start, start here! The organisers, Nine Yards Consulting, have curated an impressive line-up of brands and will be giving you easy, direct access to them, so they can help you with your questions and selections.

Clare Le Roy from The Little Design Corner will be talking about her hugely popular SketchUp online course. Kaety Thompson from Oliver Thom will talk about bathroom decor and design, and Gemma Gillett from StudioGemma will spill the beans on custom cabinetry. Former The Block NZ winner Alex Walls, of A&C Home, is also speaking.

“Each company will explain what exactly it is that they do as well as share useful tips and expert advice about the design and build or reno process and what specific fixtures and finishes are available from their range,” says Jen Jones, construction project manager and owner of Nine Yards Consulting.

“Think of it as a boutique home show, showcasing a niche community of specialists whom you can learn from, all in the comfort of your home or office.”

Sounds good to us!

Other brands already announced include Tile Cloud, Natural Paint Co, Concrete Nation, Mineral Fox, Social Light, Boho Art Styling and Nodi Rugs.

Jen is interviewing all the experts via video and each will be released ‘live’ on the website over three days from August 24 to 26.

“This is a wonderful opportunity to learn about what companies are best suited to your personal needs, as well as their products and services, in a relaxed and comfortable setting. Each day will have a different focus such as design and build with kitchen, bathroom and lighting experts; finishes such as tiles, timber profiles and rendered plaster; and fixtures/fittings such as basins, hardware and more.”

Tickets are free, but you can choose to sign up for a VIP ticket for just $45 (or NZD $47) which will get you bonus free content from the likes of Style Curator’s Gina Ciancio, boundary-pushing interior designer Alex Fulton and our very own Jen Bishop, who’ll be talking frankly about her own experience as a rookie renovator. This early bird price will increase to $92/NZD$97 as the event gets closer.

VIPs also get entry into a prize draw to win $750 worth of reno goodness, immediate access to all the content from day one, as well as lifetime access in case the timing doesn’t work for you. There’s also exclusive supplier discounts which could save you thousands, and much more. A bargain!

In her day job, Jen Jones helps rookie renovators transform their homes without unnecessary stress, timeline overruns and budget blowouts. Over the past 10 years, she’s worked with established New Zealand commercial businesses such as NorthWest Shopping Centre, Auckland Airport, BNZ, BP, Lumino, Flight Centre and more, managing their construction projects as well as undertaking residential projects of her own.

“This combination of fit out, project and cost management experience allows me to take a holistic approach to any renovation or extension project,” she says. “I set up Nine Yards Consulting in 2019 to offer this experience and expertise as a project consultant to the residential sector.”

Book your free ticket!

Categories
Design DIY RENO ADDICT Reno Products

Wall panels: All the options for a trending look

Sponsored by Intrim

Lucky for us, we get to look at interior trends on the daily and while many stick around for the requisite five minutes, the wall panel trend is one that has enduring appeal. An ideal way to imbue a home with character and depth, wall panels are surprisingly versatile too. From simple VJ boards to wainscoting and a brand-new scalloped design, there are wall panel iterations to suit every type of home from beach house to farmhouse and everything in between.

Wainscoting
A super popular look, wainscoting is being used in Hamptons and more traditional style homes across the globe. The variety of inlay mould choices and different styles of wainscoting allow for amazing creativity and this look really adds richness to a space.

Intrim wainscoting
Intrim wainscoting

Hands on renovators will be excited to hear that Intrim sells a DIY wainscoting kit that can be ordered online and used in conjunction with a variety of instructional videos making it perfect for a weekend project.

DIY wainscoting kit

Intrim Cavetto Wall
The latest offering at Intrim, the Cavetto Wall panelling design is inspired by our current obsession with curves and arches. A lining board, this design features a tongue and groove that clip together for a continuous scalloped effect. While a quick and effective option for covering an entire feature wall, you can also use them on the bottom half of a wall topped with a chair rail.

Available in lengths of up to 5.4 metres, entire walls can be covered without joins, making for a seamless finish and once installed you can paint them to match your room or make a statement with a feature colour. Made in Sydney, the scalloped design is unique to Intrim.

The Cavetto Wall design

VJ Board Pro
Very popular right now, VJ (vertical join) is a versatile look that feels perfectly at home across a variety of architectural styles from Hamptons to coastal and country farmhouse. Like the Cavetto Wall design, the Intrim VJ Board Pro is available in a range of different lengths up to 5.4 metres meaning there are no joins or wastage. Made from MDF, this design is best suited to dry rooms and is perfect for more contemporary homes or if you want to simply dip your toes in the trend.

VJ Board Pro. Photography by Carole Margand.
Intrim skirting

Lining Boards
Lining Boards give the look of the VJ Board Pro, but with narrower boards. The boards have a tongue and groove and clip together and they’re great for smaller spaces where the larger VJ Board Pro panels aren’t practical. Made from timber, they’re perfect for wet areas because mdf and water don’t mix. Like the VJ Board Pro, Lining Boards can be run vertically or horizontally on a wall, and as a ceiling lining too.

Jen used Lining Boards as a cost-effective alternative to tiles in her en suite renovation

Wall battens and timber mouldings
This look has really taken off of late, with different types and shapes of wall battens and mouldings being used to create artwork treatments on walls and furniture facings. A growing trend (we’ve seen it in a lot of kitchens), we can’t wait to see more of it.

Intrim’s Concave design is a great wall battening option

For more

Categories
Decorating 101 DIY Expert Tips

Suffering from SAD? New research shows DIY can spark back your joy

With NSW’s extended lockdown, it’s a given that many of us feel down and restless. We all miss the freedom of going out, non-essential shopping trips, and the decline of face mask usage. But did you ever feel as if you were already having the blues well before the pandemic made its comeback?

A new study has revealed that the average Aussie suffers from SAD. Seasonal Affective Disorder is a type of mood disorder that’s related to changes in seasons and is known to bring on feelings of moodiness and low levels of energy.

As the temperature continues to drop and the gloomy weather forces people to stay inside, it comes as no surprise that half of Aussies (52%) believe that winter negatively impacts their mood, with the majority (56%) saying they feel less motivated during the colder months than they do at any other time of the year.  

So what’s the solution and how exactly can we bring spark joy back in our lives especially in an indefinite lockdown?

The study commissioned by Bunnings reveals that improving your living environment actually increases your happiness, not only due to productivity but also because the end results are so rewarding. More than four in five Australians (84%) feel happier after completing a project around the home and research shows the rooms Australians spend the most time in during winter also make them happiest, with the lounge (43%) and bedroom (32%) bringing the most joy in the coldest season of the year.

With many looking to tackle home improvements to remain productive this winter and lockdown, Bunnings general manager of merchandise, Tracey Lefebure, suggests some simple but effective DIYs to refresh a  space while creating a sense of accomplishment.

“There are so many indoor projects that can be done, no matter your skill level or budget,” says Tracey. “Giving a room a new lick of paint, adding panelling or wallpaper can make a huge impact or even simply changing handles on your cupboards or reorganising your drawers can give you that feeling of accomplishment.”

Finding the motivation to start a project may seem to be a big hurdle, but Bunnings found out that once customers completed their first, they became hooked and really enjoyed getting their hands dirty to make their homes a happier place.

For inspiration and ideas

Categories
DIY Expert Tips Furniture

Chalk Paint project: how to create an ombre sunset cabinet

We just loved this Sunset Chalk Paint Ombre Cabinet by Annie Sloan and we had to ask her for the step-by-step guide to creating it so you can have some upcycling fun too!

You will need:

  • 1 x 1L Chalk Paint in Capri Pink
  • 1 x 1L Chalk Paint in Barcelona orange
  • 1 x 1L Chalk Paint in Florence
  • 2 x Large Chalk Paint Brushes
  • 2 x Large Flat Detail Brushes
  • 1 x 500ml Clear Chalk Paint Wax
  • 1 x Small Chalk Paint Wax Brush
  • 1 x lint free cloth

How to

To recreate this ombre at home, begin by painting the bottom of your furniture with a thin first coat in Capri Pink Chalk Paint. Brush in all directions. Then do the same with Barcelona Orange Chalk Paint to cover the top half of your piece. Repeat the process to give full coverage of each colour. There will be a distinct line between the Capri Pink and Barcelona Orange halves.

It’s blending time!

You’ll need two brushes for best results. Annie prefers Chalk Paint Brushes because they hold a lot of paint in their densely packed bristles and allow a lot of control. Starting with your Capri Pink brush, paint over where the two colours meet. Whilst the paint is still wet, take the other brush and work Barcelona Orange into the Capri Pink.

The trick here is not to overload your brushes; allow the bristles to pick up excess paint and mix small amounts of each colour together with each brush stroke rather than trying to deposit more paint with every movement. You should always work so one colour is painted on in one direction (i.e., upwards or left to right) and the other colour is painted in the opposite direction (downwards or right to left), so they blend together to make a new colour. A light touch is most effective.

Once your ombre is dried, channel Annie’s colour-clashing expertise by adding some Chalk Paint in Florence (as seen on the inside of this cabinet). The turquoise waters of this blue-green colour will contrast magnificently with the tropicana warm tones outside and add to the holiday feel. Finish by protecting the whole thing with Clear Chalk Paint Wax. Ta da!

For more details and stockists.

Chalk paint by Annie Sloan, from $54.95 RRP for 1L.

Categories
DIY Expert Tips Interviews Kitchens Real Renos RENO ADDICT

DIY reno solution: How to overhaul your kitchen for just $700!

We love an affordable DIY renovation solution around here so when Dulux shared a couple of budget kitchen makeovers with us recently, we couldn’t click through fast enough. Created for just $700 each with the Dulux Renovation range, the results are rather impressive. And with the average kitchen renovation costing around $21,000, and taking upwards of a month to complete, it’s no surprise that many of us are turning to paint for a fast and inexpensive solution.

BEFORE
BEFORE
AFTER
AFTER. Dulux Five Fingers Peninsula is paired with Dulux Whisper White.

A water-based interior paint range, the Dulux Renovation range is ideal for wet and high-use zones such as the kitchen. The formula is tailored to cabinets, tiles, benchtops, grout and floors making it the ideal solution for a budget kitchen reno. And rather than waiting for lengthy cabinetry installs or bench top and tile replacements, the product lets you renovate a kitchen over a few days.

BEFORE
AFTER
AFTER

And when it comes to colour selection, Dulux colour and communications manager Andrea Lucena-Orr has plenty of advice for would-be kitchen renovators. “Whether it is a high-end, luxurious look and feel you wish to create (as might be seen in your favourite restaurant) or a more relaxed, lived-in space for the whole family to enjoy, the right colours and products can make all the difference,” says Andrea. 

For those who favour classic looks, Andrea suggests pairing Dulux Domino or Malay Grey on the benchtop or tiled floor and pairing it with a warm white like Dulux Natural White on splash back tiles. “This creates a classic and sophisticated look that can be tweaked over time with kitchen accessories and stainless-steel appliances,” says Andrea.

BEFORE
BEFORE
AFTER
AFTER. This kitchen’s bench tops were transformed with Dulux Malay Grey

From navy to teal and cornflower, blue kitchen cabinetry has been steadily increasing in popularity of late and it’s a look that is fairly easy to achieve according to Andrea. “Mid-tone blues, reds and pinks can be used for a daring and playful effect in the kitchen. For example, cornflower blues on cabinets or cabinet doors, complemented with soft grey on handles, can be tied together with a warm white like Dulux Whisper White on the tiles and walls for a statement look,” says Andrea.

For more