Categories
Recipes

Foodie Friday: Beef and lemon myrtle pho

This week’s recipe is created by chef Tom Walton using the ‘queen of lemon herbs’, lemon myrtle, and brought to you by Australian Native Products. Lemon myrtle is fast becoming a must-have ingredient in the spice racks of chefs and home cooks around the country. It’s sweet, yet spicy, intense, but also refreshing and cooling on the palate, the perfect alternative for lemongrass in pho.

Beef and lemon myrtle pho

Feel free to replace the beef with cooked chicken, tofu, seafood or more veggies.

The lemon myrtle adds a delicious fragrance to the pho that works perfectly, replacing where you would usually add lemongrass.

Broth

  • 1 L beef broth
  • 2 tbsp 6mm cut dried lemon myrtle
  • 2 cm piece ginger (thinly sliced)
  • 2 tbsp soy or fish sauce
  • 1-2 tbsp palm sugar (optional)
  • Sea salt (to taste)

Beef and noodles

  • 150 g beef sirloin (frozen for at least 2 hours)
  • 100 g dried rice noodles
  • ½ bunch broccolini (trimmed)

Toppings

  • 2 tsp 1.6mm cut dried lemon myrtle
  • 2 tbsp flake sea salt
  • 1 cup bean sprouts
  • 1 large red chili (finely sliced)
  • 1/3 cup sliced shallots
  • 1 cup each picked coriander & mint
  • 1 lemon
  1. Place the broth into a pot and add the lemon myrtle, ginger, soy, palm sugar and bring to just under a simmer for 10-15 minutes, to infuse the lemon myrtle and ginger then strain into another pot and keep hot, covered over a low heat so it doesn’t reduce.
  2. Thinly slice the sirloin while partially frozen then lay out on a plate. Freezing makes it easier to thinly slice.
  3. Bring a medium saucepan of water to the boil, season with a pinch of salt and add the broccolini for 20 seconds then remove with tongs into ice water to refresh, drain and set aside.
  4. Cook the rice noodles according to packet instructions in the same boiling water then refresh in cold water and drain well. Set aside.
  5. Keep a pot of water boiling to reheat the noodles.
  6. Gently mix together the lemon myrtle and salt and keep in a small airtight container. You will need just a little for this recipe.
  7. Reheat the noodles in the boiling water, drain and add to the bottom of two bowls then add the beans sprouts, sliced raw sliced beef and broccolini.
  8. Spoon the very hot broth and the veggies over the beef and top with the sliced chili, shallots and coriander. Serve with lemon myrtle salt sprinkled over, extra herbs, chili and lemon.
Dinner, Lunch, Main Course, Soup
Vietnamese
beef, lemon, pho
Request a free sample of lemon myrtle

Categories
Recipes

Foodie Friday: Sweet potato breakfast bowl

This week’s recipe is brought to us by Australian Sweet Potatoes and by dietician Marika Day.

Sweet potato breakfast bowl

A delicious breakfast bowl packed with nutrition, this sweet potato bowl only takes 15 minutes to make.

  • 200 g sweet potato (approximately half a medium sweet potato)
  • 1 tsp salted butter
  • 1 egg
  • 3 stalks of broccolini
  • 2 handfuls baby spinach
  • Chilli flakes (to serve)
  1. Peel sweet potatoes and dice into large cubes. Bring a saucepan of water to the boil with a pinch of salt.
  2. Add sweet potato and allow to boil for 10 minutes or until soft and cooked through.
  3. Meanwhile place broccolini in a microwave safe dish with a dash of water. Cover and microwave on high for 1 minute. Add spinach leaves and return to the microwave to steam for a further 1 minute. Drain and season with salt and pepper.
  4. Poach, boil or fry your egg in a pan until cooked to liking.
  5. Drain sweet potato and add butter. Mash until smooth and creamy. Season with salt and pepper.
  6. Place sweet potato into a bowl and top with greens and egg. Sprinkle with chilli flakes.
Breakfast
breakfast, chilli, gluten free, health food, healthy, quick meal, sweet potato
Categories
Recipes

Foodie Friday: Moroccan roast fioretto with farro, pistachio, pomegranate & yoghurt

Today’s recipe is brought to us by Perfection Fresh Australia and created by award-winning chef, Tom Walton. The love child of cauliflower and broccoli, fioretto tastes sweeter than cauliflower but is packed with the same nutritional value.

In season until November, try out this trendy new vegetable with a Morrocan twist to tantalise your tastebuds.

Morrocan roast fioretto with farro, pistachio, pomegranate & yoghurt

Fresh and crispy, this quick recipe is packed with nutrients.

  • 2 packets Perfection Fresh Fioretto
  • 2 tbsp olive oil
  • 2 tsp harissa paste
  • salt (to taste)
  • 2 cups farro (cooked according to packet instructions)
  • 1 cup mint (roughly chopped )
  • 1 cup coriander (roughly chopped )
  • 1 cup dill (roughly chopped )
  • ½ cup pomegranate seeds (approx. 1⁄2 pomegranate)
  • ½ cup toasted pistachios (crushed)
  • ½ cup dried apricots (roughly chopped)
  • 3 tbsp extra virgin olive oil
  • 1 tbsp chardonnay vinegar
  • 2 tbsp pomegranate molasses
  • 1 ½ cup natural Greek-style yoghurt
  • 1 lemon
  1. Preheat an oven to 210°C and line a baking tray with baking paper.

  2. Toss the fioretto with the olive oil, harissa paste and a little salt.

  3. Spread over the baking tray and roast for 8-10 minutes, you want it lightly charred but still with a little bite. Set aside.
  4. Meanwhile, in a mixing bowl, combine the cooked farro, herbs, pomegranate, pistachio, apricots and dress with the extra virgin olive oil, vinegar and 1 tbsp of molasses. Season and toss to combine.
  5. To finish, spread the yoghurt over a serving plate, spoon over the farro salad and top with the roast fioretto, squeeze over lemon to serve.

Dinner, Lunch, Salad
Morrocan
baked, easy dinner, fioretto, health food, healthy, lunch, pistachio, pomegranate, quick meal, salad, yoghurt
Categories
Recipes

Foodie Friday: Champagne and rose macarons

This recipe is brought to us by Australian Almonds. Delicious and beautiful, they’re the perfect treat to impress your guests.

Champagne and rose macarons

Pretty in pink and a mouthwatering delight, these aren't as tricky as you'd think so have a go!

Macaron Shells

  • 150 grams ground almonds
  • 150 grams icing sugar
  • 110 grams egg whites
  • 150 grams caster sugar
  • 4-6 drops rose pink food colouring

Champagne and rose buttercream

  • 250 grams salted butter (softened)
  • 250 grams icing sugar
  • 10 drops champagne essence
  • 2 drops rose essence
  • 1 tbsp rose water
  • 1 pinch salt
  1. Preheat the oven to 150°C or 130°C fan-forced. Line 4 baking trays with baking paper or 4 silicon macaron mats.

  2. To make the macaron shells, place the ground almonds and icing sugar into a blender or food processor and pulse until fine, being careful not to overheat the mixture. Pass the mixture through a sieve 2 or 3 times, pushing through any lumps with the back of a spoon.

  3. Measure out half the egg whites and add to the almond meal mixture. Using a spatula, mix until just combined, taking care not to overwork the mixture.

  4. Place the remaining egg whites into a very clean stand mixer bowl. Whisk on a medium high speed until soft, frothy peaks form. Continue to whisk while you prepare the syrup.

  5. Place the caster sugar and 35ml water into a small saucepan and set over a medium heat. Stir the mixture and allow it to come to the boil. Using a sugar thermometer to check the temperature, cook the syrup until it reaches 118°C. Once it has come to temperature and is a syrupy consistency, remove from the heat.

  6. As the egg whites continue to whisk, pour the syrup down one side of the bowl in a slow, steady stream until all of it has been incorporated into the egg whites. Add the pink food colouring to your desired colour and continure to whisk the meringue on high speed until thick and glossy, about 5 minutes. The base of the bowl should be warm but no longer hot.

  7. Add the meringue mixture to the almond meal mixture and, using a clean spatula, fold gently until evenly combined, taking care not to overmix. The mixture should have a soft paste-like texture and a dropping consistency.

  8. Transfer the mixture to a large piping bag fitted with a 1cm round piping tip. Pipe small rounds, about 2cm in diameter, onto the lined baking trays. Help the macaron mixture to level out by tapping the underside of the trays with the palm of your hand.

  9. Set the macarons aside to form a "skin" on top of the shell, about 30 minutes. Once the skin has formed, place into the preheated oven and bake for 12-15 minutes. Once baked, open the oven door and leave ajar for 2 minutes before removing the macarons.

  10. Set the macarons aside on the trays to cool completely. Once cool, lift off the trays with a round-tip palette knife. Set aside in an airtight container until ready to fill.

  11. For the buttercream filling, add the very soft butter to the bowl of a standmixer fitted with a cream paddle and beat until very pale and light in texture. Add the icing sugar, champagne essence, rose essence, rose water and salt. Mix until all the ingredients are incorporated and the mixture is light and creamy.

  12. Transfer the buttercream to a piping bag fitted with a 1cm tip. Pipe the buttercream onto half of the fully cooled macaron shells and sandwich withanother shell.

Dessert, Snack
Baked goods, French
baked, baking, macarons
Categories
Recipes

Foodie Friday: Apple turnover

This week’s recipe is brought to us by Winning Appliances culinary expert Chloe Skipp.

Apple turnover

Stay cosy this winter with this mouthwatering apple turnover recipe.

  • 2 tbsp unsalted butter
  • 5 Granny Smith apples (peeled, cored, and finely diced)
  • ¾ cup brown sugar
  • 1 lemon ((grated zest))
  • 1 tsp lemon juice
  • 1 packet frozen Careme butter puff pastry
  • 1 egg yolk (lightly whisked)
  1. In a small frying pan over medium heat, melt butter until slightly golden and foaming.

  2. Add apples and brown sugar and increase the heat to high. Cook for 5 minutes or until sugar is dissolved and slightly thickened into a syrup.

  3. Place a sieve over a bowl and drain the apple mixture. Set aside ½ of the mixture, and place the remaining mixture and syrup in a blender and process until smooth.

  4. Place the puree back into the pan and fold through the remaining apple mixture, lemon zest and juice and set aside to cool.

  5. Take out pastry from the freezer and slightly defrost. Using a 12cm round cutter, cut 6 rounds and place 1½ tbsp of the apple mixture in the centre of each round. Fold in half and pinch together the edges. Brush with egg yolk and using a sharp knife, score diagonal lines in the pastry (like a sunset), slicing the pastry ¾ through. Place in the fridge for 1 hour or overnight. Reserve any leftover egg yolk and place in the fridge.

  6. Preheat oven to 210°C (190°C fan-forced) with 30% steam. Line a baking tray with baking paper. Remove pastries from the fridge and brush with remaining egg yolk once more, make two small holes in the long edge of pastry and cook for 25-30 minutes or until golden brown.

Dessert, Snack
Baked goods
apple, baked, baking
Categories
Recipes

Foodie Friday: Savoury pumpkin bread from 28 by Sam Wood

This savoury pumpkin bread recipe is brought to us by 28 by Sam Wood.

Savoury pumpkin bread

A gluten free and dairy free healthy snack from the popular online fitness coach.

  • 1 cup Pumpkin
  • 2 cups Almond meal
  • ½ cup LSA (linseed, sunflower, almond meal)
  • 2 tbsp Psyllium
  • 2 tsp Baking powder
  • ½ teaspoon Salt
  • 1 tsp cinnamon (ground)
  • 4 Free range eggs
  • ¼ cup Coconut oil (extra virgin) (melted)
  • 1 tbsp Rice malt syrup
  1. Preheat oven to 180°C.

  2. Remove skin and slice pumpkin into small pieces. Steam until soft, mash, and set aside to cool.

  3. In a large bowl, combine almond meal, LSA, psyllium, baking powder, cinnamon, and salt

  4. In a separate bowl, beat the eggs and add to the flour mix.

  5. Add the oil, rice malt syrup, and mashed pumpkin, and combine thoroughly.

  6. Pour into a greased loaf tin and bake for 30-40 minutes, until cooked and a skewer inserted comes out clean.

Snack
Baked goods
dairy free, gluten free, pescatarian, pumpkin, vegetarian
Categories
Recipes

Foodie Friday: Dukkah fried halloumi

Today’s recipe is by Good Chef, Bad Chef’s Adrian Richardson and brought to us by Table of Plenty.

Dukkah fried halloumi

Light, flavoursome, and easy to cook, this 15 minute recipe is sure not to disappoint.

  • Table of Plenty Pistachio Dukkah with Thyme
  • Extra virgin olive oil
  • 3 thick slices Halloumi
  • 2 slices Sourdough
  • 1 Egg
  • ½ Avocado (sliced)
  • Spring onion
  • Salt and pepper
  1. Sprinkle dukkah over halloumi slices.

  2. Add a splash of extra virgin olive oil to a hot pan. Gently place halloumi and slices of sourdough into oil – add a little more olive oil if needed. Cook until the halloumi is gooey and golden on both sides and the sourdough is toasted.

  3. Add your eggs to the pan and season with a pinch of salt, pepper and dukkah. Fry to your liking.

  4. Place the fried bread on your plate with halloumi, egg, and avocado, and garnish with spring onions. Season with salt and dukkah.

Lunch
Mediterranean
easy dinner, lunch, quick meal, vegetarian
Categories
Recipes

Foodie Friday: Spicy sesame soba noodle stir-fry

Today’s recipe was brought to us by The Chilli Factory and was created by food and recipe blogger @thedailyfoodfeed.

Spicy sesame soba noodle stir-fry

Easy, refreshing and flavour packed, while this recipe is vegetarian it works well with any choice of protein.

  • 100 g firm tofu (cut in triangles)
  • 1 tbsp The Chilli Factory Outback Storm Hot Chilli Tomato & Basil Relish
  • 1 tsp Dijon mustard
  • 15 g Lupin crumbs
  • 1 tbsp mixed sesame seeds (white and black)
  • 1 tbsp soy sauce
  • 1 tbsp rice wine vinegar
  • 1/2 tbsp hulled tahini
  • 1/2 tbsp peanut butter
  • 60 g soba noodles
  • 1 cucumber (thinly sliced)
  • 100 g broccoli florets
  • 1 flat mushroom (sliced)
  • 30 g edamame beans
  • 1 tsp sesame oil
  • 1 shallot thinly (sliced)
  1. Pre-heat the oven to 180°. Line a baking tray.

  2. Spread Dijon mustard over the whole tofu. Sprinkle the lupin crumb and mixed sesame seeds seasoning over to fully coat the tofu. Ensure that everything is covered and bake in the oven for 15 minutes.

  3. Whisk together the soy sauce, rice wine vinegar, tahini, peanut butter and The Chilli Factory Hot Chilli Tomato & Basil Relish until smooth.

  4. Cook the soba noodles for 3-4 minutes in boiling water. Drain and rinse under cold water.

  5. In a bowl, season the cucumber with table salt. Toss and let them sit for 5-10 minutes. Squeeze out the excess water, and dress with 1 tsp rice wine vinegar. Set aside.

  6. In a non-stick pan, heat the sesame oil. Add the broccoli, mushrooms and edamame. Cook until they start to soften. Add half of the chilli sesame peanut sauce to the pan and stir fry until fully coated and it starts to thicken. Remove from the heat.

  7. Add the noodles to the hot pan (heat off!) add the remaining sauce and stir until thick, glossy and fully coated.
  8. Transfer everything to your bowl, top with the baked tofu, pickled cucumber and shallots.
Dinner, Lunch
chilli, sesame, soba noodle, stir-fry, vegetarian
Categories
Art Shopping

Melbourne artist raises money for charity with foodie art prints

Melbourne creative Gemma Leslie has designed a second collection of limited edition recipe posters to raise money for FareShare, an Australian charity that provides millions of free meals for those in need. It follows the sell-out success of the first collection, which raised more than $40,000 for FareShare. 

The four new posters feature recipes from Australian hospitality heavyweights Andrew McConnell (Cumulus Inc.), Lennox Hastie (Firedoor and Netflix’s Chef’s Table:  BBQ), Lisa Valmorbida (Pidapipó Gelateria) and Kay-Lene Tan (Tonka). She has interpreted the chefs’ recipes into her signature ‘naïve’ art style, which is inspired by organic forms, imperfections and bright colour. 

Firedoor’s recipe for pipis with karkalla and native citrus

“Food For Everyone is my way of bringing a touch of happiness into people’s homes during an extremely difficult  time,” says Leslie. “For me, this project was born out of my love for sharing food with family and friends. Coming together and sharing a  meal is a communal and binding act—an act that is understood globally. I wanted the posters to capture that spirit.”  

By collaborating with some of the country’s best chefs and cooks, Food For Everyone honours those who have made a lasting impact on Australia’s food scene, while allowing people to own a small piece of culinary history. “Most importantly, it puts food on the table for those in need through the work of our friends at FareShare,” Leslie continued.

Cumulus Inc’s tuna tartare with crushed peas

FareShare runs Australia’s largest charity kitchens in Melbourne and Brisbane. It rescues surplus, quality food from supermarkets, wholesalers, farmers and other businesses that would otherwise end up in landfill and cooks it into millions of free, nutritious meals for isolated communities, low-income families, people experiencing homelessness, and others struggling to get by. 

FareShare is among hundreds of frontline charities and foodbanks across Australia that have experienced a significant increase in the need for food relief at varying times in the past year due to the ongoing impacts of  COVID-19. Many Australians currently experiencing food insecurity expect they won’t cope when the additional Government support via JobSeeker and JobKeeper is withdrawn in March.  

Pidapipó Gelateria’s strawberry sorbetto recipe

“The support from Food For Everyone has already allowed FareShare to provide more than 30,000 free, cooked and highly nutritious meals for Australians in need. Gemma’s artwork celebrates Australia’s exceptional food culture by capturing its bright spirit and bringing together the industry’s best to generously support some of our  most vulnerable,” said FareShare director Toni Hetherington. 

“As panic buying at supermarkets resurfaces during cluster outbreaks and the cost of fresh food fluctuates during the  pandemic, vulnerable people who live week-to-week continue to turn to food charities for assistance and FareShare is  committed to not only cooking enough meals to nourish those in need but cook the best possible meal for each individual.” 

Tonka’s halwa carrot cake

The purchase of every poster provides 70 meals through FareShare. Each poster is in A2 format (42cm x 59cm) and  printed on paper made entirely from 100% recycled single-use coffee cups.  

Posters are $80 each and available to pre-order online for a limited time from until 25 February 2021. 

Categories
Recipes

Foodie Friday: Chocolate dipped shortbread

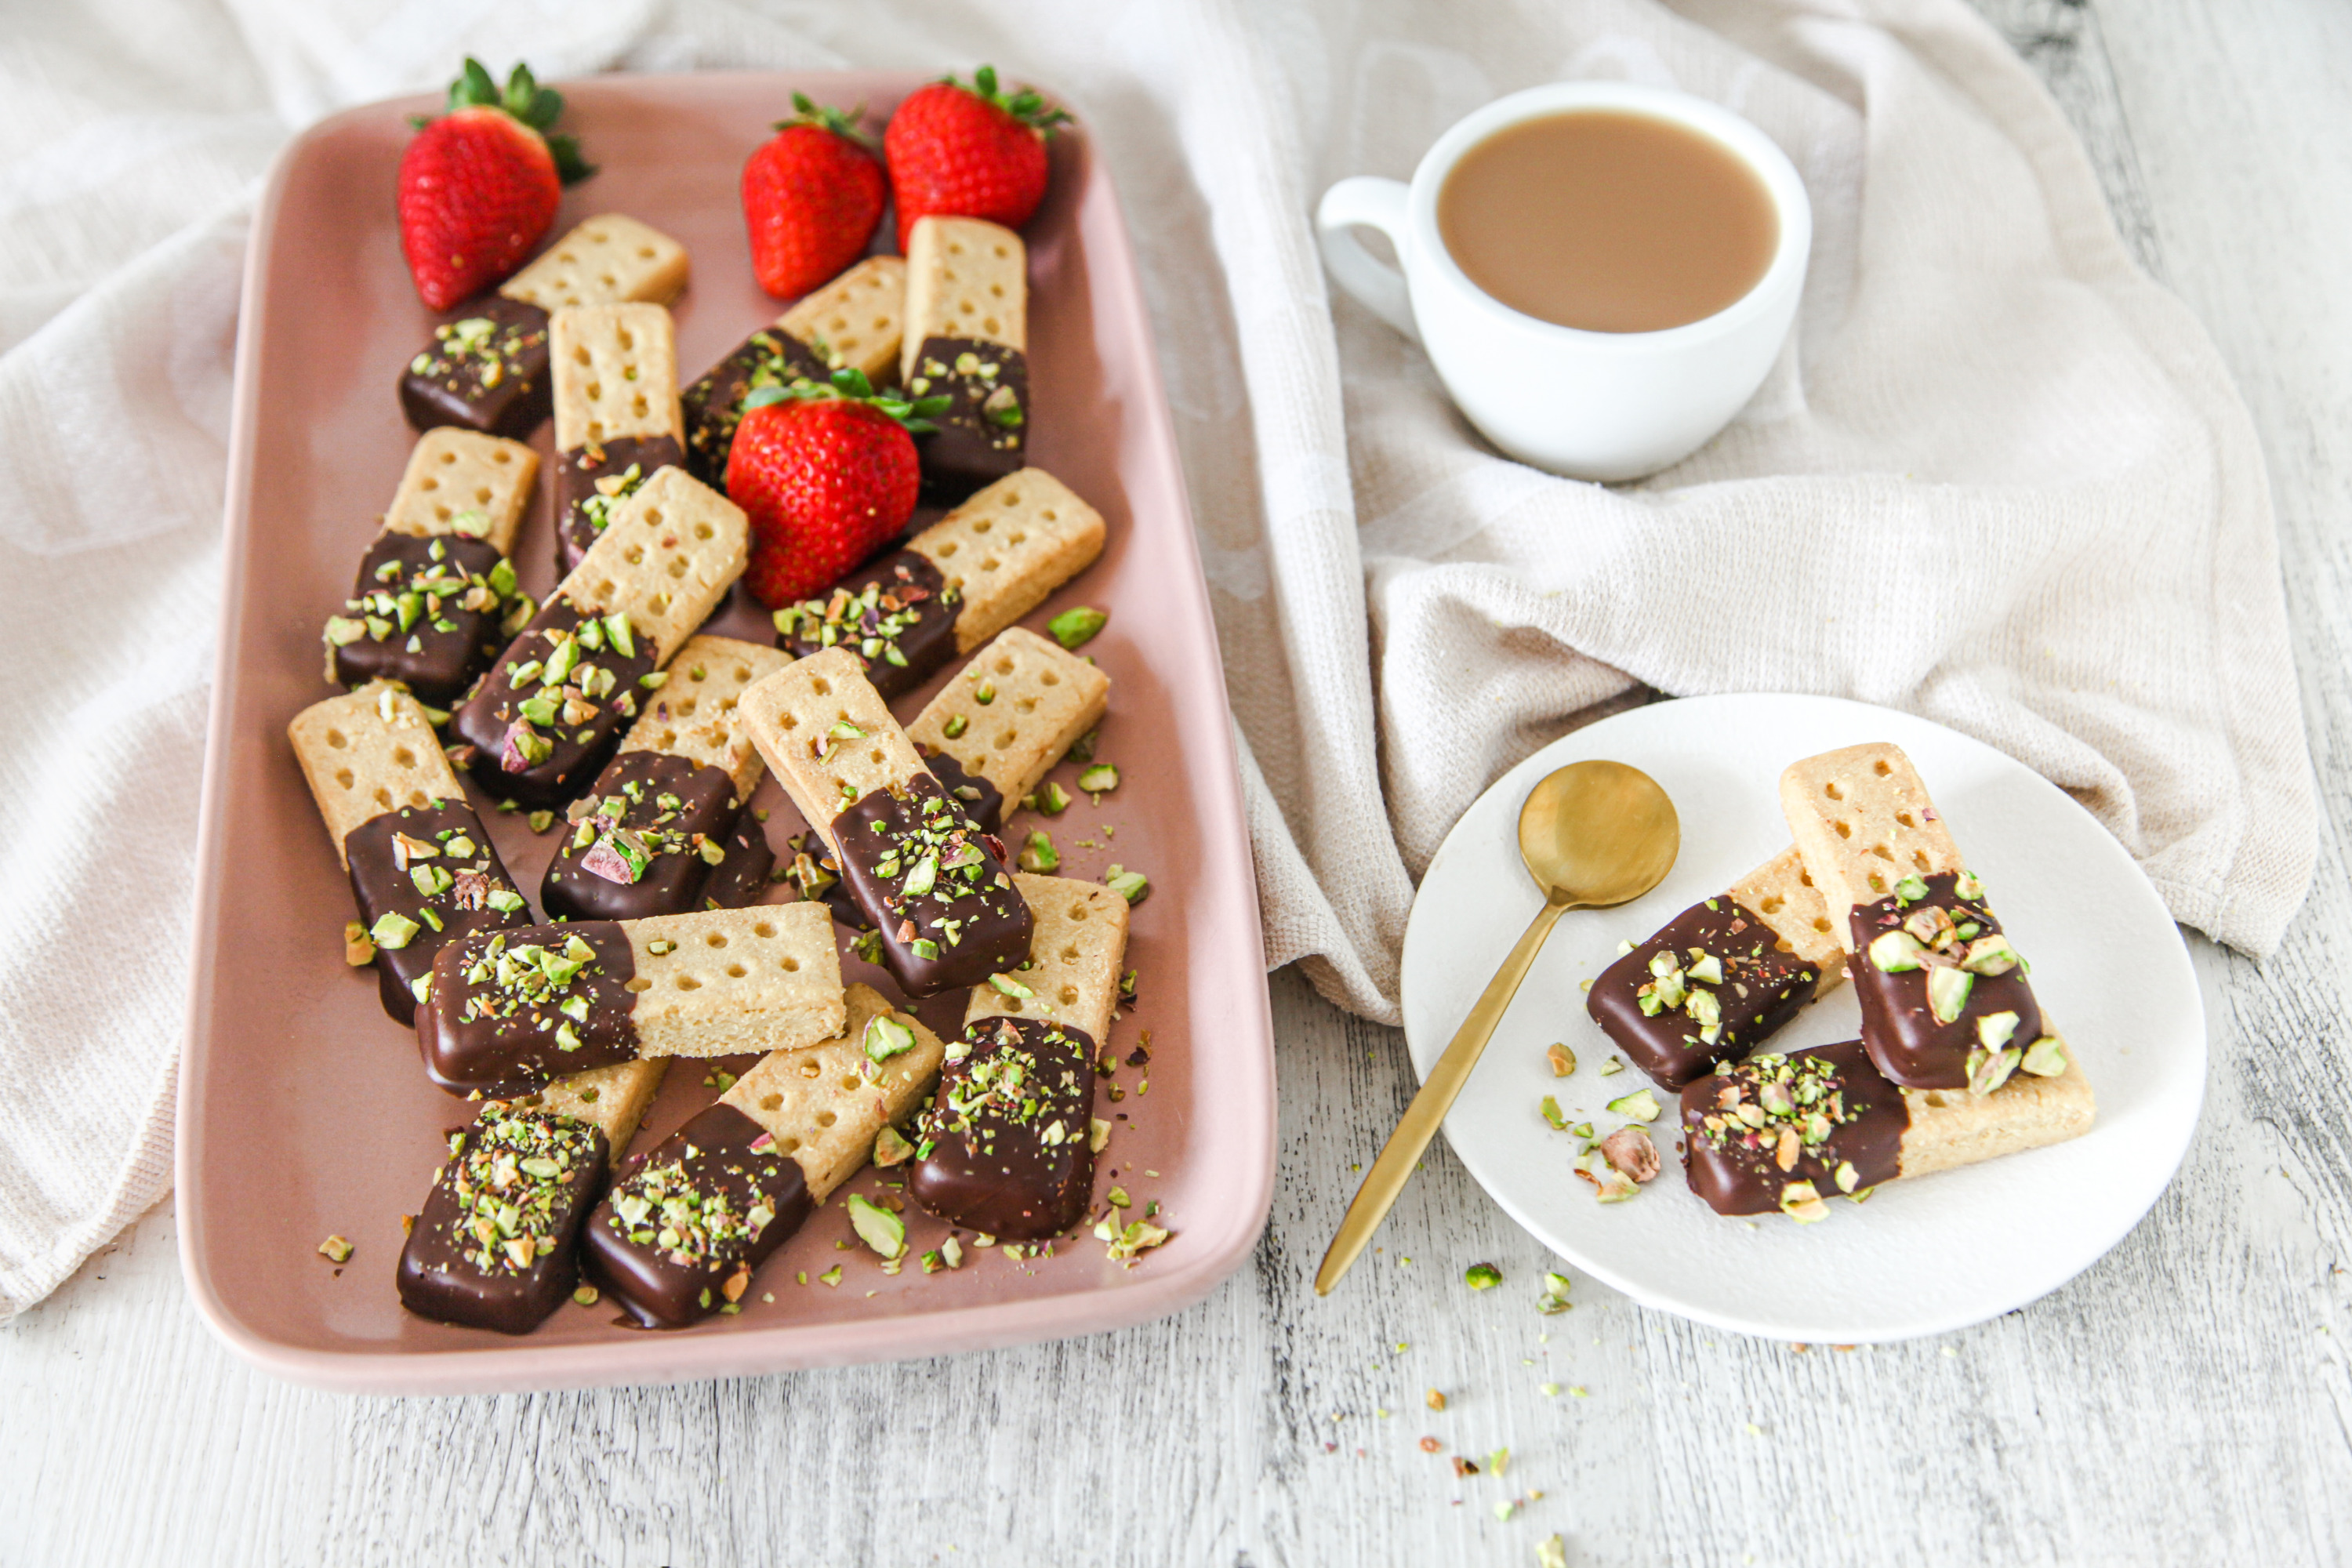
Today’s recipe, a lighter take on a classic cookie favourite, comes from Lakanto Australia. This shortbread is a buttery, light, and simply delicious snack for any coffee or high tea occasion. Lakanto Classic and Golden Monkfruit Sweeteners offer an all-natural substitute to sugar with 93% less calories.

Prep Time: 10 minutes | Cooking Time: 12-16 minutes | Serves: 20 fingers

Ingredients

  • 1 ½ cups unsalted butter (diced into 2cm cubes)  
  • 1 cup golden monkfruit sweetener       
  • 3 cups plain flour                                 
  • 1 tsp cornflour                          
  • ½ tsp vanilla essence
  • Sugar free chocolate    

Method

  1. Mix the diced butter and monkfruit sweetener in a mixer using the paddle attachment and whip until soft and smooth (approx. 5 minutes).
  2. Add the cornflour and plain flour, and slowly mix on speed 1-3 until fully incorporated.
  3. Add in the vanilla essence and whip for 3 minutes on high (this will ensure a smooth and soft dough is created).
  4. Remove from the bowl and place mixture onto a surface dusted with flour. Leave to rest for 10 minutes.
  5. Preheat the oven to 150⁰C.
  6. Gently fold the mixture on the bench. It should have a silky feel. Roll out to the desired size and height.
  7. Cut the dough to the desired shape and gently place on the baking tray. Allow to rest for 10 minutes in the fridge (this will help it keep its shape while baking).
  8. Place the tray in the preheated oven for 12-16 minutes, depending on the thickness of the shortbread.
  9. Remove from the oven and allow to cool.
  10. Melt the chocolate over a bowl of hot water until fully melted, then dip the shortbread into the chocolate and place on greaseproof paper until firm.

TIP: For a dryer shortbread, extend the cooking time by 3-4 minutes.

For more on Lakanto Australia

Love cookies?

Categories
Recipes

Foodie Friday: Red kidney bean patties with creamy cashew sauce

Foodie Friday

This recipe was developed by Minako Umehara @365cleaneats for Naked Foods.

Prep time: 10 minutes | Cooking time: 10 minutes | Serves: 4

Vegan, Gluten Free and Dairy Free

Ingredients 

Patties:

  • 475g cooked and rinsed red kidney beans
  • 130g minced brown onion
  • 100g cooked quinoa
  • 2 cloves garlic (grated)
  • 2 tbsp arrowroot flour or corn starch
  • 1 tsp pink salt
  • 1/2 tsp smoked/ sweet paprika
  • 1/4stsp ground cumin
  • 1/4 tsp ground coriander
  • Ground black pepper to taste

Cashew Sauce:

  • 120g raw cashews (soaked 4-6 hours and rinsed)
  • 120ml water
  • 2 tbsp apple cider vinegar
  • 2 tbsp lemon juice
  • 2 tbsp olive oil
  • 1 tbsp maple syrup
  • 2 tsp pink salt
  • 1 clove garlic
  • Ground black pepper to

Method

Cashew Sauce:

  1. Blend all ingredients in a high speed blender until smooth.

Patties:

  1. Mash cooked (or canned) kidney beans with a potato masher.
  2. In a frypan, saute the minced onion with 1 tbsp olive oil until softened. Once cooled, mix well in a bowl with other patty ingredients
  3. Form into 18 patties. Pan fry the patties with olive oil over medium heat until firm and browned; about 4-5 minutes on each side.

We recommend serving with your favourite side or salad.

Naked Foods is Australia’s destination for sustainable, organic, bulk wholefoods with a focus on sustainability, health, wellbeing and zero waste shopping. Shop online or in-store the first Monday of every month to receive 20% off storewide. That’s this coming Monday 😉 #thankuslater

More recipes

Categories
Recipes

Foodie Friday: Pear and ginger cheesecake

Foodie Friday

Brought to us by Australian Pears, this unique ginger and pear cheesecake combination makes for an impressive entertaining choice. How good do the pears look piled up on top? This recipe works well with Beurre Bosc or Packham pears.

Pear and ginger cheesecake

Makes an 8 inch round cheesecake serving 8-10 people | Prep time: 30 mins | Cook time: 60 mins

Ingredients

  • 2 pears, peeled, cored and chopped into small cubes
  • 20 Digestive biscuits (approx. 1⁄2 a pack)
  • 75g unsalted butter, melted
  • 2 tubs (750g) smooth ricotta
  • 1⁄2 cup castor sugar
  • 1 tsp powdered ginger
  • 4 medium eggs, lightly beaten
  • Crystallised ginger (optional)

Caramel Poached Pears

  • 5 pears, peeled, halved or quartered and cores removed
  • 4 cups water
  • 3⁄4 cup brown sugar
  • 1 tsp lemon juice
  • 1⁄2 cup heavy cream
  • 40g salted butter

Method

  1. Preheat oven to 170 degrees celsius (150 degrees celsius for fan-forced ovens). Grease the base and sides of an 8 inch spring form pan.
  2. Process the biscuits in a food processor until they form a fine crumb. Add the melted butter and mix. Pour the mixture onto the base of the pan and press with your fingers to form an even crust. Refrigerate until set.
  3. Beat the ricotta, sugar and powdered ginger together until smooth. Add the eggs, a little at a time and continue to beat till fully blended. Fold in the chopped pears.
  4. Pour the mixture into the prepared pan and smooth the top. Bake in the oven for approx. 50-60 minutes.
  5. While the cheesecake is baking, poach the pears. In a large pot, combine the water and sugar over medium-high heat. Add the lemon juice. Once sugar has dissolved, reduce the heat to maintain a gentle simmer. Submerge pears in the simmering liquid, adding more water if necessary to just cover the pears. Cut a piece of parchment paper into a circle large enough to cover the pot. Ease the paper down into the pot until it is touching the surface of the liquid.
  6. Simmer the pears until a knife inserted directly into a pear meets little resistance (about 30 minutes). Remove the pot from the heat and cool the pears completely in the poaching liquid.
  7. To make the caramel sauce to drizzle over the pears, reduce the poaching liquid to about 1⁄2 a cup. Add the cream and butter and simmer until the mixture is thick and glossy.
  8. When the cheesecake has baked and a crust starts to form all over the cheesecake (the top will become light golden brown) and a skewer inserted into the centre comes out clean, turn off oven, leave the door ajar and let the cheesecake cool completely before releasing the sides. Refrigerate until ready to serve. The cheesecake can be refrigerated and stored covered up to 3 days in the fridge.
  9. When ready to serve, top with caramel poached pears and crystallised ginger (optional).

More recipes

Categories
Recipes

Foodie Friday: Ramen with vegetables & fried tofu

Foodie Friday

As more and more people pursue a plant-based diet, the quality and variety of vegetarian dishes increases by the day. Taken from the new cookbook Vegan Japaneasy by Tim Anderson, published by Hardie Grant Books, this is a warming vegan take on what is traditionally a meat dish.

“When I first opened Nanban, we had no vegetarian ramen on the menu. This is because I just thought vegetarian ramen was wrong. It’s a meat dish and that’s that – in Japan it’s even sometimes called nikusoba – ‘meat soba.’ To make a veggie version seemed like a betrayal of what ramen is all about. But I gathered that the front of house staff were tired of having to explain why we didn’t do a veggie ramen, so I gave it a go. This is what I came up with, and it’s delicious,” says Tim.

Serves: 4

Ingredients

  • 1 pack (300–350 g/10½–12 oz) firm silken tofu,  cut into 8 rectangles
  • 2 tablespoons sake
  • 100 g (3½ oz/1 cup) cornflour (cornstarch)
  • 1 tablespoon black sesame seeds
  • 100 ml (3½ fl oz/scant ½ cup) plus 2 tablespoons vegetable oil
  • 1 sheet of nori, or 1 tablespoon aonori flakes
  • Big pinch of salt
  • 1.2 litres (40 fl oz/4¾ cups) Mushroom Dashi (see below)
  • 90 ml (6 tablespoons) soy sauce
  • 4 tablespoons mirin
  • About ½ daikon/mooli, peeled and cut into rounds about 2.5 cm (1 inch) thick
  • 80–100 g (3–3½ oz) enoki or shimeji mushrooms, roots removed and broken into small clusters
  • ¼ Chinese cabbage, cut into 2.5 cm (1 inch) strips
  • 4 portions of uncooked ramen noodles
  • 4 shiitake mushrooms (this is a good use for the rehydrated ones from making dashi), destemmed and thinly sliced
  • 2 spring onions (scallions), finely sliced
  • ½ mild red chilli, deseeded and very thinly grated (shredded)
  • A few strips of lemon or yuzu zest

Method

  1. Put the tofu into a small bowl and pour the sake over the tofu. Mix together the cornflour and sesame seeds, then carefully dredge the tofu in the cornflour mixture, ensuring it is evenly coated.
  2. Heat the 2 tablespoons of oil in a non-stick  frying pan (skillet) over a medium-high heat and cook for a few minutes on each side, until the tofu  is golden brown and crisp. Drain on paper towels and set aside.
  3. Purée the 100 ml (3½ fl oz/scant ½ cup) oil, nori and salt together in a food processor until the seaweed is completely pulverised. Leave the oil to settle while you prepare the rest of the dish.
  4. Bring the dashi, soy sauce and mirin to the boil in a saucepan, then add the daikon rounds.
  5. Reduce the heat to a high simmer, place a lid on the pan and cook until the daikon are tender, about 10 minutes. Remove the daikon with a slotted spoon and reserve. If you’re using shimeji mushrooms, boil them in the dashi for a couple of minutes, then remove and reserve (the enoki don’t need cooking). Keep the dashi at a low simmer with a lid on the pan.
  6. Bring a large pan of water to the boil and blanch the cabbage for 1 minute, then remove with a slotted spoon and reserve.
  7. Let the water come back to the boil and cook the ramen until al dente, according to the packet instructions. Drain very well.
  8. Divide the ramen among four deep bowls, pour over the mushroom dashi and toss the noodles with chopsticks to ensure they aren’t stuck together. Top with the cabbage, daikon, mushrooms, tofu, spring onions, chilli shreds and lemon or yuzu zest. Finally, add a generous spoonful or two of the nori oil to the surface of the broth.

*Mushroom Dashi (makes about 350ml, plus the rehydrated mushrooms)

  • 10 g (½ oz) kombu (a piece about 10 cm/4 in square)
  • 15 g (⅔ oz) dried shiitake mushrooms,  or 10 g (½ oz) dried shiitake plus 5 g (1/8 oz)  dried porcini mushrooms
  • 500 ml (17 fl oz/2 cups) cold water
  1. Place the kombu and dried mushrooms in a saucepan with the water and set over a low heat. Slowly bring the water to a very low simmer – you should just see a few little bubbles breaking the surface.
  2. Remove from the heat, then leave to infuse for at least one hour – it will take a while for the shiitake to fully hydrate and release their flavour into the dashi.
  3. Remove the mushrooms and squeeze them out like a sponge, then pass through a sieve (fine-mesh strainer) and store in the refrigerator for up to one week. The mushrooms will keep in the refrigerator for about four days.

Vegan Japaneasy book cover

Photography: Nassima Rothacker

This is an edited extract from Vegan Japaneasy by Tim Anderson published by Hardie Grant Books. RRP $39.99 and is available where all good books are sold.

More recipes

Categories
Recipes

Foodie Friday: Pavlova with rosé strawberry syrup

Foodie Friday

Brought to us by Jacob’s Creek, today’s recipe combines a classic Australian pavlova with a strawberry rosé syrup for a contemporary update. You can also pair the dessert with a glass of the wine label’s new Le Petit Rosé which is currently housed in a gorgeous limited edition bottle designed by Australian artist Heidi Willis.

Pavlova

Prep: 15 mins (+ cooling time) | Cooking: 1 1/2 hours | Serves: 8-10

Ingredients

Pavlova:

  • 6 egg whites, at room temperature
  • Pinch of salt
  • 1½ cups (330g) caster sugar
  • 1 tbs cornflour
  • 1 tsp white vinegar
  • 2 tsp vanilla bean paste
  • 300ml thickened cream
  • Mixed berries, to serve
  • Fresh cherries, to serve

Strawberry Syrup: 

  • 1 cup (250ml) orange juice*
  • ½ cup (110g) caster sugar
  • 100g strawberries, hulled, chopped

Method

  1. Preheat oven to 140˚C (120˚C fan-forced). Line a baking tray with baking paper. Draw a 20cm circle on the paper and turn over. Lightly spray with olive oil spray.
  2. Use an electric mixer to whisk the egg whites and salt in a clean, dry bowl until soft peaks form. Gradually add the sugar, 1 tbs at a time, whisking well after each addition until sugar dissolves and the mixture is thick and glossy. Add the cornflour, vinegar and half the vanilla. Stir until just combined. Use a large metal spoon to spoon the mixture onto the lined tray. Use a palette knife to shape into a disc, using the circle as a guide, and smooth the sides in an upwards motion to make a crown.
  3. Reduce oven temperature to 120˚C (100˚C fan-forced). Bake for 1.5 hours or until pavlova is dry to the touch. Turn oven off. Leave the pavlova in the oven, with the door ajar, for 2 hours to cool completely.
  4. Meanwhile, use an electric mixer to whisk the cream and remaining vanilla until soft peaks form. Cover and refrigerate until needed.
  5. To make the strawberry syrup, place the wine or orange juice, sugar and strawberry in a small saucepan over medium heat. Cook, stirring, for 5 mins or until the sugar dissolves. Reduce heat to low and simmer for 5 mins or until the syrup thickens and reduces by about half. Set aside to cool slightly. Strain the syrup through a sieve into a jug. Discard solids.
  6. Place the pavlova on a serving plate. Spoon over the cream and top with mixed berries and cherries. Drizzle with strawberry syrup to serve.

*You can swap the orange juice with Le Petit Rosé to add the perfect shade to pink to your pavlova.

Jacob's Creek bottle
Illustrated by Australian artist Heidi Willis, Jacob’s Creek’s Le Petite Rosé bottle is just too pretty!

More recipes

Categories
Recipes

Foodie Friday: Roast vegetable, haloumi & grain salad

Foodie Friday

Styled on the brand’s colourful Majolica range (that was inspired by traditional Italian majolica tin-glazed ceramics), today’s delicious vegetarian recipe is brought to us by Maxwell Williams. Grilled haloumi is pretty hard to resist at any time of year, but this dish would make an ideal meal on these hot summer days. Yum!

Maxwell & Williams Majolica

Preparation time: 15 mins | Cooking time: 45 mins | Serves: 4-6

Ingredients

  • 4 large raw beetroots, peeled and sliced into wedges
  • 2 medium sweet potatoes, peeled and sliced into rounds
  • 4 red onions, peeled & sliced into wedges
  • 2 tbsp olive oil
  • Salt & pepper to taste
  • 100g quinoa, rinsed
  • 100g lentils
  • 1L vegetable stock
  • 2 x 250g packs haloumi cheese, each block cut into six slices

For the dressing

  • 1 garlic bulb
  • 1 tbsp lime juice
  • 1 tbsp sherry vinegar
  • 3 tbsp extra virgin olive oil
  • 1 tsp clear honey
  • Salt & pepper to taste

To garnish

  • Coriander sprigs

Method

  1. Preheat oven to 200°C fan forced (220°C conventional).
  2. Put the beetroot, sweet potato and red onion in a large roasting tray. Cut the top off the garlic bulb (reserve it for the dressing) and drizzle with a little of the olive oil before wrapping it in foil and adding to the tray. Season the vegetables and pour the remaining oil over them. Roast for 40-45 mins, turning the vegetables halfway through.
  3. Meanwhile, put the quinoa, lentils and stock in a medium saucepan over a high heat. Bring to the boil, then turn down to medium-low heat and cover with a lid. Simmer for 15-20 mins. Drain.
  4. When the vegetables are roasted, set the garlic bulb aside and stir the remaining vegetables through the quinoa and lentils.
  5. To make the dressing, carefully squeeze the roasted garlic from the bulb into a small bowl. Add the lime juice, sherry vinegar, oil, honey and seasoning and stir to combine.
  6. Put a grill pan over a high heat. When it’s really hot, add the haloumi and grill for 45-60 secs each side (do this in batches).
  7. Spoon the quinoa and vegetables onto plates and top with the haloumi and dressing. Garnish with coriander sprigs.

More recipes

Categories
Recipes

Foodie Friday: Buche de Noel (Christmas Log)

Foodie Friday

Buche de what you say? Also known as a Yule or Christmas Log, this is a traditional dessert served at Christmas in Europe. Brought to us by Beko, if you’re looking for something a little bit different to the standard fruit cake, trifle or pavlova to serve on Christmas Day, this dessert is it!

Christmas Log

Ingredients

Cake

  • 240ml milk
  • 3 eggs
  • 250g whole wheat flour
  • 200g honey
  • 20g cornstarch
  • 1 teaspoon baking soda
  • Pinch of salt
  • 60g coconut oil
  • 1 teaspoon vanilla extract
  • 1⁄4 cup of desiccated coconut

Filling

  • 240g cream cheese
  • 1 teaspoon vanilla extract
  • 50g Greek yoghurt
  • 80g honey
  • 20mL milk

Frosting

  • 240g chocolate
  • 1 teaspoon vanilla extra
  • 55g coconut oil
  • Pinch of salt

Method

Step 1: Preheat oven to 180C.

Step 2: Grease a rimmed 35 x 45cm pan with coconut oil. Line with non-stick baking paper and grease lightly again.

Step 3: Sprinkle a clean rectangular tea towel approximately 10 x 15 inches with desiccated coconut and set side.

Step 4: In a bowl, whisk the eggs with vanilla, coconut oil, honey and milk. Add flour, cornstarch, salt, baking powder and baking soda into the egg mixture and whisk until smooth.

Step 5: Transfer the batter into the prepared pan and smooth out. Bake in the oven for 15-18 minutes.

Step 6: While the cake mixture is baking, blend the filling ingredients together in a food processor.

Step 7: Once the cake is cooked, allow it to cool in the pan for 3 minutes and then invert onto the prepared tea towel dusted with coconut. Carefully peel off the parchment paper and with a sharp knife, trim 1⁄2 cm of the cake from all the edges.

Step 8: Working from the long side, fold the excess inch of the tea towel over the edge of the cake and carefully roll up and then unroll. This will help the cake become flexible and less likely to break. Gently and evenly spread the cream cheese filling onto the cake.

Step 9: Re-roll and place seam side down on a serving platter. Cut both ends off for a smooth finish and cut the roll in half diagonally.

Step 10: Place chocolate in a saucepan, add milk, coconut oil, vanilla extract and salt and stir until the mixture is melted and has a smooth, shiny consistency.

Step 11: Frost the cake logs and garnish with desiccated coconut or cherries as desired.

*Don’t be afraid to add your own Aussie flair by including mangoes in the cream, or garnishing the cake with macadamias.

Categories
Recipes

Foodie Friday: Peach raspberry ice pops

Foodie Friday

This week’s recipe comes from the new book ‘Ice Tray Treats,’ which is available locally from online homewares purveyor UNTIL. The book is a cookbook with a difference in that there’s no cooking involved! All of the recipes include no-bake desserts and treats made using ice trays and moulds. This simple, fruity confection is perfect for the warmer months.

peach and raspberry ice pops

Makes 12 ice pops

Ingredients

For the peach layer:

  • 1 cup peeled and chopped peaches (from 1 large peach) or 1 cup frozen peaches, thawed
  • 1/2 cup water
  • 1 tablespoon sugar
  • Juice and zest of 1 lime

For the raspberry layer:

  • 1/2 cup raspberries
  • 2 tablespoons water
  • 1 tablespoon sugar
  • 12 lollipop sticks

Method

For the peach layer:

  1. Combine all the peach layer ingredients in a blender and blend until very smooth.
  2. Pour the mixture into a silicone ice tray, dividing evenly among 12 cubes and leaving room for the raspberry layer.
  3. Transfer to the freezer and freeze for three hours until the pops are partially frozen.

For the raspberry layer:

  1. In the same blender (make sure to give it a quick rinse), combine all the raspberry layer ingredients and blend until the mixture is very smooth.
  2. Remove the ice tray from the freezer. Pour the raspberry puree on top of the peach layer, distributing evenly among 12 cubes.
  3. Insert a lollipop stick in the middle of each cube and return the tray to the freezer. Chill until the pops are completely frozen, around five hours, or overnight.

More recipes

Categories
Recipes

Foodie Friday: Beetroot hummus & avocado toast

Foodie Friday

We love a fancy toast option around here (eggs can get rather dull!) and today’s recipe is brought to us by Villeroy & Boch, styled on their gorgeous new botanical tableware range ‘It’s my match.’ A bold bright beetroot hummus contrasts beautifully with avocado, fresh tomato and pistachios for a tricked up brunch that tastes as good as it looks.

Villeroy & Boch
Villeroy & Boch’s new ‘It’s my match’ range features textured greens, pinks and neutrals for spring

Ingredients

  • Sourdough
  • Beetroot dip (beetroot, chickpeas, garlic cloves, tahini and olive oil)
  • Avocado
  • Cherry tomatoes
  • Basil
  • Pistachios – roughly chopped (optional)
  • Lime wedges and sea salt to serve

Method

  1. Blend ingredients for the beetroot dip until preferred texture.
  2. Spread evenly on a thick slice of sourdough toast.
  3. Slice half an avocado lengthways and add to the toast.
  4. Slice cherry tomatoes in half and place on top of the avocado.
  5. Roughly chop the pistachios and sprinkle on top.
  6. Serve with lime wedges and sea salt for taste.

More recipes