Categories
Interiors Addict Recipes

Foodie Friday: Vegan dark chocolate, nutmeg & Oreo cheesecake

This week’s delicious desert is from Winning Appliances’ culinary expert Reece Hignell. “This beautifully rich baked cheesecake with a hint of nutmeg is light, smooth and so decadent – and vegan too.”

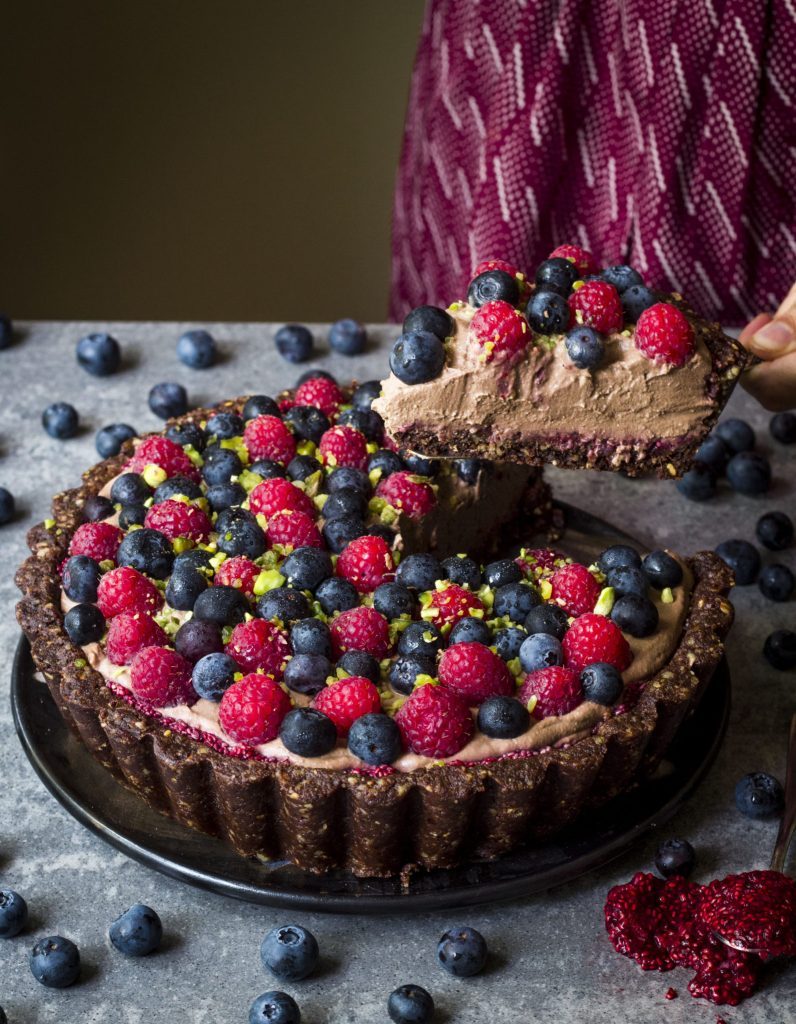
Vegan dark chocolate, nutmeg & Oreo cheesecake with rich chocolate ganache

  • 1 packet (133g Oreo Original biscuits)
  • 40 g margarine (melted)
  • 600 g vegan cream cheese (at room temperature)
  • 200 g vegan dark chocolate (melted ½ cup (110g) caster sugar)
  • ¼ cup 55g brown sugar
  • ¼ cup 35g cornflour
  • ¼ cup 25g cocoa powder
  • ½ tsp ground nutmeg
  • 1 tsp vanilla bean paste Chocolate ganache topping
  • 100 g vegan dark chocolate (broken into pieces)
  • ¹⁄ ³ cup (80ml coconut cream Fresh berries, to serve)
  1. Preheat oven on top and bottom heat set to 160°C with low steam. Grease and line the base and sides of a 20cm round springform pan with baking paper.
  2. To make the base, place biscuits in a food processor bowl and pulse just until fine crumbs are formed. Add margarine and process until just combined. Press firmly and evenly into the base of the prepared cake pan. Refrigerate while preparing the filling.
  3. For the filling, place cream cheese into a stand mixer bowl; beat on a low speed until smooth; gradually add chocolate. Add caster and brown sugar, sifted cornflour, cocoa powder and nutmeg and vanilla; mix until smooth. Pour over the biscuit base and smooth the surface.
  4. Place cheesecake on a universal tray on level 1 and bake for 55 minutes. Transfer to a cooling rack to cool for 30 minutes before transferring to the refrigerator to cool completely, about 2 hours.
  5. To make the ganache, place chocolate and coconut cream into a heatproof bowl; heat in the microwave oven on 600W for 1 minute; stir, then continue to heat, stirring every 15 seconds, until the chocolate is fully melted. Set aside to cool and thicken slightly.
  6. To assemble, remove cheesecake from the pan and place onto a serving plate; spread with chocolate ganache. Serve with berries. Recipe notes Vegan cream cheese is quite soft and smooth, so it doesn’t need much beating to make it smooth. It’s available in most local supermarkets. Store refrigerated in an airtight container for up to 3 days. You can substitute cinnamon for nutmeg and add grated orange rind for a lovely jaffa flavour.
Dessert
cake, cheesecake, chocolate, dessert, vegan

Shop Appliances Online

Categories
Interiors Addict Recipes

Foodie Friday: Julie Goodwin’s lemonade scones

This quick lemonade scone recipe is by former MasterChef Julie Goodwin, ambassador for Beyond Blue’s Big Blue Table fundraiser. Beyond Blue is encouraging people to share a meal and start a conversation around mental health to support those impacted by anxiety, depression, and suicide. The initiative takes place from tomorrow until 8 October 2022.

Julie Goodwin’s lemonade scones

Quick and easy lemonade scones from Beyond Blue's big blue table

  • Large Bowl
  • Jug
  • Cookie Cutter
  • 3 cups self raising flour
  • ¼ teaspoon salt
  • 1 cup thickened cream
  • 1 cup lemonade
  1. Preheat oven to 220*C. Line an oven tray with baking paper.
  2. Sift the flour and salt into a large bowl and make a well in the centre.
  3. In a jug, combine the cream and lemonade. Pour into the well in the bowl, stirring very minimally with a butter knife, drawing the flour into the liquid.

  4. When all the flour is incorporated, tip out onto a floured bench and using your hands, very gently bring the dough together. It’s very important not to over-handle the dough at this stage, or the scones will be heavy.

  5. When the dough has come together, flatten it to a disc about 3cm thick. Use a 5cm cookie cutter to cut rounds in the dough. Once you have cut as many as you can, the remaining dough can be brought together once more and a few more rounds cut out.

  6. Place the scones on the baking tray, touching each other. Bake for 10 minutes or until puffed and golden on top, and sound hollow when tapped with a knife.
  7. Serve warm with butter, or jam and cream.
Dessert
Baked goods
breakfast, dessert, quick dessert, scone
Register for big blue table here
Categories
Recipes

Foodie Friday: Deconstructed air fryer caramel s’mores

Today’s recipe comes from Air Fryer Guy who has partnered with Westinghouse to demonstrate the versatility of your air fryer.

Deconstructed air fryer caramel s’mores

This very decadent sweet treat is perfect for a special occasion! It's also a fun new way to use your air fryer!

  • Air Fryer
  • 6 35g large Caramello Koalas
  • 3 digestive biscuits
  • 2 sheets frozen puff pastry (partially thawed)
  • 12 white marshmallows
  • 1 tablespoon icing sugar
  • vanilla Ice cream (to serve if desired)
  1. Before preparing, freeze the Caramello Koalas for 1 hour.

  2. Crush the digestive biscuits with your fingers into a bowl.
  3. Place 1 sheet pastry onto a board. Cut sheet in half crossways then into 3 lengthways (you will end up with 6 rectangles, 8x12cm). Sprinkle about 2 teaspoons biscuit crumbs into the centre 3 rectangles. Top with a Caramello Koala. Top with remaining pastry. Seal and roll the edges. Repeat to make 6 in total.

  4. Place the s’mores onto lightly greased Air fryer tray. Air fry at 200°C for about 14-16 minutes or until light golden (not deep golden as there is more cooking to be done).

  5. Remove from oven. Top each s’more with 2 marshmallows. Then return to the oven and air fry at 200°C for about 6-8 minutes until the marshmallows are gooey. Be sure to keep an eye on the s’mores as the marshmallow can melt very quickly.

  6. Dust icing sugar over the deconstructed caramel s’mores, sprinkle with remaining biscuit crumbs and serve with a scoop of vanilla ice cream. Wait a few minutes before serving as the caramel and marshmallow are hot straight from the oven.

Dessert
American
Air Fryer, dessert, S’mores
Categories
Recipes

Foodie Friday: Mango white chocolate lamingtons

Today’s recipe is brought to us by Appliances Online and was created by Bridget O’Connor from The Neff Kitchen.

Mango white chocolate lamingtons

A sweet tropical take on our favourite Aussie snack.

Cake

  • 2 eggs (lightly beaten)
  • 1 ¼ cup caster sugar
  • 2 tsp vanilla essence
  • 300 ml pure cream
  • 2 cups self-raising flour
  • 1 cup mango (sliced)

Icing

  • 1 cup milk
  • 250 g white chocolate (chopped)
  • 5 cups icing sugar
  • 5-6 cups shredded coconut (toasted)
  1. Place wire rack on shelf 2 and preheat oven to 180° fancforced.

  2. Grease and line a 30cm x 20cm lamington pan.

  3. Combine eggs, sugar and vanilla in a large mixing bowl. Using a balloon whisk, mix together until well combined and mixture is creamy.
  4. Add the cream and whisk again until thoroughly combined.
  5. Sift the flour over the mixture and fold gently to form a smooth batter. Fold in the mango. Pour the mixture into prepared pan.
  6. Bake for 30 to 35 minutes or until cake is cooked when tested with a skewer. Allow to cool then cut cake into 24 pieces.
  7. Make the icing by placing the milk and chocolate in a saucepan over a low heat or induction level 3 and cook stirring occasionally until chocolate has melted. Sift the icing sugar into a large bowl and make a well in the centre. Pour in the chocolate mixture and mix until smooth making sure there are no lumps of icing sugar.

  8. Coat the cake pieces in the white chocolate icing then toss in toasted coconut.
Dessert, Snack
Baked goods, Modern Australian
baked, baking, cake, mango, white chocolate
Categories
Recipes

Foodie Friday: Champagne and rose macarons

This recipe is brought to us by Australian Almonds. Delicious and beautiful, they’re the perfect treat to impress your guests.

Champagne and rose macarons

Pretty in pink and a mouthwatering delight, these aren't as tricky as you'd think so have a go!

Macaron Shells

  • 150 grams ground almonds
  • 150 grams icing sugar
  • 110 grams egg whites
  • 150 grams caster sugar
  • 4-6 drops rose pink food colouring

Champagne and rose buttercream

  • 250 grams salted butter (softened)
  • 250 grams icing sugar
  • 10 drops champagne essence
  • 2 drops rose essence
  • 1 tbsp rose water
  • 1 pinch salt
  1. Preheat the oven to 150°C or 130°C fan-forced. Line 4 baking trays with baking paper or 4 silicon macaron mats.

  2. To make the macaron shells, place the ground almonds and icing sugar into a blender or food processor and pulse until fine, being careful not to overheat the mixture. Pass the mixture through a sieve 2 or 3 times, pushing through any lumps with the back of a spoon.

  3. Measure out half the egg whites and add to the almond meal mixture. Using a spatula, mix until just combined, taking care not to overwork the mixture.

  4. Place the remaining egg whites into a very clean stand mixer bowl. Whisk on a medium high speed until soft, frothy peaks form. Continue to whisk while you prepare the syrup.

  5. Place the caster sugar and 35ml water into a small saucepan and set over a medium heat. Stir the mixture and allow it to come to the boil. Using a sugar thermometer to check the temperature, cook the syrup until it reaches 118°C. Once it has come to temperature and is a syrupy consistency, remove from the heat.

  6. As the egg whites continue to whisk, pour the syrup down one side of the bowl in a slow, steady stream until all of it has been incorporated into the egg whites. Add the pink food colouring to your desired colour and continure to whisk the meringue on high speed until thick and glossy, about 5 minutes. The base of the bowl should be warm but no longer hot.

  7. Add the meringue mixture to the almond meal mixture and, using a clean spatula, fold gently until evenly combined, taking care not to overmix. The mixture should have a soft paste-like texture and a dropping consistency.

  8. Transfer the mixture to a large piping bag fitted with a 1cm round piping tip. Pipe small rounds, about 2cm in diameter, onto the lined baking trays. Help the macaron mixture to level out by tapping the underside of the trays with the palm of your hand.

  9. Set the macarons aside to form a "skin" on top of the shell, about 30 minutes. Once the skin has formed, place into the preheated oven and bake for 12-15 minutes. Once baked, open the oven door and leave ajar for 2 minutes before removing the macarons.

  10. Set the macarons aside on the trays to cool completely. Once cool, lift off the trays with a round-tip palette knife. Set aside in an airtight container until ready to fill.

  11. For the buttercream filling, add the very soft butter to the bowl of a standmixer fitted with a cream paddle and beat until very pale and light in texture. Add the icing sugar, champagne essence, rose essence, rose water and salt. Mix until all the ingredients are incorporated and the mixture is light and creamy.

  12. Transfer the buttercream to a piping bag fitted with a 1cm tip. Pipe the buttercream onto half of the fully cooled macaron shells and sandwich withanother shell.

Dessert, Snack
Baked goods, French
baked, baking, macarons
Categories
Recipes

Foodie Friday: Apple turnover

This week’s recipe is brought to us by Winning Appliances culinary expert Chloe Skipp.

Apple turnover

Stay cosy this winter with this mouthwatering apple turnover recipe.

  • 2 tbsp unsalted butter
  • 5 Granny Smith apples (peeled, cored, and finely diced)
  • ¾ cup brown sugar
  • 1 lemon ((grated zest))
  • 1 tsp lemon juice
  • 1 packet frozen Careme butter puff pastry
  • 1 egg yolk (lightly whisked)
  1. In a small frying pan over medium heat, melt butter until slightly golden and foaming.

  2. Add apples and brown sugar and increase the heat to high. Cook for 5 minutes or until sugar is dissolved and slightly thickened into a syrup.

  3. Place a sieve over a bowl and drain the apple mixture. Set aside ½ of the mixture, and place the remaining mixture and syrup in a blender and process until smooth.

  4. Place the puree back into the pan and fold through the remaining apple mixture, lemon zest and juice and set aside to cool.

  5. Take out pastry from the freezer and slightly defrost. Using a 12cm round cutter, cut 6 rounds and place 1½ tbsp of the apple mixture in the centre of each round. Fold in half and pinch together the edges. Brush with egg yolk and using a sharp knife, score diagonal lines in the pastry (like a sunset), slicing the pastry ¾ through. Place in the fridge for 1 hour or overnight. Reserve any leftover egg yolk and place in the fridge.

  6. Preheat oven to 210°C (190°C fan-forced) with 30% steam. Line a baking tray with baking paper. Remove pastries from the fridge and brush with remaining egg yolk once more, make two small holes in the long edge of pastry and cook for 25-30 minutes or until golden brown.

Dessert, Snack
Baked goods
apple, baked, baking
Categories
Recipes

Foodie Friday: Apple pie cinnamon scrolls

This wonderful recipe was created by Panaceas Pantry for Kanzi Apples.

Kanzi Apple Pie Cinnamon Scrolls with Vegan Cream Cheese Frosting

These naturally sweetened apple cinnamon scrolls are a delicious treat, whether eaten fresh from the oven, or with the vegan cream cheese frosting.

Apple Pie Filling

  • 5 Kanzi Apples
  • 1 tbsp vegan butter
  • 2 tbsp coconut sugar

Dough

  • 3 cups 450g plain flour (plus extra)
  • 2 tsp 10g instant dried yeast
  • 1/2 cup 125g plain coconut yoghurt (at room temperature)
  • 1/4 cup 45g raw sugar
  • 1/3 tsp fine salt
  • 1 cup soy milk

Cinnamon Sugar

  • 1/2 cup 90g raw sugar
  • 1 tbsp ground cinnamon
  • 1/2 tsp ground nutmeg
  • 2 tbsp vegan butter (room temperature)

Cream Cheese Frosting

  • 1 cup 140g icing sugar
  • 2/3 cup 70g dairy free cream cheese
  1. I recommend using scales for this recipe and testing that your yeast is active. Ensure your yeast is less than 6 months old.

    Add flour to a large mixing bowl and make a well. Add in yeast to the well and cover with flour, then add yoghurt, sugar and salt to the bowl.

    Hiding the yeast is important to keep it away from the salt, which would otherwise deactivate the yeast. Set aside.

  2. Warm the soy milk in a saucepan until it is around 40-50°C. If you do not have a thermometer you can use your finger to test – the milk should feel fairly warm, but still comfortable to touch.

    Pour the warm milk into the flour mix and, using a wooden spoon, combine until the dough becomes too thick to stir.

    Flour the benchtop and place dough on top. Knead for 7-8 minutes or until the dough becomes smooth and elastic, adding more flour only as needed to stop the dough sticking to your hands and the benchtop.

    Wash out your mixing bowl, dry and then lightly oil. Place dough into the bowl then cover and leave in a warm spot for 1 hour or until it doubles in size.

  3. Meanwhile, prepare the Kanzi apple pie filling. Core Kanzi apples and dice into 1 cm cubes.

    Place the butter, sugar and diced Kanzi apples into a medium saucepan and cook over medium heat for approximately 20 mins, stirring occasionally, or until the Kanzi apples have completely softened. Turn off the heat and set aside to cool.

    In a small bowl make the cinnamon sugar by mixing the sugar, cinnamon and nutmeg. You will use the butter in the next step. Grease a large, deep dish baking tray (ours was 33cm x 25cm) with butter or oil and also set this aside.

  4. After the dough has risen, flour the bench and roll out the dough to a large rectangle. Take time to create an even thickness, around 1cm thick.

    Spread the set aside butter over the entire surface then top with an even layer of the cinnamon sugar. Try to get the whole rectangle evenly covered.

    Next, spread the cooled Kanzi apple mixture on top and again spread evenly.

  5. Now it is time to roll the log. Starting from the long end, roll up the side to create a long log. You want to roll it fairly tightly, but without squishing the dough.

    Once you have created a log it is time to cut it into 12 even slices. The best way to do this is with dental floss, though a very sharp knife will work.

    Place each slice, with the cut side facing up, into the greased tray. Preheat the oven to 180°C and set aside the covered tray of scrolls in a warm spot to rise for a further 30 minutes while the oven preheats.

  6. Bake for 25 minutes, or until the scrolls are golden brown on top. Brush freshly baked scrolls with extra vegan butter to get the nice gloss top.

    You can absolutely enjoy them while warm, or allow to cool and follow the next step to frost.

  7. To make the optional cream cheese frosting, sift icing sugar into a mixing bowl. Add cream cheese and vanilla. Whisk together until smooth, then spread on top on cooled scrolls and eat.

  8. If these delicious scrolls manage to last more than the day, you can store them in an airtight container in the panty overnight, or in the fridge for a few days.

* Extra flour will be added during the kneading stage and will vary depending on your dough

* Dairy free cream cheese is available in the vegan section at all major supermarkets

* Vegan butter can be substituted with margarine or melted coconut oil

Dessert
Baked goods
apple, baking, cinnamon, scrolls, vegan
Categories
Recipes

Foodie Friday: Layered walnut cake with raspberries & vanilla cream cheese

This recipe was provided to us by Villeroy & Boch.

Layered walnut cake with raspberries & vanilla cream cheese frosting

Impress your friends and family with the unique flavour combination and rustic layered appearance of this cake.

  • Electric mixer, with paddle attachment
  • Food processer
  • 3 cake tins, 20cm
  • 500 g unsalted butter (at room temperature)
  • 200 g caster sugar
  • 200 g dark brown sugar
  • 6 eggs
  • 4 egg yolks
  • 300 g Greek yoghurt
  • 150 ml dark rum
  • 4 tsp vanilla extract
  • 450 g rye flour
  • 2 tsp ground cinnamon
  • 1 tsp ground nutmeg
  • ½ tsp ground cloves
  • 4 tsp baking powder
  • 1 tsp bicarbonate of soda
  • 1 tsp cream of tartar
  • 400 g walnuts
  • 500 g cream cheese (at room temperature)
  • 750 g icing sugar (sifted)
  • 4 punnets raspberries
  1. Preheat oven to 180°C. Combine 375g butter, caster sugar, and dark brown sugar in the bowl of an electric mixer. Beat with the paddle attachment on medium speed for 10 minutes, until very light.

  2. Whisk the eggs, yolks, yoghurt, rum, and half the vanilla, then add to the butter mixture while beating on low speed.

  3. Sift the flour, spices, baking powder, bicarbonate of soda and cream of tartar together twice, then fold gently into mixture.

  4. Place the walnuts in a food processor and grind until very fine, then fold into the batter.

  5. Spoon the batter into three lined 20cm cake tins and bake for 25-30 minutes, until a skewer can be inserted ad removed cleanly. Cool on a wire rack.

  6. Combine the cream cheese, icing sugar, remaining butter, and remaining vanilla in the bowl of an electric mixer, then beat with the paddle attachment on medium speed for 10 minutes, until very light.

  7. Spread one-third of the icing on one cake, spread flat, then top with a punnet of raspberries. Stack a second cake on top and repeat. Place the final cake on top, then use the remaining icing to cover the cake. Serve with the remaining raspberries.

Sifting the flour mixture is essential for this cake, as it helps to ensure that the layers will rise flat, making it easier to assemble. If your cakes do get peaks, simply trim with a serrated bread knife.

Dessert
cake, cream cheese frosting, layered cake, raspberries
Categories
Recipes

Foodie Friday: Mini pavlovas with passionfruit curd

This recipe is brought to us by Australian Passionfruit.

Passionfruit pavlova

Mini pavlovas with passionfruit curd

Not just a tangy, tropical treat, Australian passionfruit also boasts a range of health benefits – everything from boosting skin health to being a good mood food. We can't imagine pavlova without it and we love these bite-size versions!

Meringue

  • 8 Large egg whites at room temperature
  • 2 cups Castor sugar
  • 4 tsp Corn flour
  • 2 tsp Lemon juice (or white vinegar)

Passionfruit curd

  • 1/2 cup Fresh passionfruit pulp
  • 1/2 cup Castor sugar
  • 2 tbsp Lemon juice
  • 4 Egg yolks
  • 6 tbsp Butter

To serve

  • Whipped cream
  • Blueberries
  • Extra fresh passionfruit
  • Mint leaves
  1. To make the mini pavlovas, pre heat the oven to 180C.

  2. Line a large flat baking tray with baking paper.
  3. Whisk the egg whites until firm peaks develop.
  4. Gradually add the sugar a little at a time while whisking. Keep whisking until the meringue turns to a satiny texture.
  5. Sprinkle over the corn flour and whisk in, followed by whisking in the lemon juice and vanilla extract.
  6. Using a spatula, spoon the meringue out onto the baking tray, each mini pavlova to be approximately 10cm wide.
  7. Reduce the oven temperature to 150C, place the tray in the oven and bake for 30 minutes.

  8. Once the pavlovas are cooked turn the oven off but don’t open the door, leave them in the oven for a further 30-40 minutes to slowly cool down.

  9. Remove the mini pavlovas from the oven and transfer to a wire rack until they are completely cooled. TIP: They can be made ahead of time and stored in an airtight container.
  10. To make the passionfruit curd, combine the fresh passionfruit pulp and the sugar into a glass bowl placed over a double boiler (saucepan with simmering water). Ensure the base of the bowl is not submerged in the simmering water. Whisk until the sugar dissolves.

  11. In a separate bowl lightly whisk together the egg yolks and lemon juice.
  12. While whisking, gradually add one spoonful at a time of the warm passionfruit mixture into the bowl of egg and lemon juice mixture. Ensure you are whisking so no lumps appear. Once both have been fully mixed, add the bowl back to the double boiler and whisk further until the mixture becomes thick and creamy.

  13. Add the butter and whisk through.
  14. Take off the heat and allow to cool down before placing in the fridge, covered until you are ready to serve the pavlovas.

  15. Serve the mini pavlovas with a dollop of whipped cream, a good spoonful of the passionfruit curd, and some extra passionfruit for a pinch of tartness. Sprinkle fresh blueberries over the top and add some mint leaves.

More recipes

Categories
Recipes

Foodie Friday: Choc orange tart with hazelnut-oat crust

Foodie Friday

This recipe was developed by Minako Umehara @365cleaneats for Naked Foods.

Raw Orange Chocolate Tart with Hazelnut-Oat Crust (Vegan, Gluten Free)

This cake is kind of like the lovechild of a jaffa and a hazelnut – except creamy and fudgy, with a subtle hint of orange that doesn’t overpower. The crust was the perfect match – nutty, subtly sweet and crunchy.

Prep time: 10 minutes | Cooking time: 20 minutes | Freezing Time: Overnight | Serves: 4

Vegan, gluten and dairy free.

Ingredients 

Crust

Chocolate Filling

Method

  1. Preheat oven to 170⁰C (340⁰F). Place all dry crust ingredients in a food processor. Process well until it reaches the consistency of flour. 
  2. Add melted coconut oil to the food processor and process until it becomes like wet sand. 
  3. Press the mixture against the sides and the bottom of the tart tin. Bake it for about 17-20 min or until golden brown. Let it cool. 
  4. While cooling the crust, place all chocolate filling ingredients in a high-speed blender and blend well. Add more sweetener if you need. Layer it over the crust, and freeze it over night.
  5. Take out from the tart tin and garnish. Store in the fridge.

We used a 10cm × 25cm × 2.5cm (550ml) tart tin with a removable base to make this one, however you can use any tin with a removable base you have at home that is around this size.

Naked Foods is Australia’s destination for sustainable, organic, bulk wholefoods with a focus on sustainability, health, wellbeing and zero waste shopping. Shop online or in-store the first Monday of every month to receive 20% off storewide.

More recipes

Categories
Recipes

Foodie Friday: Raw chocolate caramel tart

Foodie Friday

Not a fan of Christmas pud? Try this instead! This recipe was developed by Minako Umehara @365cleaneats for Naked Foods.

Raw Chocolate Caramel Tart

A classic with a nutritious twist – also the perfect thing to use up some of those leftover Christmas cherries!

Prep time: 20 minutes | Freezing time: Overnight | Serves: 8

Gluten Free, Dairy Free & Raw Vegan

Ingredients 

Crust

  • 120g raw walnuts
  • 40g sunflower seeds
  • 20g shredded coconut
  • 2 tbsp flaxseeds
  • 2 tbsp raw cacao butter, melted
  • 4 Medjool dates (80g), pitted
  • 1/8 tsp pink salt

White Chocolate Layer

  • 120g raw cashews (soaked 4-6 hours and rinsed)
  • 120ml coconut cream
  • 4 tbsp melted cacao butter
  • 3-4 tbsp maple syrup
  • 1/4 tsp vanilla bean paste
  • pinch of pink salt

Chocolate Layer

  • 180g raw cashews (soaked 4-6 hours and rinsed)
  • 160ml coconut cream
  • 5 tbsp melted cacao butter
  • 3.5 tbsp maple syrup
  • 4.5 tbsp raw cacao powder
  • 1/4 tsp vanilla paste
  • pinch of pink salt

Vegan Tahini Caramel Cream

  • 5-6 Medjool dates (100-120g), pitted
  • 3/4 cup (180ml) coconut cream 
  • 1 tbsp hulled tahini
  • 1/4 tsp vanilla bean paste
  • 1/4 tsp pink salt

Method

  1. Pulse all crust ingredients until well processed but still slightly crumbly. Press the mixture into the tin.
  2. In a high speed blender place all ingredients for the white chocolate filling and blend well until smooth. Layer the filling above the crust. Freeze it until set.
  3. Repeat the same process for the chocolate layer. Freeze it until set.
  4. Pulse all the ingredients for the cream until smooth. Place in the fridge overnight to thicken.
  5. Take the cake from the freezer and remove it from the tin. Spread the caramel cream on top. Garnish with your choice of fruits and dark chocolate.

We used a 24cm / 9.5 inch tart pan with removable base to make this one, however you can use any tin with a removable base you have at home that is around this size.

Naked Foods is Australia’s destination for sustainable, organic, bulk wholefoods with a focus on sustainability, health, wellbeing and zero waste shopping. Shop online or in-store the first Monday of every month to receive 20% off storewide. That’s this coming Monday ? #thankuslater

Categories
Recipes

Foodie Friday: Tropical macadamia bark

Foodie Friday

This recipe was developed by Jacqueline Alwill @brownpapernutrition for Naked Foods.

Tropical Macadamia Bark

What tastes like white chocolate and pina colada, but packed with nutritional goodness? This Tropical Macadamia Bark! Have a piece between meals and the healthy fats will help keep your hunger at bay – plus the natural sweetness of the dried fruits will satisfy those sweet cravings!

Prep time: 5 minutes | Freezing time: 2-3 hours | Serves: 10-12

Gluten Free, Dairy Free, Refined Sugar Free & Vegan

Ingredients 

  • 2/3 cup (100g) coconut oil
  • 3/4 cup (112g) raw macadamias
  • 1 tbsp vanilla extract
  • 2 tbsp maple syrup or honey
  • 4 thin slices (35g) dried pineapple pieces
  • 4 thin slices (22g) dried apple pieces
  • 2 thin slices (15g) dried mango slices
  • 2 tbsp (26g) pistachios, roughly chopped
  • 2 tbsp (20g) dried raspberries
  • 2 tbsp (20g) dried strawberries

Method

  1. Melt coconut oil on low heat.
  2. Place coconut oil, macadamias, honey, and maple or honey in a high-speed food processor or blender and blitz until smooth.
  3. Line baking tray with greaseproof paper, pour macadamia mix over the tray and spread evenly.
  4. Drop pineapple, apple, mango, pistachios, raspberries and strawberries around the tray.
  5. Place in freezer to set for 2-3 hours.
  6. Slice and serve from freezer.

We used a 24x 30cm baking tray to make this one, however you can use any baking tray or tin you have at home that is around this size.

Naked Foods is Australia’s destination for sustainable, organic, bulk wholefoods with a focus on sustainability, health, wellbeing and zero waste shopping. Shop online or in-store the first Monday of every month to receive 20% off storewide. That’s this coming Monday ? #thankuslater

More recipes

Categories
Recipes

Foodie Friday: Little custard pots with strawberry sauce

Today’s recipe was developed by Local Lovely for Barker’s New Zealand Dessert Sauces, who recently launched a new range of family favourites.

Ingredients

CUSTARD

2 cups (500ml) milk
1 vanilla pod
3 egg yolks
1⁄4 cup (55g) caster sugar 1⁄4 cup (35g) plain flour

1 bottle of Barker’s Luscious Strawberry Sauce (or other brand strawberry sauce)

PRALINE

1⁄4 cup (55g) caster sugar
1⁄4 cup (35g) natural almonds

Method

CUSTARD

Place the milk in a medium-sized saucepan. Split the vanilla pod down the centre with a sharp knife and scrape the seeds into the milk, chuck in the pods too.

Place the pan over medium-high heat and bring just to boiling point, remove and set aside for 10 minutes.

Whisk the yolks, sugar and flour together until pale and thick. Pour a little of the hot milk into this mixture and whisk to combine. Gradually add the remaining milk, whisking as you go. Return mixture to the saucepan and place over low heat. Cook, stirring with a wooden spoon the whole time for about five minutes or until mixture coats the back of the spoon and has thickened up nicely.

Be careful not to cook the custard at too high a heat or for too long as it can curdle and become more like scrambled eggs than beautiful custard. Pour into a big jug and place straight into the fridge where it will thicken up a little more on cooling.

PRALINE

Place the sugar in a small saucepan over medium heat and cook, swirling the sugar around the pan as it melts into a golden caramel. Meanwhile line a baking tray with paper and scatter with the almonds.

Once the sugar is melted, pour over the almonds and leave to cool and harden, just five minutes or so should do it.

When the praline has set transfer to a food processor or mortar and pestle and blitz or bash until you have a fine-ish crumb. Keep in an airtight container
until needed.

To serve

Divide custard into little glass jars or bowls, top with a drizzle of Barkers Strawberry Sauce, a sprinkling of praline and the orange slices.

Love strawberries? Try these…

Categories
Recipes

Foodie Friday: Choc berry brownie tart

Foodie Friday

This recipe was developed by Anthea @rainbownourishments for Naked Foods.

BERRY AND CHOCOLATE BROWNIE TART

Prep time: 20 minutes | Chilling time: 4 hours | Serves: 6-8

Gluten Free, Dairy Free and Vegan

Ingredients 

Brownie Chocolate Base

  • 2 cups pecans
  • ¼ cup nut butter (I used peanut butter)
  • 12 Medjool dates, pitted
  • Pinch of salt
  • ½ cup cacao powder

Raspberry Chia Jam

  • ⅔ cups frozen raspberries, defrosted
  • 2 tbsp chia seeds
  • Dash of maple syrup

Chocolate Mousse Filling

  • 2 cups silken tofu
  • 1 cup chopped dairy-free chocolate
  • ½ cup canned coconut cream (see notes)
  • ½ cup maple syrup
  • ½ – ¾ cup cacao powder (depending on how strong you want it to taste)
  • Dash of vanilla bean powder

Decoration

  • 2 cups of berries
  • Handful of chopped pistachios
  • Whatever else you like!

Method

  1. For the tart case, add the pecans to a food processor and process until it forms coarse crumbs.
  2. Add the remaining base ingredients and process until it comes together and can be pinched. Press mixture into a lined tart tin.
  3. For the raspberry chia jam, add all ingredients to a small bowl and mash with the back of a fork until raspberries have broken down. Mix until combined then set aside.
  4. For the filling, gently melt the chocolate in a small saucepan or a double boiler.
  5. Add all filling ingredients to a food processor and process until as smooth as possible.
  6. Spread the chia jam along the bottom and sides of the tart case.
  7. Pour the chocolate mousse over jam and smooth the top.
  8. Decorate tart with berries and whatever else you might like.
  9. Set aside the tart in the fridge for 4 hours or until set.

We used a 20cm wide × 4cm high tart tin with removable base to make this one. If you don’t have one that deep, use a slightly bigger tart tin with a removable base.

Naked Foods is Australia’s destination for sustainable, organic, bulk wholefoods with a focus on sustainability, health, wellbeing and zero waste shopping. Shop online or in-store the first Monday of every month to receive 20% off storewide. That’s this coming Monday ? #thankuslater

Love brownies?

Categories
Recipes

Foodie Friday: Chocolate dipped shortbread

Today’s recipe, a lighter take on a classic cookie favourite, comes from Lakanto Australia. This shortbread is a buttery, light, and simply delicious snack for any coffee or high tea occasion. Lakanto Classic and Golden Monkfruit Sweeteners offer an all-natural substitute to sugar with 93% less calories.

Prep Time: 10 minutes | Cooking Time: 12-16 minutes | Serves: 20 fingers

Ingredients

  • 1 ½ cups unsalted butter (diced into 2cm cubes)  
  • 1 cup golden monkfruit sweetener       
  • 3 cups plain flour                                 
  • 1 tsp cornflour                          
  • ½ tsp vanilla essence
  • Sugar free chocolate    

Method

  1. Mix the diced butter and monkfruit sweetener in a mixer using the paddle attachment and whip until soft and smooth (approx. 5 minutes).
  2. Add the cornflour and plain flour, and slowly mix on speed 1-3 until fully incorporated.
  3. Add in the vanilla essence and whip for 3 minutes on high (this will ensure a smooth and soft dough is created).
  4. Remove from the bowl and place mixture onto a surface dusted with flour. Leave to rest for 10 minutes.
  5. Preheat the oven to 150⁰C.
  6. Gently fold the mixture on the bench. It should have a silky feel. Roll out to the desired size and height.
  7. Cut the dough to the desired shape and gently place on the baking tray. Allow to rest for 10 minutes in the fridge (this will help it keep its shape while baking).
  8. Place the tray in the preheated oven for 12-16 minutes, depending on the thickness of the shortbread.
  9. Remove from the oven and allow to cool.
  10. Melt the chocolate over a bowl of hot water until fully melted, then dip the shortbread into the chocolate and place on greaseproof paper until firm.

TIP: For a dryer shortbread, extend the cooking time by 3-4 minutes.

For more on Lakanto Australia

Love cookies?

Categories
Recipes

Foodie Friday: Vegan mocha tart with oat and almond crust

Foodie Friday

This recipe was developed by Minako Umehara @365cleaneats for Naked Foods.

Vegan Mocha Tart with Oat and Almond Crust

Prep time: 30 minutes (+ soaking time) | Cooking time: 20 minutes | Serves: 4

Vegan, Dairy Free and Gluten Free

Ingredients 

Crust:

  • 45g gluten free rolled oats
  • 40g raw almonds
  • 3 tbsp coconut sugar
  • 1/8 tsp pink salt
  • 2 tbsp + 1 tsp melted coconut oil

Filling:

  • 100g raw cashews (soaked 4-6 hours and rinsed) 
  • 120ml coconut cream
  • 3 tbsp. melted raw cacao butter
  • 3-4 tbsp. maple syrup
  • 2 tsp raw cacao powder
  • 2-3 tsp finely ground coffee beans
  • Pinch of pink salt

Decoration:

  • Handful of fresh blueberries
  • Freeze dried, chocolate coated strawberries
  • Rose petals
  • Coffee beans

Method

  1. Preheat oven to 170⁰C. Place all dry crust ingredients in a food processor and process well until it reaches the consistency of flour.
  2. Add melted coconut oil and process until it becomes like wet sand.
  3. Press the mixture against the sides and the bottom of the tart tin. Bake it for about 18-20 min or until baked through. After it has cooled down, put it in the freezer for 30 minutes to an hour. 
  4. Place all mocha filling ingredients in a high-speed blender and blend well. Layer it over the crust and freeze it until set.
  5. Remove from the tin and garnish with fruits and chocolate.

We used a 10cm×25cm×h2.5cm (550ml) tart tin to make this one, however you can use any tin you have at home that is around this size.

Naked Foods is Australia’s destination for sustainable, organic, bulk wholefoods with a focus on sustainability, health, wellbeing and zero waste shopping. Shop online or in-store the first Monday of every month to receive 20% off storewide. That’s this coming Monday ? #thankuslater

More dessert inspo…

Categories
Recipes

Foodie Friday: Honey & orange olive oil cake

This easy cake can be made the day before and is the perfect weekend brunch, especially if you’re enjoying finally (safely) having visitors to your home again! Thanks to Mastercraft for this week’s recipe.

Ingredients

  • 1 orange
  • 1/2 (125ml) cup olive oil
  • 1 tbsp orange juice
  • 1/2 tsp vanilla bean paste
  • 1/4 cup (35g) pistachios, coarsely chopped
  • 1/2 cup (140g) Greek yoghurt
  • 2 tbsp honey
  • 1 egg
  • 1/2 cup (110g) caster sugar
  • 1 cup (150g) self- raising flour
  • 1 tbsp icing sugar
  • Chopped pistachios, to garnish
  • Dried orange slices, to garnish

Method

  1. Pre-heat oven to 160°C, 140°C fan-forced.
  2. Line a 15x9cm loaf pan with baking paper and set aside.
  3. Grate orange zest into a large bowl. Add olive oil, orange juice, vanilla bean paste, pistachios, Greek yogurt, honey, egg and caster sugar. Whisk to combine. Sift self-raising flour over the mixture and stir to combine.
  4. Transfer into baking tin and cook for 30-35 minutes. Allow to sit in tin for 10 minutes before turning out onto a cooling tray.
  5. In the meantime, combine icing sugar and 1 tablespoon boiling water in a small bowl and mix to combine thoroughly, free of lumps. Pour over cake and top with chopped pistachios and dried orange slices.
  6. Serve.

More recipes

Categories
Recipes

Foodie Friday: Caramel Kanzi pie

Foodie Friday

This recipe for deep dish caramel apple pie was created by Panaceas Pantry for Kanzi Apples and is vegan unless you substitute the ingredients in brackets.

Ingredients

  • 3 sheets puff pastry
  • 8 Kanzi apples
  • 1/2 cup (110g) vegan butter (or any butter)
  • 1 Tbsp tapioca flour
  • 1/4 cup (60ml) water
  • 1 cup (180g) coconut sugar (or brown sugar)
  • 1 tsp (5ml) vanilla extract
  • 1/2 tsp ground cinnamon
  • 1/3 cup (40g) almond meal 

Method

1. Peel the apples, then cut in half and core. Cut the apples into 4mm slices, and set aside. 

2. Heat a large pot over a medium flame then add the butter. Cook for a few minutes, until the butter is melted and becomes frothy. Add tapioca flour and stir to form a paste. Immediately add sugar, water, spices and sliced apples and cook for 5-7 minutes, or until the apples begin to soften and the mix becomes fragrant. Ensure you stir regularly. Turn off heat and allow to cool completely, around 45 minutes. 

3. Preheat oven to 220C. Line the bottom and sides of a deep dish pie pan with pastry. Pour the almond meal into the base and spread evenly, then top with the cooled apple mixture. Cover the pie with the remaining pastry, in a lattice decoration or if you prefer just solid pastry (make 3 cuts in the top if you do this). Crimp the sides of the pie, then brush the top with milk and sprinkle with raw sugar (optional).

4. Bake for 15 minutes, then turn the oven down and bake for a further 40-45 minutes. The pie will brown on top, so if you prefer to avoid this, bake covered with foil for the first 30 minutes. The pie is done when the filling begins to bubble through the lattice.

Serve while hot with vanilla ice-cream. 

More recipes