
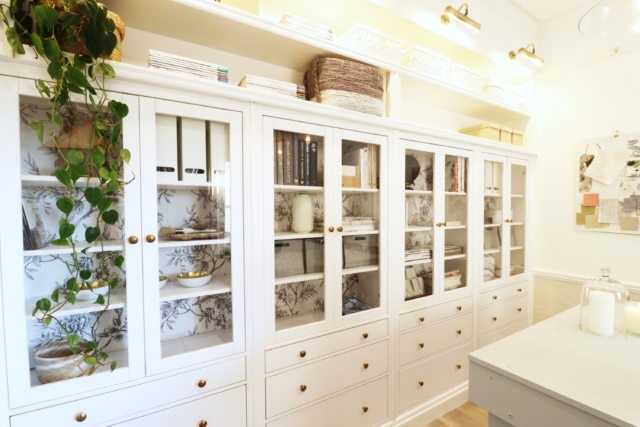
Would you love built-in cabinetry in your living room but balk at the cost? Well, you know we love an IKEA hack and this one, part of Naomi Findlay’s Carrington House reno, got us excited! So we asked her to share all the details!
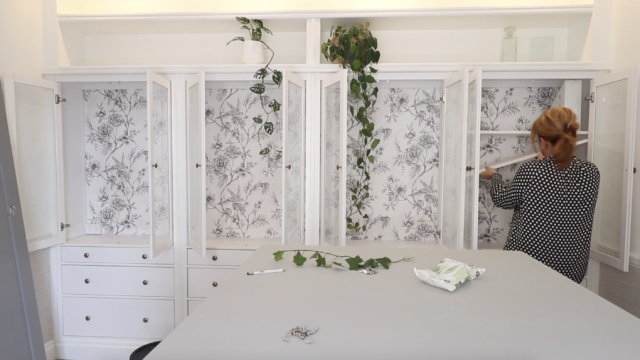
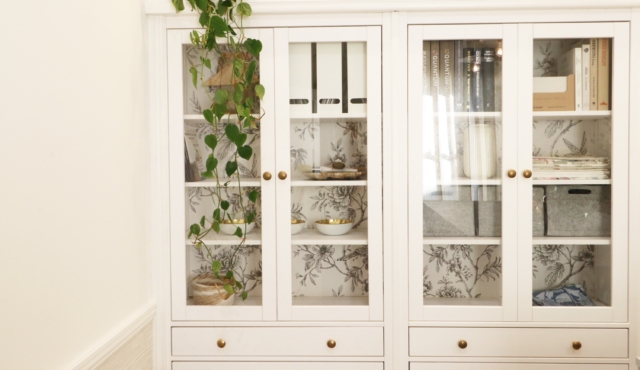
Armed with some IKEA HEMNES glass door cabinets ($499 each), some trusty trades, pretty floral wallpaper and a whole lot of creativity, Naomi created a very expensive looking built-in cabinet in her design studio space for a fraction of the price of custom joinery. Here, she walks us through just how she did it (with a little help from her friends!).

Naomi’s detailed step-by-step:
1. First up you need to measure and then measure again. What is the width, height and depth of the space in which you want to install the cabinetry?
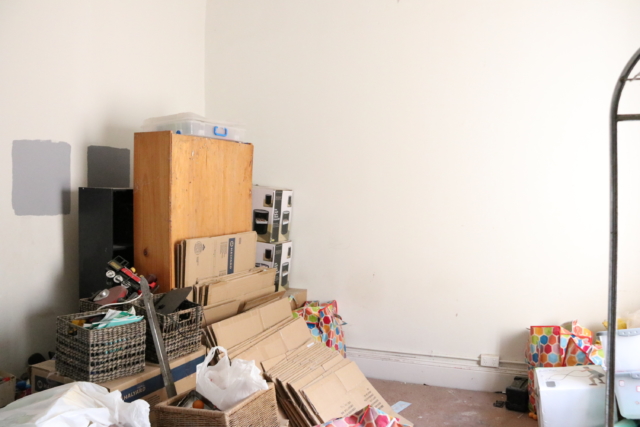
2. Find cabinetry you want to use and then look at how many units you can fit across the space. In my case, I didn’t have walls in place so had to account for all the extra centimetres that would be created before I could install the cabinetry.
3. Make sure to include a small amount of space (an extra 2cm onto the width of each unit) as you can always pack it out, but you cannot shrink your cabinets!
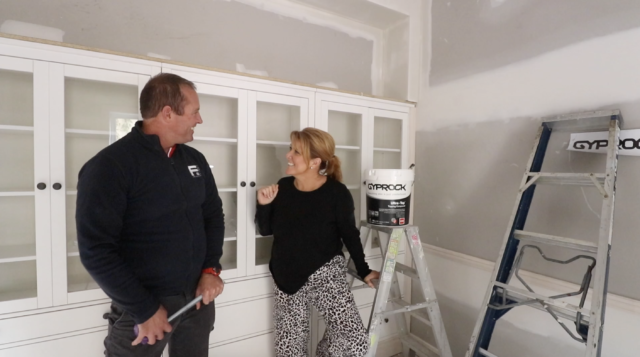
4. Prepare your walls. In this property, one wall was framed out and then gyprock was installed. For the wall on the other side, I had compressed cement sheeting direct stuck to the exposed brick. Why you ask? Well, I wanted four cabinets across the wall but wasn’t sure I had enough width. By direct sticking one of the walls it gave me the extra 30mm that I needed to get what I wanted. A great reminder that, when it comes to renovating, there is always a way around things.
5. Get it wired. Light gives life to everything! And these cabinets were always going to be beautiful but functional too. So, I had our electrician wire up four library lights to sit above the top shelves and illuminate the cabinets.
I also wanted to minimise clutter in the rooms, so I had GPOS wires put into the locations where the bottom shelves are sitting. When the cabinets were installed, I was then able to pull these through the back wall of the cabinets. This is a great way to have charging docs and devices tucked away from sight, along with all the cords and mess.
6. Build the cabinets and set them in place along the wall.
7. Frame down the bulkhead from the ceiling to provide the support and opening needed for open shelves above the cabinets. Make sure you chat with your builder to check if you need a central support across the opening. You want to make sure that the shelves can support lots of your favourite heavy books and magazines.
8. Block out in between the legs of the cabinets (if they are on legs), with some simple framing timber to make sure you have something solid to fix your skirting board to.
9. Get the plasterers back to gyprock, set and sand the open shelving above the cabinets.
10. Attach the skirting board to the front of the cabinets and fix it into the framing timber blocks inserted as above. I used Intrim Primed FJ Pine 135mm x 18mm SK498 profile skirting board for this job.
11. Putty up the nail holes in the skirting to ready it for sanding and painting.
12. Get some gold metallic spray paint and spray each of the handles gold. Once they are dry fix them in place on the cabinets.

14. Next step is to deal with the small gaps between each of the units. To do this you have to make sure that whatever you use does not impede the doors opening and closing. I chose a simple D mould that was glued and tacked in place.
15. Paint, paint and paint! I used a low sheen option to match the walls on all the shelving, except for the timber trims where I used a semi-gloss oil-based paint. I find the latter takes the wear and tear of heavy use that little bit better.
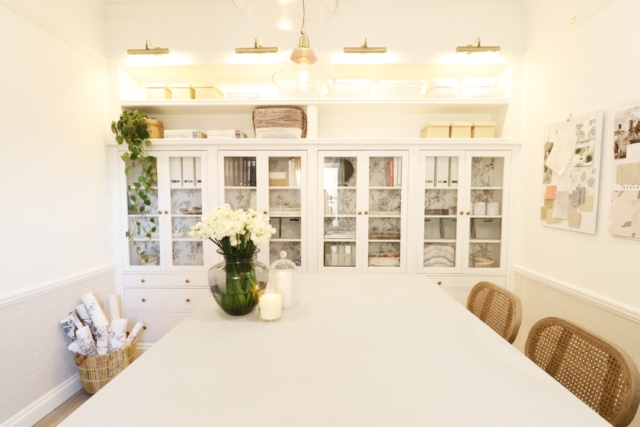
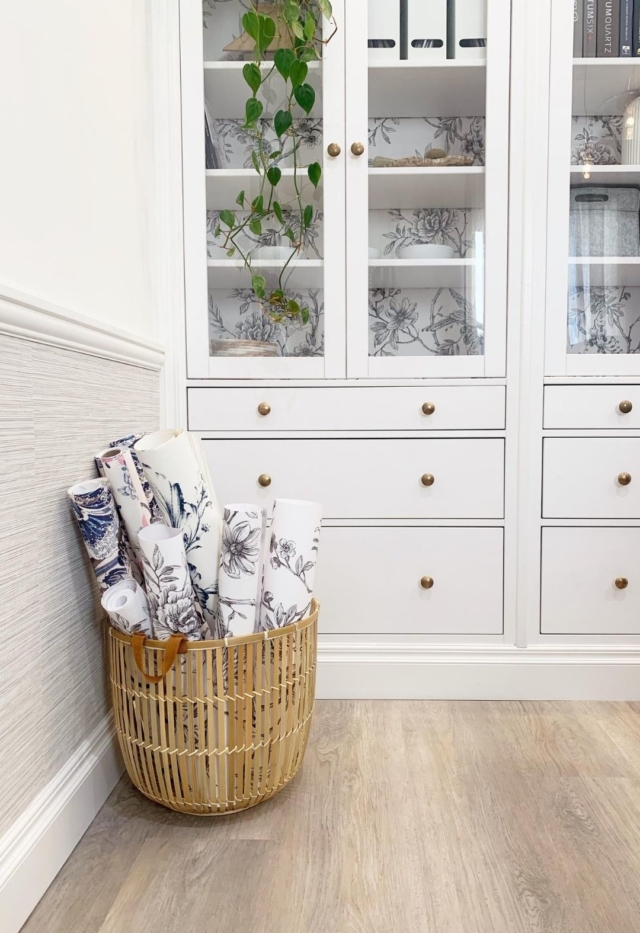
16. Adding wallpaper is the final touch that will give that real wow factor and a truly personalised feel. Remove all the shelves from the inside of the unit, then following manufacturer’s instructions, apply your favourite wallpaper to the back surface of the glass door section. Replace the shelves and you are done!
For more on Naomi’s Carrington House reno

Furniture hacks: the essential roundup of products to hack your IKEA pieces

Stone cottage renovation that’ll blow your mind!

6 replies on “IKEA hacks Australia: DIY built-in HEMNES cabinetry how-to”
It’s awesome. I’ve had the same vision about those cabinets. Thanks for sharing.
Impressive results using Ikea. Great stuff.
You’ve done a beautiful job. Where did you get your wallpaper from?
If you message Naomi via her website or socials I’m sure she will be happy to share!
love this makeover. What wall paper did you use and what colour wall paint did you use
It’s fab isn’t it? You can contact Naomi via the link at the end and I’m sure she’ll share the details!