While there are plenty of companies across the globe that cater to the booming IKEA furniture hacking scene, the latest one is based in Sydney and is the work of partners Suzanna Tauber and Mathieu Griveau. The brand’s name combines the word ‘custom’ and IKEA; a clever portmanteau that describes the business’ offering.
“We specialise in customising IKEA furniture. We believe there is still a gap in the market for an offering that enables people to easily customise, revamp and upcycle their flatpack furniture,” says Suzanna.
The IKEA Besta gets a glow up with Customea diamond fronts
An experienced joiner by trade, Mathieu has been running his own kitchen installation company for the past few years (The Flatpack Installer). And having installed literally hundreds of IKEA kitchens, he knows better than most how difficult it can be to create something unique without a hefty price tag. “Over the years, we’ve always discussed the lack of options out there. As a joiner, it made sense for Mat to take the next step and start manufacturing his own products,” says Suzanna.
Customea’s navy Mermaid design paired with IKEA Metod cupboards and drawers
Ideal for those looking for a budget option, that is a bit more interesting and less generic, the Customea range includes fronts, tops, sides and accessories that fit the IKEA Metod kitchen cabinets and bathroom vanities, the popular IKEA Besta storage units and the IKEA Pax wardrobes.
There are seven front designs to choose from ranging from plain to chevron, mermaid, diamond and shaker styles. When it comes to colours, there’s white, black, dark grey, navy, pale pink and mint green while the handle offering includes black, timber, brass and copper.
IKEA Metod kitchen cupboards with Customea’s Shake The Line fronts and brass handles
“You can either revamp existing items you may already have or consider our products when purchasing new items from IKEA,” says Suzanna who explains that the panels can be used as tops as Customea doesn’t offer stone or wood tops.
The pricing is very competitive too with doors starting from $150, drawer fronts from $100, sides and tops from $75, kickboards from $40 and handles from $15.
IKEA Metod paired with black Chevron fronts
Customea has two main competitors in Australia (Ren Studio and Arkie Design), but Suzanna believes that those brands are geared more towards architects and designers. “Ultimately, we are aiming to appeal to everyone, or at least anyone who has an IKEA product in their home!”
Would you love built-in cabinetry in your living room but balk at the cost? Well, you know we love an IKEA hack and this one, part of Naomi Findlay’s Carrington…
Furniture hacks: the essential roundup of products to hack your IKEA pieces
Who doesn’t love IKEA’s budget-friendly, simple, timeless designs? But sometimes you’d like your piece to look a little less mainstream. Well, we have some great news! There are plenty of…
IKEA furniture hack: Customise your MALM bedhead!
We love customisation and product hacking as much as the next person so when we first heard about STYLKEA we were pretty excited. Designed to make bargain furniture look expensive,…
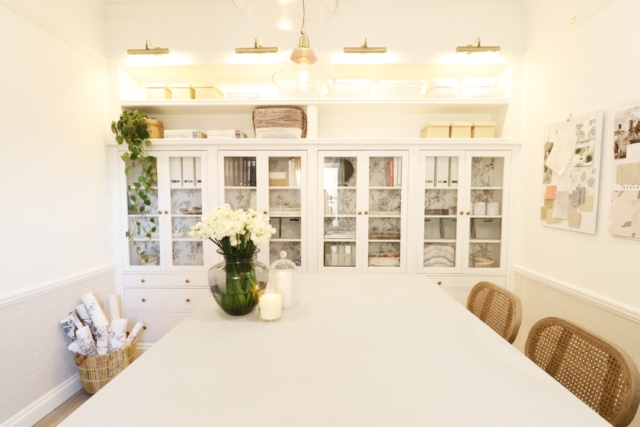
Would you love built-in cabinetry in your living room but balk at the cost? Well, you know we love an IKEA hack and this one, part of Naomi Findlay’s Carrington House reno, got us excited! So we asked her to share all the details!
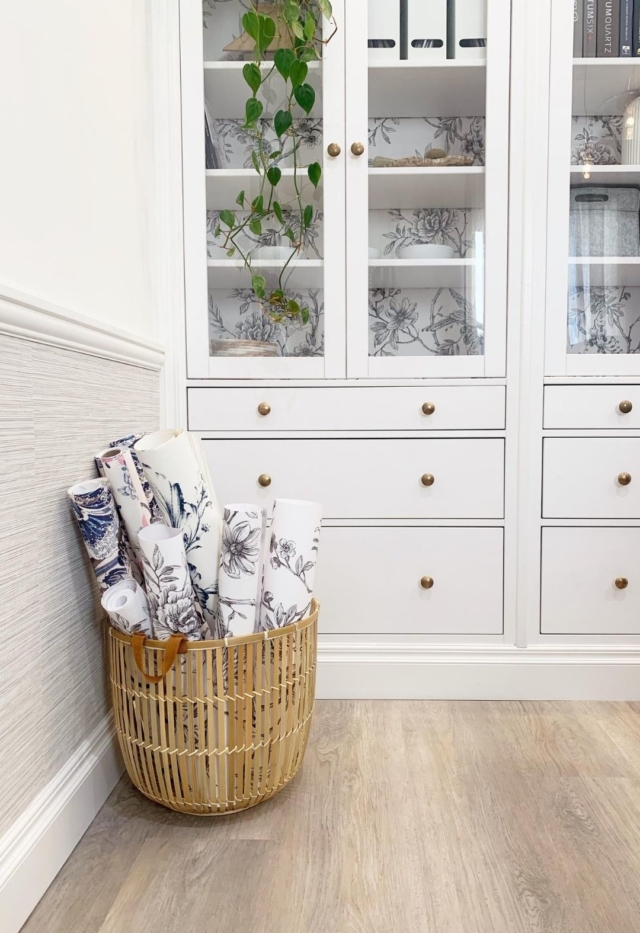
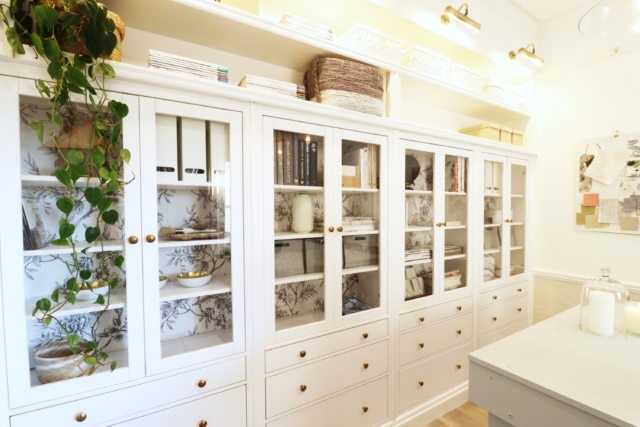
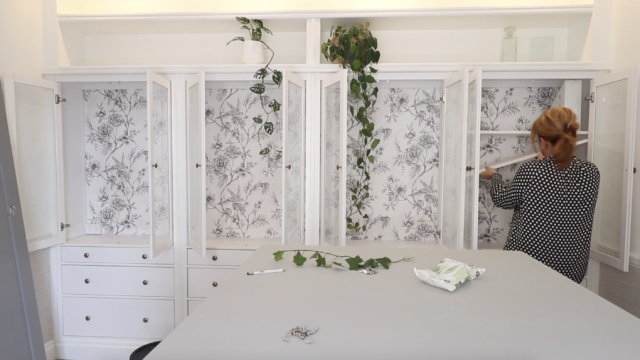
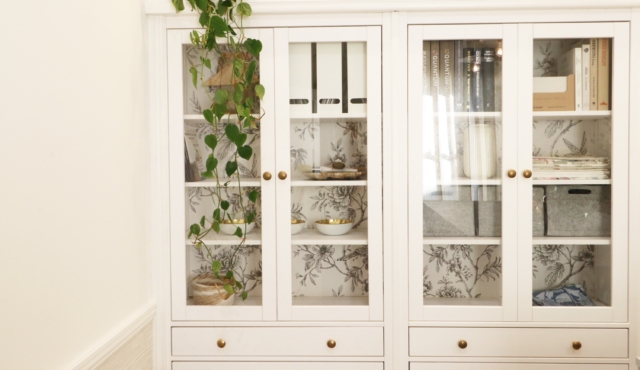
Armed with some IKEA HEMNES glass door cabinets ($499 each), some trusty trades, pretty floral wallpaper and a whole lot of creativity, Naomi created a very expensive looking built-in cabinet in her design studio space for a fraction of the price of custom joinery. Here, she walks us through just how she did it (with a little help from her friends!).
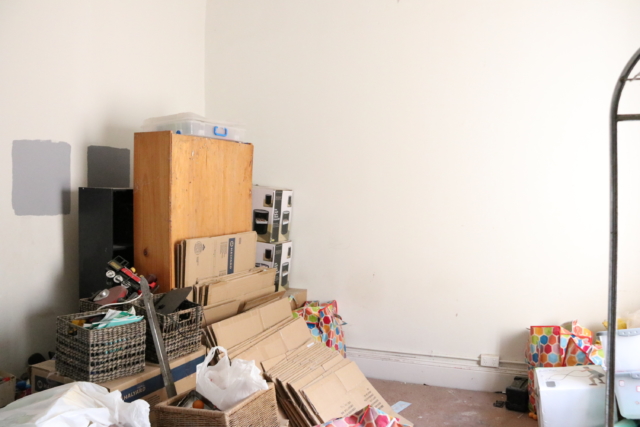
BeforeDuringAfter
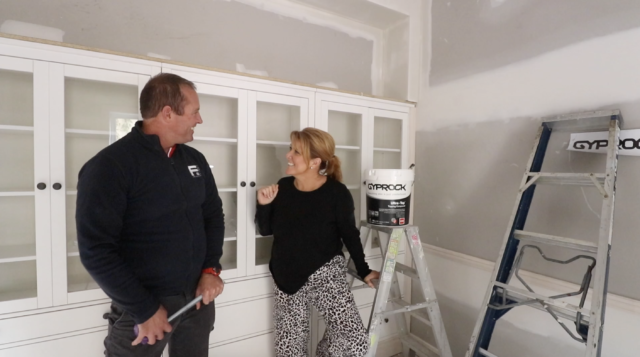
Naomi walks us through it with her builder Josh Ferris
Naomi’s detailed step-by-step:
1. First up you need to measure and then measure again. What is the width, height and depth of the space in which you want to install the cabinetry?
2. Find cabinetry you want to use and then look at how many units you can fit across the space. In my case, I didn’t have walls in place so had to account for all the extra centimetres that would be created before I could install the cabinetry.
3. Make sure to include a small amount of space (an extra 2cm onto the width of each unit) as you can always pack it out, but you cannot shrink your cabinets!
4. Prepare your walls. In this property, one wall was framed out and then gyprock was installed. For the wall on the other side, I had compressed cement sheeting direct stuck to the exposed brick. Why you ask? Well, I wanted four cabinets across the wall but wasn’t sure I had enough width. By direct sticking one of the walls it gave me the extra 30mm that I needed to get what I wanted. A great reminder that, when it comes to renovating, there is always a way around things.
Naomi with her builder
5. Get it wired. Light gives life to everything! And these cabinets were always going to be beautiful but functional too. So, I had our electrician wire up four library lights to sit above the top shelves and illuminate the cabinets.
I also wanted to minimise clutter in the rooms, so I had GPOS wires put into the locations where the bottom shelves are sitting. When the cabinets were installed, I was then able to pull these through the back wall of the cabinets. This is a great way to have charging docs and devices tucked away from sight, along with all the cords and mess.
6. Build the cabinets and set them in place along the wall.
7. Frame down the bulkhead from the ceiling to provide the support and opening needed for open shelves above the cabinets. Make sure you chat with your builder to check if you need a central support across the opening. You want to make sure that the shelves can support lots of your favourite heavy books and magazines.
8. Block out in between the legs of the cabinets (if they are on legs), with some simple framing timber to make sure you have something solid to fix your skirting board to.
9. Get the plasterers back to gyprock, set and sand the open shelving above the cabinets.
10. Attach the skirting board to the front of the cabinets and fix it into the framing timber blocks inserted as above. I used Intrim Primed FJ Pine 135mm x 18mm SK498 profile skirting board for this job.
11. Putty up the nail holes in the skirting to ready it for sanding and painting.
12. Get some gold metallic spray paint and spray each of the handles gold. Once they are dry fix them in place on the cabinets.
14. Next step is to deal with the small gaps between each of the units. To do this you have to make sure that whatever you use does not impede the doors opening and closing. I chose a simple D mould that was glued and tacked in place.
15. Paint, paint and paint! I used a low sheen option to match the walls on all the shelving, except for the timber trims where I used a semi-gloss oil-based paint. I find the latter takes the wear and tear of heavy use that little bit better.
16. Adding wallpaper is the final touch that will give that real wow factor and a truly personalised feel. Remove all the shelves from the inside of the unit, then following manufacturer’s instructions, apply your favourite wallpaper to the back surface of the glass door section. Replace the shelves and you are done!
Furniture hacks: the essential roundup of products to hack your IKEA pieces
Who doesn’t love IKEA’s budget-friendly, simple, timeless designs? But sometimes you’d like your piece to look a little less mainstream. Well, we have some great news! There are plenty of…
Stone cottage renovation that’ll blow your mind!
Most people would have run for the hills on seeing the rundown state of this 1880s stone cottage, but not our favourite renovator Naomi Findlay! Her years of experience and…
This week, Naomi Findlay shares the second finished room in the rundown 1880s stone cottage she is renovating. If you missed room one, check it out here. Over to you,…
As a parent of two small boys with questionable sleeping habits, I can tell you I’d do just about anything for a good night’s sleep and Catherine McGowan agrees. Hoping that an exciting new shared room for her seven-year-old twins Anika and Morgan would keep them in their beds, she set about creating the most appealing space for them!
And it worked!
“I was trying to figure out a way for Anika to stay in her own bed instead of hopping in with us each night,” she says. “It had got to the point where my husband David was sleeping downstairs. It sounds ridiculous really, but sometimes you do whatever it takes to get a good night’s sleep!”
Catherine, who blogs at TUBU Kids, started, as you should, with a mood board. “I’m not an interior designer and I just used PowerPoint, but it did the trick as I always referred back to this when shopping, which kept me on track when buying products.”
She wanted a fun but gender neutral scheme. “The hero of the room is the Typoflora rainforest wall mural by Materialised. The design is printed here in Sydney onto a beautifully textured wall vinyl. It comes on a roll so installers need to know what they are doing, but after a bit of research I found JJ Signs on Airtasker and they did a brilliant job.”
She designed the look around getting single tent beds. At $198 each, the teepee tent beds by Luxo Living were exactly what she was after on a budget. “They are fabulous! Great quality, easy to install and budget-friendly. For the ‘mosquito net’ camping feel, I used sheer fabric which Nanna made into drapes for us.”
They’d already painted the house in Dulux Vivid White a few years back so they simply patched and repainted the walls in that colour. “I don’t find choosing paint colour that hard but rugs are a different matter! After much deliberation, I settled on the new Rug Culture Alpine 822 in Natural. It was the last thing I added to the room and absolutely finished it off perfectly, really lifting it to another level actually. It is made with heat set polypropylene so is a good option for Anika who has allergies plus it is super practical whilst still looking very plush and elegant.”
For the rest of the décor, Catherine stuck to her mood board so when stumbling across products, she could easily check whether they would work with the overall look.
“I try to buy from independent stores and found the Pony Rider cushion in a gorgeous shop called Habitat Collective in Byron Bay. The rainbow cushion, moon mirror and cane wall hook are from my lovely local store River Folk in Como. The FLISAT bookshelf by the door had a bit of an #ikeahack with their STICKAT bed pocket re-made in fabric to work back with the wall mural.
So, has Anika stayed in her own bed?!
“Well, kind of,” says mum. “I keep finding her snuggling up with Morgan! And we had to do some intense bribery: 10 nights in her room and we’d get a kitten. All up, probably one of the best things we could have done with all this extra time at home!”
We love customisation and product hacking as much as the next person so when we first heard about STYLKEA we were pretty excited. Designed to make bargain furniture look expensive, the range lets you personalise classic IKEA furniture pieces using DIY peel-and-stick perspex panels.
And while the range previously allowed you to pimp your IKEA MALM bedside tables and chests, the brand’s latest offering means your IKEA MALM bedhead can be transformed too with looks ranging from Hamptons to Hollywood Regency and more.
The IKEA MALM bedhead and bedside have never looked so good!
“We all want to live in beautiful, inspired spaces and our aim at STYLKEA is to give people an easy way to customise flat-pack pieces into the looks they love at a price they can afford. IKEA MALM beds are the perfect blank canvas to stamp your style on,” says STYLKEA’s founder and owner Kylie Hughes.
BEFORE
AFTER
The panels come in three size options designed to suit double, queen and king-sized IKEA MALM bedheads. The 3-millimetre metal, mirror-finish and ready-to-paint panels are manufactured in Australia and given the peel-and-stick adhesive is supplied there’s no tools or mess involved either. Genius!
“A lot of people have IKEA furniture that’s too good to get rid of, but they’re ready for a change. Our Styl-Panels allow you to elevate affordable flat-pack furniture from plain to whatever your design style might be.”
To celebrate the launch, the bedhead kits are currently on sale for a limited time for a bargain price of $59.99.
Grab yourself a cuppa, as we’re sharing a fantastic IKEA kitchen hack by Front Porch Properties in these videos today!
AFTER: Clever carpentry has made this flatpack kitchen look more custom
These videos are absolutely loaded with tips and tricks for little things you can do to make a flatpack kitchen look more expensive and unique. As a flatpack kitchen owner myself (take the tour), I always love seeing how other people personalise and give character to theirs!
If you ever thought an IKEA kitchen wouldn’t suit an older home, you really need to check this out for inspiration! I particularly love all the clever uses of space and the way they’ve used the old kitchen cabinetry in the new laundry.
THE BEFORE
Rachael Turner of Front Porch Properties
This clever ‘island’, at the same height as the surrounding benches, doubles as a dining table because the house doesn’t have a dining room
Now watch the videos as Rachael takes you through what she did and why:
PART ONE
PART TWO (almost finished!)
We hope you’re feeling inspired for your next reno!
IKEA interior design leader, Christine Gough, shares her tips for decluttering and styling, and uncovering extra storage at home.
There are a few simple ways to eliminate clutter and group items so that they become a beautiful focal point in the room, rather than a mess. Pull similar items together to create an interesting, uniform and organised look. One way to do this is to group items together by material, colour, shape or function, for example books can be grouped or even glass and greenery. Suddenly what seemed to be cluttered objects become a calming inspirational focal point in your home.
You can also match colour palettes to tie your display together. I suggest grouping items in odd numbers as symmetry can look a bit stiff. Use a mix of tall and short items to create a sense of height, use larger or taller objects at the sides and back and then work down towards the middle using smaller or flatter objects in front. This will help frame your display and give it height and depth.
Of course, there are some things that need to be stored, to give you the space needed to live and relax in your home. Before you get to storage, first look at what you have. In each space or room, clear, sort and separate to identify what you will keep and what can be donated or thrown away.
Once you have sorted things, look around and see what areas could be put to good use for storage. All of our homes are filled with lots of odd spots that are seemingly useless or forgotten. But with a little creative thinking, those places underneath, behind and in between can suddenly become essential.
Top IKEA storage items to transform your home in 2017:
Under bed storage. This often unused space is a smart place to store. The IKEA GIMSE bed storage box ($14.99) is a simple, flexible and affordable option and the lid keeps dust from entering.
Use movable storage: The kitchen is the hub for entertaining so get it organised. A trolley like the RÅSKOG ($69) is a great storage solution for plates, sauces and cutlery, it is the perfect entertaining caddy that can move from space to space so all you need is right at hand.
Make the most of outdoor space: The HINDÖ greenhouse/cabinet ($169) looks great and is also a practical place to store items so they are at hand when you need them but out of the way when you don’t. Glass doors mean everything is protected from the elements, it’s perfect for succulents, plant pots and gardening accessories but consider storing plates and outdoor entertaining items, to free up space in the kitchen.
Use your walls and doors: Walls, doors and little nooks around the home are the perfect spot to place a hook to store clothes and school bags while they are not needed over the holidays. Over door hooks like the ENUDDEN ($5.99) have a covered back so they won’t scratch the door.
The top of your wardrobe: The space at the top of your wardrobe is a great spot for storing items that you don’t need to use all the time. The SKUBB storage case ($9.99) is ideal and ventilation nets allow air to circulate and protect items from dust. If space is tight consider SKOGHALL vacuum-sealed bags (from $4.99 for 2 pack) which keep textiles fresh and reduce the space needed for storage.
IKEA Australia will launch a huge selection of products in February, including new kitchen fronts made from 100% recycled materials, unique inserts to style and personalise the cube space in your KALLAX as well as a fun and coordinated range of children’s textiles and accessories.
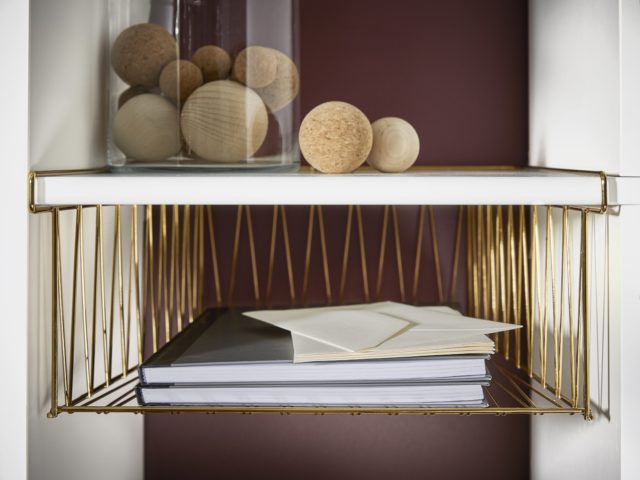
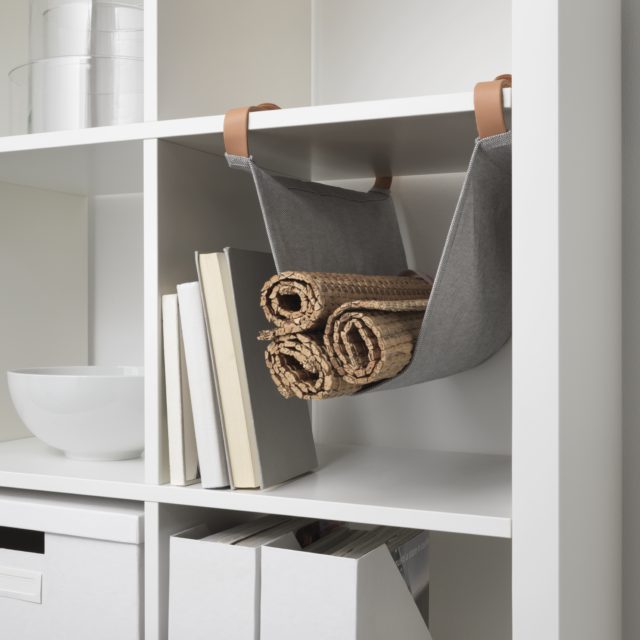
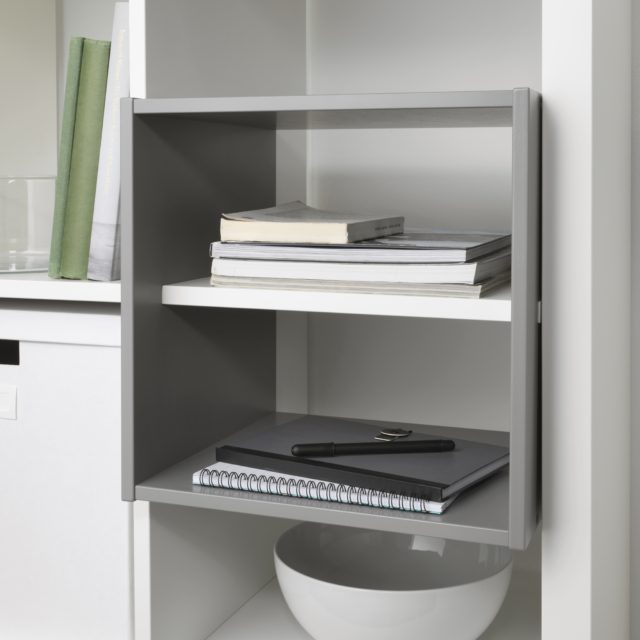
New range of inserts to pimp your KALLAX
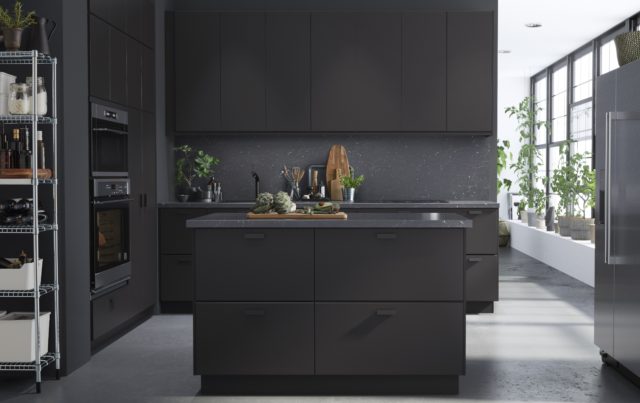
KUNGSBACKA kitchen fronts
Here are some of the best new products coming to IKEA Australia in February:
KUNGSBACKA kitchen fronts
The KUNGSBACKA kitchen fronts are the first in IKEA to be made out of 100% recycled materials. The KUNGSBACKA fronts are made from recycled wood covered in a foil made from recycled PET bottles, making them a sustainable choice that doesn’t compromise on quality, design or price.
The matte anthracite-coloured fronts not only look beautiful, but are easy to clean and feature anti-fingerprint surfaces. KUNGSBACKA fronts fit with the METOD kitchen system so you can create literally thousands of different combinations to squeeze the most out of every centimetre of kitchen space.
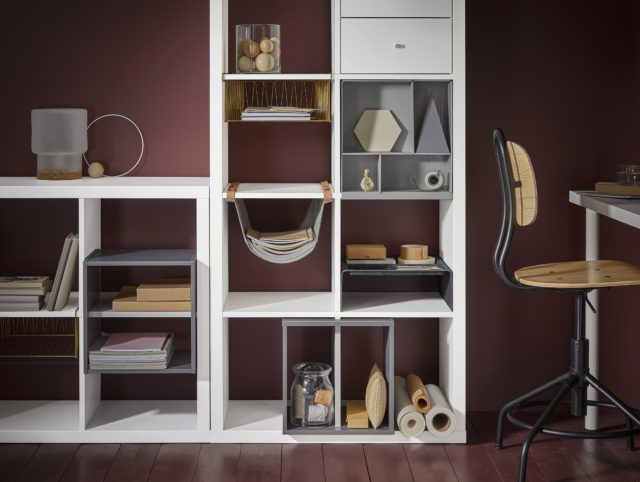
New ways to style your KALLAX
The popular IKEA KALLAX range (the new and improved version of EXPEDIT) will get a series of unique new inserts in February to help add style and function to this IKEA staple. Five new items: a hanging organiser, shelf divider, shelf insert, storage with compartments and a wire basket (hello, it comes in gold!) – will allow more flexibility to personalise your KALLAX so it can meet your exact needs.
I think these inserts are absolutely fantastic and will completely lift your storage game! I want to run out and buy myself a KALLAX unit right now so I can pimp it with these gorgeous, expensive-looking accessories. The great thing about the KALLAX is it’s as at home in the home office as it is in the lounge room and with these new inserts, it will definitely look a lot more high end and chic, as well as making it way more useful for storing and displaying your items. Exciting!
VÄNSKAPLIG, a collection designed for children
VÄNSKAPLIG means friendly and has been designed to deliver endless ways for children to mix and match their bedroom textiles and accessories, to express their own identity and create their own style and individual look. The coordinated collection includes quit cover sets, rugs, curtains and cushions.
Other new things to look out for
With a whiff of the 1920s industrial style, the FJÄLLBO storage series is a new range of small furniture pieces combining minimalist design with a rustic edge.
SJÄLSLIGT is a set of three porcelain cacti of different heights that add a humorous touch to the home. A great way for funky greenery, without the prickles.
STENLILLE is a new graphic, low pile rug with coordinated curtains (NUNNERÖRT).
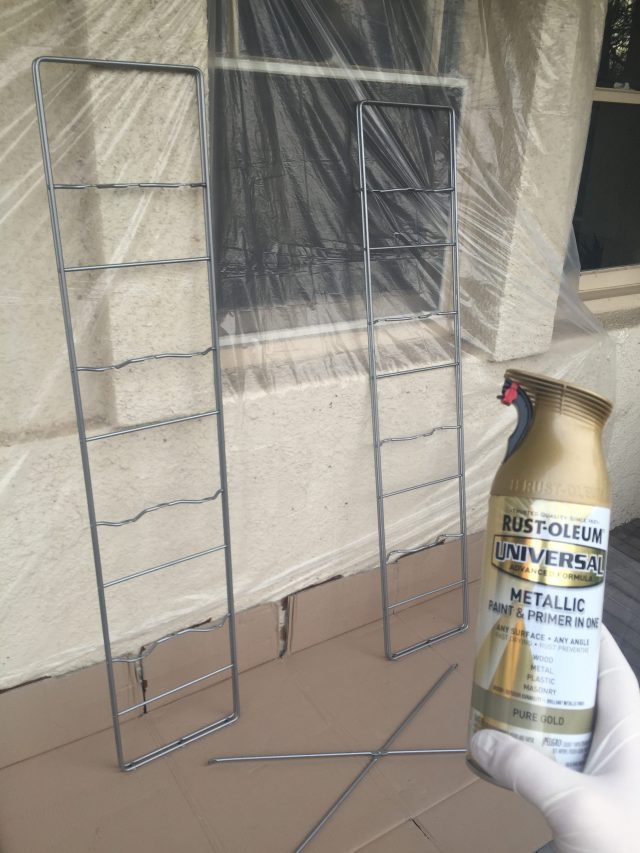
Let me just say first up, I love IKEA. I really do. They seem to always have a solution at an affordable price. Although sometimes the finishes aren’t always ideal, the great thing about Ikea is that everything comes apart so simply it’s so easy to hack it into something a bit more custom. So thanks to some spray paint from Rust Oleum, that’s exactly what I did.
I picked up an old ENETRI shelving unit off Gumtree for $30 (bargain, right?!). It’s honestly such a versatile piece and everyone always comments on it, wanting to know where they can get their hands on one. Unfortunately IKEA no longer sell them but there always seems to be one out there on Gumtree.
Always put a drop sheet down first to protect your flooring, I always then put a layer of cardboard on top to spray on as I learnt the hard way that EVERYTHING sticks to drop sheets including whatever you’re spraying. Ha!
Step Three: Spray away
The beauty of the RustOleum spray paint is that is that it is a primer and paint in one go so it saves a lot of time and mucking around! I always recommend doing two coats to make sure you haven’t missed any spots and ideally leave it overnight to dry.
–Kathryn Bamford is a certified interiors addict and regular contributor. You can follow her DIY and design adventures on Instagram @thedesignrookie.
We love a good IKEA hack here at Interiors Addict and, following on from the popularity of our recent high chair post, we thought we’d bring you a selection of our favourite covers for the popular IKEA Antilop. Clean, modern, cheap and user-friendly, there are many reasons the $30 ANTILOP is one of the world’s top-selling high chairs and while you can use it sans cushioning, the matching inflatable IKEA PYTTIG cushion makes for a more comfortable ride and these covers make for a much prettier one too. Plus, as parents know, feeding can be pretty fraught so anything that makes the experience more enjoyable certainly has our vote.
Yeah Baby Goods: This gorgeous cover is made from heavy weight cotton (for improved wash durability) and also comes with a matching silicone placemat. Their other designs are pretty amazing too. We love! $47.
ThatsSewMacy: Made in South Australia, these cushion covers are fronted with 100 per cent organic cotton and are all part of small, boutique batches. The company will also create a custom order. $25.
Kaylabearperth: This high chair cover is made in Perth and the range features plenty more two-toned options too. $35.
K for Kids: Made from easy-to-clean oil cloth, these covers are reversible, giving you two decorating options for the price of one! $29.95.