Categories
Design DIY Expert Tips Interviews RENO ADDICT

IKEA hacks Australia: DIY built-in HEMNES cabinetry how-to

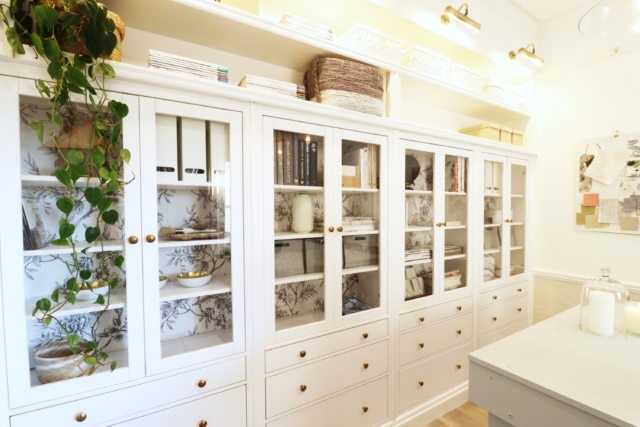
Would you love built-in cabinetry in your living room but balk at the cost? Well, you know we love an IKEA hack and this one, part of Naomi Findlay’s Carrington House reno, got us excited! So we asked her to share all the details!
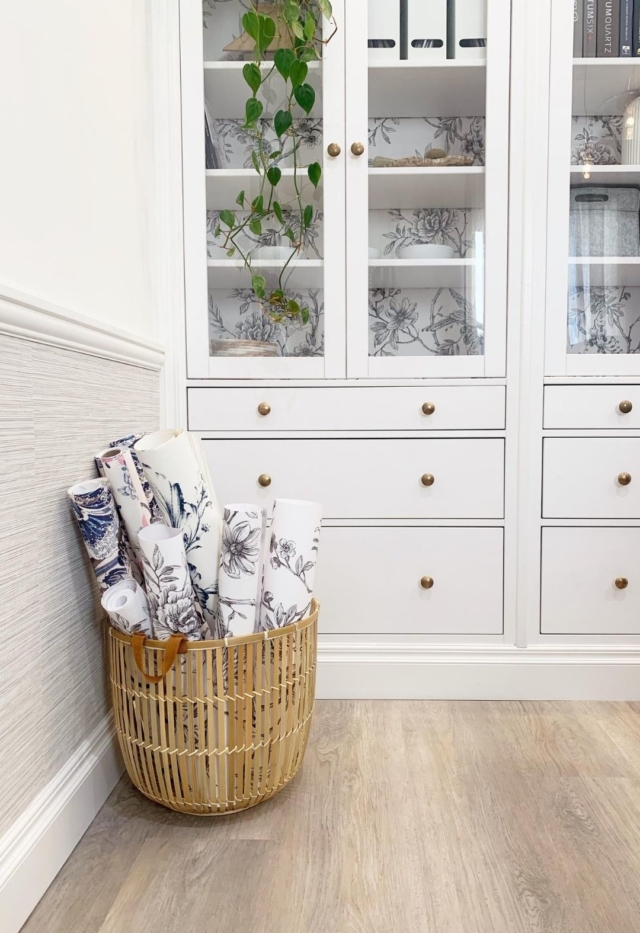
Armed with some IKEA HEMNES glass door cabinets ($499 each), some trusty trades, pretty floral wallpaper and a whole lot of creativity, Naomi created a very expensive looking built-in cabinet in her design studio space for a fraction of the price of custom joinery. Here, she walks us through just how she did it (with a little help from her friends!).
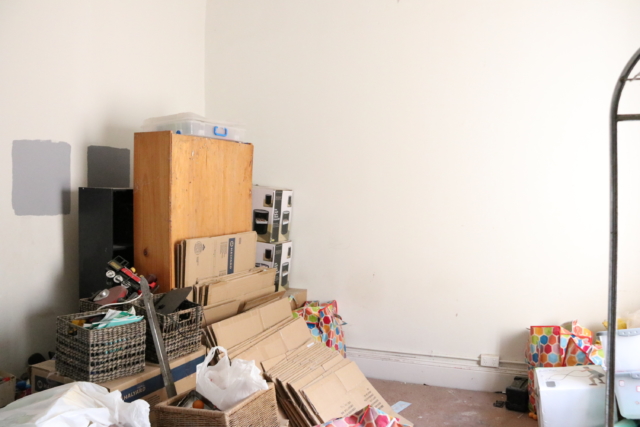
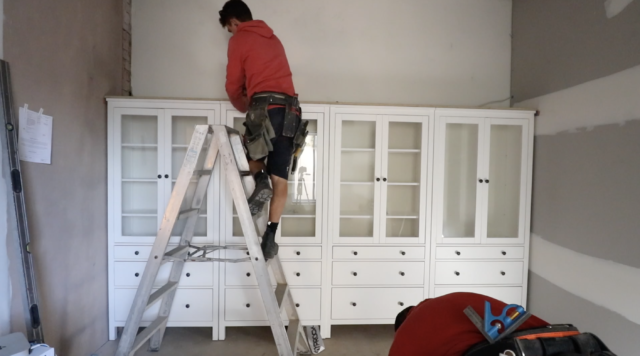
The room before
Before
During
After
Naomi walks us through it with her builder Josh Ferris

Naomi’s detailed step-by-step:

1. First up you need to measure and then measure again. What is the width, height and depth of the space in which you want to install the cabinetry?

2. Find cabinetry you want to use and then look at how many units you can fit across the space. In my case, I didn’t have walls in place so had to account for all the extra centimetres that would be created before I could install the cabinetry.

3. Make sure to include a small amount of space (an extra 2cm onto the width of each unit) as you can always pack it out, but you cannot shrink your cabinets!

4. Prepare your walls. In this property, one wall was framed out and then gyprock was installed. For the wall on the other side, I had compressed cement sheeting direct stuck to the exposed brick. Why you ask? Well, I wanted four cabinets across the wall but wasn’t sure I had enough width. By direct sticking one of the walls it gave me the extra 30mm that I needed to get what I wanted. A great reminder that, when it comes to renovating, there is always a way around things.
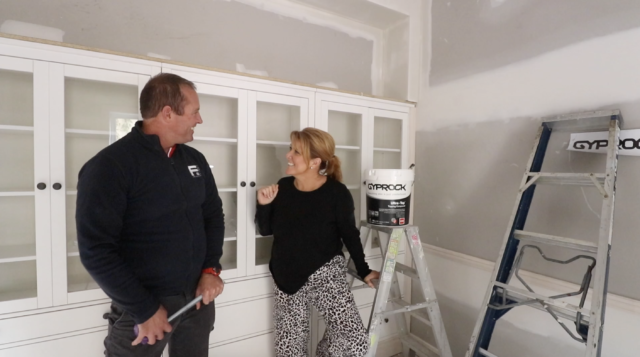
Naomi with her builder

5. Get it wired. Light gives life to everything! And these cabinets were always going to be beautiful but functional too. So, I had our electrician wire up four library lights to sit above the top shelves and illuminate the cabinets.

I also wanted to minimise clutter in the rooms, so I had GPOS wires put into the locations where the bottom shelves are sitting.  When the cabinets were installed, I was then able to pull these through the back wall of the cabinets. This is a great way to have charging docs and devices tucked away from sight, along with all the cords and mess.

6. Build the cabinets and set them in place along the wall.
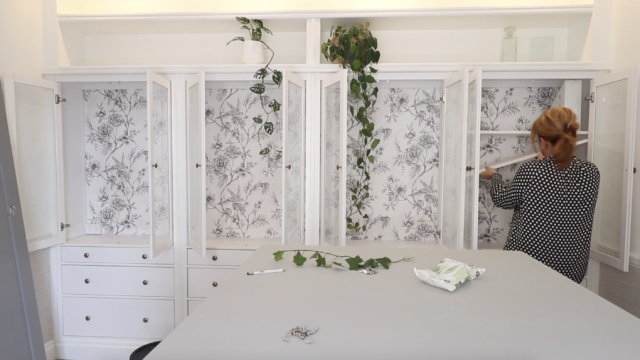
7. Frame down the bulkhead from the ceiling to provide the support and opening needed for open shelves above the cabinets. Make sure you chat with your builder to check if you need a central support across the opening. You want to make sure that the shelves can support lots of your favourite heavy books and magazines.

8. Block out in between the legs of the cabinets (if they are on legs), with some simple framing timber to make sure you have something solid to fix your skirting board to.

9. Get the plasterers back to gyprock, set and sand the open shelving above the cabinets.
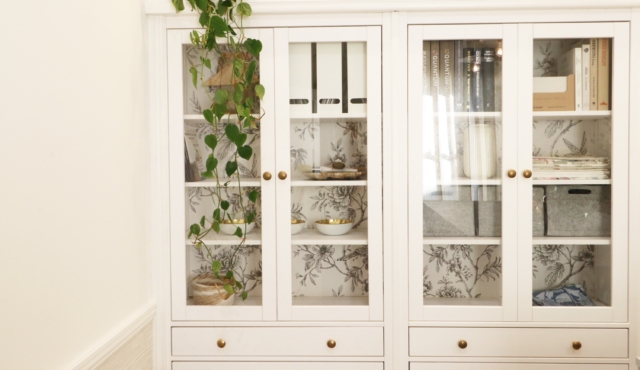
10. Attach the skirting board to the front of the cabinets and fix it into the framing timber blocks inserted as above. I used Intrim Primed FJ Pine 135mm x 18mm SK498 profile skirting board for this job.

11. Putty up the nail holes in the skirting to ready it for sanding and painting.

12. Get some gold metallic spray paint and spray each of the handles gold. Once they are dry fix them in place on the cabinets.

14. Next step is to deal with the small gaps between each of the units. To do this you have to make sure that whatever you use does not impede the doors opening and closing. I chose a simple D mould that was glued and tacked in place.

15. Paint, paint and paint! I used a low sheen option to match the walls on all the shelving, except for the timber trims where I used a semi-gloss oil-based paint. I find the latter takes the wear and tear of heavy use that little bit better.
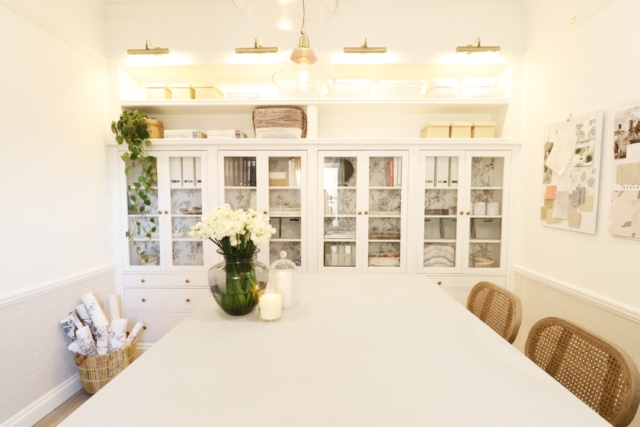
16. Adding wallpaper is the final touch that will give that real wow factor and a truly personalised feel. Remove all the shelves from the inside of the unit, then following manufacturer’s instructions, apply your favourite wallpaper to the back surface of the glass door section. Replace the shelves and you are done!

For more on Naomi’s Carrington House reno

Categories
DIY Expert Tips RENO ADDICT

DIY tiling: don’t try it before reading these tips from the tradie!

As we spend more time at home, Aussies are picking up their tools and diving into DIY reno projects of all shapes and sizes. But knowing where to start can be daunting for even the savviest of renovators, and tiles can be especially tricky if you’ve never tiled before. 

Kyal Demmrich on the job

As a renovation expert, carpenter and The Block alumni, Kyal Demmrich has spent his fair share of time diving into DIY renovations with his wife Kara. “We have completed more than 35 reno projects now, and over that time I’ve found that knowing what our end goal is, including the style we’re going for, really does help with the rest falling into place,” Kyal says. With the right information and the right tools, most renovations are relatively easy, particularly when you follow a few simple tips. 

With tiling, once people have landed on design elements like choice of tile and laying pattern, most of the hard yards have been run – though caution needs to be taken to avoid missteps such as using unsuitable adhesives, tiling on surfaces that are not dry, and failing to measure and cut accurately.

“There is a great saying in the trade: Measure twice, cut once. That’s my golden rule for all things tiles and DIY,” Kyal says. “From calculating how many tiles you need, through to the cuts and configuration of the tiles themselves, never underestimate the importance of a good old tape measure and solid forward planning.”

Other tile ‘tricks of the tradie’ offered by Kyal:  

Dry surfaces: Before you start, your surface should be dry, clean, and smooth. If you are tiling in a wet area, it must be waterproofed correctly before you commence tiling.

Clean tiles are a must: Tiles should be dry and completely clean. Any loose powder on the backs of tiles should be removed to avoid contaminating the adhesive. A fine bristle brush is good to help with this.

Not all adhesives are created equal: Do not skimp, and make sure you choose the right adhesive for the surface and type of tile. There are many brands of adhesive out there, and they are all designed for specific types of tiles and tile surfaces.

Size does matter for the novice DIYer: Tiling with big tiles is tough, even for seasoned pros. Large format tiles are heavy and are expensive to replace if mistakes are made, so DIY novices should aim for tiles no bigger than 300 x 600mm.

Start with the grate: The secret with tile layout is starting from the floor grate (either inside or outside the shower) and working your way outwards. Draw up a plan of your floor/wall/splashback and map out where your tiles will go. At this point, you should also check that you have the correct fall to the grate. This ensures that your water will drain away correctly.

Dry laying is everything: Dry laying tiles first ensures you have the correct number of tiles as well as creating a vision of how they will look. Dry laying is also the perfect time to confirm whether you are happy with your tile choice, or if you need to make last minute changes. 

Lay tiles carefully: Tiles that are placed unevenly create an uneven joint (or ‘lip’) which could be a trip hazard – there are levelling products out there to help with this. Make sure you tile the floor before your wall – wall tiles should slot neatly above your floor tiles. Where silicone is used, leave a 2-3mm gap where walls and floors meet.  

Peel and place technologies: A fantastic product to make your tiling even easier is BT-Instalay CTU by Gripset. This flooring system is a game-changer and can prepare a surface for tiling in only four quick and easy steps. BT-Instalay CTU is also 10 times lighter than cement sheets, making it an ideal flooring system for DIYers. It is also a waterproofing membrane if you are using it in wet areas.

Grout is a gift: Follow the manufacturer’s instructions exactly. Wait at least 24 hours after laying before grouting and protect the tiles from any water or weather conditions by covering them with old clean sheets. Do not grout where walls meet floors or where two walls meet. Instead, apply silicone when the surrounding grouted area is dry. Epoxy grout is a fantastic option due to its durability and stain resistance. It is a breeze to clean and perfect for outdoor or wet areas, making it an exciting alternative to cement grout.

Kyal is an ambassador for Beaumont Tiles, Australia’s biggest retailer of tiles and bathroomware with 118 outlets across most states.

Categories
Interiors Addict

Channel 7 seeks expert renovator for TV show

Do you buy, renovate and sell Aussie homes for a living? Channel 7 is looking for expert renovators to join an on-camera team for a new program. The right person must have an extensive background in residential property renovations. If you consider yourself a ‘flipper’ then this could be right for you.

You should be able to explain concepts easily to a broad audience and be willing to share your knowledge. If you are selected to be part of the team you must be comfortable on camera and confident sharing your opinions on what work/changes/renovations will help a property’s value and what traps there are when renovating.