Categories
Expert Tips Interiors Addict Interviews Outdoor & Exteriors

Plunge pools: everything you need to know about small pools

There’s no denying that COVID has had a very significant impact on the way we live and what we expect from our homes. We’ve reported a lot on the increasing importance of the backyard post-lockdown, and a pool is the icing on cake for many Australians. But with reduced block sizes our backyards are shrinking, which explains the increased popularity of the plunge pool.

Blue Haven Pool
This plunge pool is nestled inside a small backyard in Sydney’s Woolooware
Blue Haven pool

“There’s no denying that the COVID-19 pandemic was tough for everyone, and because Australians love the great outdoors, it was not surprising that many families wanted to transform their homes to feel like a holiday all year long,” says Blue Haven Pools and Spas CEO Remonda Martinez who has seen a massive increase in enquiries since the pandemic – particularly for plunge pools.

Plunge pool vs traditional
Just because a plunge pool is smaller than its full-size counterpart doesn’t mean it isn’t as versatile or luxurious. “You can use a plunge pool to dip in and relax after a long day or add swim jets if you want to do laps but don’t have room in your yard,” says Remonda.

A plunge pool can also serve as a focal point or fabulous backyard feature with the money you save on size (they are cheaper than larger, traditional pools) freeing up funds to allocate to decorative touches. “Smaller pools are more affordable to dress up with finer finishes like fully tiled interiors, heating and in-floor cleaning systems,” says Remonda. 

Plunge pool
This courtyard 6m x 3m plunge pool, in Sydney’s Bondi Junction, is fully tiled with with gas heating, travertine surrounds and blue mode lighting.

Is a small pool worth it?
While plunge pools are more affordable than traditional pools they are still very much a luxury item which makes many people, understandably, question whether a small pool is worth the investment. “They are definitely worth it! Since a small pool costs less to landscape with less fencing, paving and surrounding costs, you can spend more on the pool and make it an incredible feature piece,” says Remonda.

Popular for sloping blocks, the glass window panel is a fabulous example of how a small pool can be elevated, through smart design, to become a true garden feature. And when you consider the way a pool looks when the sun sets (think dazzling pool lights, and moving water), a plunge pool really does have the power to create an incredible night vibe.

Blue Haven pool
This 6m x 4m plunge pool, in Sydney’s Cronulla, includes a tiled spa

Is a smaller pool easier to maintain?
Smaller pools are generally easier to maintain when compared to larger pools. However, it’s important to note that the ease of maintenance also depends on factors such as the type of pool, its materials, and the location. “It’s also worth noting that smaller pools are also cheaper and faster to heat. There’s nothing better than a cool pool all summer and a hot spa for winter and, with a plunge pool, it’s totally possible!”

This 3.4m x 3.7m plunge pool makes for a cosy backyard retreat

What size backyard do you need?
With plunge pools starting at just 4 metres wide, it goes without saying that they will work in even the smallest backyard. To give you an idea as to whether a plunge pool will work in your backyard you need to allow for at least a metre from the yard’s boundaries to the edge of the pool’s water. You also need to allow for around a 1.5 metre distance from any dwelling or structures. 

“An underground easement or sewer line may also restrict the pool size but the beauty of a custom-designed concrete pool is that it can cater for all types of restrictions effortlessly,” says Remonda.

Plunge pool
This 4m x 3m fully tiled plunge pool, in Sydney’s Caringbah, features a handrail and was designed for an older couple and their physiotherapy needs.

How much does a plunge pool cost?
Adding a swimming pool to the backyard is a construction process so pricing is site specific but Remonda explains that a designer concrete plunge pool starts from around $35,000 on a standard block. If your backyard has restricted access, sandy or loose soil conditions, a sloping block, retaining walls or you are building over or adjacent to a sewer line, the pool will cost more.

“My suggestion is always to assess the site costs first and then see how much is left in the budget to spend on the finishes such as fully tiled luxe interiors, mineral water, spa seats, mini jets, heating and lighting.”

For more on Blue Haven Pools & Spas

Categories
Design Designers Expert Tips Homewares Interiors Addict Shopping

How to decorate your rental home in a damage-free way

Renting. Let’s face it – it’s got plenty of challenges, but there’s a certain sense of satisfaction in transforming a blank slate into something that feels cosy and ‘you’. And there are plenty of temporary ways you can style your rental property without running the risk of losing your bond and upsetting your landlord.

A serial renter in Sydney, Sophie Cartwright is a lighting designer and founder of the gorgeous new lighting brand Soffle. Today, she shares her top tips for adding personality to your rental space.

Sophie Cartwright

Use indoor plants to add a fresh feel
Adding greenery into your rental space will give it an instant lift. Choose fake florals to jazz up your coffee table, add herb pots to add a homely feel to your kitchen, and an orchid or eucalyptus plants to reinvigorate your bathroom; an easy and inexpensive way to breathe life into your space.

Create a green corner and take it with you when you move house!

Create wow factor with a statement pendant light
The main light in most rentals usually comes from a pendant light. With so many different affordable styles available, the main ceiling light is a real opportunity to stamp your personal design aesthetic on the space.

As well as providing plenty of lovely lumens, a large pendant light can be a focal point in a lounge, drawing the eye as you enter the room and tying everything together. 

Replace window coverings
Roller blinds or stained old curtains can make a rental feel very run-down. Switching these out for drapes or new curtains is a great way to introduce new colours and patterns into your home. Trial different fabrics and textures to liven up any space. 

Draperly
Photo: Draperly

Use table lamps to introduce colour and texture
When starting to design your space, texture and colour are key ways to put your unique style into a home. As well as providing a lovely layer of warm, atmospheric lighting in a room, well-chosen table lamps can also bring a pop of colour and texture whether they’re on or not!

In the room below, the scallop jute Soffle lampshade paired with a textured base creates a striking look which provides drama and contrast against the neutral backdrop of the room.

Soffle lamp shade

Spend more on versatile furniture pieces
The downside of rentals is that you’re often moving from one to the next, and for this you need versatile furniture pieces that work in any space. Sophie’s top tip is to choose pieces that will work hard for you. Think coffee tables that have heaps of storage, ottomans that can double as toy chests, or sofa sets that work well together or great separately as a sofa and occasional chairs. 

west elm coffee table
A storage coffee table, like this one from West Elm, is a great idea for small spaces.

Create a reading nook with a floor lamp
Floor lamps add height and elegance to a room, and they’re also great for dividing spaces up and creating different zones such as a reading nook. You can make these cosy corners with soft materials and a fabric lampshade, like this reading nook by Sophie, featuring Soffle’s extra-large scallop lampshade. 

We love this Soffle Scallop lamp shade

Change up your lampshade for a quick transformation
Lampshades are an easy, effective, fun (and affordable) way of quickly styling up a room. As well as complementing an existing design theme, they can also be a way of introducing bold new colours, patterns, materials and textures. 

During the summer months, choose bright colours and linen textures to freshen up your look and during the cooler months opt for dark greens, blues and heavy textures to anchor your space and add warmth.

The Soffle scallop lamp shade below, in duck egg blue, sets off the hues for the rest of the room decor below. It creates a lovely, relaxing harmonious vibe while still hogging plenty of limelight for itself.

The brainchild and nickname of founder Sophie, Soffle offers a slice of Australian design that’s committed to doing good. Soffle works in partnership with SolarBuddy, and for every lamp purchased, they’ll donate $5 towards a solar light a child can use to light up their home with brightness and comfort. SolarBuddy works with children all around the world who don’t have access to this much-needed essential.

After trawling the Australian market in vain looking for beautiful, modern and affordable light solutions, Sophie took matters into her own hands. Soffle was created for like minded people who love the sense of warmth and welcome a well placed light can create.  

Shop Soffle online

Categories
DIY Expert Tips Interiors Addict

5 tips for first time painters: it’s all in the prep!

The thought of painting walls and ceilings yourself can be a daunting. Nobody wants to make what seem like permanent mistakes whilst painting for everyone to see. That is why British Paints has shared their top tips that all first time painters need to know.

Check for damage on walls

The first important step when starting a new paint project is to check walls for damages and marks, in order to determine exactly what paint and tools are needed. Are there any leaks? Is there pre-existing mould or stains? Are there any cracks? If these aren’t attended to before painting, it will impact the final result. Water stains, oil based stains, ceiling mould, gaps, holes or cracks are all common types of damage. Such issues can be solved with specialist paint products.

*Tip: Use oil-based products for water stains and water-based products for oil-based stains!

Set up with the right tools

Having the right tools is essential for tackling a paint project. Pairing the right paint to the right brush/roller is key to ensuring the finished product is faultless. Brushes are perfect for small areas, trims and edges, while a roller is great for a large painting area, such as a wall or ceiling.

Along with the correct pairing, add the following to the shopping list: frame, ladder, roller tray, roller pole, drop sheets, painter’s tape, filing blades, gap filler, rags, sandpaper, sugar soap.

How to know when to use a primer

Although similar, primers and undercoats both serve quite different functions. Primers act as a foundation for paint to stick to, while undercoats create a flat and level base for topcoats. An easy way to remember when to use a primer is if a surface is new and hasn’t been painted before.

If a surface is painted and in good condition, but in need of a refresh, a regular paint without a primer can be used. Ensure the wall has had a good clean, with sugar soap, then use British Paints Clean & Protect Low Sheen to give the wall a refresh. Clean & Protect is guaranteed to protect from mould, it’s easy to apply, allows for a smooth flow and an even finish.

Choosing the right paint

Paints are designed for different purposes and it’s important to look for a paint specific to the project at hand. When painting a ceiling, for example, the aim is for a lower gloss paint, to create a flat finish. Whereas, if painting exterior surfaces, use a paint that can protect against seasonal demands.

Once the purpose of the paint is decided, it’s time to choose the colour! To assist with the hardest decision of all, Aussies can visit British Paints’ online colour wall assistant tool to work out the best colour for the project and how much paint is needed.

Give it a go!

The best way to get started on a painting project, is to just give it a go! Painting is supposed to be fun, particularly for painting novices setting out to DIY homes. Because of this, British Paints has the Good Job Guarantee which gives painters piece of mind by offering paint replacement for any mishaps or mistakes that happen along the way – so there’s no reason not to give it a go!

Click here for all paints and more help with painting

Categories
Expert Tips Interiors Addict

Top 5 Christmas styling tips to make holiday hosting easy

As great as the festive season is, for many of us Christmas can be a stressful time with hosting duties expected of us. It’s hard enough to keep the house clean and tidy let alone make it scream Christmas spirit for visiting family and friends! Thankfully with Christmas just around the corner, property stylist Justine Wilson has shared her top Christmas styling tips for 2022:

1. The main event – a tree!

There are so many styles and price points that there is something for everyone. From real trees to real touch trees, to sparse looking, or snow-covered, pre-lit or plain, there are so many to choose from. This year I have been a big fan of the ones available at Target which are beautiful and very affordable, or for a more top end fuller tree my other favourites are Alfresco Emporium and Balsam Hill, these trees will last a lifetime.

2. Ornaments

You can’t have a beautiful Christmas tree without lovely decorations or ornaments and as with Christmas tree styles, ornaments are just as varied. A traditional colour palette of gold and silver is timeless and my pick this year. Alternatively, you can go for the minimal Nordic look marked by bead garland and handmade wood ornaments, or a more traditional tree adorned with red and gold tones and lots of ribbon and trimmings. Pick a style that reflects you and your family for the best impact. David Jones always has beautiful ornaments as do Pottery Barn and Adairs.

3. Tablescapes

One of the highlights of any Christmas is the Christmas feast! Whether you gather for a family breakfast, lunch, or dinner, whatever your tradition, having a beautifully styled table will always set the tone. A tablescape can be as simple as a run of garland and a few candle votives, or it can be an elaborate setup that mirrors the style of your tree. My tips for a magical table are in the small details, such as place cards so everyone feels welcome, nice napkins and simple under-plate chargers – charger plates can dress up any crockery set and adds a sense of occasion to the meal.

4. Wreaths

Nothing says welcome like a beautiful Christmas wreath at your front door and like Christmas trees – the style you opt for will depend on your overall decorating theme. It could be a beautiful native wreath, a flocked snowy wreath, a glittery wreath, or simple greenery. Real or faux they make a beautiful statement and add that festive touch to your home’s entry. This season my favourite wreaths can be found at Tara Dennis Store and The Christmas Cart.

5. Pets

Last but not least get your furry friends involved this Christmas. I have three beautiful dogs who love a dress-up and of course new Christmas themed toys and beds that also act as decorations in their spaces.

For more on Vault Interiors

Categories
Design Designers Expert Tips House Tours Interiors Addict Interviews Real Renos RENO ADDICT Styling

How to embrace colour & maximalist style in your home

When interior designer Rachel Collard first perused this 1940s Mount Martha beachside shack, she had every intention of knocking it down and replacing it with a brand new build. But instead, she fell in love with the area (there’s hot springs, wineries, breweries and miles of beach) and decided to perform a cosmetic flip on the abode which she has affectionately titled Miss Morris. With a comfortable work/life balance as the goal, Rachel splits her time between Melbourne and the home which is also available to rent for short stays.

Lounge room
Lounge room

“The home’s maximalist feel came from me wanting to be able to give other people and myself an alternative to the normal cookie-cutter homes in the suburbs. So I decided to play with colour and have fun so when that people come and stay at Miss Morris they feel like they’re on a getaway,” says Rachel who runs her own business, R&Co.Design.Studio.

Bedroom
Bedroom

In describing the maximalist design aesthetic in general, Rachel explains that while most people think it’s just a huge amount of stuff and colour thrown into a room, all the choices are very deliberate.

“It’s about getting the balance of colours and textures right. Everything is very considered, despite how it looks,” says Rachel who recently went on interior designer Simone Haag’s tour of LA where she got to experience some incredible homes in the maximalist vein.

“What struck me was how much fun they have over there with materials and colour. Nothing is safe and it’s about personality and not fitting in with trends,” says Rachel who shares her top maximalist tips with us today.

Kitchen
Bathroom
Bathroom

Layering
The layering of materials and finishes is central to the look. “For example, if you paired striped and spotted fabrics you would need to include a plain or flat surface to offset them. It’s about creating negative and positive spaces as well as breathing space,” says Rachel. It’s important to get the scale of your patterns and textures right too – finding the right balance helps make a home feel considered and not chaotic.

“Grouping is another important part of laying. Put a cluster of objects/vases or plants in one corner then leave the other bare to give the eye a break,” says Rachel.

Rachel in the lounge room

Colour
“Start with cool or warm palette and then commit to that. Colour is a feeling. Does it make you feel happy? Does it make you want cosy up on the couch? For me it’s important to create emotion when you move into a space,” says Rachel.

Rachel always wanted to use colour in this home as she didn’t want white, blank canvas walls. Obsessed with pink at the time, a custom Porter’s Paint blush shade adorns the walls and Porter’s Paints’ Glasshouse transformed the home’s timber floor. A seafoam green, the floor colour references the ocean and was designed to bring the outside in.

Children's room
Children’s room

Go bold or go home
“Don’t worry about what other people think. If this is a style you love, keep going on that journey. Most people can’t create this type of look. It’s about having faith in what you can achieve and sticking to your guns,” says Rachel.

When Rachel embarked on this home, most people thought her design brief wouldn’t work but feedback has been nothing but positive. “It’s big and bold and people remember it.”

Spare room
Second bedroom

Photography: Spacecraft

For more on R&Co.Design.Studio | Too book your stay at Miss Morris

Categories
Expert Tips Interiors Addict

Alana Lowes’ top tips to save money when moving

Did you know that we’re now officially in ‘moving season’? Typically, about two-thirds of all moves in Australia occur between October and March and with rising costs of living there’s expected to be even more people moving houses over this summer. Luckily, if you’re one of the many planning a move soon, moving ambassador Alana Lowes has shared her top tips to save money when doing so.

Alana Loves

1. Time is money

Removalists usually charge between $60 and $90 per half-hour so if there is something you can do to save the removalists’ time, it will also save you money. You can save hundreds by disassembling beds yourself, bundling loose items together to save multiple trips, bringing items to the front of the house or out to the truck, having things clearly labelled so removalists know exactly where everything should go, leaving a clear space for removalists to park, opting for a morning move when removalists are likely to have more energy, and even offering them a cool drink and turning the aircon on so they stay refreshed.

2. Slash bills

Take advantage of a move to implement some simple cost-cutting hacks such as lowering the temperature of your hot water for instant savings on your electricity or gas bill, installing ceiling fans which are more economical than air conditioning, and changing to energy efficient light bulbs (the NSW Government even has an initiative that can help with this).

3. Go secondhand

Sell or donate unwanted goods so nothing unnecessary is going in the removalist truck and you might even make some money to help with the move. You can also opt for secondhand items in your new home – it’s better for the environment and your hip pocket.

4. Be savvy

The removalist industry has moved with the times so it’s easy to get quotes and compare prices on platforms like Muval, which can also help you save hundreds or even thousands on small moves by finding spare space in bigger trucks or tapping into discounted last-minute space in freight travelling interstate.

If you’re looking to save money whilst moving visit Muval

Categories
DIY Expert Tips Interiors Addict Interviews

How to create a mudroom in a hallway or alcove

A mainstay in American homes, we’ve seen the mudroom concept surge in popularity in Australia over the last few years. A practical space at the entrance of your home, used to store all your household belongings, a mudroom is the perfect place to house shoes, hang up your bag, keys, dog leads and more.

These spaces are beginning to become popular DIY projects, as people crave functionality within the home and embark on a spring-cleaning refresh. And you don’t need a dedicated space to create a mudroom – a hallway, nook or alcove will suffice.  Wendy Rennie from Haymes Paint has some great tips to share.

Colour is everything when creating a mudroom
The first and most essential step of creating a DIY mudroom is differentiating the space from the rest of the house through the use of colour.

The great thing about a mudroom is that you can create one out of nothing. Often, these handy little spaces can be used to fill up an entryway or transform a hallway, inviting guests to take a moment to kick off their shoes or hang up their jacket as they enter your home. But to make this space feel like its own, colour is required.

“Since the mudroom is the entrance to the home, it is key to select a colour theme that is consistent with the rest of the house, but still creates impact. You want the impact of the first impression to flow harmoniously throughout the entire home,” says Haymes Paint colour and concept manager Wendy Rennie.

Haymes mudroom

“I recommend using a darker shade to differentiate the mudroom from the rest of the house, especially if you do have an alcove or separate entryway to use. If your mudroom is simply an extension of your hallway then a lighter neutral, complemented by accents of a darker tone that may feature elsewhere in the home is a nice introduction for your guests of what is to come,” says Wendy.

You can choose any colour theme you desire, as long as you steer clear from bright primary colours. Reds, yellows or even blues will be too overwhelming when first entering the house.

Bring it to the next level with furniture
Not everyone has a dedicated room or nook that they can designate for this space, and the good thing is you don’t actually need one. You’d be amazed at what you can create with simply the right colour themes and a few simple pieces of furniture.

A set of hooks you can drill into the wall, a hall table and a cute wooden shoe rack is all you need to create a ‘mudroom vibe’ without requiring a designated room. The best part about these furniture pieces is that they are practical but also aesthetic, adding character and style to a hall or entryway.

Haymes mudroom
This mudroom features the Haymes Paint Artisan Surface Industrial finish on the walls

Accessorise!
Once you have selected the furniture you can inject your personality into the mudroom through the accessories you choose.

To warm up the mudroom, Wendy suggests laying down a rug to add a pop of colour and act as an entryway for your guests. Potted plants by the door and in the corners will also enliven the mudroom with the freshness of greenery, acting as the perfect transition from the outdoors to the indoors.

Photography: Martina Gemmola

For more on Haymes Paint

Categories
Expert Tips Interiors Addict

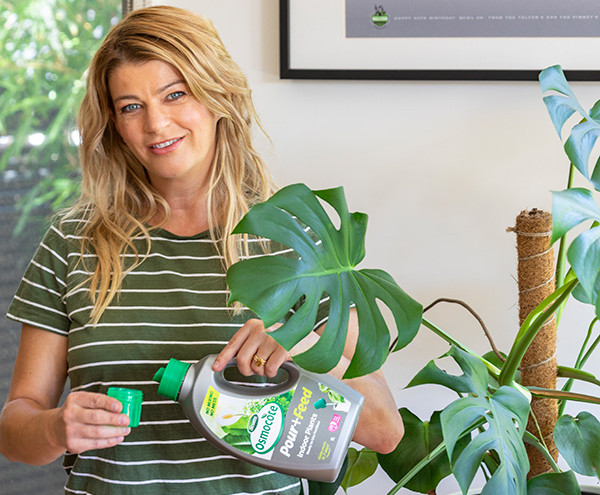
5 easy ways to look after your plant babies from Melissa King

If you’re anything like me, your indoor plants don’t last too long. Whether you are a first-time plant owner like me or a well-seasoned gardener these simple tips and tricks from gardening expert and Scotts Osmocote ambassador Melissa King can help you be a better plant parent (without having to spend endless hours refining that black thumb). 

Tip 1: Don’t drown your plants with love

Over watering is the biggest killer of indoor plants. Wilting leaves can be a sign of too much or too little water (among other things). So if your house plants are sulking, don’t always assume that they are thirsty. Poke your finger into the soil first to see if it’s dry down to your second knuckle before getting out the watering can.

Tip 2: Some extra TLC never hurt

Give your house plants a regular wipe down with a moist cloth to prevent an accumulation of dust on the leaves. To give them a thorough clean, pop them in the shower every month or so to remove any build up, helping make them look shiny and healthy. You could also put them outside in the rain or sprinkle them with the hose before bringing them inside again.

Tip 3: Lighting is key

Some houseplants grow well in low light, others need it a bit brighter to flourish, so position them around your home according to their required light levels and keep them away from heaters and blasts of cold and warm air. 

Here’s a good rule to live by; If it’s bright enough to be able to read a book in a room with the lights off, then there’s enough light for your indoor plants to thrive. 

Tip 4: Plants like dinner too

They key to thriving plant babies? Food! Pick up Scotts Osmocote pour + feed. You don’t have to mess around diluting it in a watering can, simply pour a capful into the base of your plant every fortnight or when your plants look like they need a boost.

Tip 5: When was the last time you changed your potting mix?

If your plant babies are looking a bit tired or practically jumping out of their pots then it might be time to repot them. I recommend trying Scotts Osmocote potting mix for indoor plants, which is tailor-made to bring out the best in your green beauties. It doesn’t contain compost or pine bark, which are known to shelter pesky fungus gnats. Instead, it’s based on an expert recipe of Scotts Coir, Sphagnum Peat and Perlite, which provides the ideal foundation to keep your indoor plant babies looking fresh, green and lively.

For more on Scotts Osmocote

Categories
Interiors Addict Kitchens RENO ADDICT The Block

A closer look at The Block 2022 kitchen trends

During every season of The Block, Kitchen Week is always one of the most exciting parts of the show. A lot rides on creating a great kitchen space. Along with the living room, the kitchen is really the centre of the home – a hub where we spend time entertaining, with family and cooking.

To help Aussies with their next kitchen reno, no matter what their style is, design expert and group design manager at Winnings Appliances Kate McGlone, speaks about the overall design of each house’s kitchen, plus her top three tips to get the look.

Ryan and Rachael Kitchen

House 1: Tom and Sarah Jane (modern industrial farmhouse)

“Tom and Sarah Jane’s kitchen showcases a traditional farmhouse look with an industrial influence. They have achieved a timeless look with the shaker style doors, an admired design feature in farmhouse kitchens. Their introduction of industrial copper pendant lights and a modern benchtop profile complement the shaker doors, combining traditional and contemporary design elements,” explains Kate.

“They have added interest through layered styling which is a low cost, low commitment and high impact way to add personality to a kitchen. They’ve worked to create a liveable kitchen that can change from a family friendly kitchen to an entertainer’s haven really effortlessly.”

Tom and Sarah Jane’s kitchen

Get the look

  1. Copper accents add an industrial, yet glamorous aesthetic that subtly elevate the farmhouse trend: consider tieing in accents like Tom and Sarah Jane have with pendant lights and larger appliances like their Fhiaba copper fridge and knobs on their deep grey Ilve Majestic double oven
  2. A farmhouse style sink adds a nod to the country that will fit in many homes and has the added benefits of space for cooking and cleaning. Abey’s ceramic single bowl sink lends itself perfectly to the farmhouse trend but will also fit in with a number of styles.
  3. Create a liveable kitchen that is perfect for a big family or hosting multiple guests by opting for ultra-functional pieces, such as a Zip tap, providing boiled, chilled and sparkling water on demand

House 2: Ryan and Rachel (contemporary)

“Rachel and Ryan’s kitchen features a contemporary, refined, yet timeless look, which has been achieved through a clean material pallete. The introduction of shadow lines throughout the cabinetry adds interest. The brushed stainless accent door hardware is the hero of this kitchen, contrasting elegantly against their matte joinery, adding a subtle yet impactful stainless accent to this clean kitchen design.”

Ryan and Rachel’s kitchen

Get the look

  1. For a contemporary space with Scandinavian nods, use blonde or warm wood accents in benches, shelving and beams; keep cabinetry light and bright; and pair with timeless yet impactful black and graphite appliances like in a statement Ilve oven and Vintec wine fridge
  2. Opt for matte tap and sinkware like the Zip Hydrotap and Gessi pull out sink mixer in brushed nickel for a sophisticated yet contemporary feel
  3. Add a bold fridge, such as the Fhiaba 561L X-Pro Fridge Freezer for a contemporary, timeless look

House 3: Sharon and Ankur (modern)

“Although there aren’t too many nods to country, Sharon and Ankur’s modern kitchen has a considered look as they share subtle ties between their door hardware and their appliances. Their kitchen consists of Smeg’s Dolce Stil Novo range, which features minimalist styling in black eclipse glass and refined copper, creating a timeless, elegant aesthetic. Copper was then brought into the door hardware and the pendants creating one cohesive look. Their hero island bench stands out in the middle making it a perfect entertainer’s kitchen.”

Sharon and Ankur’s kitchen

Get the look

  1. Tie in copper and black for a modern aesthetic with a slightly industrial edge. Copper joinery on cabinets are harmonious with a sink ‘moment’ like Oliveri’s single bowl sink in copper. Offset shine with dark, modern and minimalist black tapware like from Zip and a Dolce Stil Novo cooktop in black
  2. If you fancy yourself as somewhat of a sommelier like Sharon and Ankur’s imagined buyers, consider a forward-thinking sommelier drawer to house all your wine goods
  3. Create functionality and added timelessness by opting for classic black appliances and ensure consistency in your appliances throughout the kitchen and butler’s pantry. Like Sharon and Ankur, think of harmonious appliances from one range like they have with black Dolce Stil Novo appliances

House 4: Dylan and Jenny (modern farmhouse)

“Dylan and Jenny’s kitchen showcases a true farmhouse aesthetic with a neutral colour palette with elements of popular sage green. They have used fluted glass on their overhead cabinets with a brass mesh interface on the island bench, creating beautiful texture through their materiality. Their attention to detail and careful material selection has elevated the overall finish, creating an opulent modern farmhouse aesthetic that would appeal to many buyers”.

Dylan and Jenny’s kitchen

Get the look

  1. Sage green is an ongoing trend of people’s hearts. If you love Dylan and Jenny’s sage green kitchen, consider warming up grey-ish, muted sage with warm brushed gold accents in your cabinetry and sink and tapware, like Dylan and Jenny have done with the Zip Hydrotap.
  2. For a home cook or a lover of entertaining, consider doubling the size of your oven cooking space with a dual oven like Dylan and Jenny’s classic black Smeg Portofino dual fuel oven and stove. Christmas lunches and dinner parties will become a breeze.
  3. For easy entertaining, opt for a wine cabinet like this Vintec for a sleek way to store your favourite wines – an impressive way to showcase and serve wine at any party

House 5: Oz and Omar (integrated, industrial chic)

“Oz and Omar’s kitchen is an entertainer’s dream with a minimalist yet bold and timeless look. They have taken inspiration from metropolitan Melbourne and have created an industrial yet sophisticated space. Their integrated appliances allow for a seamless finish and were fundamental to achieving this sleek showpiece kitchen, fitting in perfectly with modern Australian lives. While moody and dark, their kitchen has clear nods to European design trends, which are bold, black, industrial and highly integrated.”

Oz and Omar’s kitchen

Get the look

  1. Add clean lines for an industrial aesthetic by utilising integrated appliances that feel hidden, yet are very easily accessible. Oz and Omar did this with the likes of a V-ZUG integrated dishwasher, touch displays on ovens and matching V-ZUG appliances
  2. For the perfect entertainer’s dream, The Galley’s Ideal Workstation sink adds a commercial-level feel with space and functionality that makes prep work and cleaning a joy
  3. If you’re a fan of Oz and Omar’s moody, industrial kitchen, ensure you have ample natural light to offset the dark aesthetic and soften with textured stools and wooden features

For more on Winnings Appliances

Categories
Architecture Before & Afters Design Designers Expert Tips House Tours Interiors Addict Interviews Real Renos RENO ADDICT

An architect’s Melbourne apartment reno & expert advice

Nestled inside a mid-century Melbourne apartment block, this home was given a sensitive restoration recently with architect Bonnie Mills at the helm. Home to Bonnie, her partner Ashley Raggett, toddler Sonny Raggett and the family dog Teddy, the home combines natural stone, terrazzo and walnut timber in a nod to the apartment’s heritage.

“The whole aesthetic is a link back to the mid-century origins of the apartment – certainly the walnut timber, terrazzo and the square tiles in the kitchen,” says Bonnie, who has furnished the home with a mix of modern and vintage furniture finds as well as mid-century inspired lighting.

BEFORE Lounge and dining
AFTER Lounge, dining and kitchen

Completed over a two-year period, (while Bonnie was pregnant and nursing a newborn no less!) the process started in the bathroom where there was originally a freestanding washing machine sitting beside the vanity. Conveniently, Bonnie’s partner Ashley is a plumber (The Peoples’ Plumber) and thus was able to undertake this work himself. “Ashley did all the plumbing work and we now have a European laundry inside the bathroom space,” says Bonnie of the bathroom that features square tiles from Artedomus as well as terrazzo sourced from Signorino. A highlight of the home, a skylight completes the sanctuary-like space.

BEFORE bathroom and laundry
Bathroom
AFTER bathroom and laundry

“We were priced into an apartment and don’t have a garden, so we wanted to bring the outside in in any way possible and to make it feel as house-like as possible. The skylight creates a space for solitary bliss. I like to look up at the stars and have that quiet space in the home,” says Bonnie. 

Skylight
Bathroom skylight

The kitchen renovation began after the bathroom was finished, with the removal of a wall requiring engineering and building permits. “It was worth it though as the old kitchen was completely cut off and there was a lot of disconnect between the spaces,” says Bonnie. Zellige-style tiles from Tiento Tiles as well as natural stone from Signorino are paired with walnut timber accents in the kitchen. “The stone is Venato Forte and it reminds me of the dappled light and reflection on the wall that we get through the kitchen window,” says Bonnie.

BEFORE kitchen
Kitchen
AFTER kitchen

Nearby, the dining room features corner bench seating which is full to the brim with Sonny’s toys. “The bench seating was one of the best buys as it helps to conceal all of his things,” says Bonnie. It’s also a lovely, light-filled spot to enjoy breakfast in the mornings.

BEFORE dining
Dining room
AFTER The dining room bench seat provides much needed storage in the apartment
BEFORE bedroom
Bedroom
AFTER bedroom. Bonnie sourced the mid-century bed from Facebook Marketplace.

Bonnie’s top tips for renovating

  • If you can help it, don’t live in the home while renovating. “In hindsight I should have waited for everything to be done before moving in. There are efficiencies in doing it all at once rather than calling trades back several times,” says Bonnie.
  • Find good quality trades. “When we went cheap, we paid twice as you end up getting people back to fix things if they aren’t done properly the first time,” says Bonnie.
  • Spend as much time as possible in the planning phase so that you have fewer decisions to make on site. 
  • Try to renovate to a building’s context or architecture rather than to what you have seen online. “Design to the context. This creates something timeless with purpose rather than just following trends,” says Bonnie who warns against getting stuck in a Pinterest loop during the design phase.
  • When it comes to materials, think about sustainability and the lifespan of a product. “Products like natural stone and terrazzo are often overlooked due to cost. But a lot of the time they are a more efficient choice in the long run. For example, if you chip or burn natural stone you can sand it back and reseal it, so it’s got a much longer life expectancy,” says Bonnie.
Sonny's room
AFTER Sonny’s room

Photography: Elise Scott: Styling: Studio George

For more on Bonnie Mills

Categories
Expert Tips Interiors Addict Interviews

Latest Haymes Paint palette an antidote to the pandemic

The latest Haymes Paint colour palette has dropped and, as with many things lately, it’s inspired by the pandemic. But rather than dwelling on the negative aspects it is rooted in a desire to leave uncertainty behind and move towards a new, more optimistic, chapter. Designed to reflect a fresh approach to life, and renewed energy, the latest colour forecast is aptly titled Energy Shifts.

“Everyone will have a personal preference for the energy in each palette. There is never a one size fits all approach to colour and our life experiences actually really impacts our colour preferences. So understanding why you are gravitating toward a specific colour will help when selecting colour for your home because it will give you insight into how that colour is going to make you feel and the energy it will bring to your home,” says Haymes Paint colour and concept manager, Wendy Rennie. The new collection is comprised of three palettes – Live Wire, Light Play and Carefully Nurtured.

Live Wire
“This palette has a lively and bright energy to it. The colours are clear and vibrant, evoking a sense of joy and playfulness. The key to making these colours work in the home environment is to pair them with a crisp white to create a bright and cheerful contrast without overwhelming the senses with too much colour,” says Wendy of the Live Wire palette.

This palette also draws inspiration from the 60’s and 70’s making the colours the perfect choice to complement vintage or retro interior choices such as a feature vintage-inspired tile or vinyl flooring. 

Light Play
The Light Play palette features deeply intense colours paired with lighter tones – a nod to light and shade and how they influence our energy. “Light Play is an exploration of how colour and texture can combine to create a considered atmosphere within the home space. The contrasts within this palette also show the way energy can shift throughout the home by the colour and texture choices within a room,” says Wendy.

Carefully Nurtured
Carefully Nurtured is a harmonious colour palette that offers balance in tone, value and hue. “Each colour works with the other to create a perfect colour range that really feels calming for the mind. The colours chosen for this palette have a connection to the outside world, with soft greens and warm neutrals dominating this scheme,” says Wendy. Peach skin tones and pops of yellow add vibrancy the otherwise more subdued scheme.

Photography: Martina Gemmola

For more

Categories
Appliances Expert Tips Interiors Addict Smart Home

5 easy tips to keep your air conditioning costs down

The winter chill and rising energy costs are hitting Australians simultaneously. While homeowners research alternative energy providers to minimise their spending this season, Kyle Rafter of Fujitsu General, offers some advice for those with an existing air conditioning system to help minimise energy consumption and maximise comfort.

Keep the air conditioning unit clean

Dust and debris can build up on both the indoor and outdoor units, restricting airflow. This can cause the system to work harder, leading to higher energy usage and increased running costs. Keep dust away by wiping down the outdoor unit and cleaning indoor unit filters regularly; this will ensure the system is ready when needed.

Have the system serviced by a licensed technician

Fujitsu General recommends a full service every one to two years depending on use. Keeping your unit maintained will ensure it is running at peak performance.

Use timers

Program the air conditioner to turn on automatically during off-peak times to heat the room before waking and before returning home from work or school. This avoids operation at full power during peak times and lowers demand on the unit.

Only heat the rooms being used: keep doors and windows closed and, for homes with a ducted system, use zone control features to heat specific areas.

Adopt Wi-Fi technology for remote control

Smart technology makes it easy to control an air conditioner remotely using a smartphone or tablet. If you have left home and forgotten to turn your air conditioner off, the Fujitsu General anywAiR technology range currently includes a Wi-Fi adaptor compatible with Fujitsu Lifestyle range indoor units; and the anywAiR technology ducted controller for ducted systems.

(Alternatively there are third party gadgets you can use to make any air con a smart one).

Set the right temperature

Don’t be tempted to increase the indoor temperature to heat a space faster as this can put unnecessary pressure on the system and contribute to an increase in energy use. In winter, setting the temperature between 19°C to 21°C will assist in minimising energy consumption.

For more on Fujitsu General’s latest air conditioners.

Categories
Expert Tips Interiors Addict Styling

Five simple tips to style your home for the winter

Sydney-based property stylist Justine Wilson from Vault Interiors shares her 2022 tips to create a cocooning, welcoming environment as we shift our time to indoor living.

“It’s going to be a wet and cold winter season this year, if the start of the year and El Nino is anything to go by, so it’s the perfect time to cosy up your home. No matter what your budget, there are a few simple ways you can add warmth to every space in the home.”

Layer up

You don’t have to swap out all your summer/autumn items when the seasons change, but to prepare for the drop in temps, consider layering lovely thick textured throws, blankets, pillows, and rugs for that extra warmth. Materials such as faux fur, wool, velvet are great for this time of year. Don’t overlook swapping out textiles such as curtains or bedding to thicker fabrics and textures.

Dried or faux florals

Dried florals are a great way to beautify your space in the cooler months. They also last a long time and can add that pop reminiscent of the summer months. It’s always nice to have a floral arrangement either on your coffee table, console, or dining table. There are also wonderful faux floral twigs, branches, and greenery available, to give that evergreen look.

Air refresh

In winter your environment can tend to get stuffy, as we leave windows shut and doors closed, so consider beautiful scents to enrich your space. For winter I love the muskier notes, but you can opt for any scent that you love. Scented candles are a great way to  change the feel of a room, also diffusers or even wax melts will do the trick.

Outdoor spaces

Think about adding a fire pit so you can still enjoy the outdoors and those cool nights under the stars or add an inexpensive pergola or cover structure. A cantilever umbrella is also a great option so you can enjoy sitting outdoors even if the weather shifts. It’s also really nice to add some fairy lights or lanterns, so you get that pretty ambient glow even if you just catch a glimpse through your window.

Consider tones

When changing your décor for the seasons, it’s nice to take inspiration from the  surrounding environment, in winter warm earth tones such as mustards, greens, rich blues, rust tones and deep reds will echo the changing leaves. This winter colours such as blush, deep pinks and even purples are on trend. Warmer tones such as browns, beiges and caramels will also be popular with homeware designers. Introduce a new colour just by simply swapping out some accessories, cushions or throws.

More from Vault Interiors

Categories
DIY Expert Tips Furniture Interiors Addict

A DIY abstract cabinet hack from Bunnings

The latest research from Bunnings has revealed that more and more Aussies are turning to upcycling to help their dollar stretch further and to create something that nobody else owns. According to Bunnings, 59% of Aussies have turned to upcycling and in doing so have saved themselves an average of $576 by breathing new life into old furniture. 

We’ve long celebrated the virtues of upcycling and today’s cabinet hack, by Jaharn Quinn, is another fabulous DIY project that you could tackle in a weekend. Combining a storage cube unit with MDF, glue and paint, here is Jaharn’s step by step guide to help you create a one-of-a-kind sideboard.

Jaharn Quinn’s super fun Bunnings cabinet hack

Materials

I used a drill with different sized multi-purpose drill bits, hammer, jigsaw, clamps, screw driver, rollers, paint tray, paint brushes and sander for this project.

How-to


1. Begin by assembling the cube storage – this should take about 10 to 15 minutes. If you click on the product link above you’ll find assembly instructions. Next, measure the width and height of the cabinet, and divide this into two to get the measurements for the two cabinet doors.

The assembled Bunnings storage cube

2. Head to Bunnings, pick up your melamine white MDF panel and premium plywood pine, and get the cabinet doors and the melamine MDF cut to size.

3. When you get home, attach the melamine MDF (white side facing in) to the back of the storage cube using the staple gun. Paint the cabinet doors and when they are dry, lift the storage cube onto your work surface and place it onto its side.

Attaching the MDF
The storage cube with MDF backing in place

4. Attach the hinges to the storage cube and cabinet doors using these instructions from Bunnings. The only difference is that the cabinet doors in this video already have a hole cut out in them, so you will need to do this yourself. Use a pencil to mark where you need to cut a hole. Use a drill to make lots of small holes and then use a hammer to bang the plywood out. If this is a little confusing, head over to my Instagram to see how I did it. Use a screwdriver to lift or drop the doors down, or to pull them left or right. The Kaboodle hinges are incredible, and you will now have a fully fledged cabinet!

Attaching the hinges

5. Attach the furniture legs onto the underside of your new cabinet using a drill. If you find the legs are a little loose, use Selley’s Liquid Nails and let it dry overnight.

The legs

6. Using a pen, draw the outline of a range of various abstract shapes and cut them out using a jigsaw. Smooth the edges down using a sander. Position the abstract shapes onto the cabinet and glue them down using Selley’s Liquid Nails. The shapes may slip on the sides of the cabinet so use painter’s tape to hold them into place, and let the glue dry overnight. When the glue has dried, paint the furniture legs before standing the cabinet upright.

7. Now it’s time to paint the cabinet doors! You will need to apply several coats to fully hide the MDF. While the paint is drying, apply one coat of Zinsser B-I-N Primer Sealer to the sides and top of the cabinet. Once dried (and it dries quickly), apply a couple of coats of white paint and set aside to dry. And your abstract cabinet is finished!

DIY Bunnings hack
Voila!

For more

Categories
Appliances Design Expert Tips Interiors Addict Interviews Kitchens

The latest kitchen trends from EuroCucina in Milan

The only major kitchen trade show in Europe (and arguably the most important global kitchen industry event), EuroCucina takes place in Milan every two years (Covid aside!) and is a great place to seek out the latest trends. With a front row seat, Winning Appliances’ group design manager Kate McGlone was at this year’s event last month, and she’s identified several key trends that will likely trickle down into Aussie kitchens this year.

“The main theme to emerge from EuroCucina this year was the notion of connection. Living in a post-COVID world many brands were focused on creating spaces that could be used for all occasions, celebrations and day-to-day life. With sleek, simple and warm tones incorporated with appliances and technology to make life easier, kitchens are now becoming a centralised part of homes and lives,” says Kate.

Ilve's EuroCucina display
Ilve’s EuroCucina display

Integration and minimalism redefining the use of the kitchen 
“It was evident that people’s concept of the kitchen has changed post-COVID. It is no longer just a functional space to cook, it is now used as a space to interact and host, a space where kids do homework and adults work,” says Kate.

Minimalist kitchen design prevails but it now goes beyond just the integration of appliances with people looking to hide as much away as possible. The use of pocket doors was a recurring theme given how they allow appliances, products and miscellaneous items to be hidden and out of sight. “Stemming from European influence, pocket doors are a great way to add more space,” Kate adds.

Gaggenau’s minimalist kitchen display was a EuroCucina standout

Bringing nature into the kitchen 
It seems the biophilic trend has permeated kitchen design with many brands showcasing natural stone at EuroCucina, moving away from porcelain or tiles. Recyclable and reusable, stone benchtops have lasting longevity and are a fabulous, sustainable option. “These natural pieces are one of a kind and are celebrated as a work of art from nature,” says Kate who noted that natural elements were brought into the kitchen through the use of plants and greenery too.

V-ZUG’s display signals its focus on enhanced living through bringing in natural elements

The return of timber
While the black kitchen trend signalled a move away from the ubiquitous all-white option, timber is back in a big way – rich maple and walnut were featured in many of the kitchens showcased at EuroCucina. “Designers’ desire to move towards deeper timber tones that evoke a sense of warmth was recognisable. Curved battening was on-trend, adding further interest and texture to the accents of maple and walnut within kitchen joinery.”

For more

Categories
DIY Expert Tips Interiors Addict

Three quick DIY paint projects for the winter

A winter weekend is the ideal opportunity to take on a DIY project, allowing you to stay  cosy at home and update your space. To help you pick the perfect project, British Paints has shared their top three options that can be completed in just 48 hours.

1. Give an old piece of furniture a new life

Transforming an old piece of furniture is a great way to save money and help the environment. While it might seem like a challenging task, with the right paint and equipment, it can be done in just a few days.

To get started, you’ll need to remove any hardware and give your piece a good sand. Next wipe down the surface with a  damp cloth then apply an undercoat.

Once your undercoat is dry, give your piece of furniture another light sand before adding your topcoat.

You’ll need to add two coats but wait until the first is fully dry before adding the second. Now, all that’s left to do is reattach your hardware and your freshly painted piece is ready to enjoy!  

2. Make a great first impression with a fresh front door  

A coat of paint on your front door can instantly transform the look and feel of your home. It’s an easy project to complete in a day, so the perfect one to try this weekend!

To get started, you’ll need to take the door off its hinge and lay it flat across a couple of sawhorses, chairs or even a table. Next it is time to prep! Start by removing any hardware, then sanding and wiping down with a damp cloth.

If you’re painting over a dark colour, paint that is both an undercoat and topcoat in one is handy. Only two coats are needed for full coverage, and you can paint over a water or oil based paint, so you don’t need to worry if you don’t know what type of paint was previously on your door.

Once you’ve finished painting, it’s time to re-attach your door and watch as your guests are wowed as they enter your home!

3. Add some style to your space with a feature wall  

Feature walls add impact to any space. They’re quick and easy to complete and a great way to start building up confidence in your painting skills.  

Remember, you don’t need to paint the entire wall to create a stylish statement. Consider quirky and unique options like  painting half the wall, a painted bedhead or arch.

Before you start painting move all your furniture away from the wall, lay a drop sheet to protect your flooring and mask up any skirting boards or electrical switches.

Next, clean your surface with sugar soap. Then it’s time to start painting! For the best results, you’ll need to use a paint roller to paint your feature wall. Make sure your roller has been cleaned well before you start, to ensure a smooth paint finish.

Once you’re ready to roll, place your feet towards the wall and grip the roller with firm but relaxed hands. You’ll need to  start at one side of the wall and work towards the other, never starting in the middle, as this can result in an uneven finish.

Finally, as you let your roller work its magic, remember to always paint in a W pattern for best results.

More from British Paints

Categories
Expert Tips Interiors Addict Outdoor & Exteriors

Expert tips to build your own family-friendly fire pit

Backyard fire pits are fashionable, affordable and practical, and are becoming increasingly popular as we look to utilise the outdoor space in winter with functional landscaping features. Essentially, a fire pit is the new water feature; it’s a great addition to the backyard, transforming the outdoor area into a cosy and inviting space.

“The ambience a fire pit brings is worth the investment alone, providing an enjoyable feature for the garden and a natural gathering spot for socialising and entertaining. It’s a great focal point, I like to describe it as nature’s TV and people are naturally drawn to the campfire-like atmosphere,” explains landscape expert and Adbri Masonry brand ambassador, Jason Hodges.

Fire pits come in many shapes and sizes and they are not all created equal. If you’re looking to entertain and have children or pets, the best option is a “family-friendly” fire pit made with concrete barrier blocks. These fire pits look great and provide extra safety by creating an attractive barrier around the fire, keeping flames out of reach of children and pets.

Jason offers a simple step-by-step DIY guide to building your very own family-friendly fire pit:

Choose the right spot

It’s important to choose a spot that is far enough away from plants, fences, trees or anything flammable. Consider the wind and the direction it will blow smoke from the fire. You should also be able to walk around the fire with ease.

Start digging

Dig a circular hole for the base of the fire – a three-foot diameter creates enough space for a good-sized fire while keeping everyone close enough to be able to chat.

Prepare the base

Spread sand throughout the trench and level. You can use a mortar mix of 6 parts sand and 1 part dry cement for a stable base.

Start building

Use concrete blocks to start constructing the wall around the pit. Choose a block that enables circular walls or has specialty corner units to save you cutting the units. Jason’s first choice is Adbri Masonry’s Miniwall blocks. They are easy to stack in a circle and give a great finish. For square and rectangular pits, use Versawall. If you are on a tight budget, using garden wall blocks can save you money as they double as a seating area, so no extra furniture is required.

Build your fire

Construct a tepee by stacking wood and kindling in the centre of the pit. Light the fire and enjoy all year around!

Watch this video with Jason for more guidance:

More from Adbri Masonry

Categories
Expert Tips Interiors Addict Styling

Look beyond styling tricks when viewing a home to buy

From cleaning until every surface sparkles to lighting, decluttering and even creating optical illusions, making your property visually appealing is one of the most important things you can do as a seller because first impressions are everything. So, as a buyer, your first impression of a property is the last thing you should rely on!  

It’s easy to laugh about having a batch of freshly baked goods at an open home, but sellers go to extraordinary lengths to entice buyers. Good styling has become a very profitable industry for experts (and is a worthy investment for sellers in our opinion). They can strike the perfect balance between making a room look spacious yet cosy, unique enough to be memorable yet easy for any buyer to imagine living there. 

Michelle May, principal of Michelle May Buyers Agents and host of Buy Your Side is someone who’s gone to thousands of open homes and is privy to all the tricks vendors use to make a great first impression, she still feels the emotional pull created by impeccable styling. 

But all that styling disappears the moment you get the keys, so it’s essential to look beyond the sumptuous soft furnishings at any open home. Michelle has shared her tips on some of the most common tricks to look out for.

Removing the curtains

This makes a room look brighter, bigger and a lot cleaner but is often an impractical way to live, especially in bedrooms where light is an important factor.

Turning the lights on

Ensuring every switch is flicked on is an easy way to hide a lack of natural light, so don’t be afraid to switch the lights off to get a more accurate representation of lighting.

Swapping out furniture for smaller pieces

A bedroom looks bigger with a double bed over a king; the same goes for couches in living areas. You need to think practically about the size of your existing furniture in relation to the space and whether you’d be happy to downsize to a double bed if required.

Playing music

A curated playlist is an easy way to create a homely vibe in a property and also a great way to distract from unwanted noises such as arguing neighbours, traffic, barking dogs and screeching pipes.

Sending belongings to storage

The price of a storage unit for a few weeks is insignificant compared to many thousands on a sale price, which is what good styling can bring to a sale. Many sellers pack up their non-essentials while their home is on the market, so ask yourself, ‘what’s missing here?’ and ‘what do I need to fit in this space?’

Once you’ve looked past all of the creative ways sellers make their home more appealing, it’s time to get practical about the space and one major factor is often forgotten in the excitement of open homes: storage.

From appliances like air fryers and rice cookers in the kitchen to the ironing board, vacuum cleaner, tools, lawnmower, excess linen, suitcases, and even shoes. No matter how minimally you live, you’ll undoubtedly always have a few bulky items that need a home. Keep a checklist of things you own on your phone as you wander around open homes to avoid any rude shocks come move-in day.

More on Michelle May