Categories
Design Designers DIY Expert Tips

Architectural mouldings: what they are & how to start

You may have heard a lot of buzz about wall panels and wainscoting lately, seen it used by some of your favourite renovators in the media or on The Block. Like me, you may love the look but didn’t actually know that architectural mouldings is the term for all these fancy add-ons for your walls, skirting, door and window frames! Well, now you do!
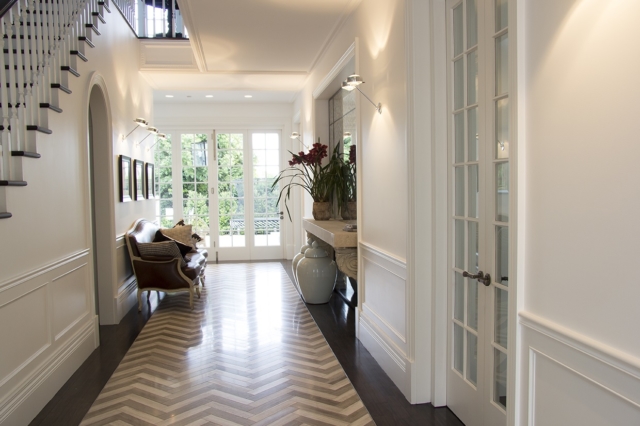
“Mouldings, including skirting boards, architraves and wall panelling are those details that seem so small, but make one of the biggest impacts in a room,” says Candace Brigden from Intrim, the leaders in timber architectural mouldings. “They frame all of your hard work, they create depth and character, and most of all elevate the luxe in an interior.”
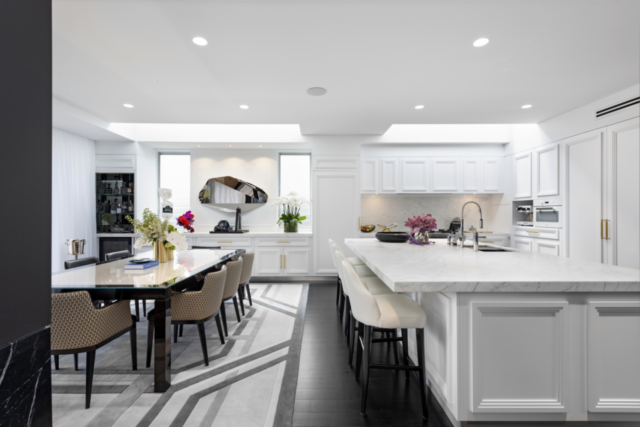
Roxy Jacenko used Intrim mouldings in her kitchen

But the options are many and varied which could leave you feeling a little confused as to which and how much you should use in your home, and whether they’ll suit it.

Luckily for you, Intrim have put together a free handy guide to help! So if you don’t know where to start, it’s time to download it.
“With so many decisions to make, it can be overwhelming knowing where to start. This is why we recommend to start with your finishings!” says Candace.

“This guide is as beautiful as it is informative, and as it has been curated exclusively for Three Birds Renovations’ Reno School, it is filled with beautiful images from their previous projects.”
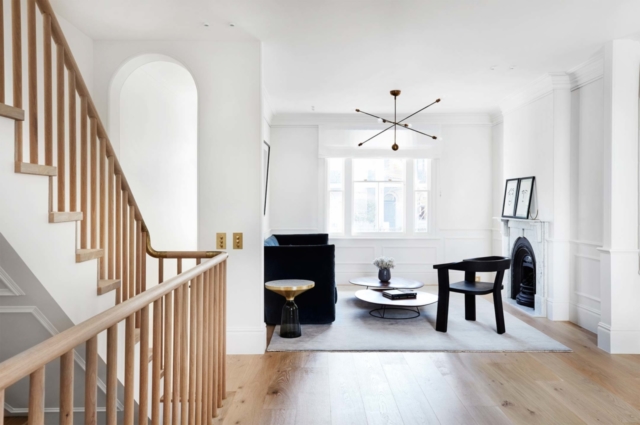
Intrim’s guide gives you information, tips and tricks on:

  1. Understanding mouldings types and how to use them in your home.
  2. How to choose the right style of mouldings for your home, explaining the key features of each interior style.
  3. Guiding you through choosing the right size of mouldings for your room, as well as what sizes of different mouldings compliment the other. This section answers their most common questions around “what height skirting boards to choose?” and “what size architrave to match my skirting with?”
  4. How to measure your room for skirting boards, door architraves and window architraves so you can plan the quantity you need for your order.
  5. Explaining the different types of wainscoting accompanied by stunning project images to show the look and impact each can give your interior. They also provide easy to follow wall-measuring instructions to create the layout for basic wainscoting.
  6. What type of timber to use for your mouldings. Discussing the benefits and disadvantages of MDF and pine timbers, their two most popular timber choices.
  7. Whether you should purchase primed or raw mouldings, the benefits of priming and the long term time and cost savings it can provide to you.
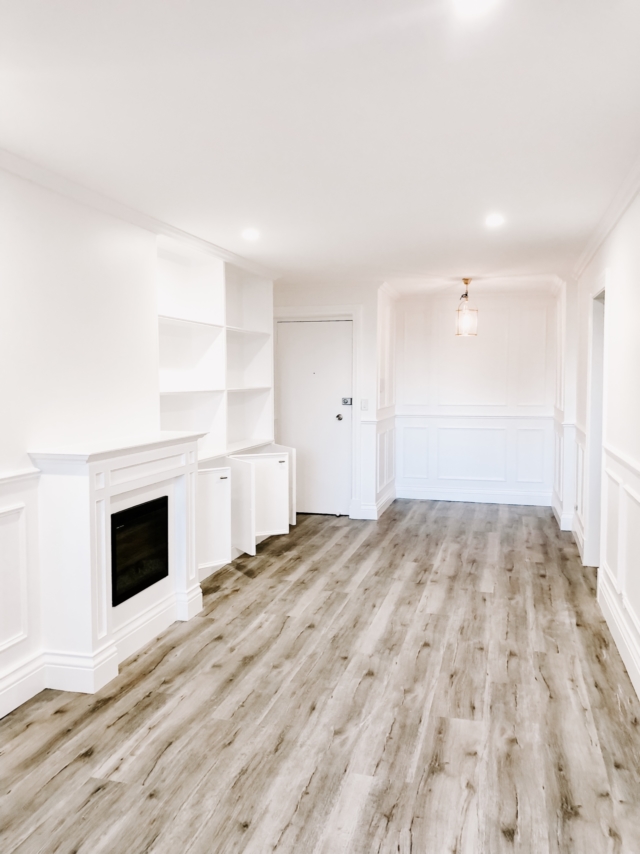
This small 70s apartment was transformed with Intrim mouldings

Intrim, an Australian owned and run business, are conscious of and actively pursue reducing their environmental footprint, supporting farming communities through their FSC certification.

Even if you haven’t got a lot to start from, the Intrim team can lead you to previous projects and social pages where you are sure to find a look you love to emulate in your own home. Contact them via their website any time.

DOWNLOAD the guide. 

Categories
Design Designers Expert Tips

Why wall panelling is so popular and worth it

Sponsored by Intrim

The rise in popularity of features like wainscoting, now accounts for almost half of joiner Jason Alexander’s work at Living Walls Joinery & Decor.

And while he admits he doesn’t keep up with what’s on trend or watch shows like The Block, he says wall panelling will always add a classic and expensive look to any home. Having done his apprenticeship in the UK, working on countless heritage homes, Jason knows what a difference the sum of all the little details make. And with features like wainscoting, this can now apply to newer homes too.

“People are looking for something that isn’t going to date. The sort of looks houses had pre-war were very timeless. A lot of the stuff since then, like the seventies, has been very faddy, even though some people like that too. So that classic look tends to work in most homes today.”

The half-height wainscoting with a chair rail is probably what Jason and his team are asked for the most. “It gives you a flavour of it without it being too in your face,” he says. And in terms of bang for buck, there’s nothing like it for impacting the look and feel, or value of your house, for a relatively low price. “To get the same impact you’d need to do something like re-do the kitchen or bathroom and we all know how expensive that can be.”

Jason says many choose to install wall panelling in the common areas only, and this is enough to really improve the look and character of their home: “It completely changes.”

And while there are MDF and timber options, you basically get what you pay for, and you’ll use the material suited to the application. “You wouldn’t go into a multi-million dollar house in Mosman, for example, and use MDF,” he says.

In terms of having a go at DIY wainscoting yourself, Jason says the most important thing is to have quality tools. He and his team are very precise, using laser levels for every job. “We’ve been doing this so long that we know lots of little tricks to get the best outcome. Like most things, if you do it well, it will add value, and if you don’t, it can look terrible.”

While panelling accounts for around half of Living Walls’ jobs, they’re also seeing a rise in popularity of things like fire surrounds for modern gas fireplaces, coffered ceilings and custom wine racks. In general, he thinks the value of getting things made custom, is now appreciated more.

“People are realising that you can’t just buy off the shelf, put it in your house and it fits and works perfectly for the space,” he says. “If you walk into a home and see character and nice features, you feel like it’s a home that someone has put real love into. If your home has these kind of touches, then even without a stitch of furniture or styling, it will still have character.”

In terms of adding value for resale, Jason says there’s no question that having things like beautiful panelling, skirting blocks and cornices will achieve that. Sadly, people are often already stretched when they first buy their home, so can’t afford to add them until later.

“Spending say $25,000 on doing all of those things beautifully could easily take a house that’s not quite worth a million to $1.1million because people will walk in and feel it has that X-factor.”

For more on Living Walls Joinery and Decor | Find timber mouldings and more at Intrim

All images of Living Walls jobs

Categories
DIY Expert Tips Homewares

DIY wainscoting just got really easy!

If there’s something that’s stayed consistently popular in interiors in the last few years, it’s wall paneling. Whether it’s whole walls of VJ or half walls of a more traditional wainscoting, there’s a solution for everyone and there’s nothing quite like it for adding instant depth and character to your walls, literally!

And as we all seem to have been gripped by home improvement fever in lockdown, Intrim, the leaders in timber mouldings, got their thinking caps on and came up with a really simple DIY solution, sent in the post in a tube! Along with a step-by-step video tutorial, it has everything you need to get cracking by yourself.

“This is a product we have considered for some time as we often hear from customers that they cannot find a carpenter to install small amounts of wainscoting in their home or they don’t have the budget for a big reno and would like to install it themselves,” says marketing and brand manager Candace Brigden.

“Many people are DIY inclined but don’t have access to expensive power tools, so we developed these kits that have most of the mouldings pre-cut, ready-to-go and an adhesive that just sticks the trim right onto the walls.”

Candace notes we’re spending much more time in our homes, looking around to see what we can fix, change or beautify. “It also gives people a great sense of pride and satisfaction to see what they have been able to achieve and create themselves.”

Wainscoting is the perfect solution for all areas of the home from a feature wall in your baby’s nursery to the length of your hallway!

Does it really look quality though? Candace says yes, because what you receive in these packs is exactly the same premium quality inlay mould and chair rail you would receive in a regular order from Intrim. “They look just as beautiful once installed, the only difference is this way you can DIY. The Intrim team have spent numerous hours brainstorming how to simplify the installation process so that this is within the reach of even a beginner DIY-er.”

You can choose whether to do just the bottom half, or the whole wall, depending on which kit you buy.

With their expert knowledge, they’ve streamlined the steps and taken out some of the guess work around cutting, by offering pre-cut lengths, and easy to follow formulas.

The easy-to-follow installation video (above) will really help guide you through the process.

“This is something very different to what we have done in the past so we probably needed this climate as the push to get it out there,” Candace adds. “We’re hoping people love it as much as we do and it puts beautiful mouldings in the hands of many more people who previously wouldn’t have had it within their reach, or possibly even considered it.”

The inlay mould and chair rail they’ve chosen will suit a wide variety of styles from Hamptons and Scandi, to Colonial and Edwardian, and everything in between.

“It will elevate the look of the home and make it much more classic. Wainscoting adds depth, character and a luxurious design feel you cannot achieve through other means. We’re hoping people really take hold of it and get creative too, customising it for their own homes. The only limit is their imagination and creativity!”

Anyone really can give this a go! “We have made it as simple as possible through the products in the kit to the installation instructions and video we prepared. Best of all, you don’t need any serious tools and there is no nailing required!”

Their top tip for a nervous beginner is to spend your time planning. Make sure your measurements are correct, and double (even triple!) check before installing on the wall. You may even like to sketch up a little plan of the wall with your measurements to follow to help visualise and keep you on track.

The colour paint you finish the wall and mouldings with will have a major impact on enhancing the end result, so carefully consider your finishes too.

If you are looking for a more traditional look, stick with just using the Kit A, which gives you the chair rail and inlay mould on the bottom section of the wall. For a more classic or modern look, install Kit B too, which adds further inlay mould, or ‘frames’ as some people call them, on the top section of the wall.

You can do as much or as little as you like. “If you have a smaller space, we would recommend installing on a feature wall/s, such as two or more blank walls in a living room or the wall where the head of your bed sits in a bedroom.

“If you want to tackle a larger area, make sure the wainscoting is installed to flow through the spaces. For example, you may want to make an impact to your entry and install a full wall of top to bottom wainscoting, but make sure you continue that down the hallway too, even if it is just on the lower section of the walls. Our product team are always here to bounce your design ideas off too and help you plan your design.”

For more on Intrim’s DIY wainscoting kits

NEED INSPO? Timber mouldings totally transform small 70s apartment

Categories
DIY Expert Tips Shopping Styling

Three Birds Renovations’ dirty blush office makeover

Sponsored by Intrim

Has there ever been a better time for a bit of home office inspo? The Three Birds Renovations team recently made over their office, and although they’re not currently able to work from it (they’re #safeathome like the rest of us), it’s a great example of how much difference the look and feel of your office can make.

Being creative types, working somewhere beautiful was always going to be important to them. “We are inspired by beautiful interiors so it only makes sense that our own workplace is beautiful and inspirational too,” says Lana Taylor.

Now, their ‘old’ office was hardly plain, but two years on from moving into their first Three Birds HQ, the girls felt it needed some loving. “It was looking a little tired and didn’t really reflect how our design style and business had grown in that time. With a growing team of gorgeous girls, we wanted to create a luxe, feminine space where everyone loves coming to work each day.”

With busy work days, they wanted the office to have a calming vibe and to be full of pretty things to make it an enjoyable place to spend each day.

“We called our vision board the #dirtyblushcrush! It was all about gritty pretty: feminine pink tones with a bit of grunt, so that it doesn’t look like Barbie’s office! Our vision was for lots of detail like panelled walls, patterned wallpapers, many different complementary textures and a mixture of natural and plush materials.”

What you won’t see is a bunch of individual desks. “We prefer collaborative workspaces so we can sit around the tables together to roll out some floorplans, or grab a coffee and sit back on in the lounge area for a creative brainstorming session. Our creative juices really flow best in a relaxed and inspiring environment,” Lana adds.

In terms of what made the biggest difference, the Intrim moulding on the walls is right up there. “This feature really takes the space from corporate office to elegant lounge room, which is how we wanted it to feel. The beauty of Intrim mouldings is that they’re custom-sized so we could choose how we used them.

“We have a full wall of panelling at one end of the office, which frames our huge Jai Vasicek artwork. Around the rest of the walls we just ran the moulding one third of the way up, to make way for the beautiful wallpaper which Grace Garrett made for us.”

The girls have generously shared their vision board for this project, and they recommend this as the best way to start any design project.

“This should help people pick out the key elements they’ll need to recreate this style at home: a dirty pink colour palette, lots of Intrim moulding on the walls, patterned wallpaper and natural rattan furniture with pops of gold. Voila!”

For more on Intrim

For more on Three Birds Renovations | Roxy Jacenko’s new house: a kitchen to die for!

Categories
DIY Expert Tips RENO ADDICT

DIY wall panelling ideas: create more cosy!

Sponsored by Intrim

I don’t think I’m alone in thinking home has never been more important. And it’s not just because we have no choice but to be spending a lot more time at home now, but because living somewhere that feels safe, comforting, cosy, and perhaps organised and with a sense of flow, is great for our mental health in uncertain times.

And while many are pressing pause on major renovations, for obvious reasons, there’s a whole world of DIY home improvements we can all be getting stuck into with more time on our hands. My friends have always told me the little things about my own place bother me more than most because I work here and notice them all the time. And I think they’re right! When you notice the same things day in, and day out, they get irritating and the sense of urgency to finish them ramps up!

This home is an amazing example of the difference the little things can make. The owner of this project home has taken it to a next level, expensive looking, character filled, unique residence. And much of that is due to simple timber moulding and paint (as well as a good splash of marble!). Expanses of blank white walls are not exactly cocooning, but panelled walls in contrasting colours, are a game changer, don’t you think?

BEFORE panelling

AFTER panelling (paint and marble!)

Wall panelling has been gaining popularity for quite a while now, whether that’s wainscoting, whole walls of VJ or super impactful, detailed, more traditional Hamptons looks. I can’t get enough and I personally installed (well, my carpenter did) wainscoting in our dining room when we renovated. It’s actually pretty easy to do these things yourself though, and the video below from Intrim shows you just how. If you don’t believe me, there’s also more of a guide here.

https://youtu.be/ZJqV4e1GXy8

Bear in mind there are two kinds of wainscoting you can install: recessed panel and raised panel. And it’s the latter that’s a plausible (and very cost-effective) DIY job. Raised panel wainscoting is where the inlay mould is fixed directly to the wall to create a multi ‘picture frame’ across the wall look. It’s relatively simple and excellent for homes where you are looking to add some more subtle detailing without a heavy, traditional Hamptons or American style influence. The video above explains it much better!

Intrim are an Australian-owned business so they’re not experiencing any issues with supply. You can get free samples sent to your door and they can even offer virtual meetings to make sure you’re making the right decisions, measuring up correctly, and to answer all your design questions.

Contact Intrim for more information.

Timber mouldings totally transform small 70s apartment

Roxy Jacenko’s swoon-worthy kitchen