Categories
Design Designers DIY Expert Tips

Architectural mouldings: what they are & how to start

You may have heard a lot of buzz about wall panels and wainscoting lately, seen it used by some of your favourite renovators in the media or on The Block. Like me, you may love the look but didn’t actually know that architectural mouldings is the term for all these fancy add-ons for your walls, skirting, door and window frames! Well, now you do!

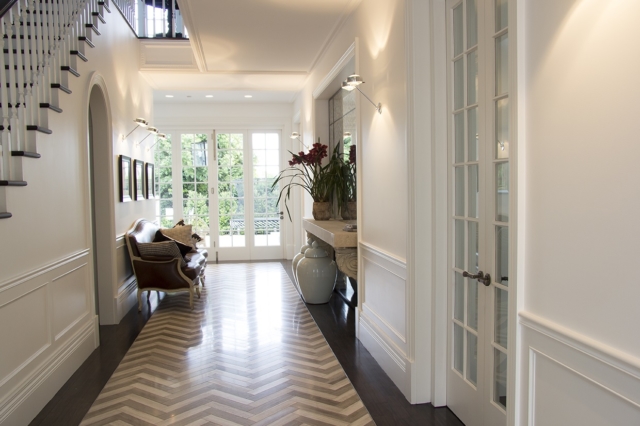
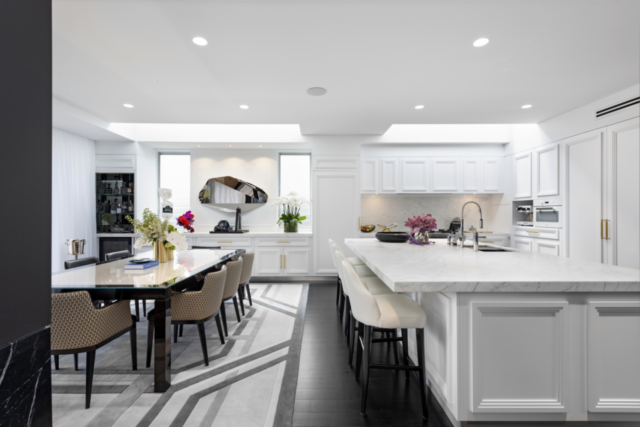
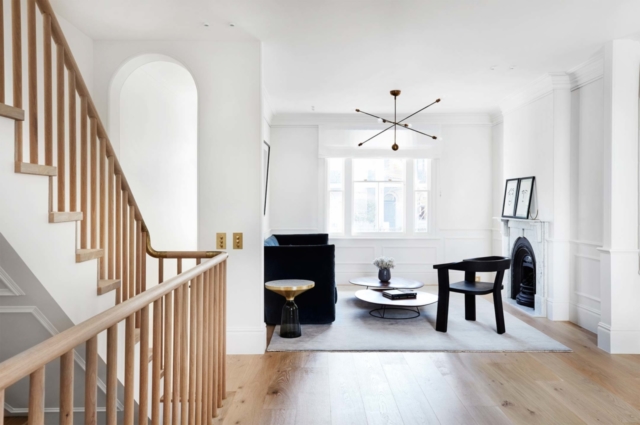
“Mouldings, including skirting boards, architraves and wall panelling are those details that seem so small, but make one of the biggest impacts in a room,” says Candace Brigden from Intrim, the leaders in timber architectural mouldings. “They frame all of your hard work, they create depth and character, and most of all elevate the luxe in an interior.”

Roxy Jacenko used Intrim mouldings in her kitchen

But the options are many and varied which could leave you feeling a little confused as to which and how much you should use in your home, and whether they’ll suit it.

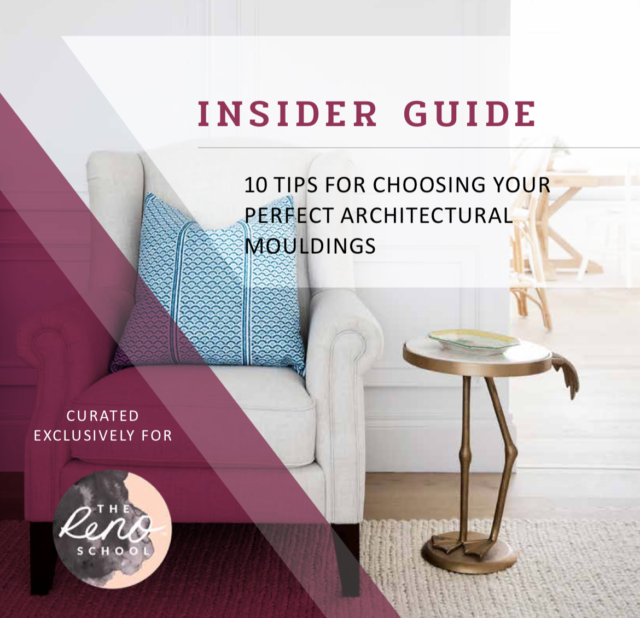
Luckily for you, Intrim have put together a free handy guide to help! So if you don’t know where to start, it’s time to download it.

“With so many decisions to make, it can be overwhelming knowing where to start. This is why we recommend to start with your finishings!” says Candace.

“This guide is as beautiful as it is informative, and as it has been curated exclusively for Three Birds Renovations’ Reno School, it is filled with beautiful images from their previous projects.”

Intrim’s guide gives you information, tips and tricks on:

  1. Understanding mouldings types and how to use them in your home.
  2. How to choose the right style of mouldings for your home, explaining the key features of each interior style.
  3. Guiding you through choosing the right size of mouldings for your room, as well as what sizes of different mouldings compliment the other. This section answers their most common questions around “what height skirting boards to choose?” and “what size architrave to match my skirting with?”
  4. How to measure your room for skirting boards, door architraves and window architraves so you can plan the quantity you need for your order.
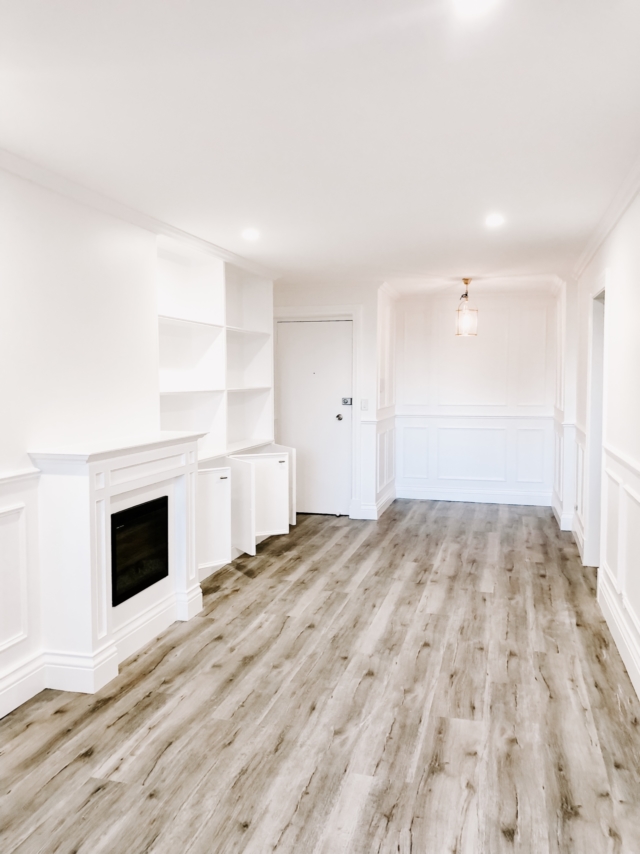
  5. Explaining the different types of wainscoting accompanied by stunning project images to show the look and impact each can give your interior. They also provide easy to follow wall-measuring instructions to create the layout for basic wainscoting.
  6. What type of timber to use for your mouldings. Discussing the benefits and disadvantages of MDF and pine timbers, their two most popular timber choices.
  7. Whether you should purchase primed or raw mouldings, the benefits of priming and the long term time and cost savings it can provide to you.
This small 70s apartment was transformed with Intrim mouldings

Intrim, an Australian owned and run business, are conscious of and actively pursue reducing their environmental footprint, supporting farming communities through their FSC certification.

Even if you haven’t got a lot to start from, the Intrim team can lead you to previous projects and social pages where you are sure to find a look you love to emulate in your own home. Contact them via their website any time.

DOWNLOAD the guide. 

Categories
RENO ADDICT

3 ways to take your reno from ordinary to extra special

Sponsored by Intrim Mouldings

As someone currently renovating a very dated sixties house which was lacking in any architectural features or pretty character, I’ve been learning a few lessons about how to add these things and what makes the biggest difference. I wanted to share my top tips and products for adding some extra va-va-voom to your reno. It’s all about the details!

Architectural mouldings

I’m talking skirting, cornice, paneling and architraves. These are things you may not have given a second thought if you’ve never renovated yourself or have always lived in a new build. It is absolutely amazing how much difference putting a little thought and budget into these finishing touches can make. The addition (or replacement) of these trims can add some serious wow factor!

Paneling in particular is definitely having a moment. Indeed I have used VJ paneling extensively in my recent kitchen and dining reno and I love it. I now want it everywhere. How much is too much?!

I used painted MDF VJ paneling to create wainscoting and add visual interest in my dining area

Intrim Mouldings have some amazing products available and I seriously recommend a visit to their website for inspiration. Recently used by Three Birds Renovations in ‘Bonnie’s Dream Home,’ they certainly have the seal of approval of Australia’s most stylish female renovating trio!

Hamptons style skirting from Intrim packs a punch in Bonnie’s dream home

Shadowline skirting is a great choice for modern or Art Deco homes

We recently did a Facebook Live with Intrim, where they answered a lot of your questions on how and when to use mouldings. You can watch it here if you missed it. And if you’re not one of those visual people, check out their online room styler tool.

Who can go past the ever popular Hamptons look? These Intrim products are best sellers.

Flooring

While our kitchen re-do is probably my favourite thing about our part-renovated home, it’s the flooring that has made the biggest difference and I still can’t get over how much it modernised, brightened and added consistency and flow to our home. We also get a crazy amount of comments and questions about it! Months later, I still have all the heart eyes for our Impressive Ultra laminate from Quick-Step. I haven’t spotted a single scratch or dent and believe me, it’s seen a lot of kids running (and riding trikes) around, furniture being moved and tradie boots. It’s a dream to clean and I know I’ll never tire of it.

You may remember that our old floors were a patchwork quilt of cork, dark parquetry and pine boards. Never did a house feel so chopped up!

I really believe you should put a lot of thought into your flooring and buy the best you can afford. Buy well and buy once, as they say. Real timber is beautiful but it isn’t the most practical choice for every home. Do your homework, save up, and your new floor can really transform your home. Read more about why I chose the floor I did.

Doors

Doors (and their hardware) can really date a home. Replacing them can make a huge difference and doesn’t have to cost a fortune. We recently replaced all our internal doors and our front door with beautiful panelled ones from Corinthian’s MODA range (photoshoot coming soon).

The barn door our carpenter created for our laundry is again one of the most commented-on features of our home, and our recent wardrobe door upgrades by Sydney Doors were the icing on the cake of our bedrooms, really finishing them off.

Our carpenter created this barn door from the kitchen to the laundry

Our new wardrobe doors

Don’t forget doors and windows! Our windows aren’t the prettiest but you’d never know because the plantation shutters we have throughout do a great job of disguising them!

I hope this article has given you some reno inspo. What would be your top tips for adding some wow factor to your reno?

Our Reno Addict section

Categories
Designers Expert Tips RENO ADDICT The Block

Julia and Sasha’s new reno, update 4: making the big decisions

It’s instalment four of our exclusive series with former Blockheads Julia and Sasha and so much has happened! Read on for Julia’s warts and all account, some exciting developments (and, let’s be a honest, a few fails!).

We all have those friends we text from time to time saying: “We must catch up!” But of course, we never do. I feel like that’s been us of late so sincere apologies, we’ve been swamped. The good news is there’s a lot to catch up on and I’m on my third coffee and ready to overshare. Let’s go.

Building a two-storey house is no cakewalk. It’s not as easy as whacking on a second level and wham bam, thank you mam. Oh no. There’s scaffold to build and trusses to move, roofs to attach and money to lose. (Dr Seuss, who invited you?!).

After shelling out a small fortune for staging equipment, it was time to settle on our biggest decision to date – the exterior colour scheme. I’d been extremely decisive up to this point but everyone has a catalyst for change and this was mine. I cannot tell you how many hours I spent driving around the neighbourhood gawking at houses. An elderly gentleman actually asked if I was checking him out and I awkwardly said: “Yes, indeed I was,” because I didn’t know what else to say. Truth be told, he had a lovely abode and I ended up pinching the colour scheme for Little Willow.

Exterior inspiration. Credit: The Block, New Zealand

Whilst most heritage homes boast galvanised iron roofs, we had our hearts set on something more intense. There were the traditional offerings of course, but they were all a bit blue or brown and we couldn’t embrace them. Enter Basalt, a perfect mid-grey reminiscent of lead. Our first instinct was to lock in matching gutters but our roof plumber called us ‘boring’ so we buckled and went with contrasting Monument. Opting for the two-tone effect was a risky move but my nickname as a child was ‘Drama Llama’ and as they say, if the name fits…

Basalt and Monument Roof

Choosing the right white can be an absolute mine-field. The first question you need to ask is: “Am I a warm or cool kinda person?” We’re obviously very cool and prefer whites with brilliant undertones. They elicit a sense of calm and are widely appealing, thus perfect for Little Willow. We tested a million paint samples before deciding on Crisp White by Taubmans. It’s the perfect stark-but-not-too-clinical shade and sets a lovely tone for the property. Pro tip: Only swatch on materials you are not actually using. I went to town on a sheet of plasterboard that ended up being redundant because the samples would forever shine through.

Sash helping weatherboard

Little Willow was built from the top down to allow for full scaffold and a safer worksite for our crew. Once the upper roof was secure, it was time to attach the weatherboards. I know people go mad for brick homes but they’ve never been my thing and seeing Little Willow clad in the good stuff made my heart soar. The painters did a stellar job and for the first time in a long while, she beamed again. It was like she’d spent an afternoon at Sephora sampling Make Up For Ever Ultra HD Foundation. She was literally flawless.

The top storey

Of course, things aren’t always as they seem and it’s what’s on the inside that counts. With the top level watertight, it was time to draft the electrical plan. Can you sense the excitement in my voice? No, no you can’t because there literally isn’t any. Lighting is so not my jam and I’d been avoiding it like the plague. As it transpires, it’s the stuff Sash’s dreams are made of so I handballed it quick sticks and got back to Younger. She spent hours marking out a legend with six different highlighters and proudly presented it to our electrician. Sash often says her biggest achievement was winning the Under 11 70m hurdles at Camberwell Little Athletics, but this almost pipped it. She opted for a mix of pendants, wall sconces, downlights, and lanterns but left me to supervise come rough in. That was an interesting day but I’ll spare you the details. Let’s just say I’m now an expert at laying under-floor heating because we all learn from our mistakes, don’t we?!

After what felt like eons, we were finally ready for plaster. Anyone who’s ever built or renovated a home will tell you this is by far the best bit. For the first time we could see the interior take shape and make sense of the space. In a nod to the home’s heritage, we reinstated the original gutter cornices. It really is next level and adds to the luxe vibe throughout. Sash left me to my own devices when selecting the ceiling roses for the formal rooms and immediately regretted her decision. She thinks they’re too elaborate but in my world there is no such thing so, next!

Cornice and ceiling rose

Whilst we were busy bickering, our trades made the great escape and started tiling the upstairs bathroom. Selecting tiles has never been my strong suit but I’m going to toot my own horn and say I absolutely nailed this choice. The marble rhomboid from Beaumont Tiles is the perfect focal point, balanced by soft grey on the floor and white matte on the walls. Our rule of thumb is to use contrasting grout on feature tiles and matching on all others, so we opted for white on the rhomboid as it really makes them pop. Given we’re all about consistency, we’ll be incorporating marble into all wet areas, albeit in different shapes. It’s worked a treat for us in the past so stay tuned for all the inspo.

Tiled bathroom

Now the majority of the building work is complete, it’s time for the fun stuff! In the next instalment we’ll reveal our kitchen and laundry design, courtesy of our dear friends at Freedom Kitchens. They’ve helped us create three stunning spaces in the past and we can’t wait to show you what we’ve come up with this time. They’re real show-stoppers so get ready to pin all the things.

Until then,

Julia xx

Missed a bit? Week 1 | Week 2 | Week 3

Categories
Architecture Design RENO ADDICT Shopping

Gyprock launches new cornice profile, perfect for the chic modern home

While I do love the occasional colourful, pattern-crazy interior, as a rule, I’m a big believer that less is more.

_80Y3114_MED

Minimalist homes can often make a space look bigger and calmer, however, it’s still important to have some personality! So incorporating building elements, such as cornices, can provide an attractive finish to help create balance and liveliness in a contemporary environment.

_80Y2456_MED

Developed for just this need, the new Presto Cornice from Gyprock is a chic architectural feature, delivering a subtle impact while adding depth and warmth. The profile demonstrates geometric simplicity by merging modern design elements with elegantly finished edges. Quick to cut and fast to install, Presto is a cost-effective way to give your ceiling a clean and modern finish and offers a great alternative to the basic look of  a square setting.

MW025(HIA_MW)012_MED

Presto’s smart and sophisticated design, features a 92mm flat face, which forms a 15mm step along the ceiling. It can be installed on plasterboard, fibrous plaster or cement rendered surfaces and is easily adaptable to any interior.

Comprehensive installation instructions including residential installation guidelines and DIY installation guides and videos can be found on the Gyprock website under the Resources tab.

For more information.

Categories
Interiors Addict

Finish off a room with cornicing

When it comes to putting the finishing touches to your rooms, have you thought about adding cornicing? I’ve always thought it looks so much nicer than nothing at all and in crisp white, it can contrast so well with your wall paint colour.

gyrprock cornice 1