Atop one of Melbourne’s CBD apartment blocks sits a meticulously designed penthouse, almost entirely customised by its new residents. It is home to Joan and Wes, who purchased the entire top floor of Hawksburn Place Residences before the building even hit the market. Starting from an empty shell, they worked closely with the building’s developer to customise the floor plan to their specific desires.
“Joan and Wes’s situation was really unique in that they were able to purchase this penthouse as a shell and work not just with us as the developer, but the project’s interior designer to create a completely bespoke home,” said developer Tim Gurner. “Every room, every material, every piece of marble chosen reflects their specific tastes – it’s very rare that a penthouse can be customised like this.”
The expansive home spans 345sqm of internal area and another 461sqm of external terrace. It includes three bedrooms, three bathrooms, a library and a marble-clad kitchen. The wraparound terrace boasts phenomenal 360-degree views of the CBD and a 12.5m plunge pool.
Working with esteemed designer David Hicks, they created a unique interior, with custom cabinetry and raised ceilings showcasing priceless antiques and art the couple have collected from around the world. These antiques include the penthouse’s feature chandeliers, which the couple sourced from Paris.
“The antiques speak for themselves so we provided a dramatic backdrop for them to sit seamlessly. Introducing specific places for each piece with strategic lighting was also key.” said David.
The bold departure from the white-on-white design trend results in a sumptuous mix of chocolate parquetry, smoky walls, and rattan armchairs. The darker, more moody interior palette absorbs and offsets the abundance of natural light afforded by the surrounding floor-to-ceiling windows.
The penthouse is fitted with plentiful luxury hotel style details, such as private access lifts, access to the on site seven-day-a-week concierge, and a six-car garage.
The project team was led by luxury developer GURNER, alongside David Hicks, Cox Architecture and landscape architect Paul Bangay.
I’ve shared our living room on here many times and I really love the space, but what people often ask me is: “but where’s the TV?” Well, there’s a reason I never showed the room from that particular angle because it was never ever quite right and I hate messy cables on show and the often cluttered look of an entertainment unit. That’s all changed now with this amazing built-in, which we did on relative budget.
Is it a TV unit? Is it a credenza? Is it built-in joinery? Who knows, or cares? It just looks and functions great! And this room is finally good from all angles. Not to mention, that navy!
That gorgeous navy cabinetry? It’s flatpack Kaboodle from Bunnings, like we used in the laundry recently, and the doors are one of the regular colour options (Bluepea) rather than being painted by us.
I feel what really takes it next level is the Caesarstone top. It’s White Attica, which I’ve always loved (since I saw it in one of The Block houses years ago) but wasn’t quite right for out kitchen (which is Noble Grey). I felt it was the perfect contrast for the navy in the living room and I really didn’t want to matchy-match with the kitchen because really, who matches their separate living room to their kitchen?! At the same time, there’s an element of continuity and flow there, thanks to the paint colour and the navy cabinetry being the same as the laundry. Not to mention we now have shaker profile doors in the living room, kitchen and laundry.
One of the things I struggle with most with TVs in general, and all the stuff that comes with them (speakers, cables, Foxtel box etc) is the generally messy or cluttered look. I knew that I needed to go one further to really pull together this cabinetry and this was with the use of VJ Board Pro board from Intrim on the wall behind. It’s painted in the same blue as the other VJ in our kitchen and dining (Chinchilla Fur by Haymes Paint).
So, how did we do it? First, we needed to chat with our electrician about getting all the cables in the wall and marking that out before Trent from Pure Renovation Group fixed the VJ Board Pro onto the wall. It’s a great affordable MDF product which is easy to install and comes pre-primed in sheets and ready to paint. I’d been on the Kaboodle 3D planner online to work out which combination of cabinets would fit the 3-metre wall as neatly as possible to create that custom look. Luckily for me, this worked out so so well using two different cabinet sizes! We did think about using less deep wall cabinets instead but as we had plenty of space here, we decided to use the deeper cabinets and create maximum storage.
To avoid them looking too ‘kitcheny’ we decided not to use a kick board, to make them lower, and we chose push to open hinges and no handles or knobs. Like planning the laundry, this process was very intuitive and easy, even for an amateur!
I really love the look and the contrast of the navy in this room. The stone finishes it off beautifully and stops it from being too dark. The paneling behind just pulls it all together. And overall, we have a very custom look for a lot less than custom joinery (which absolutely has its place but this isn’t the house or the room I want to invest in that for).
My husband was delighted that this set-up meant I agreed to us buying shiny new speakers for his hi-fi setup (he’s old school like that) on the basis that they were white, even if they are a bit bigger than I was led to expect but that’s another story… I drew the line at a new TV because there’s really nothing wrong with this one (and care factor: zero!).
Almost every ugly black box (Foxtel, amplifier, CD players and the like) is in the far left cabinet so there’s actually heaps of storage too, for things like CDs (I told you my husband was old school) and other completely non-TV and audio-related things that need a home. I mean, can you ever have too much storage? I think not!
I’m so thrilled with the end result and the only thing that could make it better would be a Samsung The Frame TV! The only downside? We can’t take this setup with us if we ever move!
I thoroughly recommend considering using flatpack to achieve a built-in look like this, or even to create your dream buffet, for example. I hope this how-to gives you some inspiration!
My new navy and gold laundry revealed: before and after
Our kitchen was the very first room we renovated in this house, almost four years ago. It was a case of “I’m not buying the house unless we can afford…
Charlie Albone and Juliet Love share a first look at their new home
With two sons, it didn’t take long for Aussie landscape designer and TV host Charlie Albone and his interior stylist wife Juliet Love, to outgrow their two-bedroom home. After going…
Kaboodle get a handle on jewellery for your cabinetry
Sponsored by Kaboodle I’ve often said that elements like handles, knobs and tapware are the jewellery for your kitchen; the finishing touches where you add a bit of personality and…
With the living room being one of the most used rooms in the home, it’s an important space to get right when fitting it out with furniture.
Make use of every inch with good-looking custom storage
Considering how frequently it is used, when designing your living room, you should be making the best use of space. The position of windows and doors, sofa sizing, and the need for storage are all factors that can affect how well the space functions and flows.
One way to ensure your living room is both stylish and functional is with custom furniture. It’s a great solution when designing your dream living room as it has a number of benefits and there are so many different ways it can be used to upgrade your living room space.
Create a cohesive living room design
A custom furniture maker can work with you to design and build your dream furniture set that you can’t find in any shop. You can have any piece of furniture custom made to suit the style of your home, so you won’t have to spend hours trying to find that perfect piece. Also, if your living room flows on from the kitchen or dining room, you can get a seamless look by getting your furniture maker to match the finishes in those spaces to your custom living room furniture.
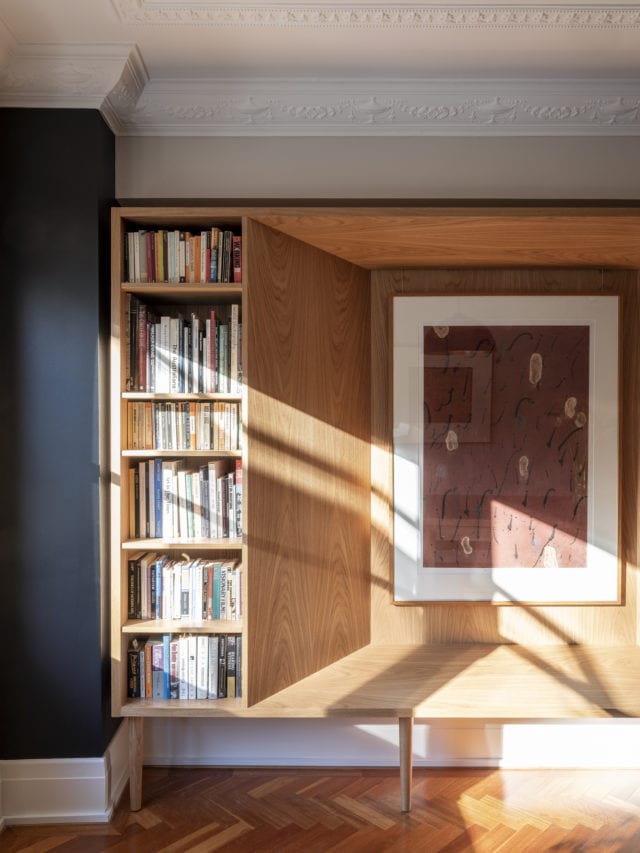
A custom built-in study nook
Hide ugly cables
Joinery in the living room means you can hide those unsightly cables that come from your tv, set top box, video game console or router. While all you see is a streamlined row of cabinetry, behind it, your cabinet maker can create a host of openings so you can group your cables together and feed them through. This keeps your living room free from clutter and the ugly mess of cables that can disrupt the clean look of your living room.
Cables? What cables?!
Utilise every space
If you have an unusually shaped living room or awkward spaces that won’t fit standard pieces, custom furniture is the ideal solution to utilise that space. Install custom joinery to create a study nook in that void you can’t fill or have built-in bookshelves put under the stairs. Even if you have a standard living room shape, but it’s small, you’ll be able to design furniture that will make the most of your space, giving you a balance between storage and style – something every home needs!
Make a statement
While most living room furniture is designed around the position of the tv, why not add a custom entertainment unit or buffet, so it takes the focus away from the big black rectangle. Think shelving for beautiful decorative pieces and large, smooth countertops to create a sense of space. Using custom cabinetry means you’ll have a truly unique piece of furniture that can’t be found in the shops and there’s no better way to make a statement in your living room than with a one of a kind piece!
If you’re thinking about getting custom joinery or furniture made for your living room, remember to think about how the space will predominantly be used, what functionality you need, and how your custom pieces will fit in with the style of your home. Take those into consideration, and you’ll be sure to design the perfect living room for your home.
-Contributed by Husk&Co, specialists in the manufacture and installation of high-end custom joinery and beyond.
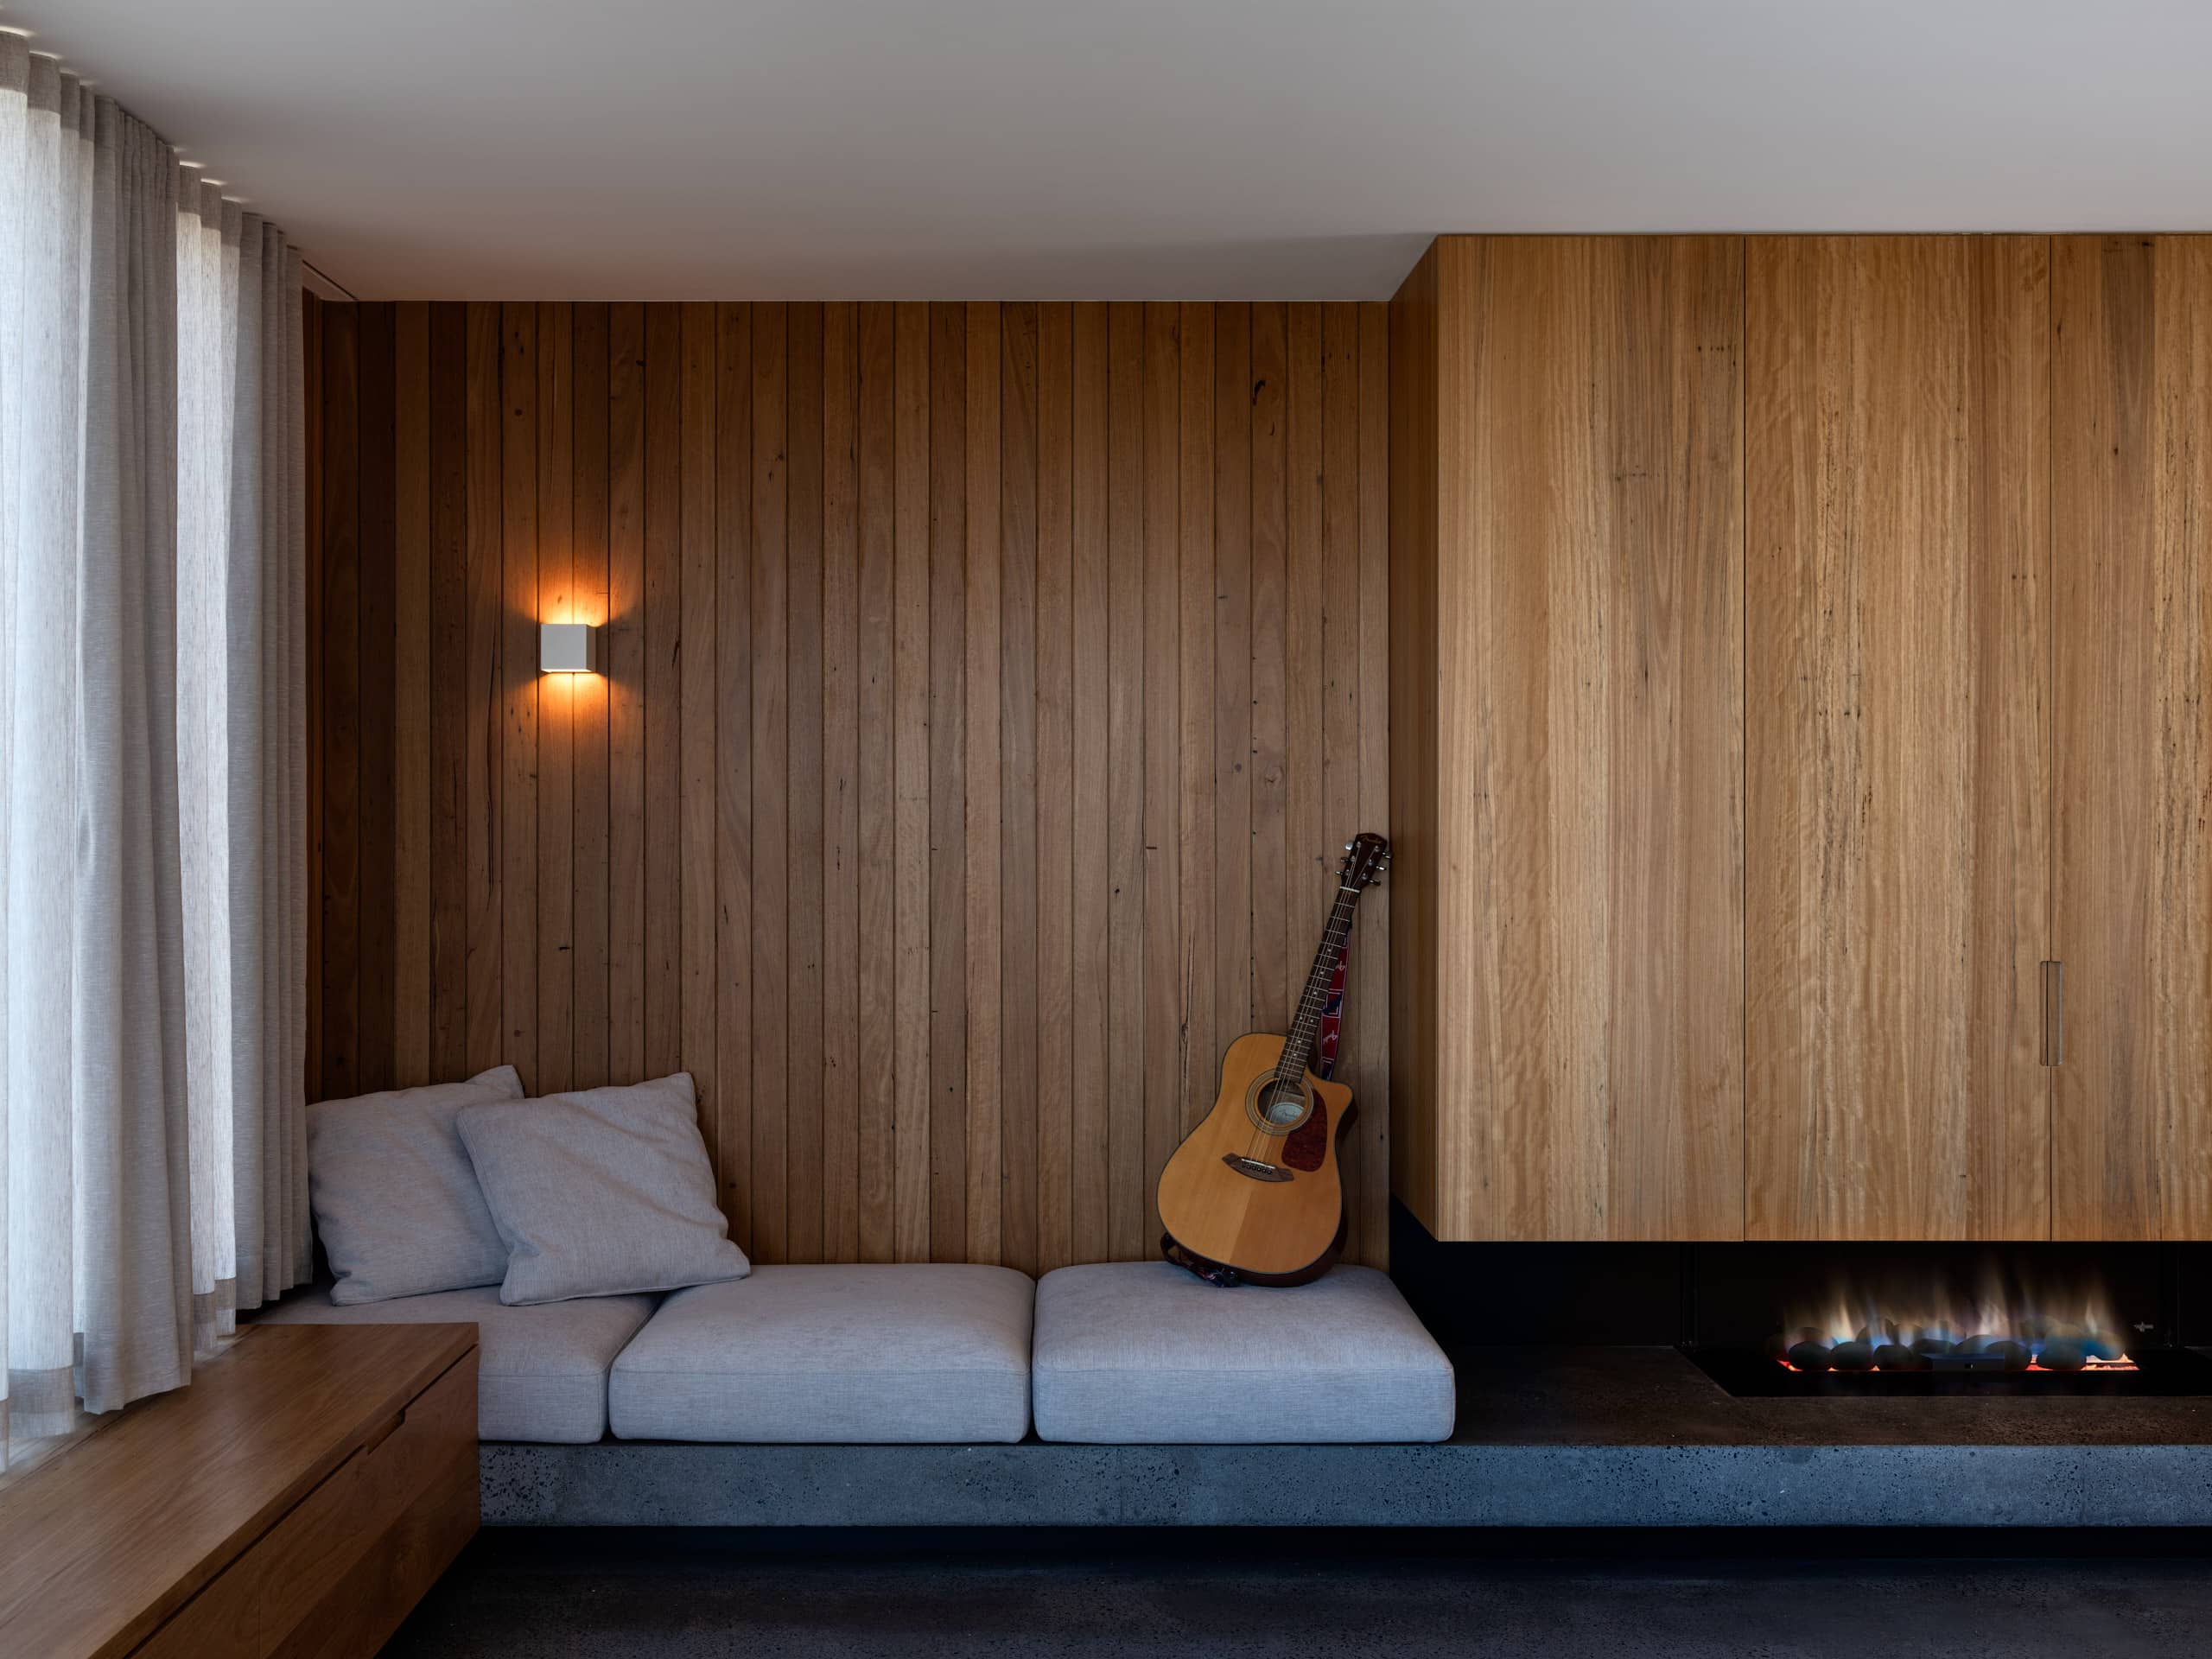
Custom joinery and a fireplace: a winning combo!
When it comes to creating a focal point in a space, a fireplace is usually a real winner. Add to that, surrounding custom joinery with built-in storage and suddenly you’ve…
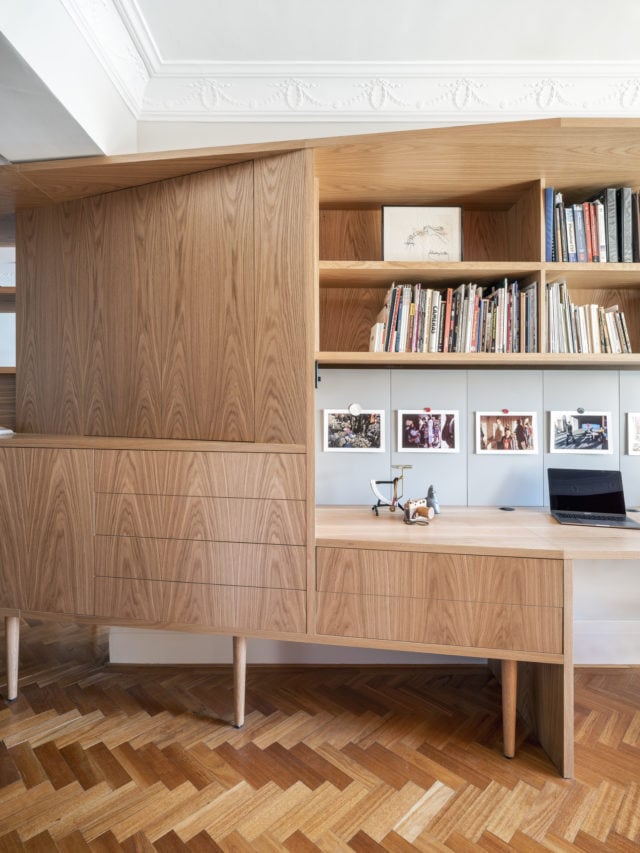
While lockdown got us all talking about working from home, home office and study nooks had already been an increasingly sought-after feature for some time. With many of us living in smaller spaces these days, creating a home office that doesn’t take over an entire room, is a great option. Here, we round up some great examples.
Photos: Sue Stubbs
Interior designer Kate Maguire designed this space (above) to be a part of the joinery in the family room of her own Sydney home, as they don’t have a separate office space. “It is tiny but mighty and functions very well, though it doesn’t usually look this tidy! I use it every day, as I work and study from home.”
Previously Kate, of Kate Maguire Interiors, had a hutch desk in the same room, but admits it didn’t look or function half as well! The joinery was part of a larger renovation, making the home a lot more functional in general.
Kate’s expert tips for creating your own office nook:
Think about how you plan to use the space and make sure you consider everything. Not pictured is my big ugly A3 printer, which is essential for my work, so I had to make sure that the desk area would be big enough for me to work comfortably and still have space for the printer to live.
Consider the placement of powerpoints and IT equipment. This will help to keep the space tidy and clutter-free.
Shelving with baskets, as well as drawers, helps to give everything a place, which again makes it much easier to keep the space tidy.
Task lighting will help to make the space more comfortable to work in.
Apartment dwelling forced interior decorator Briar Stanley, of Sunday Collector, to get creative with storage in a previous home, where she created this office nook:
Photos: Jacqui Turk
When renovating the kitchen, she had the extra cupboards added for all her work samples. They sat alongside a handy desk nook with pocket doors that hid away the clutter when she didn’t want to be thinking about work.
Fellow apartment dweller Ellie Jeffery, says her husband thought she was slightly mad when she suggested this office nook when they renovated their laundry!
“I’ve been watching a lot tiny house tours on YouTube and I love the concept of having multiple uses for a room or piece of furniture. It makes perfect sense, particularly when you live in Sydney and real estate is so expensive! So when we decided to redo the laundry, I thought it would be good to make it as versatile as possible. A study nook just made sense.”
Ellie lives on Sydney’s Upper North Shore in a two-bed apartment with her husband, young daughter and another baby on the way. The office nook was completed just as lockdown began. “It was great timing. I will definitely be using it going forward. I usually work a day a week or so from home.”
The financial controller has also set up her dining room to do double duty as a playroom, making their home work for their growing family. “Having watched all the amazing things you can do with a tiny house, I definitely don’t think it’s necessary to dedicate a whole room to one use. One of the working from home tips I see frequently is to pack away at the end of the day. It’s so easy to do that with my study nook and it does help me switch off.”
Belinda Rosenbaum painted the mural in the study nook for her girls, below, which was created by cabinetmakers J and K Badewitz:
“Our little house in Merimbula (a holiday shack in its previous life) is pretty tight on space so this was like adding a whole new room!”
Shelley Boyd’s home office (below) is tucked under the stairs. “It’s a great use of dead space which has been turned into a room of its own. My advice for utilising spaces like this is to introduce storage options so that paperwork and mess can be moved out of eyesight. Lighting is also important for both practicality and atmosphere. My space has lots of natural lighting as well as a statement desk lamp.”
The Boyd Blue owner says: “I am inspired by bold colour, texture, tone and hand crafted finishes and my office is filled with samples, inspiring images and an array of knick-knacks I have collected from various travels across the world. My fur babies Hugo and Daisy are never far away and I love the company they bring.”
The last three examples below, are by Brisbane interior design duo Anju Designs, who are experts at getting the most out of smaller homes.
Incorporated into the custom joinery with floating shelves, this study area works beautifully adjoining the kitchen and dining area, and provides a generous workspace in a two-bedroom apartment:
The architecture of this bedroom allows for the perfect little study nook. A small space with lots of natural light, and great use of an area that otherwise would have had no purpose:
This study nook utilises a walk-through space adjacent to the kitchen which leads through to the laundry. The built-in shelving provides ample storage space but by keeping it open, the area still feels light and spacious:
So, if you thought you didn’t have space for a home office, it may be time to think again!
Small space design ideas: a beautiful apartment reno
Size, as they say, isn’t everything, and Anju Designs made the most of every inch in this stunning Brisbane apartment makeover. We take a closer look at all their clever…
Kerrie Hess: Illustrator’s chic home office
The creative tools are never too far away for illustrator Kerrie Hess who let us take a peek inside her chic home office recently; an ultra-feminine, largely monochrome space that…
Working from home? Interiors experts share tips
By Lexi Kentmann As many of us make the shift to work from home, potentially from a busy household bustling with both kids and adults, we’re looking for ways to…
When it comes to creating a focal point in a space, a fireplace is usually a real winner. Add to that, surrounding custom joinery with built-in storage and suddenly you’ve made the beautiful blend of form and function. Interior designer Sarah Yarrow tells all…
The fireplace is often located in our lounge rooms which means, for these modern days we live in, we’re also contending with the placement of a TV, sound equipment and a myriad of additional accessories. Using the fireplace as the starting point and evolving the design of joinery around that is the way to go.
Here are my tips for creating an impactful space using a fireplace and joinery:
Plan! Work out exactly what you need from the space – do you need loads of storage to hide kids toys, photo albums, AV equipment etc? Or, do you prefer a more minimal clean line approach with little to no closed storage with the focus being to highlight the wall texture and materials used? Can the TV sit above the fireplace or do you prefer it off to the side? Once you know what you realistically need from a functional perspective, the design of the joinery will naturally have a direction to follow.
The fireplace Decide on the type of fireplace you’d like (or can have in your home). Consider your lifestyle, budget and longevity. For example, the nostalgic idea of a wood burning fireplace might conquer up warm fuzzy feelings and images of cold nights with a red wine in hand, however, the reality of that also means the clean up and maintenance that comes with a wood burner along with the smoky smell which can linger in your fabrics and safety for young children. That’s not to say you shouldn’t install one though (I’m personally a huge fan of the tradition of a wood burning fireplace, in the right situation). The goal should always be about carefully considering what is going to work for YOU! Maybe a gas or electric fireplace will be a better option.
Materials & colour Here’s where you can have some fun! Once you’ve decided on the actual fireplace, you can take those plans from step 1 and start to create the surrounding joinery. Go custom! As opposed to trying to buy off the shelf, adhoc individual furniture pieces or shelving. Custom allows you to maximise every inch available based on your design goals and will ultimately always deliver a better result. Regardless of the style you’re trying to achieve, whether it be traditional and of period or contemporary, you can still inject your personality into the design via colour and material choice. This might be coloured cabinetry, textured wall panelling, an ornate marble surround or classic heritage tiles. Whatever speaks to your style and the architecture of your home. A good designer can help you visualise this with drawings and suggest the most appropriate material choice.
Finishing touches Time to personalise! It’s your home and styling it so it’s representative of you and your loved ones is essential. Displaying accessories which are meaningful to you is what makes a space feel lived in, welcoming and interesting. Depending on the design of your fireplace, you may have lots of open shelving to display books and collectables; or it might be a mantle only to show off a special framed photograph and a sculptural vase. The important thing here is to showcase what you love. A few guidelines to help; less is often more, display only what you really love and store away the rest knowing you can always change the accessories up every few months or when you tire of seeing the same ones. Consider scale and proportion and try to keep a colour palette which is relevant to the other spaces within the home. If you’re opting for a minimal look, displaying something ornate and sculptural is a perfect way to highlight the architecture of the fireplace and joinery and allows that accessory to be the hero – for example, a vase or urn, artwork or vintage artefact. Remember, the finishing touches can always evolve as your life changes and interests grow. Life is dynamic so there isn’t necessarily a ‘finished’ utopia for our interiors either; I suggest to keep evolving your home, just as you do yourself. Allow it to grow with you and it will always feel relevant.
Renovating can get expensive… very expensive! So inevitably the question comes: when to splurge and when to rein it in? Custom cabinetry is, in my opinion, something worth spending money on. Not only do you get exactly what you want, but you also get a seamless design that works for kitchens, entertainment units, bathroom vanities and laundries.
There’s a lot of hard work that goes into cutting the intricate pieces and sections of custom cabinets to justify that premium price, so it’s important you do your research and ensure you are getting a genuine made-to-measure service.
Sarah Comerford, Director at HOME by belle, a kitchen and bathroom renovation specialist based in Sydney, shares her top tips and trade secrets for getting the best bang for your buck.
Start with the layout
This may seem obvious but is so important. Look at the layout of the home, make sure you get the orientation right and that all the cabinetry flows together. Also consider the sight lines and what areas you notice the most. Find ways to get the most functionality out of your space to maximise storage and clever design ideas will start to come to you.
Steer clear of swinging doors
Swinging doors take up a lot of space and traditional cupboards can accumulate clutter so consider filling the base cabinets with draws. Draws are much better for maximising storage and are ideal for both kitchens and bathrooms. While you may lose a small amount of space due to draw runners, what you gain back in practicality is more valuable. There are also many functional design ideas that can go into a draw, for example a spice draw, pull-out bins and slide out benches that can be designed bespoke for your home.
Consider the finishes
The trend today is to introduce a lot of different finishes and there are many to choose from. For instance polyurethane, satin finish, timber veneer, stone and marble. The mix of finishes makes the design process more involved but it is becoming increasingly important as people look to create spectacular centrepieces for the home.
Treat handles like jewellery
Handles can take beautiful cabinetry to the next level and make a big style statement. There are many different styles of handles to choose from, which can allow you to add a personal touch. But handles aren’t for everyone and there are a number of handle free options available.
Create concealed walk-in areas
There is currently a big trend towards butler’s pantries and creating concealed spaces in the home. This is a result of more people integrating their kitchen and living areas and wanting to hide unsightly mess. Walk-in pantries can act as multi-purpose storage areas, for instance a place to store kid’s schoolbags or conceal a laundry.
Don’t forget the laundry
It’s a mistake to think laundries don’t need a lot of effort. Laundries need storage and functionality and deserve to be just as amazing as the kitchen. Consider things like a spray tap for cleaning muddy boots, basins large enough for soaking, built-in ironing boards and pull-out bars for airing clothes.
I’m sure today’s master bedroom and en suite by Highgate House will make you swoon. From the perfect colour palette to the custom joinery, marble bathroom and wow factor side tables, it’s pretty special.
The clients, a young family, wanted their inner city Brisbane property to feel like an American home, having spent a lot of time in the States. “Because we started almost from scratch, we could achieve exactly the look that they were after,” says interior designer Leigh Boswell.
“I really love every part of these two spaces, in particular the pendant light we sourced, which couldn’t have been better with the coffered ceilings. The bed and the bedsides are really to die for too.