Categories
Expert Tips Furniture Jen's reno Living Room RENO ADDICT Reno Products Shopping

Faking built-in joinery: how we used flatpack and VJ to create an amazing TV unit

I’ve shared our living room on here many times and I really love the space, but what people often ask me is: “but where’s the TV?” Well, there’s a reason I never showed the room from that particular angle because it was never ever quite right and I hate messy cables on show and the often cluttered look of an entertainment unit. That’s all changed now with this amazing built-in, which we did on relative budget.

Is it a TV unit? Is it a credenza? Is it built-in joinery? Who knows, or cares? It just looks and functions great! And this room is finally good from all angles. Not to mention, that navy!

That gorgeous navy cabinetry? It’s flatpack Kaboodle from Bunnings, like we used in the laundry recently, and the doors are one of the regular colour options (Bluepea) rather than being painted by us.

I feel what really takes it next level is the Caesarstone top. It’s White Attica, which I’ve always loved (since I saw it in one of The Block houses years ago) but wasn’t quite right for out kitchen (which is Noble Grey). I felt it was the perfect contrast for the navy in the living room and I really didn’t want to matchy-match with the kitchen because really, who matches their separate living room to their kitchen?! At the same time, there’s an element of continuity and flow there, thanks to the paint colour and the navy cabinetry being the same as the laundry. Not to mention we now have shaker profile doors in the living room, kitchen and laundry.

One of the things I struggle with most with TVs in general, and all the stuff that comes with them (speakers, cables, Foxtel box etc) is the generally messy or cluttered look. I knew that I needed to go one further to really pull together this cabinetry and this was with the use of VJ Board Pro board from Intrim on the wall behind. It’s painted in the same blue as the other VJ in our kitchen and dining (Chinchilla Fur by Haymes Paint).

So, how did we do it? First, we needed to chat with our electrician about getting all the cables in the wall and marking that out before Trent from Pure Renovation Group fixed the VJ Board Pro onto the wall. It’s a great affordable MDF product which is easy to install and comes pre-primed in sheets and ready to paint. I’d been on the Kaboodle 3D planner online to work out which combination of cabinets would fit the 3-metre wall as neatly as possible to create that custom look. Luckily for me, this worked out so so well using two different cabinet sizes! We did think about using less deep wall cabinets instead but as we had plenty of space here, we decided to use the deeper cabinets and create maximum storage.

To avoid them looking too ‘kitcheny’ we decided not to use a kick board, to make them lower, and we chose push to open hinges and no handles or knobs. Like planning the laundry, this process was very intuitive and easy, even for an amateur!

I really love the look and the contrast of the navy in this room. The stone finishes it off beautifully and stops it from being too dark. The paneling behind just pulls it all together. And overall, we have a very custom look for a lot less than custom joinery (which absolutely has its place but this isn’t the house or the room I want to invest in that for).

My husband was delighted that this set-up meant I agreed to us buying shiny new speakers for his hi-fi setup (he’s old school like that) on the basis that they were white, even if they are a bit bigger than I was led to expect but that’s another story… I drew the line at a new TV because there’s really nothing wrong with this one (and care factor: zero!).

Almost every ugly black box (Foxtel, amplifier, CD players and the like) is in the far left cabinet so there’s actually heaps of storage too, for things like CDs (I told you my husband was old school) and other completely non-TV and audio-related things that need a home. I mean, can you ever have too much storage? I think not!

I’m so thrilled with the end result and the only thing that could make it better would be a Samsung The Frame TV! The only downside? We can’t take this setup with us if we ever move!

I thoroughly recommend considering using flatpack to achieve a built-in look like this, or even to create your dream buffet, for example. I hope this how-to gives you some inspiration!

Photos: Jacqui Turk

Categories
DIY Kitchens RENO ADDICT

Kaboodle get a handle on jewellery for your cabinetry

Sponsored by Kaboodle

I’ve often said that elements like handles, knobs and tapware are the jewellery for your kitchen; the finishing touches where you add a bit of personality and show your style. While we might play it safer with our cabinetry choices, handles don’t have as much real estate in a kitchen but they do have the ability to make a real impact. Which is why flatpack experts Kaboodle’s latest handles are so exciting!

Cabo handle, Vela handle and Cabo knob in brushed amber gold

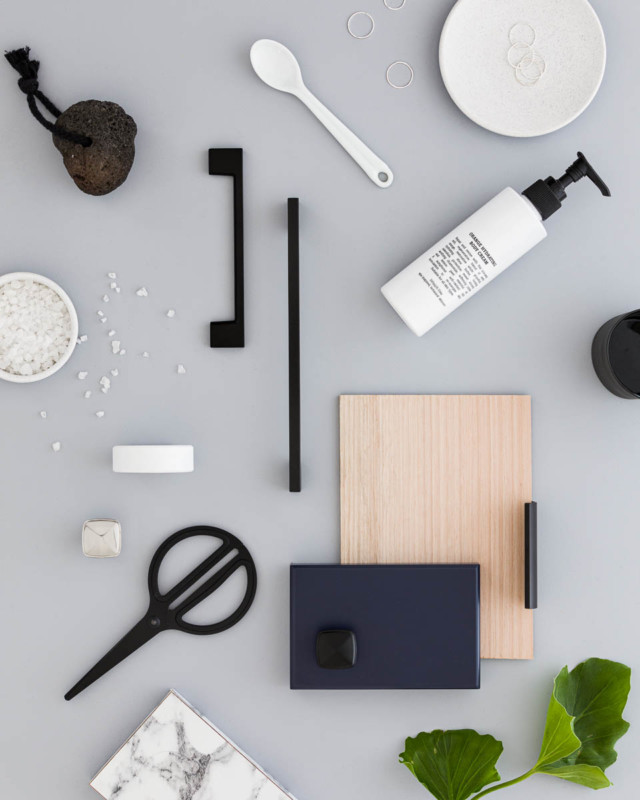
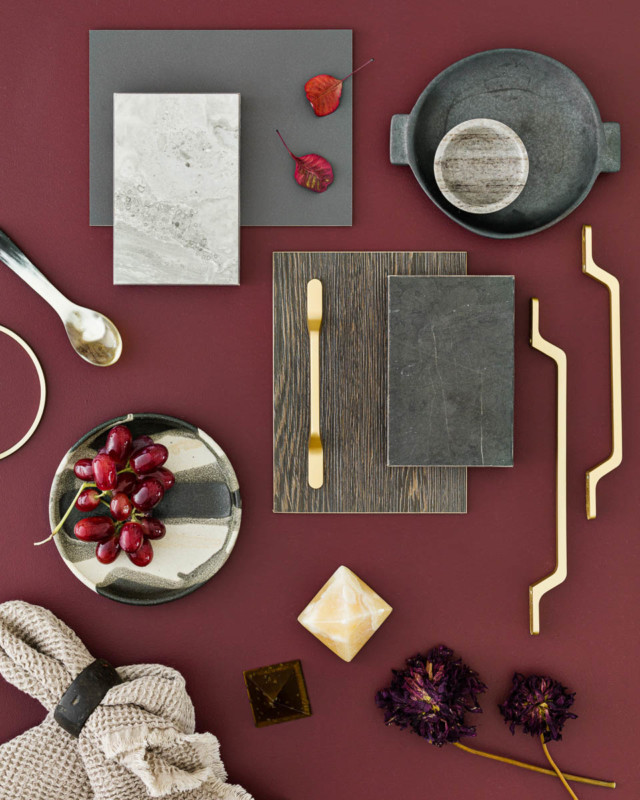
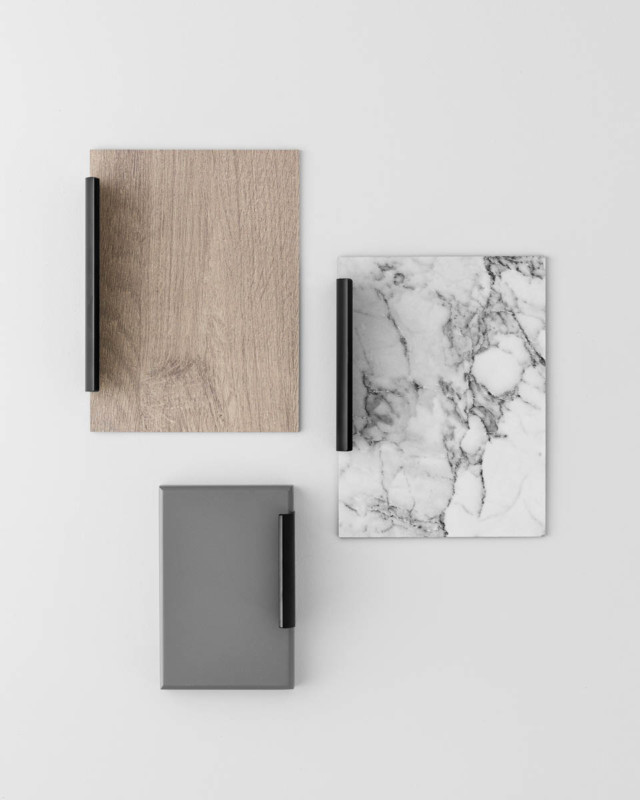
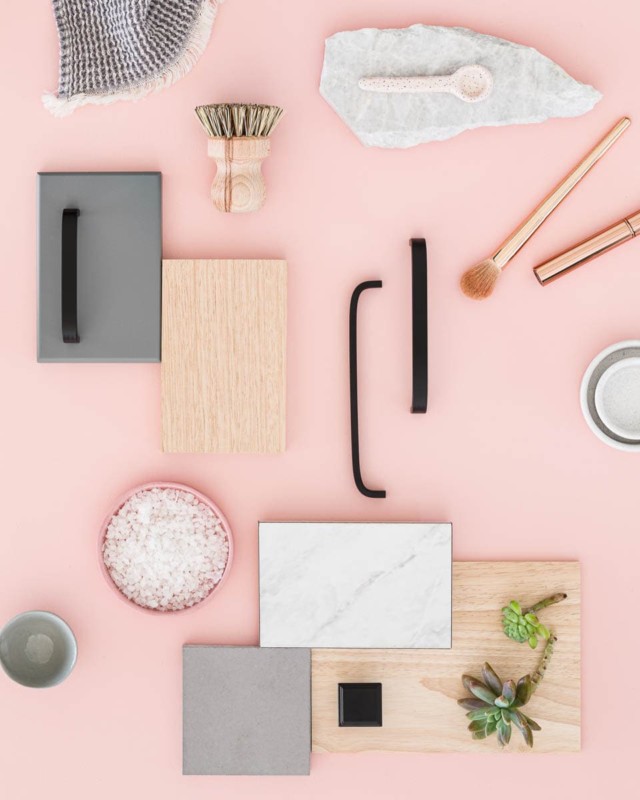
Based on trends from Europe, the 12 new handles, knobs and cup handles come in an array of lovely finishes with designs to suit traditional kitchens and laundries through to the most modern.

Casco cup, Cabo knob and Pasto handle in brushed nickel

While I’m a big fan of flatpack as a way to save on your renovations and have a flatpack kitchen myself, before now, the range of handles available from flatpack brands has often been limited, leading people like me to look elsewhere for these finishing touches. But there are certainly several I’d be happy to pick from this range!

You used to be lucky if you got a matt black option as well as the standard chrome but these new Kaboodle handles include those two as well as brushed bronze, brushed stainless steel, brushed amber gold, brushed nickel, polished stainless steel and worn gold, with various sizes on offer. Impressive, no?!

Cali handle, Plaza and Iza knob in matt black

Kaboodle have identified cabinetry handles as a real trend for 2021 too. European-inspired handles and knobs in stylish finishes are being used to introduce colour, contrast and materiality into the kitchen, working as tactile accents.

Salento
Smooth and streamlined in its form, the Salento handle is an elegant choice if you are looking for a handle that combines both contemporary and classic design. Available in both matt black and worn gold, in various sizes.

Cali
Clearly identified by its straight-edged and geometric form, the Cali handle will bring a modern edge to your space. Available in matt black and brushed nickel, in various sizes.

Bolivar
Organic in nature, the Bolivar handle boasts a soft, circular structure, creating an ergonomic design that doesn’t compromise on style. Available in matt black, in various sizes.

Salento handle in worn gold

Vela
Vela’s classic, arch-shaped design makes it the perfect choice if you’re after a subtle and elegant handle, suited to almost every interior style. Available in brushed nickel and brushed amber gold, in various sizes.

Pasto
Featuring an elongated bar and straight, sophisticated edges, the Pasto handle was designed with longevity in mind – this handle will stand the test of time. Available in matt black, chrome and brushed nickel and in various sizes.

Plaza
Modern and on-trend, the Plaza handle is sleek and streamlined in its form, making it the perfect accessory for a contemporary kitchen, looking to achieve an effortlessly chic design. Available in matt black and brass, in various sizes.

Iza knob
Boasting decadent, geometric details, Iza takes inspiration from Art Deco design. Its soft, round edges make it the perfect choice if you’re hoping to add some understated luxury to your space. Available in matt black and brushed nickel.

Plaza handle in matt black

Cabo handle
Chunky in its form, the Cabo handle boasts strong, robust design, perfectly suited to a more traditional scheme. Available in brushed nickel and brushed amber gold, in various sizes.

Cabo knob
Charming and subtle, the Cabo Knob is perfect if you’re looking for a handle that’s understated, yet timeless. Available in brushed nickel and brushed amber gold.

Turbo handle
Combining both traditional and contemporary design, the Turbo handle features a circular body with refined detail, lending it more to classical or country-style design. Available in matt black and brushed nickel. 

Bolivar handle and Turbo knob in matt black

Turbo knob
Taking inspiration from Art Deco style, the Turbo Knob is sure to make a statement with its square edge form and layered detail. This is the perfect choice if you’re looking to incorporate some glamour into your design. Available in matt black and brushed nickel.  

Casco cup handle
Timeless in nature, the cup-shaped form of the Casco handle makes for a stunning design feature, suitable for both classic and country-style spaces. Available in matt black and brushed nickel.

For more information on Kaboodle, which is available at Bunnings.

Categories
Kitchens RENO ADDICT

Half price kitchen? How to reno an expensive room for less

By Tamara Wrigley

The kitchen is the heart and soul of a home. It’s where families and friends come together to talk about the day, cook meals for the family and is generally the centrepiece for entertaining friends – so it’s no surprise that a kitchen is the most renovated space in Australia.  

Tamara Wrigley

In most cases, kitchens and bathrooms are also the most expensive part of a new build or renovation – costing the average Australian around $20,000. The thing is, you can do a beautiful kitchen overhaul for as a little as $10,000 or less. Done well, an updated kitchen adds even more value to your home when it comes time to sell.

If you have champagne taste but are on a beer income, here are some tips on how to update your kitchen on a budget – and get more of what you want for less:

1. Budget

THE most important tip of all. Creating a budget is an essential part of your remodel so before you start the kitchen remodel or replacement, determine how much you are willing to spend on your kitchen. Never start a renovation with an open-ended budget; you’ll end up blowing out and it will lead to unnecessary expenses. Once you have a budget, put in a contingency allowance as no doubt through the process you may want to change and tweak a few items, or you could come across some unexpected structural issues. Water damage, termites or rotten timber are all too common in old kitchens, walls and sheeting. If you have little backup funds, this won’t be so gut-wrenching when you have to spend more money than expected. Keep in mind that kitchen cabinets usually take up about one third of the typical remodel budget.

2. The triangle

While we all want a tasteful kitchen that looks amazing, don’t compromise on functionality. The ‘triangle’ is still fundamental in any redesigned kitchen plan. What is the ‘triangle’? It’s the busiest and most functional area in your kitchen where you should be able to draw a triangle between the kitchen sink, the stove/oven, and the refrigerator. Easy access from all points is a must.

3. Restore/rejuvenate/recycle

Renovate with a big emphasis on sustainability and protecting mother earth, and be aware of how long items you dump will remain in or on our earth (or end up in the ocean) until they break down. I like to use what I have and, if possible, repurpose it. If you like your kitchen the way it is but it just needs refreshing, check out Dulux’s Renovation Range. Refreshing your kitchen space has never been easier as it requires no primer on most surfaces and is easy to apply. Use the power of paint for cupboards, benches, tiles, and flooring.

If your heart is set on a new kitchen, look at places like Facebook MarketPlace as you can often find a great kitchen for a third of the price of purchasing a new one.  

Other great places to look are bric-a-brac shops. Some people would rather just ring up a charity shop or junk yard to collect their old kitchens rather than paying for the cost to remove and dump them. You know what they say – “one man’s trash is another’s treasure”. The simplest one of all is to ask a friend or family member if they know of anyone renovating and removing kitchens – again, you could score a kitchen for next to nothing.

By restoring or recycling, you are doing your bit to stop wastage and scrap being bulldozed into landfill.

4. Keep it simple

It’s pleasantly surprising, the difference a new paint scheme can make to a space, but more importantly, you’ll be amazed how much of a difference changing minor things like powerpoint covers, light switches, handles, and tapware makes. Mix that with new lights and you have just transformed your kitchen space for as little as $1,000 or less. While it’s inexpensive, making these little changes will modernise a property and lift it to the next level.

5. Flatpack

There, I said it. The “F” word most of us hate, and which also leads to high levels of anxiety, stress, and arguments between partners – FLAT PACK! If you don’t mind some good old fashioned elbow grease and instruction-reading, then buying your kitchen online from places like IKEA, or Bunnings which has the Kaboodle range, or another favourite of mine, diy.com.au, could save you some serious coin. All I would suggest is to know your measurements and the layout of your kitchen.

Get some graphite paper and draw your kitchen out first. Usually, in designing, 1m equates to 1cm when drawing. Some companies will offer free design apps. When visiting in-store, take advantage of their knowledge too. Once you know your design and measurements, then order away and wait for those boxes to arrive. I’ve been told wine may help the building process… just saying.

All that’s left to do now is get creating your new or revamped kitchen space.

-Media personality Tamara Wrigley has been a property developer for more than 23 years. Tam purchased her first property at the age of 21 and now has an empire of 30+ properties worth millions. To keep up to date with Tamara’s renovations, follow her on Instagram

Categories
Expert Tips Kitchens RENO ADDICT

IKEA kitchen hack: be inspired by this before & after!

Grab yourself a cuppa, as we’re sharing a fantastic IKEA kitchen hack by Front Porch Properties in these videos today!

AFTER: Clever carpentry has made this flatpack kitchen look more custom

These videos are absolutely loaded with tips and tricks for little things you can do to make a flatpack kitchen look more expensive and unique. As a flatpack kitchen owner myself (take the tour), I always love seeing how other people personalise and give character to theirs!

If you ever thought an IKEA kitchen wouldn’t suit an older home, you really need to check this out for inspiration! I particularly love all the clever uses of space and the way they’ve used the old kitchen cabinetry in the new laundry.

THE BEFORE

Rachael Turner of Front Porch Properties

This clever ‘island’, at the same height as the surrounding  benches, doubles as a dining table because the house doesn’t have a dining room

Now watch the videos as Rachael takes you through what she did and why:

PART ONE

PART TWO (almost finished!)

We hope you’re feeling inspired for your next reno!

Our interview with Front Porch Properties’ Rachael Turner on being a woman in the male-dominated construction industry.

More Kitchens & Bathrooms | More on Renovating


Categories
House Tours Jen's reno Kitchens

The big kitchen reveal

Photography by Jacqui Turk

I am so excited to finally share my new kitchen with you today! Seeing these beautiful pictures makes the last two months of mess and chaos seem more than worth while!

They say the kitchen is the heart of the home and in this house, it really is. Not just because everyone hangs out in this room, but because it really is in the middle of our home. And the light here is the best in the house. It used to drive me nuts that people gravitated towards this room because of the light when it was unrenovated, as we had much nicer spaces to entertain in like the living room! Now I am no longer embarrassed of my kitchen, I am happy for people to congregate in here and admire it whenever they want!

Black barn door hardware from Bunnings

Bar stools from GlobeWest

This really is my dream kitchen. I’m going to blog about some of the finer details separately, but today’s post is just the first overview of what we chose, what we did and why. In terms of layout, this has not changed drastically, but we did get rid of the back door (see before pix at the end of this post) to allow the cabinetry to go right to the end of the kitchen. We were also able to move our fridge freezer into the kitchen (it’s the little things, right?!) because previously there was nowhere to fit it and it lived in the dining room!

The starting point for this room was the cabinetry from Freedom Kitchens. I always knew I wanted white shaker style doors so when I found out this was possible using their new, more affordable flatpack option, the Essential range, I was thrilled. I saw flatpack as an opportunity to make great savings, which would allow me to still have the other things I dreamed of like stone benchtops.

My good friend, TV interior designer James Treble, sketched me out a rough layout I loved over dinner one night and we were off! I then worked with Freedom Kitchens design consultant Nina Hughes to turn that sketch into a detailed plan, taking into consideration the flatpack options available. This in-home service is included for everyone buying from their flatpack range, as well as a site check to make sure nothing has slipped through the net, before your cabinets are made. This really made me feel confident. I think buying a kitchen off the shelf with no professional advice or checks would have made me worry myself sick!

The next thing I chose were the handles. Anyone who knows me or has been to my home knows I just love a brass accent! I was always going to have gold handles and I sourced these from Kethy (available through The Block Shop) after seeing similar in Julia and Sasha’s beautiful Block kitchen. It was a winning combo from the start. I didn’t look at another handle so this proved to be one of the easiest decisions!

Then benchtops: through my job, I know Caesarstone by reputation and I loved their designs. I had three samples on high rotation but I finally went for the most subtle, Noble Grey, for a few reasons. I liked the contrast of the grey with the white cabinetry, and while the Calacatta marble-look designs have been hugely popular recently, I wanted something a little different. Then I saw blogger Briar Stanley from Sunday Collector use Noble Grey in her amazing kitchen and that sealed the deal.

Of course, then I needed to decide on a complementary splashback. I absolutely love tiles but trying to choose some left me paralysed by indecision! There were just too many amazing choices. I could have opted for subways, and I am a fan, but again, I wanted something a little different. So I decide to carry the Caesarstone up the splash as well; a decision I have not regretted for one second! The splash behind the cooktop is really quite deep so it makes a real feature. When the light through the opposite window hits it, it really shows off the veins in it. I also think the streamlined look it has created has allowed me to add my other, more bling touches, without it feeling cluttered or over the top.

Speaking of bling, the gold tap is from Meir and I am so in love with it! Taps really are like jewellery in a kitchen. You can’t miss them so you might as well make a statement! Their new Tiger Bronze colour was released at just the right time a few months ago and I was lucky enough to be one of the first to get my hands on it! Would a gold sink as well prove too much? I must admit, I did really worry about my decision, but in the end, it all came together beautifully. And nobody can believe that sink came from Bunnings!

Of course, a kitchen can (and should!) look beautiful but it needs to function too! Having room for a fridge freezer was a great start! But I needed to think long and hard about the appliances, which I chose from Italian brand Ilve. I was really excited to get an integrated dishwasher from an aesthetic perspective but this one works brilliantly and even has a light inside, plus one which shines onto the floor so you know it’s on (being that it’s hidden behind a cabinet door). I just love how it seamlessly blends into the kitchen.

Choosing an oven was a lot harder than anticipated and something I’ve never done before. I eventually decided on a 90cm electric oven and having that extra space is already proving a Godsend when entertaining. I can’t wait to give it a really good workout on Christmas Day.

Then of course you have to match that with a 90cm cooktop even though I’m not sure I’ll ever use all six burners at the same time! We first wanted gas but had a delay finding out if we could get connected, which led us to opt for induction. I’m so glad we went this route because I bloody love it! I cannot believe how quick it is to heat up, it’s a dream to clean and, importantly, it’s safe, which when you have an adventurous climbing toddler around is one less thing to worry about. I’m also thrilled with our hidden rangehood which allows me to have an uninterrupted row of overhead cupboards.

So, we had the bones of a great kitchen, but there were two other things I needed to achieve: replacing the dated sliding door to the laundry, with a modern take on a barn door and black hardware was the first. I wanted the door to have VJ panelling so we did this by cutting Easycraft panels (I’m in love with this product) to size and fixing them to the front of a very cheap, plain door. We then decided what the hell, why not panel the entire wall and wow, wasn’t that the best call? This wall has become a real feature of the kitchen. We also did the back of our breakfast bar in the same paneling and colour.

Art by the Print Emporium

Secondly, I wanted to tie in the dining area, which adjoins the kitchen and previously had a cork floor, much better. I did this by adding VJ wainscoting to this room and painting it in the same grey (the panelling is in Haymes Paint Chinchilla Fur and the walls are Haymes Paint Greyology 4). It has made a huge difference. Of course, having the same floor helped massively too.

The icing on the cake of all this was our new Quickstep Impressive Ultra laminate floor (more on that next week) which we have also laid in the living room, hallway and my home office. Once that went down, we were finally finished!

A few other things I’m really glad we did and are worth a mention were:

  • adding bulkheads for a more finished, streamlined look (and no dust or clutter accumulating on top of the overhead cupboards)
  • putting a power socket in the back of the pantry so I could hide the Nespresso machine and toaster away in there
  • making sure there was a space for the microwave under the breakfast bar out of sight, so it didn’t have to use precious benchtop space
  • making one of the five powerpoints (you can never have too many) a USB one (we use this every day to charge a phone or laptop and it has proven really handy)
  • opting for a pullout double bin under the sink so there’s no ugly bin on show or in the way (I obviously need to get out more but I really love this!).

I could rave about my new kitchen all day but I’ll focus on some other aspects in future blog posts.
Overall, I am thrilled with kitchen and that it is finished before Christmas! I’m just waiting on my blinds (Romans) and looking for the perfect new kettle! A huge thank you to our friends at Integriti Bathrooms who helped project manage this reno.

Now, we could finish this without taking a look back at the before photos!

What do you think of the transformation? If you have any questions, please write them in the comments below and I’ll get back to you.

Want more? Take the VIDEO TOUR with Jen.

Listen to my husband Damian interview me about our kitchen reno in this podcast!

More kitchen and bathroom inspo.

Categories
Expert Tips Jen's reno Kitchens RENO ADDICT

How to get a luxe look for less in your kitchen reno

In partnership with Latitude Financial Services

Kitchens can be expensive. Very expensive. I’m in the middle of one so trust me, I know! And while we all know they sell houses and they’re the heart of the home (why so many kitchen cliches, eh?!), we don’t all have unlimited budgets, much as we’d love to have the best of everything.

Today, I’m sharing some of the best ways to still achieve a luxe look without spending a fortune, with a few of my own examples thrown in.

Go flatpack

Flatpack kitchens no longer have the stigma they used to; probably because they’re a lot lot better than they used to be. A flatpack kitchen will save you a significant amount of money compared to a custom job. I’ve personally chosen a flatpack kitchen from Freedom Kitchens’ relatively new Essential Range. I could still have a satin finish and shaker profile door, which is what I wanted anyway, so I’m happy!

Freedom Kitchens’ Essential Kitchens range

Some other popular flatpack kitchens are:

  • IKEA
  • Kaboodle at Bunnings
  • Semble

When doing your calculations, bear in mind that if you don’t have the time, skills or inclination to put it together yourself, you’ll need to factor in the cost of a handyman or similar to help. All of the above brands suggest that they are a DIY product though, so technically, you should be able to handle it yourself. We don’t all have the time or patience though!

Pimp your cabinets

I’m talking hardware. You can buy your handles from anywhere, not just the place you got the cabinets from. So look around for something special. For a few hundred dollars you could have your cupboards looking amazing. I’m using brass Kethy handles and I’m in love! They’re going to be like the jewellery of my kitchen!

I’m having these brass handles by Kethy in my kitchen

Mix up your fronts

Just because you have an affordable flatpack kitchen, doesn’t mean you have to go for an all gloss white look. There are a lot more colours and finishes available these days and there’s no reason why you can’t go two-tone; in fact, it’s quite on trend. Think about having your top cabinets one colour and your bottoms ones another (probably darker).

Image: Freedom Kitchens

Make a splashback statement

I’m talking tiles! There are so many affordable options out there now. Yes, you can get great results with the common subway (like half the country!) and if you’re going to do this I’d suggest a more organic imperfect subway or a bevelled one, perhaps mixing up the grout by choosing black or a grey rather than white (doesn’t show dirt either!). But if you’re feeling brave, make a real statement with something colourful, patterned or textured. This won’t set you back too much in the average kitchen but will make a huge difference compared to the cheaper glass splashback. Other affordable yet impactful options might be mirror (if you can handle the cleaning) or pressed tin.

Source: DiLorenzo Tiles

Consider some open shelving

This may be as simple as some overhead flatpack cabinets without doors. Or you might decide on a few solid timber shelves. Being able to display cook books or beautiful ornaments unexpectedly in the kitchen really can add a touch of class, personality and individuality; not things we associate with a bog standard cheap kitchen!

Josh and Jenna’s Reno Rumble kitchen. Source: Caesarstone

Accessorise like a pro

A little goes a long way. Think cannisters, stacked timber chopping boards of different sizes, a marble mortar and pestle, an amazing fruit bowl on the breakfast bar. Places like Target and Kmart are you friend here! Or if you have a bit more to spend, invest in something beautiful like a handmade ceramic fruit bowl, a great coffee machine or even some framed art for the wall.

Source: Freedom Kitchens

Paint and wallpaper

So you can’t afford the navy kitchen of your dreams. You can have navy walls! There’s generally not much spare wall in a kitchen which makes it easier to be brave with your colour choice, especially if you’ve kept it simple elsewhere. I’m intending to paint the sliding barn door from our kitchen to our laundry navy. You’d think I was obsessed with navy or something…

Source: Little Greene

Don’t forget your window treatments

Like accessories, window treatments can make a real difference to the look of the end product and really finish it off. Think about plantation shutters for a high end look (they won’t cost you much for just this one room) or how about having a Roman blind made in an amazing linen or patterned fabric?

Image: Shutters from DIY Online Blinds in Bec and George Douros’ latest reno

–For help with financing your reno, speak to our partners at Latitude Financial Services.

Categories
Jen's reno Kitchens

The plans for my new kitchen revealed (and the before!).

In partnership with Latitude Financial Services

I feel like I’ve been planning my new kitchen for months. Oh yeah, I have been! It’s been five months since we moved into our new (old) home, affectionately called the “nanna house” due to the old lady who lived here for three decades before us. We have been slowly but surely bringing her into the 21st Century but the first major job on the list was the kitchen and now the wheels are finally in motion. We are looking at an imminent demo, so any tips for surviving without a kitchen for a few weeks, will be gratefully received in the comments (thanks in advance!).

So here’s what we’re dealing with now. A very original kitchen which had a little spruce-up prior to the house going on the market. We’re talking old school solid timber cabinets installed long before soft close doors and smooth drawer runners were invented. They’re not even tall enough for most of today’s mod cons, like the Vitamix and the bigger wine glasses, for example. I haven’t unpacked more than the essentials because despite much scrubbing, you can only get that orange floral lining paper (which has become one with the cupboards) so clean. The laminate benchtop is actually in amazingly good condition and the brown oven and electric coil cooktop still work surprisingly well. But the museum piece dishwasher keeps tripping the electric and leaks every time we use it. But at least we have a working dishwasher!

We’ll be replacing those sliding dining room doors with French doors

Then there’s that random half-wall three quarters of the way down on the lefthand side. On the other side of that is, well, dead space! And the beautiful sliding door to the laundry.

The design was always going to be relatively straightforward: maximise use of space by removing the half-wall and bricking up the back door (we have two others!) and move the breakfast bar back into the kitchen as it is currently encroaching on our already-narrow dining room. Making space for a modern fridge-freezer (ours currently lives in the dining room because there’s nowhere for it!) was also pretty important!

While I had a pretty good idea what I wanted to do, when you have talented friends, you’d be mad not ask their advice, and I have several! So when interior designer James Treble (from Channel 10’s The Living Room) was at our place for brunch one day, I made him earn his food by drawing me up a quick plan! And it suddenly all clicked into place.

Poor James wasn’t actually expecting me to publish this when he scribbled it down in 5 minutes!

We than had a designer from Freedom Kitchens come out to tell us what was actually possible, using the drawings as a rough guide. This was really helpful as there were plenty of things I hadn’t considered. She explained everything really well and I felt much more confident in what we were doing after that. Some plans were produced, which I was happy with, and we are now waiting for a site check and measure this Friday before we can go any further. I am dying to lock in my trades and get going! Our friends at Integriti Bathrooms (they did our beautiful bathroom reno at the old place) are coordinating the trades with me (thanks guys, I wouldn’t trust anyone else!) and this has been a huge learning curve for me too, but it was about time I learned a bit more about the process!

Initial plan from Freedom Kitchens

So, what will be be doing in here? I’m going for classic with a touch of glam!

Shaker-style cabinetry was always going to be my choice. Due to a very tight budget (we maxed out on our mortgage!), we decided to go with Freedom Kitchens’ new and very affordable flatpack option, The Essential Kitchens Range. My handyman will assemble the cabinets, even though it’s apparently a piece of cake. That stuff just isn’t mine and Damian’s forte!

As this is a longterm home, it had to be a stone benchtop. I’ve chosen Caesarstone’s Noble Grey as a nice contrast to the white cupboards while still being quite light (I had dark benchtops in my last place and hated them). I’ll be taking that up the splashbacks too. Our kitchen is flooded with natural light, the best light in the house, so I wanted to keep it all light and bright in here.

Against many people’s opinions on what will date or what is on trend, I am sticking by my decision to go with brass handles from Kethy, a gold Zip tap and even (wait for it) a gold undermount sink. Controversial!

Personally, I think brass is a classic look. Rose gold, I’d agree, may be having an extended temporary moment, but when you think about it, brass has been around in interiors for a really long time! I don’t have resale in mind as we intend to live here for at least a decade so I’m taking the opportunity to specify what I really want. This is one flatpack kitchen that is being seriously pimped!

To add a little colour, pattern and texture, I’m considering a Roman blind made from some kind of navy-based textile (you knew there’d be navy, right?) and some navy rattan stools like these from Naturally Cane.

I love this kind of look. Image: blinds-2go.co.uk

Or I might add the colour and pattern with wallpaper (away from any water or potential oily splashes, don’t worry!) and have plantation shutters instead. Lots to think about!

Appliances were a learning curve! I’ve chosen mine from Ilve and after dreaming of a freestanding cooker for a really long time, at the last minute, I decided a more streamlined built-in look would be better for our kitchen. What I knew I needed though was quality that would last and something big enough to cope with entertaining and a growing (no, that’s not an announcement!) family. I’ve gone for a 90cm oven, a 90cm induction cooktop, a concealed rangehood and an integrated dishwasher. I won’t pretend this European brand’s style credentials didn’t sway me too!

Flooring is still up in the air after a supplier let me down at the last minute (yes, this happens to media too!), but we are looking to replace the floor everywhere bar the bedrooms (which are newly carpeted) as soon as the kitchen’s finished.

I look forward to sharing this journey with you over the coming weeks!

–Looking to renovate your kitchen? Get some tips on how to finance it from our partners at Latitude Financial Services.

Categories
House Tours Kitchens

A Sydney blogger’s light-filled and lovely IKEA kitchen

Photography by Lucas Boyd

We recently checked out blogger Rebecca Lowrey Boyd’s kitchen and loved it so much, we persuaded her to share all the details with us. You can check out more of Rebecca’s writing at Wee Birdy.

I never thought I would renovate our kitchen. When we bought our ‘70s modernist pole house on Sydney’s upper North Shore three years ago, I was a staunch defender of its wood-panelled walls and ceiling. While everyone peered around in the gloom, I felt like I was living in a little wooden cabin in the the bush.

Why renovate?

After three months of living with our kitchen, the charm of the timber-lined space wore thin. The darkness of the kitchen was at odds with the rest of the house, which we’d since painted white and was bathed in light. More than anything, the clunkiness of the cabinetry was annoying. The drawers were heavy and frequently got stuck, and everything felt disorganised and messy. The overhead cabinets dividing the kitchen and living room made the room feel dark and closed in.

Why IKEA?

We knew a stone benchtop was out of the question because we have two poles going through the benchtop. The only option was timber so we could cut around the poles like a jigsaw. For a flatpack option, IKEA appealed because of the budget-friendly cabinetry and oak benchtops. We’ve got a Scandi-style home and it’s easy to get the Scandi look with IKEA. Finally I was drawn to the soft-closing, deep drawers that are so much more expensive in a custom-made kitchen.

Big changes

We removed the overhead cupboards that hung over the benchtop, which opened up the space and allowed the light from the living room to flood the kitchen. We also painted the dark timber panelling white in Dulux Natural White.

Benchtops

IKEA’s AKERBY worktop in oak (no longer available but there are similar).

Cabinetry

White IKEA FAKTUM cabinets (now called METOD).

Splashback

Hand-made ceramic subway tiles with black grout. We loved the organic look and the wavy surface imperfections. It gave our flatpack kitchen a more handcrafted, customised look.

Sink and tapware

The DOMSJÖ double bowl sink completed the relaxed Scandi-style look, which tied in with the rest of our house. We’d like a black kitchen tap but for now we’ve got an ELVERDAM tap (we love the pull-out spout for rinsing dishes).

Appliances

IKEA SVAVANDE ceiling-mounted extractor hood.

Lighting

We spray-painted IKEA’S white RANARP pendant lights black, and hung them over the working area of the benchtop. We also ran LED strip lighting under the bottom cupboards. It gives the space a soft glow at night, which is great when we have the TV on in the next room.

Mini vertical pole gardens

Our home is filled with plants and the kitchen wasn’t going to be the exception, so we painted the poles white and turned them into mini vertical gardens with Little Urban Farmers’ hanging gardens planters.

Worst thing we did

We orginally went with IKEA’s recommended tradesperson. We ended up having to rip out the benchtop and start again.

Best thing we did

Hire our builder, Matthew Blackmore. He carefully cut around our poles and joined the new IKEA oak benchtops seamlessly with a biscuit-joint, held together with benchtop clamps and wood glue. (The first tradie butt-jointed the benchtop together with Sikaflex and the finish was messy.

Our tradie dream team

Builder: Matthew Blackmore 0499 997 375

Painter: Joey Neukam 0435 162 240

Matt Blackmore’s top 3 IKEA timber benchtop tips

  1. If you’re joining together IKEA timber benchtops, ask your carpenter to make a biscuit joint and hold it together with benchtop clamps and wood glue.
  2. Use kitchen grade benchtop oil and give your benchtop three generous coats of oil with a second sand.
  3. It’s worth choosing the IKEA solid timber benchtops instead of the timber veneers, as the woodchip can disintegrate around the cut-outs to the sink and it can get black mould. If you do get a timber veneer, use the end strip to protect around the pieces which are exposed to the sink.

More kitchens and bathrooms

Categories
Expert Tips Kitchens

The best tricks for a cheap DIY kitchen makeover

By Cherie Barber

Last month, I highlighted two bathrooms I’d renovated for prices that probably drew disbelief from some who might have forked out treble the amount for half the impact. Those two case studies hopefully did demonstrate what highly targeted cosmetic renovating is all about.

This month, I’m shifting the focus to kitchens. The trick, as always, is to zoom in on the obvious flaws, without delving into expensive and largely invisible or unnecessary updates. For example, updating things like old tapware, handles, lighting and power point covers are cheap fixes compared with moving your sink from one end of the kitchen to the other.

If your kitchen layout is perfectly okay, then don’t mess with it, short of maybe adding a few additional cupboards or shelves, which won’t require plumbing or electrical trades – that always bumps up the price.

Saving graces

If you really do need to install a new kitchen, there are a couple of cost savings worth considering. While I’d consider it design suicide to try and install your own flatpack kitchen and get it looking professional (hire a carpenter or installer for this), there’s no reason why any handy DIYer can’t assemble the cupboards themselves. If you’ve successfully pulled off an IKEA brain teaser, then you should be fine with this assembly task.

And if you’ve decided to project manage the kitchen renovation yourself, be sure you’re across the all-important “order of works”, which dictates which trades are needed for what stage of the renovation (eg, carpenter, sparkie, plumber, tiler, benchtop installer, etc); otherwise you’ll either be waiting on trades that aren’t available or paying for endless callouts when a couple would have covered it.

A couple of useful free tools are:

Bunnings kitchen planner 

Wattyl colour planner 

Here are two kitchens I’ve done that highlight what you can be achieved on tiny budgets if all they need is a few decades stripped away.

The $2300 kitchen

  • Paint existing kitchen cabinets and rangehood with specialty paints
  • Paint benchtops, tinted to Taubmans “Viking Gray”, finishing with White Knight Bench Top Clear
  • Install new feature tiles for splashback
  • Remove old oven and reformat the space to incorporate microwave
  • Install Gerflor feature panels on underside of the breakfast bar
  • Install feature light over breakfast bar
  • Install new slimline venetian blinds

Before

After


The $4000 kitchen

  • Reshuffle existing kitchen cabinetry for a more functional layout
  • Add corner shelving
  • Create a new large pantry (not pictured)
  • Install new benchtop in missing sections
  • Replace handles
  • Install new kitchen appliances
  • Install new splashback wallpaper
  • Install glass panel over wallpaper
  • Install white tiles around window
  • Repaint existing kitchen cabinets
  • Resurface benchtops using Rust-Oleum Benchtop Transformations Kit 
  • Install micro venetian blind

Before

After

Cherie Barber is the director of Renovating for Profit, a company that teaches everyday people how to buy and renovate properties for a profit. 

Categories
Expert Tips Kitchens RENO ADDICT

How to create beautiful DIY kitchens on a budget

By Nikki Dudley

Does your beloved kitchen need an overhaul (as in wham, start from scratch)? If sweating over a scouring pad with a second bottle of spray n’ wipe and a fresh lick of paint won’t cut the mustard, then your answer is yes, go for it.

Step Zero. Where to even begin?

Take a good hard look at what you’ve got to work with in terms of the size, structural walls (those that are load-bearing), type of interior materials (such as plasterboard or asbestos) and if you’ve got existing character like timber casement windows or antique fittings.

Measure it up as it looks now. Sketch it on a piece of paper. Take pictures on your phone. Decide if any aspects will stay such as cupboard handles, flooring, lighting, cabinetry or white goods.

Nobody (except maybe Beyoncé) has an endless bank account, so we must consider budget. For some guidance, realestate.com.au suggests $12,000-to-$16,000 can create a sparkling kitchen that shouldn’t over capitalise your property. We feel this is quite hefty and using DIY methods could save you up to half this amount.

Know that kitchens do (help) sell homes. They are the heart, soul and personality of your bricks and mortar and it’s generally where you meet, entertain and dine with those you love. So don’t be too tight with your wallet.

Image 0-  Project One. Before
Outdated kitchens to be overhauled by nooks & cranny

Image 1- Project Two. Before

Step One. Planning.

Before you start swinging around a crowbar (or a Miley Cyrus wrecking ball, which looks like fun) you do need to plan (and plan some more). We would wholeheartedly agree with Oliver Davis’s recent guest post, “to direct your spend appropriately.” This also applies to your time, energy and elbow grease.

Plan for your budget. Plan for your time. Plan for your design. Plan to stay committed to this project ‘til the very end (it’s worth it). Let the internet and online shopping be your friend. Google. Pinterest. Houzz. Instagram. eBay. Gumtree. Craigslist. And so on…

[contextly_sidebar id=”DuGXMQUHgjejQpk6NujGPt4Mp0UMf2ff”]Attend showrooms, open homes for sale and high-end display villages. Seek out trends, designs, colours, ways to entice natural light. Do consider splurging on a butler’s pantry, tap mixers, pendant lighting, gas stove tops and energy-efficient white goods. Alternatively, you can save on a DIY timber meat safe as a unique island bench (made at the standard 900mm height, of course). This is an excellent way to save on cabinetry costs.

Image 2- Project Two. Handmade Island Bench
Custom made island bench by nooks & cranny

And note that leftover tiles are often a lot cheaper than glass, stainless or Perspex panels when planning your splashback. The subway tile or mosaic effect, we think, is just as glamorous and easy to clean.

Also, keep in mind that leaving the existing sink, dishwasher or integrated refrigerator portals where they are (or as close to their current location as possible) saves a lot of money. However it is often crucial to redesign the layout but just know that employing trades to move and reconnect infrastructure will eat into your moolah.

Consider the existing and new location of powerpoints, switches, television ports, plumbing and air-conditioning units (and their direction of airflow). Importantly, also think about where you will place your Vitamix, kettle, toaster, knife block, fruit bowl and microwave. Ensure there is room for any bulky items. Don’t have any? Bet you do. Think breadmaker, ice-cream maker, casserole dishes, saucepans, pots (heavy things that require a sturdy shelf). Plan for their home.

You now certainly have a solid plan to take your sketches to a hardware store for quoting. Also email them to local cabinet makers. Tip: It pays to shop around.

Step Two. Demolition.

Let the games begin. And may the odds be ever in your favour! (Oops yes, we are both Hunger Games fans). Start by turning off your power. Disconnect everything (as you don’t want to blow the place or yourselves up the wazoo).

Has your skip bin hire arrived? This is a good $150(ish) well spent, as opposed to 20 dump trips. Trust us on this.

Image 3- Project Two. During demolition
Two demolition scenes, by nooks & cranny

Image 4- Project One. During demolition

Demolish strategically and logically. Stay safe. Follow your plan. Big items out first. Flooring removed last. Everyone always forgets the clean-up phase. Allow time to clean your now empty shell in preparation for the grand installation. No dust. No grime. No live wires. Consider sugar soap and a decent vacuum and mop x2.

Image 5- Project One. Clean up
Empty (clean) kitchen shell, by nooks & cranny

Step Three. Construct.

The right tools are (sooo) important for efficiency (and your sanity). Ensure your workshop is stocked and any extra help and supplies are arriving as per schedule.

Follow the DIY cabinetry flat pack kit instructions is our best advice. Away you go with a drill, Allen key set, level and silicone.

Image 6- Project One. After
Complete flat pack kitchen, by nooks & cranny

Image 7- Project One. After
Step Four. Entertain and enjoy.

Ensure the budget allows for your finishing touches such as an indoor herb garden, new cookbooks for display, fresh flowers (always), or a set of new cocktail glasses to peep through the glass overhead cabinetry (oh how very Dee and Daz from The Block).

Finally, make sure you now take time to marvel in this beautiful space you’ve personally created for your home and family. Entertain and enjoy.

Image 8- Project Two. After
Complete custom made kitchen, by nooks & cranny

–Nikki Dudley is one half of nooks & cranny, a brand spankin’ new DIY renovation blog to inspire and assist enthusiasts create beautiful homes (on a budget).

Categories
Furniture

NOMI: a new concept in customisable Australian, timber, flatpack furniture. No tools required!

NOMI is an exciting new concept in Australian designed and made furniture. Designed by you online, made of timber, with customisable colours and other options, delivered to you (flatpacked) free and (possibly the best bit) no tools required for assembly. Too good to be true?!

nomi Time Table

Sydney locals Michael Grassi, Henry Gresson and Tomek Archer have collaborated to launch the new concept. By combining online technology, product design and efficient manufacturing processes, their aim is to provide affordable and accessible designer furniture that can be customised online. NOMI launched at the end of last month.

Award winning designer Tomek, of Tomahawk Studios, has created the range with simplicity at its core. Clean lines and unassuming proportions make NOMI suitable for the home or office. “The collection has been conceived as a range of basics, informed by a series of studies into fundamental furniture types,” says Tomek. “Constructed from solid timber, the adaptable series of chairs, tables and storage each have timeless and enduring qualities that are equally suited to blending in or standing out, depending on the customiser’s efforts.”

nomi Time Coffee Table

Co-founder Michael adds: “We wanted to offer something special and unique, something that hadn’t been seen in the furniture space before. Our vision was to provide affordable designer furniture and create a place where people could interact with our products in new and exciting ways.”

This short video explains how it works…

Categories
Interiors Addict

Easy to assemble, Australian bed, requires no tools

The new Kiribed from Melbourne’s Synapse Design is striking yet simple and, best of all, easy to assemble.

kiribed2

Created by head designer Rolf Meumann, he describes the assembly as “a beautiful puzzle underscored with tension; held firmer in use. This is a fresh, engaging aesthetic in bedroom furniture.”

Categories
Interiors Addict

Preview of the new IKEA Stockholm collection

It’s a little way off yet, but IKEA Australia will launch STOCKHOLM, a new collection of products with a focus on living, dining and sleeping solutions, in August.

Ikea stockholm room setting

STOCKHOLM is designed to add a warm and homey feeling through design that embodies both quality and comfort. Organic colour schemes are inspired by nature, like the lush greens and browns of fertile country fields. Organic shapes are paired with straight lines, adding a modern and distinctly Scandinavian touch. Materials like natural walnut woods run through most of the collection, as well as mouth-blown glass, bone china and warm textiles. The result is both contemporary and classic.

Categories
Interiors Addict

Pay someone else to put together your flatpack? Yes please!

I feel like I need to tell you about Airtasker, just in case you don’t already know about it! It’s a free online service that lets you outsource everyday tasks (like putting together your latest Ikea purchase or even collecting it if you don’t happen to have a big enough car/van) at a price you’re prepared to pay.

It’s that simple but SUCH a good idea. You log on, quickly create an account, post details of the task and how much you’re prepared to pay to get the job done and sit back and wait for the bids from ‘runners’. 

Categories
Interiors Addict

Design-your-own-flatpack company wants to take on IKEA with Aussie-made

From the same factory turning out high end furniture for Herman Miller and Living Edge comes a new design-your-own flatpack range with grand designs on taking a chunk of Ikea’s market.

Young entrepreneur Priyanka Rao has furniture in her blood. Her dad Sudhindra owns furniture manufacturer Luxmy and runs her new venture with her. But the idea for Evolvex actually came while shopping for furniture for her younger sister who was moving to Canberra for work.

“She couldn’t find anything she liked when we went out, but she really needed new furniture for the new place, so she bought stuff that would just have to do. Most of the flatpacked products broke on the way home in some way or another so Dad carted the lot to his furniture factory to fix it up,” says Priyanka.

“In the process she requested a few customised features and when we chatted about the experience later we dreamed of an online flatpack furniture store where only high quality, eco-friendly furniture was made available and the customer had the option of customising the furniture to fit their particular needs.” Three years later Evolvex.com.au launched.

Her father (known as Rao) started Luxmy Furniture (the parent company of Evolvex) in 1997 after successfully establishing and running manufacturing companies in various industries. Priyanka studied architectural design, worked in the industry, and then did an MBA while working in various roles in the recorded music industry. “I joined Luxmy Furniture in early 2011 after Dad and I finally decided that we should bring Evolvex to life. I find my design and marketing background complements Dad’s operational background really well.”

Luxmy Furniture manufactures for just about every major furniture supplier in the commercial sector – Herman Miller, Living Edge, Haworth, Stylecraft, Zenith, Corporate Culture and so on. In partnership with their clients, they’ve manufactured furniture for the offices of The Prime Minister’s Cabinet, Optus, Facebook, IBM, Louis Vuitton, 3M, Commonwealth Bank and many more.

So Evolvex is producing affordable, quality, customisable flatpack furniture in this country. What’s more, it’s eco-friendly. “We found that the majority of the flatpacked furniture on the market was made from MDF or particle board with high levels of formaldehyde and this is something we have made our mission to change,” says Priyanka, 25. “We only use the highest quality ‘E0’ rated MDF board that has been certified by the Australian Forestry Standard (AFS). This is extremely important for us ethically. Because the customers are getting the product direct from the manufacturer we can maintain a great price point.”

So does Priyanka really think she can take on Ikea? “We aim to the number one provider of high quality flatpack furniture available online in Australia and given IKEA doesn’t sell online for their east coast stores, I think we’ve got a great chance at winning that race,” she says with a cheeky grin. “We come to you online from the convenience of your couch and we even deliver to you so you don’t have to move.”

Evolvex has positioned itself in the ‘low to mid’ market, with its target customers being students, families with young children, young renovators and small businesses with less than 10 employees.

“Our ideal customer has gone through their ‘Gumtree/eBay/found on the street’ furniture phase and is now looking to invest into high quality furniture that will last them for the next five-to-10 years. They’re also time poor and would prefer to have someone make their lives easier by delivering furniture to them that fits their needs.”

Their most popular products are currently their storage cubes and black and white TV cabinets. The most popular colours chosen are white, black and beige.

“Our product is unique and patent pending, as we let customers customise furniture to their needs via an online application. As the product is made from interchangeable modular components, the pieces can be rearranged at a future date to make an entirely new piece of furniture. They can buy additional parts and increase the size of their original design. We named the business Evolvex as you can evolve your design by exchanging different parts.”

Check out their website and their YouTube channel to see how it works for yourself.