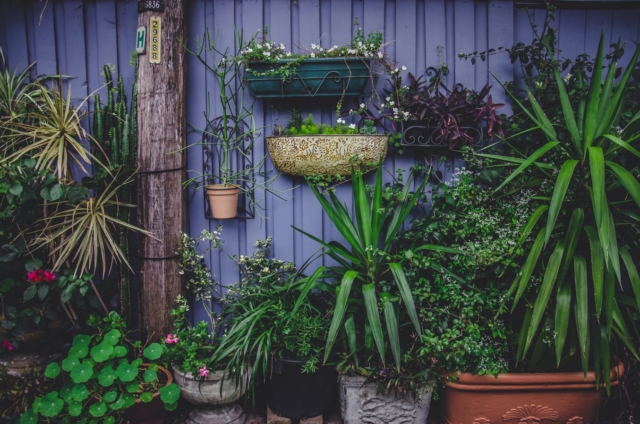
If you’re anything like me, your indoor plants don’t last too long. Whether you are a first-time plant owner like me or a well-seasoned gardener these simple tips and tricks from gardening expert and Scotts Osmocote ambassador Melissa King can help you be a better plant parent (without having to spend endless hours refining that black thumb).
Tip 1: Don’t drown your plants with love
Over watering is the biggest killer of indoor plants. Wilting leaves can be a sign of too much or too little water (among other things). So if your house plants are sulking, don’t always assume that they are thirsty. Poke your finger into the soil first to see if it’s dry down to your second knuckle before getting out the watering can.
Tip 2: Some extra TLC never hurt
Give your house plants a regular wipe down with a moist cloth to prevent an accumulation of dust on the leaves. To give them a thorough clean, pop them in the shower every month or so to remove any build up, helping make them look shiny and healthy. You could also put them outside in the rain or sprinkle them with the hose before bringing them inside again.
Tip 3: Lighting is key
Some houseplants grow well in low light, others need it a bit brighter to flourish, so position them around your home according to their required light levels and keep them away from heaters and blasts of cold and warm air.
Here’s a good rule to live by; If it’s bright enough to be able to read a book in a room with the lights off, then there’s enough light for your indoor plants to thrive.
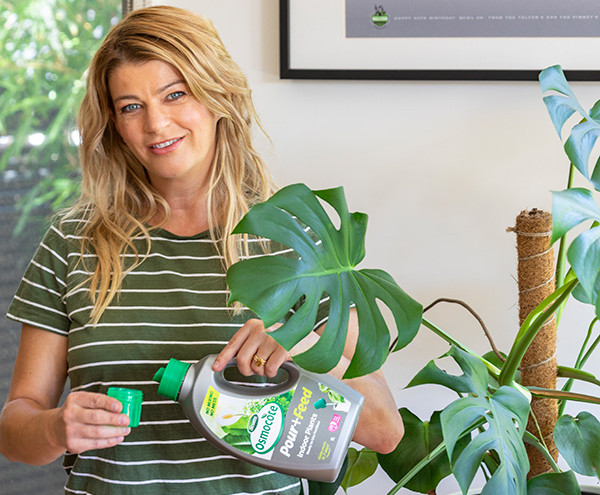
Tip 4: Plants like dinner too
They key to thriving plant babies? Food! Pick up Scotts Osmocote pour + feed. You don’t have to mess around diluting it in a watering can, simply pour a capful into the base of your plant every fortnight or when your plants look like they need a boost.
Tip 5: When was the last time you changed your potting mix?
If your plant babies are looking a bit tired or practically jumping out of their pots then it might be time to repot them. I recommend trying Scotts Osmocote potting mix for indoor plants, which is tailor-made to bring out the best in your green beauties. It doesn’t contain compost or pine bark, which are known to shelter pesky fungus gnats. Instead, it’s based on an expert recipe of Scotts Coir, Sphagnum Peat and Perlite, which provides the ideal foundation to keep your indoor plant babies looking fresh, green and lively.
The houseplants trending in 2022 and how to care for them
Melissa King, Better Homes and Gardens presenter and Scotts Osmocote ambassador, shares her horticultural wisdom! #SentimentalPlants It’s not surprising that…
Jason Hodges’ expert guide to a Hamptons style outdoor area
For over a decade Australians have had a love affair with the Hamptons style, with the trend increasing throughout the…
Plant Life Balance, a leader in Australia’s green space industry, has just launched the Greener Spaces Better Places initiative with ambassador Charlie Albone. And it seems we’ve never been more interested in plants than since the onset of COVID-19 with 44.2% of Australians believing the pandemic has made them more aware of the importance of nature in their family’s lives. Additionally, sales of herb and vegetable plants in Australia has increased by 27%.
Charlie Albone
But, if you’re like most people, caring for greenery can seem like an intimidating task but this is where Charlie’s expertise comes in. “There’s a green thumb in us all, and we’re seeing this now more than ever as people turn to gardening – successfully – for the first time since lockdowns. I’m looking forward to sharing my story and top tips so more aspiring gardeners can feel confident to get out there and get their hands dirty!” says Charlie.
Charlie’s tips for indoor plants
Life for an indoor plant is tough as not much has evolved in a dark cave with air-conditioning. You need to show your indoor plants some love.
Pick wisely; selecting tropical plants with big leaves, peace lily, devils’ ivy and monstera are all fail safe.
Put them in a well-lit ventilated area, the more natural you can make the environment the better the success.
Overwatering will kill them as quickly as underwatering them so come up with a routine and stick to it. Regularity is the key to success and each situation will be different but start with a little bit every three days and see how your plants respond. Adjust the amount of water before adjusting the regularity.
Take your indoor plants for a shower once a month – this will replicate rain, wash off the dust from the leaves and soak the root balls giving them a boost of hydration. Don’t use any hot water as this could scold the leaves.
If you are showering your plants, you shouldn’t need to wipe the dust off your leaves, however for super shiny specimens, dab the smallest amount of olive oil on a cloth and shine them up.
How to pick a plant for the outdoors
It can be a daunting process picking plants for a garden, they seem like such a big investment and you desperately want them to succeed. Although it’s never fool proof, you need to follow a process to get the best chance of success.
First up you need to study where your new plant baby is going to go. This will stop you from buying things you like the look of but simply won’t grow in the spot you want them to grow in. Work out how much sun the spot gets, if it’s full sun, semi shade or full shade. Then dig a hole and pour a big bucket of water into it and see how quickly it drains away, this will tell you a lot about your soil and how it drains.
When you’re at the nursery don’t be scared to ask for advice, plant people love to share their knowledge and now you know your sun requirements and how the soil drains you stand a good chance of getting the right plant for your spot.
Improve your soil with compost, known as black gold, it helps to bind sandy soil together and break up clay by bringing in worms. (Heavy clay can also do with a handful of gypsum)
Soak your plant in its pot in a large bucket of water before planting to ensure it’s completely hydrated, leave it in there until all the air bubbles have stopped. You can add in some seaweed tonic if you want to help settle it in quicker.
Your plant is used to living like a king at the nursery so establish it with plenty of water as this will ensure good root growth and establishment.
Tips for getting the right plant for your spot
The leaf will tell you so much about a plant, as a rule of thumb small leaves can take lots of sun and large leaves need more shade. If they are hairy, silver, or succulent, chances are they like baking in hot sun too.
Buy fast growing plants in small sizes and slow growers in larger sizes to make your dollar go further, in the end they will catch up to each other.
Research the plant and find its mature height so you can plan your planting scheme, these are often given in perfect growing conditions in a natural habitat so for your garden you can plan for it to get to 75 per cent of this height.
Charlie Albone and Juliet Love share a first look at their new home
With two sons, it didn’t take long for Aussie landscape designer and TV host Charlie Albone and his interior stylist wife Juliet Love, to outgrow their two-bedroom home. After going…
Covet my coffee table: with Juliet Love & Charlie Albone
Photography by Susan Papazian This week, we’re excited to give you a glimpse of the home of interior-exterior design duo and husband and wife, Juliet Love and Charlie Albone. Juliet…
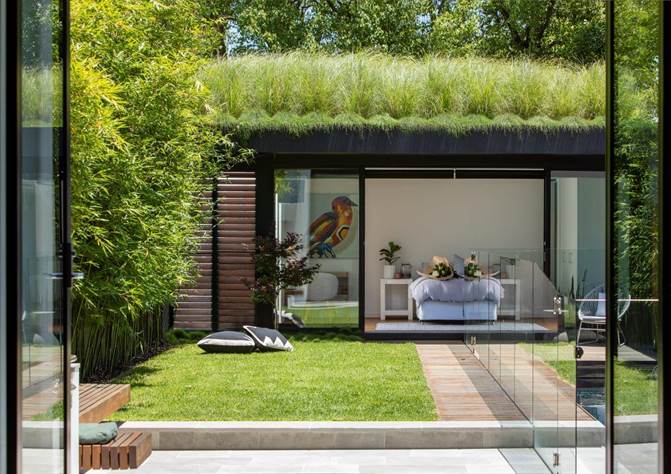
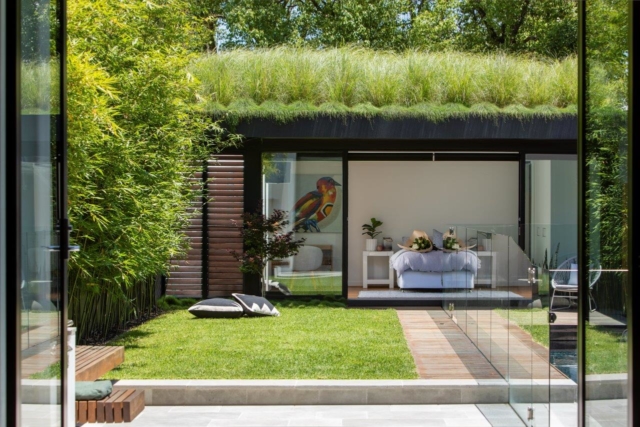
The biophilic design trend continues apace and thus so does our obsession with bringing the outside into our homes as much as possible. Literally surrounded by flora, this Sydney garden was designed by The Greenwall Company founder Mark Paul and it’s just been announced the winner of the Green Space Residential Award in the 2021 Australian Institute of Horticulture Awards.
Mark’s family home is not only a sustainable haven (that has the ability to exist off the grid in the middle of Sydney), but it features an array of innovative landscape features including greenwalls, greenroofs, Eco Pillows and even removable pond gabions.
The winning garden
“There are six large podium planters with one containing a 12,000 litre wetland and pond over the garage. It has greenwalls and greenroofs, rock (lithophytic) and tree plantings (epiphytic). It considers amenity, aspect, cultural requirements, view lines and the needs of a family and two boys who need to understand about vegetable gardens, chickens, fish and tadpoles to name a few,” says Mark Paul of the garden that was built from the ground up. When Mark started the project, the garden had no soil and a sandstone base which makes the end result all the more incredible.
The front of the home features a nature strip of native grasses and hedges that are cut annually. The three front planter beds are mainly planted with natives, in a nod to the adjacent bushland. There are a total of 140 plant species in the greenwall and 240 species on the roof which makes for amazing biodiversity in the one garden.
The gorgeous rear garden
Recognising excellence in the horticulture industry, the Australian Institute of Horticulture Awards had a huge number of entries this year with projects all around Australia and Singapore putting their hats in the respective ring.
“We are thrilled to have received this award and appreciate the recognition of the 30 plus years I have been involved with the AIH, and the work we have undertaken to find new ways to reclaim the built environment by greening spaces.”
The Block 2021 exterior facade and front garden reveals
It was an emotional night on The Block as the contestants said goodbye to their trades and it sunk in that they were almost done! The scores were a lot…
Here’s Jason Hodges’ top tips for preparing your garden for spring to ensure your outdoor space is a thriving green paradise in no time:
Jason Hodges
To help your soil reach optimum levels come spring, fertilise anywhere between every six weeks and every three months for ultimate growth.
Mulch, mulch, mulch! Mulch insulates soil and acts as a buffer from cold temperatures. It also helps to retain water and keep roots moist.
Remove any damaged branches that you can see on your deciduous trees.
Prune your trees and bushes so they have the best chance to bloom in spring.
Pick up fallen leaves regularly so your lawn gets as much sun as possible.
Winter is a great time to start a herb garden. Herbs such as rosemary, thyme, basil and lemongrass are hardy and very easy to grow, whether you have a balcony apartment, quarter acre or acreage. Start with herbs and then add vegetables.
“Start on your garden now and it will be healthy and strong for Spring. Not only are you looking after your environment at home, you’re also looking after our environment as a nation and helping to preserve our most precious resource – water,” says Jason.
Jason is an ambassador for Charlie Carp. Their all-natural fertiliser products are available from Bunnings stores nationally.
With thousands of award winning garden designs under his belt, and a long list of some of the country’s best gardens under the care of his business Landart Landscape, Matt Leacy shares his top tips for ensuring your garden thrives this spring and summer.
Creating a luscious lawn
One of the best things you can do for your lawn as we come out of winter is to de-thatch. Thatch is an accumulation of dead organic lawn matter or a build-up of roots that can prevent moisture, nutrients and air getting through to the grass roots.
If you’ve got very large lawn spaces, you might consider using a de-thatcher to do the job. Otherwise, a thatch rake or normal garden rake should work, depending on the size of the lawn and how thick the thatch is.
You should also aerate the lawn to help get water and nutrients through to the turf zone. If you’re working with a big lawn, you might look at using a motorised aerator. Otherwise, you can use spiked aerator shoes or a simple garden fork.
Once you’ve removed thatch and aerated, add some coarse sand or top dressing over the lawn – and don’t forget to fertilise with something high in nitrogen, and preferably organic.
Maintenance will set you up for summer
It’s not necessarily the fun side of gardening, but now is the ideal time to get into garden beds and remove any weeds before the weather gets hotter and they really take off. And now is also the as time to prune plants to get them in prime condition for growth in spring and summer.
Ensure that any ornamental grasses like miscanthus are cut to about 100-to-200mm above the ground and that any shrubs such as bottlebrush that like to flower in spring are pruned well before their flowering month.
Mulching is the garden gift that keeps on giving
Mulch is a must when it comes to keeping your garden beds looking great in summer.
Mulch will help your soil retain moisture as the weather heats up – and it’s also helpful for keeping weeds at bay.And mulch can come in a variety of colours that can enhance your garden design.
I like to use an organic compost and a slow release fertiliser. Dig it into the soil by hand where possible, but be wary of applying too close to plant trunks and stems. Excess moisture can cause stems to rot, so it’s generally best to mulch at least 50-70mm thick and to keep the mulch well away from stems and trunks.
As the weather gets hotter, keep an eye on your plants and keep topping mulch up.
Re-design and plant out garden beds and pots
Plants should always play a key part of any outdoor space, whether they’re potted or in a garden bed.
When you’re choosing what to plant it’s always good to consider what is to come – our summers are long and hot so if you’re planting greenery rather than something that will just give you a seasonal burst of flowers consider plants that are water-wise and will hold up well in the heat of the coming months.
Some great water-wise plants to consider include agaves, dragon trees, tree aloes, Nolinas and cactuses. They’re not only low-maintenance, but also bring a lot of form and structure into the garden – as well as being very diverse in terms of texture and colour, which means they can be suited to many different styles of outdoor spaces.
Succulents are a great choice. They are very versatile and water-wise. Some of my favourite succulents include Crassula, Carpobrotus, Aloes, Senecio, Sempervivums and Sedums.
Native Australian species such as Lomandra, Westringias and Casuarinas are awesome if you’re looking to plant on mass for large spaces. Mixing these with some exotic succulents and native ornamental grasses can create some really interesting planting palettes with varying textures and colours.
Grow your own food
If you would like to add a veggie patch to your outdoor space for spring and summer, and we’re finding in these times a lot of people are, planting things like spinach, iceberg lettuce, snow peas and kale as well as zucchini, and cherry tomatoes are always great staples that will flourish close to year round.
Chinese greens will also thrive, and Pak choi (also called bok choy) will be up and ready to eat in only six to eight weeks.
Herbs such as aromatic basil, mint, parsley, thyme, rosemary, chives and chillies are all good choices for summer growing, as well as herbs with known health benefits such as turmeric, ginger, ginseng, Echinacea and maca.
With many of us utilising a limited garden space, using edible plants as part of your overall garden design has become very popular. If you’re keen to look at foodscaping to update your garden for spring and summer I would suggest adding edible flowers, using rosemary trimmed into balls, or using Cranberries or a wild or Alpine strawberry, mint, thyme or oregano as ground cover.
From a design perspective, my tips for creating a space that is bountiful, functional and beautiful include:
Create structure – if you are dedicating a space to growing food then geometry and structure work to maximise space.
Consider colour – opt for heirloom varieties like purple kale and blue cabbage to create a design feature.
Many vegetables and herbs also have lovely flowers and variations in foliage that add interest. Be sure to layer and use the different textures and colours in your garden design.
Screen or create shade with fruit bearing trees – if you need some screening trees look at how you can use trees that fruit. Citrus, apple and pear trees are great options.
Use raised garden beds – build in seating and storage around the edge of your garden bed to make tending to it more enjoyable and to maximise the use of space, and also look at planter boxes, tiered garden beds, pots and herb walls. These are particularly practical for small courtyards or balcony spaces.
Run fruit and vegetables off pergolas and other outdoor structures. Things like hanging strawberries can soften these structures with attractive greenery – and will also save you having to dedicate land space to your veggie patch.
If you’re concerned about the look of your edible garden while transitioning between seasons consider hedging or other structures to conceal beds when they’re not looking their best. And interspersing herbs and vegetables with other plants will help minimise any sparseness that may arise as an edible plant goes out of season.
Summer gardening: Expert tips for a lush outdoor room
With the garden increasingly an extension of the inside of the home, we thought it was time to gather some expert tips and tricks for the outdoors as the summer…
Garden trends 2020: Have you heard of foodscaping?
Australia experienced its hottest and driest 12 months on record last year, with the Australian Bureau of Meteorology reporting temperatures that reached 1.52C above the long-term average. With high temperatures…
How to shade your garden for summer
With the weather well and truly starting to sizzle, don’t leave it any later to get your garden summer and party season ready. With a few creative touches to your outdoor…
Analysis by all you can read magazine subscription app Readly has found that, based on what we are reading, Aussies love rolling up their sleeves and getting stuck into renovations and the garden. We’re making, crafting, and learning to DIY! The stats show that there has been a 242% increase in the readership of the home and renovation magazine category. That’s huge!
With spring in the air, this is only set to increase as we will be pulling up our sleeves and getting stuck into our homes a little more.
So, what can we start thinking about this spring? We have rounded up some advice from the experts.
For our gardens:
Tammy Huynh, horticulturist and owner of Leaf an Impression says that if you have been thinking of starting a veggie patch, now is the time to do it. Here are her tips:
You will need at least 6-to-8 hours of sun (depending on what you’re growing) and access to a garden bed or pots. If your soil is hard to dig, it’s likely to be made up of a lot of clay. You can help ‘soften’ the soil by adding soil conditioners like compost, aged manure, blood and bone, and gypsum. If it’s too difficult to dig, consider a raised garden bed and fill with a good quality mix from your nursery.
For most parts of the country, now is the time to sow: tomatoes, beans, eggplants, zucchinis, chillies, sweetcorn, silverbeet, squash, leafy greens like lettuce, rocket, spinach, bok choy, endive and herbs. Always check plant labels, especially on seed packets, to understand when to plant in your area. Just because you can buy tomato seeds in winter, it does not mean you should sow them!
To maximise your harvest, ensure you prepare the soil well beforehand. This includes adding organic matter like compost or aged manures. My go-to is always homemade compost and handfuls of dynamic lifter (which is made up of composted chook manure). Fork all the ingredients into soil and blend in well. Sow seeds or plant seedlings, ensuring there is sufficient spacing between plants, otherwise this will cause problems with air flow and sunlight later down the track. As plants are growing, feed with a liquid fertiliser specially formulated for veggies.
For leafy greens, you can start harvesting quite early. Always remove the outer leaves first and take a handful at a time. Pick fruiting veggies (tomatoes, zucchinis, beans) when ripe, otherwise pests, birds, or other critters will quite happily help themselves. To help extend your harvest, sow successive seeds or seedlings, but only grow as much as you will eat, otherwise you end up wasting food and precious resources.
Veggies are growing plants, so they also need to be watered quite regularly, especially during the hotter months. Watering early in the morning is ideal, as the plants take up the water before it evaporates. You can also mulch plants with lucerne or sugar cane mulch, which will help conserve soil moisture.
For our clutter:
Jo Carmichael, from All Sorted Out, gets you started on this with four easy steps:
The wardrobe: It’s best to start with our own wardrobe and clothing edit first, before moving onto rifling through the kids or partner’s things. Move seasonal items, heavy jackets, sweaters, and wintery boots up to the top shelf. Bring down the summer items – placing them within easy reach.
The entrance or Mudroom: Store and remove the items which have been left here the last few months. Maybe the numerous rain jackets could be rotated out, and the straw hats could hang ready for sunny days outside. A fresh pump pack of sunscreen to match the hand sanitiser should now be stationed here. Tidy the shoe basket – are there old sneakers here no longer worn, that could be tossed? A decluttered entrance ready for spring is just what you need.
Pet paraphernalia: Dogs, cats and other beloved animals certainly come with their fair share of equipment. Now is a good time to check their blankets, bedding, where the food is stored ensuring it all smells fresh and looks welcoming. Glance at the leads, brushes, and toys – maybe the worn out ones could be replaced!
The pantry: With Covid-19 we have all been working and cooking from home more than usual. The hot weather can affect the freshness of some pantry items. Get the condiments, sauces and spices out of the pantry, check they are still fresh, wipe bottles and lids clean if in good order, or toss – making a note on the shopping list of what needs replenishing. Wipe the pantry shelf clean before returning the items.
Freshening up the interior of our home:
Jane Thomson, interior designer, says, “With naughty Covid still impinging on our lives, we’re spending more time in our abodes. Now more than ever, we are bound to make our surroundings as yummy and as nurturing as possible.”
Here are Jane’s insights into kitchen makeovers that won’t cost the earth:
Obviously the easiest way to refresh your kitchen is to paint your existing cupboards and drawers. Painting gives maximum impact and is inexpensive. These days there are so many products available from your local Bunnings or hardware store to transform surfaces, in order for you to prepare the surfaces and paint over most door and drawer materials.
Changing your kitchen handles is super easy and takes no time. Look for brands that have gorgeous accent handles and some practical door and drawer pulls. A personal brand favourite of mine is LO & CO.
Re-tiling your splashback is also one of the easiest and inexpensive ways of zjooshing your look. Mosaics, subway tiles, stone tiles all look amazing. Alternatively, use tile paint, which is one of the cheapest ways to reinvigorate your tired look.
Adding a humble pendant or pendants to an island bench can also change the overall look of your kitchen. Some cheeky concealed lighting to the underside of your top kitchen cabinets also looks amazing. Lighting is everything.
Another way to zjoosh your kitchen look is to remove a door from your top cupboards and replace with open shelving. Style with plants, cookbooks, and artwork that can sit easily on a shelf.
New faucets or mixers also add a quick and easy way to freshen your look, especially brass and black fittings.
If you have a little extra budget in the kitty, you could also look at installing a new benchtop.
Jane also points out that when you’re looking to freshen up the rest of your home with paint or accessories, the colours of the season are soft whites, greens, coral and peacock blue or green.
Summer gardening: Expert tips for a lush outdoor room
With the garden increasingly an extension of the inside of the home, we thought it was time to gather some expert tips and tricks for the outdoors as the summer…
How to Declutter a Room Fast With These 5 Easy Steps
If you’re short on time, but your home is big on mess, you will want to know how to declutter a room fast with these 5 easy steps. A messy…
Renovation ideas: 5 ways to make your home cohesive
By Naomi Findlay One of the biggest questions I get asked from soon-to-be-renovators is how do you make your home feel cohesive without being boring? Well, you don’t have to…
Across the country, people seem to be honing their green fingers as we all get used to the idea of staying home. And it’s not just in the garden either. Houseplants have never been more popular, but now we’re supposed to stay home unless we need essentials, how can we get our green fix?
The answer is online, and this is no longer a niche market. There are plenty of places to buy your pathos, fiddle leaf or monstera on the internet, you just need to know where to look.
Popular Aussie plant influencer Lush Little Jungle (Rachel Smiles) has composed a list of more than 50 places to buy plants online and is sharing them in one easy to access document!
Rachel Smiles of Little Lush Jungle
So whether you’re looking to make your Zoom background look a little more aesthetically pleasing, you want to add life and air-purifying goodness to your surroundings, you want to support local businesses or all of the above, we have you covered!
With a slowing property market, Aussie home ownership trends are changing with people choosing to stay put and renovate rather than relocate, according to the 2019 Adbri Masonry Great Australian Backyard Survey.
“It’s clear the current market conditions lend themselves towards people staying put for longer. The 2019 survey findings support research showing that home ownership ‘hold time’ has been on a steady increase for over a decade. In 2004 the average time in a home was 6.8 years compared to 10.5 years in 2014 and our survey shows this is increasing to 20 plus years,” says Adbri Masonry marketing manager Karl Wood.
The flow-on effect of staying put means people are concentrating on home improvement projects and, given the Aussie propensity for outdoor entertaining, the backyard is high on the list. “We don’t just reside in the one place for longer, we grow in it, and it’s important that our home and backyard grows with us. A backyard that is perfect for your family today is unlikely to meet your needs in 10 or 15 years and must evolve as your family’s lifestyle does,” says landscape designer and Adbri Masonry brand ambassador Jason Hodges.
“Outdoor projects represent great investments – not only do they provide you with a brilliant asset at sale, but these areas give back to the family every day. The best part is, outdoor projects have a low whole-of-life cost because they use specialty products that are designed for outdoor use to last long term. The pavers you put in your new courtyard today will still be there long after you leave the home. You might renovate your kitchen and bathroom twice in 20 years, but the outdoors can be done just once if you do it well,” says Jason who shares his top backyard future-proofing tips below.
Do it once, do it well Unlike kitchens and bathrooms, styles in the backyard last longer. Like any project, there is an obvious up-front cost but when you consider the whole of life cost, the investment in hard wearing materials stacks up. Long after the price is forgotten, the quality remains so consider concrete pavers, by design they are thicker, stronger and built to last outside. Informal seating walls that double as garden beds offer extra seating and long-term good looks and if you’re looking to treat yourself, choose a feature outdoor piece of quality furniture.
Prepare for the future Try to accommodate the fact your ideas and needs will change for your outdoor area over time. So, for example, don’t block access to parts of the yard you may need later – perhaps you will want a pool or a BBQ area. It’s much more economical to think ahead rather than having to build and rip elements out at a later stage.
Have a transitional mindset At all life stages, everyone wants a really nice outdoor room. Our enviable climate and love of the great outdoors make enhancing our outdoor living areas a top priority for many homeowners. As your life changes think about how you can change the backyard space to meet your needs. An example of this is building a sand pit for the kids while they are little and then converting it into a vegie patch as they grow. Once the perimeter and foundation are built, minor cosmetic enhancements will allow the space to grow with you. The children’s sandpit becomes the veggie garden, and later on in life you can repurpose the sandpit by converting it to a fire pit which is the perfect finish to an entertaining area that’s served your family for life.
This hopscotch area can become a veggie patch when the kids have grown
Take your time Have a game plan. For more than half of those surveyed, cost is a barrier to renovating. It pays to create an overall picture of what you would like to achieve and then break it down into manageable chunks of your time and budget.
With the garden increasingly an extension of the inside of the home, we thought it was time to gather some expert tips and tricks for the outdoors as the summer holidays kick off. “Numerous plants burst into bloom or bear fruit at this time of year, but the hotter weather can also be tough on our plants,” says Tristan Eastaugh, product manager at garden tool company Cyclone.
“It’s important to take care of your garden in the summer months, and with some careful planning and the right tools, you can also promote healthy growth throughout the season,” says Tristan who shares his top five summer gardening tips with us.
Cyclone straight hedge shears
Mulch, mulch, mulch! “A fresh layer of mulch helps to conserve moisture and suppress weeds. In fact, mulch can reduce evaporation from the soil surface by as much as 70 per cent when applied correctly, so it’s a vital ingredient in obtaining a water-wise garden. It can also help to prevent soil erosion and even-out temperature variations,” says Tristan.
First up, it’s important to give the area a good weed and soak, then spread a five centimetre layer of mulch evenly over the soil with a shovel. “Organic mulches such as straw and bark break down over time, helping to nourish and improve the soil. Just avoid placing them too close to the stems of plants to avoid rotting,” says Tristan.
Fruit trees Some of us are lucky enough to have fruit-bearing trees in our garden and for them Tristan has plenty of summer gardening advice. “Deciduous trees that bear summer fruit benefit from a good prune as soon as the crop is harvested. Plants that bear new wood this season, such as peaches and nectarines, are also good candidates for a summer prune. Summer cuts heal quicker, so there’s less chance of disease entering the plant. It also helps promote a bumper crop for the following season, as it gives the plant plenty of time to develop lots of new fruit-producing growth instead,” says Tristan.
“Start by removing any dead, damaged or diseased limbs, then tackle any structural flaws like crossing or rubbing limbs and branches that grow inwards. Finally, cut back one third to one half of all growth made since spring,” says Tristan who advises using a pruner for thinner stems and a lopper for thicker branches.
Cyclone multi-purpose shovel
Roses “Most of us think of rose pruning as a winter job, but if you want to get the best out of repeat-flowering varieties, such as Autumn Damask or Gypsy Boy roses, then summer pruning is a must. After each flush of flowers simply prune off a third of the growth in a rounded shape using a pair of Cyclone straight hedge shears. Yes hedge shears! It’s that easy,” says Tristan who explains that the straight blades are perfect for precise pruning, while the stem cutter (known as a notched blade) on the shear is ideal for managing larger stems.
And the effort will way off. “You’ll be rewarded with another flourish of blooms six to eight weeks later. A great idea is to time your pruning ready for them to re-flower for a special event or garden party,” says Tristan.
Cyclone aluminium bypass pruner
Soil
Not only is composting a great way to use your kitchen and garden waste but it’s fabulous for your garden’s soil too. “Adding compost to your garden beds helps nourish and enrich the soil by encouraging healthy microbial activity, as well as improve its structure, drainage and moisture holding ability. Add a good balance of ‘green’ matter, like vegetable peelings and lawn clippings, and ‘brown’ matter like dry leaves, shredded newspaper and straw to the compost mix,” says Tristan.
“For the best quality compost turn your heap every three to four days – air is important to the decomposition process and turning re-heats the pile to keep it in an aerobic state, as well as eliminate odours,” says Tristan who recommends the Cyclone garden fork for the task. “The tines help create additional passageways for air and moisture in the pile while turning it, compared to a spade. The four tines are also forged from a single piece of steel, so they’re super tough and versatile,” says Tristan.
Summer is finally here which means long, lazy days in the backyard relaxing and entertaining friends. Few people know more about creating beautiful outdoor areas than landscape gardener and star of Selling Houses Australia, Charlie Albone.
“Now is the perfect opportunity to do up your outdoors as most people have a bit of extra time off to both enjoy their outdoor space and finish off reno jobs. Just plan ahead to ensure you can get the necessary tradesmen in so you’re not left with a half-finished yard,” says Charlie of the pre-Christmas push.
One of the most essential components for a great outdoor space is paving. Charlie has some great tips about paving, tiling and making the most of your indoor and outdoor spaces.
“Paving sets the whole tone for a project, it can dictate the style and quality of the garden space. It’s often difficult to replace if you do it last and instead choose all your furniture, plants, screens and so on first. So it’s important to get it done right first time around – spending some time on your paving choice will pay off in the end,” says Charlie.
What is your best advice for creating an inviting deck or patio area? “Make sure you have the proportions you need for the amount of people you have in the garden. Nothing is worse than being cramped or feeling like you’re too small for the space. Spend time planning to ensure you get all the items you want in your garden rather than jumping in without considering the space as a whole,” says Charlie.
What hard surfaces would you recommend for paving? “Porcelains are huge at the moment. Amber Tiles’ Urban Surface range is super hard-wearing and comes in a variety of colours and sizes. A new trend we are seeing is wrapping the paving or tiling down into the pool for a continuous streamlined look – this can be done with a porcelain. Limestone is also a great timeless hit if you are after something that won’t age and will always look top notch,” says Charlie.
What are the best ways to create shade if there is none? “I love a pergola with a deciduous climber such as wisteria as this lets in winter sun but people also like a fixed structure such as a roof. Just make sure it’s got good ventilation and lighting. Retractable shade sails are also nice as they offer some softness and can be pulled back in winter, and umbrellas are a cheap, flexible alternative,” says Charlie.
How should you light the space? “Natural light is the best option as it’s the most relaxing. However, for night-time drama, up or down light features are great. Try to think of garden lighting as creating shadows rather than lighting for practicality. Staggered cross lighting down a path also looks much nicer than a flood light. However stronger lighting for certain areas such as a barbecue, can be used. You don’t want to end up burning anything because you can’t see properly!” says Charlie.
How do you work out what amount of outdoor space is best for green planting? “When it comes to planting, I always say more is more but realistically you should have as much space for planting that you can successfully maintain. A large poorly kept garden is much worse than a small well maintained one,” says Charlie.
What furniture would you recommend for entertaining? “You get what you pay for in outdoor furniture and flimsy won’t cut it. Not only does outdoor furniture have to contend with all the rigors of life, it has to put up with UV and all sorts of weather conditions. Consider how you want to use the space and dress it accordingly whilst remembering you’ll need to leave enough space around the furniture to move so it doesn’t feel cramped,” says Charlie.
Are you a fan of outdoor wall art or garden features? “It all depends on the garden and the actual feature. If it’s not considered as part of the design then it can often look like a cheap add on which I’m definitely not a fan of! If the garden is set up to make the most of a feature with considered sight lines and complementary planting then it can look fantastic,” says Charlie.
Charlie his wife, interior stylist Juliet Love, are both brand ambassadors for Amber Tiles.
Summer may well be finished but that doesn’t mean that outdoor entertaining is over for the year. Far from it in fact! Thanks to the climate we enjoy here in Australia, our backyards get a workout almost all year round. Maximise the entertaining potential of your outdoor space with these top tips to spice up your backyard from landscape expert and Adbri Masonry ambassador, Jason Hodges.
We often think that a backyard upgrade is out of reach, cost wise, but Jason assures us that that isn’t the case. “Upgrading the backyard doesn’t have to be expensive or time consuming,” he says. “It’s simply a matter of thinking about how you want to use your property, then incorporating beauty and utility into your design. You also don’t need to pull on the tool belt and bunker down for a full reno. “You don’t need to undertake a full renovation to get the most out of your space this entertaining season,’ says Jason.”
3 DIY projects to spice up your backyard
1. It’s all about the base – A paved base is the perfect foundation for your outdoor furniture and barbeque, which can also help bring together an indoor and outdoor area such as a pergola. DIY paving is one of the best things you can do to enhance your backyard space and it will also become the main focal point of your entertaining area. Things to consider include what colour, texture and size paver to choose from depending on the look you want to achieve. You will find a step-by-step guide on how to lay pavers here
2. Go vertical to create new space – If you don’t have lots of square footage in your backyard, you can always build up. Create something out of nothing by framing your entertaining area with a freestanding, double-sided wall using blocks. This DIY project will define your backyard, while doubling as informal bench seating for unexpected guests. The beauty of using blocks such as the AB Courtyard is that there is no need to excavate to build on an existing base. However, when building directly atop an existing paved or concrete surface, ensure the area is flat. You do not need to glue blocks to the existing surface, the weight of the blocks will hold the wall in place, though if you want extra support, you can use a landscape grade adhesive to secure units onto the existing flat surface.
3. Take it one step at a time – In times gone by, pathways have been a forced consideration providing a stable thoroughfare to get from one side of the backyard to the other. In today’s backyards they have more purpose. A designer stepping stone path is a great complement to any home, and there are countless options for dressing it, including pebbles and Mondo Grass. Other benefits include price and water drainage. A stepping stone path uses less material than a solid path and is a great option for those narrow areas down the side of a house. Solid paths in narrow areas may encourage water to run up the side of your house causing rot and damage.
For more information on backyard DIY projects for this summer, visit www.adbrimasonry.com.au
Need to sell your property, fast? If you only have a couple of weeks until open inspection, these reno ideas will make a big difference to the sale price.
Describing a property as a ‘renovator’s delight’ no longer has the romantic overtones it once did. If you need to sell your place quickly, hiring a property stylist who can highlight areas of interest for buyers with well-chosen, well-placed furniture and accessories, as well as good lighting is the best value for money.
But if you have a fortnight up your sleeve before open home and want to make some changes, here are five quick renovations you can make if you don’t have time for a full upgrade.
Image source: Pinterest
Paint
A fresh coat of paint can liven up a property and even help to highlight some of its features. But a paint job isn’t just a matter of making the walls and ceiling look new, it should also be used to neutralise the look of the property as that helps the stylist add value.
Buyers want to see themselves in the place and you’re more likely to attract them if you give them a blank canvas for their vision rather than keeping that bright purple in the bedroom, funky as it may have been at the time it was painted.
Time required: Depends on the size of the property, how many coats and whether you want to do it yourself or hire professionals, but anywhere from 1-2 days to 1-2 weeks.
Image source: Pinterest
Replace, don’t renovate
Even a quick kitchen and bathroom renovation can take up to eight weeks so if you only have two weeks to play with, what should you do? Identify what looks the most dated and seek to replace parts and resurface fixtures rather than do a complete renovation.
Instead of gutting the kitchen, this might mean spray painting a tired looking splashback. In the bathroom, spraying tiles and resurfacing the bath or shower recess can make a huge difference.
In both places, replacing old tap fittings can instantly make sinks look newer, and while you’re doing the changeover you can also fix any minor leaks. Also consider replacing the handles to pantry cupboards, cutlery drawers and vanity compartments.
Time required: A few hours to a couple of days.
Image source: Pinterest
A grand entrance
Make a great first impression by focusing your efforts on the entrance to your home. Clean and tidy the entrance by removing debris, fixing the wobbly step and giving it a lick of paint. If you have greenery leading up to the house, landscape it.
Time required: A few hours to a day.
Opening doors
Speaking of entrances, doors can make a big impact so make sure they open and shut smoothly, without creaking, and the surfaces are free from scratches and dents.
Consider replacing the doors completely if they look dated, shabby or cheap. For the cost of a few quality doors you can transform your property significantly.
Time required: If you have the replacement doors ready, a day.
Floor them
Worn, stained or wonky floors are highly noticeable, ruining the look of the property. You might be able to get away with a rug or a floor runner but if you can’t and need to replace the carpet or add floating floor boards, do it before your open home to make the place fresh from the ground up.
Time required: Professionals can replace the floors of a two-bedder in around 1-2 days. It’ll take longer for bigger properties or if you want to DIY.
Renovations don’t need to be big time-consuming projects. There are always little things that can make a big difference to the sales price of a property if you’re short on time.
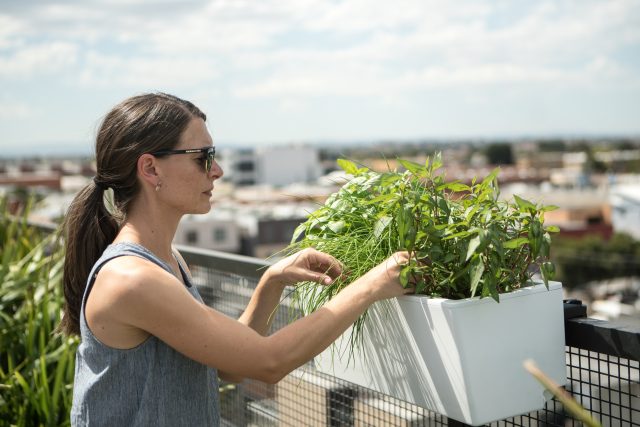
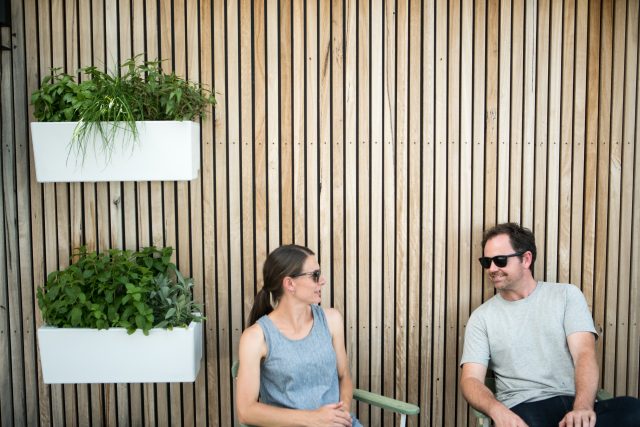
I’ve always liked the idea of growing my own vegetables, but I can say pretty confidently they wouldn’t prosper under my watch. So a self-watering planter, well for me, that’s the way to go.
The new Glowpear Mini is versatile and engineered for growing food in tight, urban spaces. Run it up a wall, sit it on a bench or hang it over a balustrade. Then set and forget the self-watering technology, and your plants will be fed how they want and when they want, regardless of your busy (or lazy!) lifestyle.
Glowpear co-founder Lloyd Fenn explains that while he was inspired to design a vertical solution for growing edibles as a result of his own attempts to grow fresh produce for his family, it was the feedback from Glowpear’s customers that ultimately informed the design and functionality of their latest product, the Glowpear Mini.
“Our followers consistently share with us their love for the Urban Garden’s (their original product) user-friendly functionality, contemporary aesthetic, and the results they get from its self-watering system, but they also consistently tell us they want something smaller, something vertical, and that portability is essential,” says Lloyd. “To overcome the perceived constraints of urban spaces, the Mini needed to be even more compact than our previous releases, so we wanted to design something with the versatility to traverse every spatial option within an urban context.”
With a unique, modular design, each planter can either stand alone or be interconnected. There is also a strong focus on health and the environment with the Glowpear Mini using less water than traditional planters because of capillary action watering, minimising evaporation and watering plants as needed.
The Glowpear Mini will initially be launched on crowd funding platform Indiegogo on 12 April 2016 and will then be available globally through selected retail partners.
The Canvas Workshop and Jamie Durie are holding a pop-up store at Jamie’s Rosebery showroom in Sydney this Saturday (23 January).
You’ll be able to purchase ex-display prints, wall panels and cushions from his range at up to 50% off the RRP. Jamie will be there for a meet and greet and to offer his style advice to customers on the day.
A limited number of best-selling canvas prints will be available at the special price of $199.
Copper fixtures is a trend that’s big in kitchens and house interiors and it’s definitely also being requested and featured prominently in designs of outdoor spaces. But how can you use copper in the garden to create a stylish and contemporary backyard?
Placing a statement copper piece in your outdoor area adds character, charm and something unique to draw the eye to. Copper works well for light fittings, outdoor showers, fireplaces, water features and bespoke pots.
One of the things that work so nicely when using copper outdoors is that it acquires a beautiful patina over time. This look works particularly well for light fittings and shower heads, as the patina allows them to subtly settle into the garden.
However, if the polished copper look is your preference, then keep copper pots and fittings under shelter so they weather more gradually or get used to polishing!
Just about any plant looks good with cooper, tall leafy plants such as a Kentia palm or fiddle leaf fig work really well. Silver foliage plants also contrast beautifully. Kalanchoe ‘silver spoons’ have a really interesting texture and shape and offset the copper perfectly.
Whether you’re looking to create a feature zone for dining or entertaining, complete a poolside area or build a garden path, pavers are a clever and effective way to make the best use of any space, and they’re a lot easier to lay than many people think. Time-poor homeowners are looking for practical ways to bring the family together while showcasing their individuality and personal style and DIY pavers fit this bill perfectly.
Here, are my step-by-step instructions for tackling any paving job.
1. Excavation
Mark out the area to be paved allowing a little extra for working room. Remove any soil, grass and all loose debris and vegetation and ensure to excavate deep enough to allow for selected paving and sub base construction. For pedestrian paving projects, you can work off 100mm of road base, 30mm of sand plus the thickness of your paver. (This is not applicable for driveway paving).
2. Preparing the base
It’s all about the base! Getting the foundation right is the key to your long-lasting and low maintenance paved area. Start by distributing road base evenly over the excavated area. Compact the road base with a plate compactor (whacker-packer) at least twice – remember your hearing protection for this part of the job. Spread washed sand over the compacted road base to a thickness of 25-to-30mm. Screed the sand with a timber float or straight edge and ensure it is on the same plane – check with a spirit level.
3. Laying the pavers
Set up a string line running along the edge(s) of your paved area. The string line will help ensure your edges are straight and pavers are flush. Begin laying pavers starting at one end of the project and working your way across. Leave a 3mm gap between the pavers for the jointing sand (you will sweep this in later). Ensure each paver is square with the string line and level using the spirit level. Wriggle pavers into place and tap with rubber mallet where required to ensure level.
4. Edging and locking in the paving
This is another really key step; you have laid your pavers and now you need to make sure they stay in place. Utilise a sand and cement mix to ‘haunch’ or lock-in around all sides of your pavers. This is achieved by making a small sand and cement mix in a wheelbarrow and then screeding this mix along the edge of your paver from the base to approximately 75 per cent of the paver’s height on an angle. This helps to ‘lock in’ the paved area and to help pavers stay in place. It does not hurt to also use a little of the sand and cement underneath the outer header course, as this will create even more strength.
5. Locking sand and sealing
Finally you can now add the locking sand. Sweep this sand in dry and it will fill the 3mm gaps you left in the pavers. Once the sand is settled you can use a whacker-packer with an old piece of carpet beneath it to compress and settle the pavers into the sand bed ensuring a great finish. Hose down area upon completion. Although not a must, sealers can enhance the look of the paver as well as protect it from both the elements and day-to-day wear and tear such as food fats and general staining.
— Jason Hodges is Australia’s well-loved celebrity landscaper, most notably seen on the Channel Seven lifestyle TV show Better Homes and Gardens. Jason is also a brand ambassador for Australia’s leading masonry manufacturer Adbri Masonry.
If you love the popular magazine and TV show, you will love Better Homes and Gardens Live, an interactive experience with everything from cooking and craft workshops, to gardening and building demonstrations.
Kicking off in Perth from October 23-to-25, at the Perth Convention and Exhibition Centre, and then heading to Sydney from November 13-to-15, at Sydney Showground at Sydney Olympic Park; the three-day event is the perfect mix of inspiration, education and fun.
Food enthusiasts can watch Fast Ed, Karen Martini and Ellie Vernon cook up a storm on the Food Stage, while interior design enthusiasts can learn styling secrets from Tara Dennis, Demi Harman, Julia Matthews and Dora Papas at the Decorating & Craft Stage. If it’s a green thumb you’re after, join Jason Hodges on the Gardening Stage to answer your landscaping and gardening questions, while Roger Fox will help kids nurture their own seedlings in the KidZone.
Adam
House Rules winner and carpenter Adam Dovile will be presenting at the DIY & Building Stage to share easy and quick fixes for around the home, and if you’re a pet lover, Dr. Harry will be sharing his experiences with our furry friends at the Pets Stage.
New to Better Homes and Gardens Live this year are the intimate masterclasses, which will give you a chance to learn from and work with the experts and the Better You section, where you can find out all about the latest beauty trends, and revitalise your body and soul with everything health and wellness related.
Jason
So, whether you’re a new homeowner looking for DIY renovating tips, a parent needing guidance on the best pet to buy, a keen shopper looking for a unique purchase or a large family trying to find ideas for saving space around the house, this event is the perfect chance to get expert advice and have some fun doing it.
Whether you’re a new home buyer, gardening enthusiast or just enjoy a bit of greenery around the home, most would agree that outdoor spaces have the potential to herbicide bank accounts. Here’s some handy tips to keep your garden flourishing without the costly price tag.
Composting
Composting is an ideal way to help the environment whilst also saving money. Compost can provide valuable nutrients for your plants. By composting yourself, you save money and take advantage of your food waste. Collect fallen leaves and lawn clippings to add to the compost and use them as mulch on the garden.
From an aesthetic perspective, a large compost site or bin in the backyard doesn’t have to be an eye sore. Hedges, shrubs, burying bins underground are all ways that clever design can marry style and function.
Recycle
Use recycled garden items – either from your own garden or recycling centre – to help keep garden makeover costs down and to add a rustic, lived in feel to your green space.
Bringing in a garden expert can save you in the long-term with advice on what can and can’t be salvaged from your existing garden (including plants and materials). Re-purposing materials can drastically reduce the cost of new work.
Budget
Cost reductions start with the design of the space. Good design considers your budget and provides a response that meets your brief. This is where a design and landscape expert can really help. Landscape designers have suppliers they can call on year round for plants, and industry relationships for all of the building materials. We know how long something will take to build and how much things cost so bringing in an expert is a good way to stay on budget.
Water
If drought tolerant plants aren’t chosen or you live in a harsh and dry climate, watering can be quite costly over the long-term. A few hot tips to remember:
Be conscious of your future water bills. Invest in a rainwater tank to save money in the long run.
Manage the consistency of watering, by deeper less regular watering – it encourages healthier deep root systems on your plants.
Spread mulch around the soil of your plants – it reduces weeds, saves water and insulates your soil.
Make your own soil wetting agent.
Pick suitable plants
Selecting the correct plants for your garden plays a large role in their future cost and upkeep. It is essential to choose plants that not only look great but will also handle your local conditions. A few low maintenance plants suited for mass planting of large areas are Beschorneria, Echium and Westringia. These plants all work well together, are drought hardy and flower at different times of the year. Combined with various ornamental grasses and succulents you will have an amazing effect without all the fuss