Categories
Expert Tips Jen's reno Kitchens RENO ADDICT

How to get a luxe look for less in your kitchen reno

In partnership with Latitude Financial Services

Kitchens can be expensive. Very expensive. I’m in the middle of one so trust me, I know! And while we all know they sell houses and they’re the heart of the home (why so many kitchen cliches, eh?!), we don’t all have unlimited budgets, much as we’d love to have the best of everything.

Today, I’m sharing some of the best ways to still achieve a luxe look without spending a fortune, with a few of my own examples thrown in.

Go flatpack

Flatpack kitchens no longer have the stigma they used to; probably because they’re a lot lot better than they used to be. A flatpack kitchen will save you a significant amount of money compared to a custom job. I’ve personally chosen a flatpack kitchen from Freedom Kitchens’ relatively new Essential Range. I could still have a satin finish and shaker profile door, which is what I wanted anyway, so I’m happy!

Freedom Kitchens’ Essential Kitchens range

Some other popular flatpack kitchens are:

  • IKEA
  • Kaboodle at Bunnings
  • Semble

When doing your calculations, bear in mind that if you don’t have the time, skills or inclination to put it together yourself, you’ll need to factor in the cost of a handyman or similar to help. All of the above brands suggest that they are a DIY product though, so technically, you should be able to handle it yourself. We don’t all have the time or patience though!

Pimp your cabinets

I’m talking hardware. You can buy your handles from anywhere, not just the place you got the cabinets from. So look around for something special. For a few hundred dollars you could have your cupboards looking amazing. I’m using brass Kethy handles and I’m in love! They’re going to be like the jewellery of my kitchen!

I’m having these brass handles by Kethy in my kitchen

Mix up your fronts

Just because you have an affordable flatpack kitchen, doesn’t mean you have to go for an all gloss white look. There are a lot more colours and finishes available these days and there’s no reason why you can’t go two-tone; in fact, it’s quite on trend. Think about having your top cabinets one colour and your bottoms ones another (probably darker).

Image: Freedom Kitchens

Make a splashback statement

I’m talking tiles! There are so many affordable options out there now. Yes, you can get great results with the common subway (like half the country!) and if you’re going to do this I’d suggest a more organic imperfect subway or a bevelled one, perhaps mixing up the grout by choosing black or a grey rather than white (doesn’t show dirt either!). But if you’re feeling brave, make a real statement with something colourful, patterned or textured. This won’t set you back too much in the average kitchen but will make a huge difference compared to the cheaper glass splashback. Other affordable yet impactful options might be mirror (if you can handle the cleaning) or pressed tin.

Source: DiLorenzo Tiles

Consider some open shelving

This may be as simple as some overhead flatpack cabinets without doors. Or you might decide on a few solid timber shelves. Being able to display cook books or beautiful ornaments unexpectedly in the kitchen really can add a touch of class, personality and individuality; not things we associate with a bog standard cheap kitchen!

Josh and Jenna’s Reno Rumble kitchen. Source: Caesarstone

Accessorise like a pro

A little goes a long way. Think cannisters, stacked timber chopping boards of different sizes, a marble mortar and pestle, an amazing fruit bowl on the breakfast bar. Places like Target and Kmart are you friend here! Or if you have a bit more to spend, invest in something beautiful like a handmade ceramic fruit bowl, a great coffee machine or even some framed art for the wall.

Source: Freedom Kitchens

Paint and wallpaper

So you can’t afford the navy kitchen of your dreams. You can have navy walls! There’s generally not much spare wall in a kitchen which makes it easier to be brave with your colour choice, especially if you’ve kept it simple elsewhere. I’m intending to paint the sliding barn door from our kitchen to our laundry navy. You’d think I was obsessed with navy or something…

Source: Little Greene

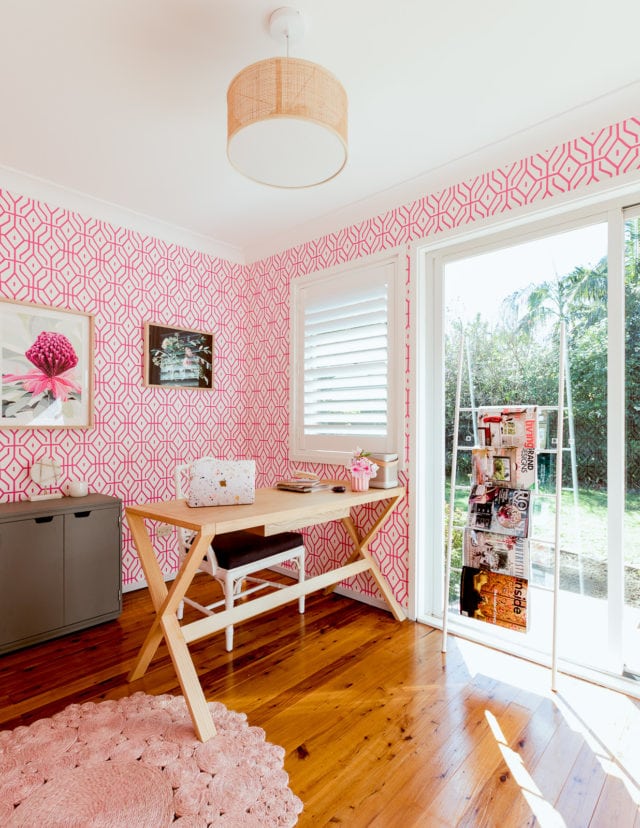
Don’t forget your window treatments

Like accessories, window treatments can make a real difference to the look of the end product and really finish it off. Think about plantation shutters for a high end look (they won’t cost you much for just this one room) or how about having a Roman blind made in an amazing linen or patterned fabric?

Image: Shutters from DIY Online Blinds in Bec and George Douros’ latest reno

–For help with financing your reno, speak to our partners at Latitude Financial Services.

Categories
House Tours Jen's reno

Jen’s home office reveal

Photography: Jacqui Turk

I’m excited to reveal my new home office; once a very dull and boxy little room, otherwise known as ‘bedroom 4’ on the floorplan! It did have a few great things going for it though: the best light in the house and a window and glass doors looking out onto the garden. Our house is very long and the office is right at the back, away from any noise and distraction.

It needed help though. And as this is a long term home, I really wanted to make an effort with this workspace and make it somewhere I really wanted to hang out and felt inspired and happy to work in. There’s nothing that transforms a small and featureless room more, in my opinion, than wallpaper. I’d wanted to use one of Anna Spiro’s designs for Porters Paints for years. Damian wasn’t sure about the pink so I compromised on the blue version. But when I found they were out of stock, I somehow managed to persuade him it was a good idea to revert to pink. At the end of the day, I’m the one who works from home so it’s really my domain. That and the fact the garage has been earmarked as his man cave and I’ll happily have nothing to do with what goes on in there!

Before the wallpaper, I’d already had a plantation shutter put on the window. Since these photos were taken I’ve also had sheer curtains put on the sliding door. They filter the light really well because the sun can sometimes be a bit too much and soften the room nicely.

I don’t need much furniture, being someone whose work is largely online and stored in the cloud. Laptop, printer, paper diary and a few notebooks and pens aside, I don’t need much physical stuff. Which keeps things tidy! I already had the two grey home office storage units from Pottery Barn. I love them because they’re grey and don’t look too corporate or officey. The one with the doors neatly hides the printer (never a good look!) and even if you don’t need storage, you’ve got to have somewhere to display pretty things, right?!

Speaking of pretty things, it was love at first sight for that cut glass lamp. Amazing. I’m still on the lookout for a more interesting shade to swap out for the white one it came with, just to mix things up a little. The rattan lampshade on the pendant light is the same one we’ve used in all the bedrooms. It’s a nice textured neutral.

The magazine rack is actually a bathroom ladder. I think I saw it used this way in a magazine and stole the idea, but I can’t remember which, sorry!

I’m having a major floral moment and these two prints by Kimmy Hogan (right) and Lamai Anne (left) seem to work well together and with the wallpaper.

It took a long time to work out where the desk should go (the doors make this room a tricky one to work with) but Damian finally cracked it and as soon as I realised the chair should be looking towards the door, that was it! I also have a thing about having my back to the door and not knowing who might creep up behind me, so this this works well! I imported that chair from Jonathan Adler years ago and while it is made of resin and thus super heavy and not ergonomically sound at all, I just love it so there. The desk itself is solid timber. I love its generous size, simplicity and the fact it has a small drawer where I store pens (not a fan of pen pots!).

The round blush pink rug helps balance the room a little as most of the action is happening at the far end.

This room is definitely polarising but I’m unapologetic! This is my space where I get work done and earn money so it’s important too. It doesn’t have to be everyone’s cup of tea! That said, I find most women love it and men just shudder and say the wallpaper would give them a headache! Each to their own!

It’s actually really fun and refreshing to have a room which can be so self indulgent (when you’re in a couple you do have to be at least a little conscious of your other half’s tastes!). And the fact that this room feels so good and is a pleasure to work in makes me happy every day. All in all, I’m glad I had the guts to go bold in this room.

The floors in here will be replaced with an oak laminate next month, and the sliding doors will eventually be replaced with French double doors.

What do you think?

Where’s it from?

Wallpaper: Rosey Posey Trellis by Anna Spiro for Porter’s Paints

Installation by AKRA Wallpapering

Grey storage units: Windsor range from Pottery Barn

Table lamp: Zoya table lamp from Lighting Lighting Lighting

Pendant light: Shore pendant in tan rattan from Beacon Lighting

Desk: Altar desk in natural ash from Contents International Design

Chair: Jonathan Adler Chippendale Armchair, available in Australia through Coco Republic

Plantation shutter and sheer curtains: DIY Online Blinds

Art: Kimmy Hogan and Lamai Anne.

Rug: Cochin blush hand stitched rug from Early Settler

Bathroom ladder (used for magazines): Home Republic Bath Storage Ladder from Adairs

Terrazzo MacBook Skin: Uniqfind

Gold stapler: Kate Spade (available at David Jones)

Bluetooth speaker: Bang & Olufsen (available at Myer)

Gold wall clock: Target

See my master bedroom

Categories
Bedrooms House Tours Jen's reno

Jen’s new house room reveal: the master bedroom

Even though our “nanna house” is nowhere near finished and very much a work in progress, I thought it was time to share some of what we’ve done with you. And sometimes, when you have a seemingly endless list of jobs and expenses ahead, it’s really important to stop and look at how far you’ve come. It’s only been six months, after all!

So, today, I’m sharing the master bedroom. Only it’s not actually the master bedroom as per the floorplan. This brings me to a point about living in a new home as is for a while, if you can bear it, before getting stuck in. We immediately moved into the master bedroom (there are four all up) of this house because, well, the floorplan said so, it’s the biggest, and we are the grown-ups, right?! It also has an en suite, which is a very functional but dated eighties addition.

But the room just didn’t work. It’s all wrong with the feng shui and the only way to fix that will cost money. The same goes for the en suite. It’s hardly the stuff of sanctuary! So we made the call to move into a smaller bedroom at the front of the house. It just feels better for now! And I’m not that fussed about having a big bedroom, just a nice one! One day, when we have the money, we will rip out the robes in the ‘real’ master bedroom and reconfigure it, re-do the en suite and move the en suite door. But for now, we are in our ‘new’ room. And the master is a spare room.

I’m still in two minds about whether artwork will work above the bedhead or fight with it. This framed photo is of my treasured navy wedding shoes. The bedsides are last season’s west elm and came from the old place. I love the warmth of the timber.

Because it’s not that big, I didn’t want to clutter it up, so it was always going to be all about the bed. We started with a neutral base of grey carpet, grey paint (Haymes Greyology 4), white plantation shutters (from DIY Online Blinds) and the rattan pendant shades we have in all the bedrooms, from Beacon Lighting. We didn’t have carpet in the bedrooms at our old place, and I’m really glad we decided to have it in the bedrooms here. It’s also much cheaper than hard floor! And I knew this room would feature my favourite colour: navy. And what goes perfectly with navy for a little luxe factor? My favourite gold accents!

The ink art on the left is by Melbourne’s Casey Freeman, who I met through Instagram, and was in our previous bedroom.

I had been drooling over Heatherly Design Bedheads’ work for years, since we first featured them on the blog. When I saw the Sibella design it was love at first sight but I had to think about it for a while before I committed. I tend to play it safe and when I go a bit “out there” it doesn’t always work! But months later, I still loved Sibella so it was time to order her! Even better, Damian also loved Sibella (which I was not expecting, to be honest!). I was careful not to overdo it, but the Galleria lamps from Lighting Lighting Lighting were just the perfect complement.

This Freedom ottoman is completely surplus to requirements but it just goes so perfectly, it had to come in here from elsewhere in the house.

The mirror was a wedding present that lived in the dining room in our previous home. The white linen quilt cover is from Sydney brand Major Minor and it feels beautiful, I’m telling you! But it was too stark in contrast to the bedhead so I layered on this fab navy coverlet from my friend Naomi at Silk Home (she has her own made for staging). Rather than Euros, which would hide some of my statement bedhead, I chose kingsize pillows from The Pillowslip Store with their classic white cotton covers (they have some amazing patterned ones too, including gingham). Most of the cushions and the throw are from Adairs (their range is amazing, check it out).

Damian’s side of the bed, which always has flowers, honestly… The small bowl was from kikki.K.

There are built-ins opposite the bed (not pictured) and we have plans to replace them one day, as well as the skirting throughout the house. I’m still working out whether and what kind of rug this room can take. This room is right next to a large walk-in cupboard which we may turn into a walk-in one day, but for now, we just love having somewhere to store all our, well, crap!

This large mirror is on the wall to the right of the bed

So while this room does not have the sheer size of our old one, as stop-gap master bedrooms go, I’m really happy with it, and find it a restful space which is easy to keep tidy because of its simplicity and lack of stuff. I have resisted adding my usual pop of pink and I think the all-blue scheme works nicely. I am considering a wallpaper feature wall (perhaps the window wall). It would of course have to be quite subtle. But we’re almost done in here!

Love to know what you think (please be kind!).

Coming soon: home office and living room!

Photography: Jacqui Turk.

Categories
Jen's reno Kitchens

The plans for my new kitchen revealed (and the before!).

In partnership with Latitude Financial Services

I feel like I’ve been planning my new kitchen for months. Oh yeah, I have been! It’s been five months since we moved into our new (old) home, affectionately called the “nanna house” due to the old lady who lived here for three decades before us. We have been slowly but surely bringing her into the 21st Century but the first major job on the list was the kitchen and now the wheels are finally in motion. We are looking at an imminent demo, so any tips for surviving without a kitchen for a few weeks, will be gratefully received in the comments (thanks in advance!).

So here’s what we’re dealing with now. A very original kitchen which had a little spruce-up prior to the house going on the market. We’re talking old school solid timber cabinets installed long before soft close doors and smooth drawer runners were invented. They’re not even tall enough for most of today’s mod cons, like the Vitamix and the bigger wine glasses, for example. I haven’t unpacked more than the essentials because despite much scrubbing, you can only get that orange floral lining paper (which has become one with the cupboards) so clean. The laminate benchtop is actually in amazingly good condition and the brown oven and electric coil cooktop still work surprisingly well. But the museum piece dishwasher keeps tripping the electric and leaks every time we use it. But at least we have a working dishwasher!

We’ll be replacing those sliding dining room doors with French doors

Then there’s that random half-wall three quarters of the way down on the lefthand side. On the other side of that is, well, dead space! And the beautiful sliding door to the laundry.

The design was always going to be relatively straightforward: maximise use of space by removing the half-wall and bricking up the back door (we have two others!) and move the breakfast bar back into the kitchen as it is currently encroaching on our already-narrow dining room. Making space for a modern fridge-freezer (ours currently lives in the dining room because there’s nowhere for it!) was also pretty important!

While I had a pretty good idea what I wanted to do, when you have talented friends, you’d be mad not ask their advice, and I have several! So when interior designer James Treble (from Channel 10’s The Living Room) was at our place for brunch one day, I made him earn his food by drawing me up a quick plan! And it suddenly all clicked into place.

Poor James wasn’t actually expecting me to publish this when he scribbled it down in 5 minutes!

We than had a designer from Freedom Kitchens come out to tell us what was actually possible, using the drawings as a rough guide. This was really helpful as there were plenty of things I hadn’t considered. She explained everything really well and I felt much more confident in what we were doing after that. Some plans were produced, which I was happy with, and we are now waiting for a site check and measure this Friday before we can go any further. I am dying to lock in my trades and get going! Our friends at Integriti Bathrooms (they did our beautiful bathroom reno at the old place) are coordinating the trades with me (thanks guys, I wouldn’t trust anyone else!) and this has been a huge learning curve for me too, but it was about time I learned a bit more about the process!

Initial plan from Freedom Kitchens

So, what will be be doing in here? I’m going for classic with a touch of glam!

Shaker-style cabinetry was always going to be my choice. Due to a very tight budget (we maxed out on our mortgage!), we decided to go with Freedom Kitchens’ new and very affordable flatpack option, The Essential Kitchens Range. My handyman will assemble the cabinets, even though it’s apparently a piece of cake. That stuff just isn’t mine and Damian’s forte!

As this is a longterm home, it had to be a stone benchtop. I’ve chosen Caesarstone’s Noble Grey as a nice contrast to the white cupboards while still being quite light (I had dark benchtops in my last place and hated them). I’ll be taking that up the splashbacks too. Our kitchen is flooded with natural light, the best light in the house, so I wanted to keep it all light and bright in here.

Against many people’s opinions on what will date or what is on trend, I am sticking by my decision to go with brass handles from Kethy, a gold Zip tap and even (wait for it) a gold undermount sink. Controversial!

Personally, I think brass is a classic look. Rose gold, I’d agree, may be having an extended temporary moment, but when you think about it, brass has been around in interiors for a really long time! I don’t have resale in mind as we intend to live here for at least a decade so I’m taking the opportunity to specify what I really want. This is one flatpack kitchen that is being seriously pimped!

To add a little colour, pattern and texture, I’m considering a Roman blind made from some kind of navy-based textile (you knew there’d be navy, right?) and some navy rattan stools like these from Naturally Cane.

I love this kind of look. Image: blinds-2go.co.uk

Or I might add the colour and pattern with wallpaper (away from any water or potential oily splashes, don’t worry!) and have plantation shutters instead. Lots to think about!

Appliances were a learning curve! I’ve chosen mine from Ilve and after dreaming of a freestanding cooker for a really long time, at the last minute, I decided a more streamlined built-in look would be better for our kitchen. What I knew I needed though was quality that would last and something big enough to cope with entertaining and a growing (no, that’s not an announcement!) family. I’ve gone for a 90cm oven, a 90cm induction cooktop, a concealed rangehood and an integrated dishwasher. I won’t pretend this European brand’s style credentials didn’t sway me too!

Flooring is still up in the air after a supplier let me down at the last minute (yes, this happens to media too!), but we are looking to replace the floor everywhere bar the bedrooms (which are newly carpeted) as soon as the kitchen’s finished.

I look forward to sharing this journey with you over the coming weeks!

–Looking to renovate your kitchen? Get some tips on how to finance it from our partners at Latitude Financial Services.

Categories
Expert Tips Homewares Jen's reno RENO ADDICT

Why I’m using LED lighting in my new home

LED lighting used to be energy efficient but well, kinda ugly! The good news is that these days, by choosing LED, you can save energy and money, have your pick of beautiful light fittings and a nice, dimmable light which isn’t blue-tinged or harsh like a hospital! Winning!

I first learned what money-suckers those halogen downlights can be in our old apartment, where we had them in every room. OMG. When we swapped them for the newer style LED downlights, our power bills decreased dramatically. I’m someone who likes light and to have lights on if it’s anything less than full sunlight in the day, much to my husband’s annoyance!

When we moved into this house (with more rooms and therefore more lights!), we were faced with a lot of dated glass pendants (an old lady had lived here for 30 years before us) and, unlike many people, I didn’t want to immediately start again with downlights. I love pendants and they can be really nice design features, like jewellery for your room in a way. It was also a lot cheaper to replace pendants with pendants than have downlights put in. I still wanted good-looking LED light fittings though. These days, that’s not an issue.

I chose some gorgeous gold chandelier-style lights from Beacon Lighting (they’re now sold out in gold, but these are very similar) for our foyer, living room and play room. They’re so elegant and just the right mix of classic and modern.

They take nine globes each (27 in total!) so it was important they were energy efficient! We chose the heritage LED globes in warm white which are pricey at almost $30 each, but come with a three-year warranty (I’d suspect they’ll last a lot longer than that). It took a couple of attempts to get the right brightness after trying the first batch in our home and finding they were way too bright (these globes aren’t dimmable, but some similar ones are), but we are now delighted with them. Everyone comments on the lights as soon as they come in! The globes don’t look anything like what you’d imagine as energy efficient. And they really had to be as good-looking as the chandeliers or it wouldn’t work!

An LED heritage globe. Not ugly at all!

In our bedrooms, we went for something more neutral with less globes! These rattan shades from Josh & Jenna’s range for Beacon were my way of sneaking some rattan (which I love and my husband hates!) into the house.

I love the texture they provide, and they take two globes each, so it’s a nice diffused light. These come in three different diameters and two different colours. I went for this natural one, but there’s a darker tan too (there’s also matching floor and table lamps too if that’s your thing!).

I’m getting some professional shots of my reno progress so far very soon, so look forward to sharing some of the lights in situ with you all.

LED stands for Light Emitting Diode; a semiconductor device that converts electricity into light. Super energy efficient and long lasting, LEDs use approximately 85% less energy than halogen or incandescent lighting, which means significant savings on your power bills. The estimated lifespan of LED lighting (depending on the globe) is 15,000 to 50,000 hours. That’s compared to 1,000 to 5,000 for halogen.

If you’re not sure where to start, need advice on how many lights you need and how bright for example, Beacon Lighting can give you personalised help via their online chat facility, by emailing them or by calling 03 8561 1599.

Categories
House Tours Jen's reno Kids Rooms Parenting

Sebastian’s big boy bedroom reveal + win a $1000 voucher!

A collaboration with Pottery Barn Kids

As most of you know, we moved house a few months ago and shortly afterwards, headed to the UK for a month. So we decided it wasn’t worth reassembling Seb’s cot and that we would start his room from scratch as a “big boy room” with a single bed and try our luck.

Now, who better to collaborate with on this important room than my favourites, Pottery Barn Kids? When they asked if I’d like to work with them on Seb’s room, I couldn’t have said yes fast enough! Luckily, I was really clear what I wanted for him from the get-go: a timeless, classic, calm, comfortable space, loosely themed around his favourite things: anything transport! While I agree that kid’s rooms should be fun and about the kids, he is lucky enough to have his own playroom which is chock full of primary colours, toys, plastic and fun! So the idea for the bedroom was for it to be very calm and sleep-inducing (he has never excelled in the sleep department, much to our disappointment!). It was to be unashamedly low on toys and big on books! The other major factor was that this room could easily transition with him as he got older, with solid big ticket items which weren’t too babyish.

I am absolutely thrilled with what we created together and Seb transitioned to being in a bed amazingly well (okay, maybe because he was already jetlagged from our UK trip, but I’ll take it!). While he does all his playing in the playroom still, he loves choosing books for bedtime from his Madison Bookrack Tower. If you ask me, all kids should have one of this style of bookcase where the covers are facing out. It makes reading and choosing books so much more appealing, especially when they’re down at their level. Just make sure you anchor them, and any furniture for that matter, to the wall. Pottery Barn Kids furniture comes with anti-tip kits.

The starting point for the room was Haymes Greyology 4. I originally picked a green paint colour without first testing it on the walls (don’t do this, people!) and it turned out to be a “lime crime” so we swiftly changed that to this gorgeous grey, which we have in most of the rest of the house. We have also carpeted all our bedrooms in a nice mid grey and installed plantation shutters.

We went for grey for the main furniture items because it’s a bit different to white but still very timeless and the bedside, bed and dresser would look just as appropriate in a teenage boy’s room. They’re all from the Elliott range.

We picked the Elliott bed for many reasons. Firstly, it has two height settings, so while he’s little it can be lower and therefore easier for him to hop in and out on his own (which he does). Second, on the higher setting, you can put a trundle underneath (perfect for sleepovers when he is older). And third, it’s just a really lovely classic shape that will again look perfectly fine in an older kid’s bedroom. The quality of this furniture pretty much wowed me and it’s made of solid timber and MDF with traditional carpentry techniques. It’s better than what we have in our own bedroom, I think! The dresser and bedside come fully assembled and the bed is straightforward to put together (although you can pay extra for Pottery Barn Kids to do this for you when they deliver). I read up on mattresses and the importance of kids having something supportive while their little bodies are still growing. We chose the Sealy Posturepedic Dusk from Forty Winks in medium firmness.

We bought this Moomin print for our future child while on honeymoon in Tokyo before we were even pregnant or planning to be!

Onto the more fun stuff, the ride-on train went down a storm and is rarely in the bedroom but rather being tripped over elsewhere in the house! Damian is totally jealous and wishes he’d had one when he was a kid. Months later, Seb still comments on his “toot-toot sheets” (Organic Train Sheet Set) which we combined with more neutral linen like the gorgeous Vintage Yarn Dye Reversible Quilt (which I may yet steal for myself!).

Don’t expect toddlers to smile in photoshoots when it’s past their nap time…

You can never have too many Anywhere Chairs (out of shot) to sit on (this is his second). I recommend them to everyone with kids. the Collector’s Shelves are a great way to display favourite books and toys and add colour and interest. We now change them around regularly. And another favourite piece is the the Rowan Lamp (it comes in brass or nickel) which is a first of its kind in that it also has a nightlight in the base. We also put a super cool neon ‘Sebastian’ light on the wall from Neon Poodle which sadly arrived after the photoshoot. It’s a real wow piece.

The whole process of putting this room together was so fun. Pottery Barn Kids interior designer Ebony Quaid was an awesome help; so passionate about her job. From putting together a concept board based on my wants to providing advice and helping style the finished space, it was great working with her.

Jen with PBK’s Ebony Quaid

Since the shoot, we have unpacked properly and added a lot more art and accessories to this room but it is still a very calm and simple space. I’m thinking about doing one wall with wallpaper. What do you think?

Did you know Pottery Barn Kids offer free design services to all their customers (not just bloggers like me!)? Here’s a little video of Ebony and I discussing the room:


Do you have a little one (or one on the way) whose room needs a makeover? One lucky person will win a $1000 voucher to spend on whatever they like at Pottery Barn Kids!

Simply fill out the form below or pick one up in store. Entries close at 11.59pm AEST on 31 August 2017.

[gravityform id=”42″ title=”false” description=”false”]

For full terms and conditions.

Photography by Jacqui Turk.

Categories
Jen's reno

We bought a house!

(The real estate photos originally shared in this post have been removed since we realised how easy it was to Google image search them and discover our exact address!)

Those who follow me on Instagram will have probably worked out by now that we have bought a house but I thought it was about time I actually blogged about it here as I will be sharing the reno journey with you over the coming month and years. Yes, definitely years! This is a long-term family home for us and there is plenty to do!

We have already done some updates (I have zero patience) but for the purposes of this post, I’m starting from the very beginning with the journey as to how we got here. As you can imagine if you know a thing or two about Sydney property prices, it has not been easy!

So, why did we sell our beautiful, two-bedroom apartment with recently renovated bathroom after just a year (I’m still mourning the loss of that bathroom!)? Long story short, it was a good time to sell. Another unit in our block went to auction and we couldn’t believe what it sold for. We knew ours was a better apartment and was likely to go for more and, doing the sums, it looked like we could just (by the skin of our teeth) afford to upgrade to a more long term family home; a standalone house with a yard! The dream! Not to mention the million and one issues we had with our owners’ corporation put us off living in a strata building for life (I could write a series of angry blog posts but that’s not going to help me move on!). We also have a very active toddler and hope to have another one day (no announcement, no!) and while we could have made it work, we knew more space and a yard would make life easier. Not to mention the constant fear of Sebastian managing to climb over the third floor balcony, no matter how safe and careful we were. Terrifying.

So, we sold the apartment for a great price (if you need an agent on Sydney’s Upper North Shore, James Tasker at Di Jones Wahroonga is exceptional) in early December. Happy days!

We started looking for modest three-bedroom houses in the neighbouring suburbs which we knew from our research were just within our reach financially. Then Christmas happened: nothing on the market for weeks. And weeks. When things started coming back online towards the end of January, we kept losing out prior to auction by frustratingly small amounts, but amounts we didn’t have nonetheless. We started to wonder if we had made a bad move selling the apartment as it looked like we might only have the option of buying a bigger, three-bedroom apartment or a townhouse (strata: ugh). The thing was, prices were continuing to go up all the time.

So we decided it was time to look a little further afield (still in Sydney’s north) and finally it seemed we were in with a chance on our budget. The best thing was we could get four bedrooms and a bigger house and yard if we were lucky. And we finally were.

Our “nanna house” (we used this to affectionately nickname her when discussing the other options and it stuck!) was the first house we saw in this suburb. It was packed at the first open. It had, and definitely still does have, a really good vibe and nice flow about it. It had a huge living room and a separate (yet adjoining) family room (which we immediately earmarked for a playroom we could close the door on and not worry about the mess) as well as four bedrooms. As I work from home, the extra bedroom is priceless as an office. We fell for this house, warts and all. We could immediately see ourselves living here.

The house was/is seriously dated. We’re talking original kitchen and bathroom and even the more modern (I use the word loosely) en suite is pretty embarrassing. The exterior is red brick veneer and UGLY. God bless her, this house has absolutely no street appeal. We have about four different kinds of flooring in here including cork! The same lady had lived here since 1989 and had recently, reluctantly (she loved this house) gone into a nursing home.

But we have space, so much space! And it’s peaceful. The back yard is just the right medium size for us, private and full of established trees, shrubs and flowers. The neighbours either side have kids and seem nice. We have several parks in walking distance (although Seb calls the yard a park now!) and a cafe and little shop right on the next corner (winning!). While we had been looking for a three-to-five-year home, we now have ourselves a potentially forever home.

So, there’s a lot wrong with the house aesthetically and it wasn’t exactly a bargain (clearly there’s no such thing in Sydney these days) but it is ours, it is structurally sound, it can last us forever if needs be, we are in and it feels really great to know we aren’t going anywhere for a really long time. I have had enough of moving.

We have hardly any money left and I’m doing deals and calling in favours left, right and centre to get our hideous kitchen ripped out and replaced ASAP (I’ll share more on my vision for the kitchen soon). We’d love to do both bathrooms but we will have to wait a while and save up and learn patience.

So what have we done so far? We have painted throughout (made a couple of errors there which I’ll learn from and blog about!), we’ve carpeted the playroom and bedrooms and recently had plantation shutters installed by our friends at DIY Online Blinds. These things alone have made a big difference. Next up, we’re replacing all the lights. To save on the electrician’s bill we’re replacing the existing pendants with new, more modern ones rather than going for downlights.

I’ve worked out there are a lot of little things (as well as the glaringly obvious like kitchens and bathrooms) which age an older home and will need replacing. These include lights, light switches and power sockets and door handles (maybe even doors!). And the other thing is, each time you fix up one thing, it makes something else look even worse in comparison! Not to mention the boring yet essential things which cost money and don’t make the house look any better at all (air con and termite prevention treatment being just two of them!).

Once we’ve done the kitchen, we can sort out the flooring situation. I have no doubt having the same floor throughout the living areas will make a massive difference. I’m thinking a medium-toned oak laminate of some kind. And longer term there are so many more plans, including an exterior and back yard makeover.

I’m really looking forward to sharing our reno journey with you and hope you’ll like it and learn from it! You can expect me to absolutely keep it real and if there are mistakes along the way I’ll be sharing them too!

Better get back to tightening my belt and working hard so we can afford to pay the mortgage…