Categories
Interiors Addict Recipes

Foodie Friday: Delicious satay chicken skewers

Today’s recipe is Satay Chicken Skewers by Kathryn Bamford from The Wholefoods Refillery. These skewers are great for an easy weeknight dinner or when entertaining. Everyone will be begging for the recipe – and will be astonished at how EASY it is! Get 20% off your first order with the code JEN20.

Satay Chicken Skewers

Whack em on the bbq and they will be done in no time! These skewers are great for an easy weeknight dinner or when entertaining.

  • 800 g chicken tenderloins
  • 6 tbs The Wholefoods Refillery Satay Paste
  • 2 tbs coconut oil
  • 1 spring onion (to serve)
  • 1 handful of roasted peanuts (to serve)
  • 1 lime (wedged)
  • bamboo skewers
  1. If you’re cooking on the BBQ, soak your bamboo skewers in water for an hour before you need them.

  2. Place the chicken tenderloins and satay paste in a large bowl or in an airtight container. Toss to combine, ensure all sides of chicken are coated. Cover and leave to marinate in the fridge for a minimum of an hour (overnight if you have the time, so the flavours really soak in).

  3. Preheat a char-grill pan or bbq on medium heat.

  4. Thread the chicken on the skewers, brush with coconut oil and cook in batches, occasionally turning for 6-8 minutes or until cooked through.

  5. Serve with spring onions, lime wedges, and crushed peanuts.

  • Get adventurous, swap out chicken for beef or pork to mix it up!
Dinner, Side Dish
Asian fusion, Modern Australian
Australian summer, BBQ, Chicken, easy dinner, health food, satay
Categories
Interiors Addict Recipes

Foodie Friday: Pineapple and rosemary gin & tonic

Today’s recipe is by Kathryn Bamford from The Wholefoods Refillery. And we know what you’re thinking pineapple and rosemary… what?! Trust me on this. It’s a good idea, incredibly delicious, and oh so easy to make. Get 20% off your first order with the code JEN20.

Pineapple, rosemary gin & tonic

I know you're thinking pineapple and rosemary… what?! Trust me on this. It’s a good idea, incredibly delicious, and oh so easy to make.

  • 50 ml gin
  • 150 ml tonic
  • 1 piece dried pineapple
  • 1 lime (juiced)
  • 2 rosemary sprigs
  • 1 pinch salt
  • Ice (to serve)
  1. In a cup add some ice then gin and pineapple.
  2. Squeeze in one lime, add salt and top with tonic.
  3. Let the pineapple infuse for 5 minutes and garnish with rosemary sprig to serve.

Don’t forget to eat the pineapple when you finish drinking!

Drinks
cocktail, gin, pineapple
Categories
Dining Expert Tips

Entertaining at home during Covid with more style & less stress

Staying in is the new going out and if we embrace this, I think we could all come to enjoy the good old fashioned dinner party a lot more in 2020! We asked Sydney caterer Kate White, of Katering, for her tips on being the host with the most without losing the plot!

If you want to make sure you enjoy the occasion as much as your guests, Kate says don’t forget to keep it real. “Easy entertaining is about making your guests feel relaxed, so it is important that your entertaining style is a reflection of this or your home or your style. Don’t try to be anything you’re not!”

Great life advice, we say!

A golden rule is never to try a new recipe for the first time on your guests: far too stressful and risky!

“I love Asian food, so relish the chance to cook fresh light food for my friends,” says Kate. One of her favourite dishes to cook for friends is master stock spatchcock twice cooked with a green mango salad and nahm jihn.

She also loves grazing boards, and this way of eating helps make guests instantly relax. “I love that this becomes part of the décor but you have to be generous so invariably a lot gets wasted, although I usually pull it out again for my four children and it gets eaten!” The majority of her wedding and event clients request grazing boards these days, although in the current climate, Kate says they’re sadly not very Covid-friendly.

If you do go down the platter or grazing board route though, remember to be practical. Make sure your platters are small for six-to-eight people and break this up along the table, so when serving 20 people you would have three to four platters of each dish, for guests to share amongst themselves. “Large platters cannot be lifted or handed around by the guests as they are too heavy and too big for the space.”

Kate thinks shucking oysters to order can be fun and a talking point, but if that’s a little beyond your skill level, having friends round for risotto is another favourite of Kate’s. Remember you’ll need to stand in the kitchen to stir for this one though! “Alternatively mud crab pasta is also a winner for easy entertaining with the casual vibe.”

Possibly the biggest dinner party faux pas is leaving guests feeling hungry (the shame!) so Kate says know your quantities, including 180-to-250g of meat per person. “Most home cooks over-cater from my experience! Be generous!”

Creating a sense of occasion starts with low and ambient lighting: lots and lots of candles and dimming overhead lights where possible. Great linen, of course, always helps. “At the moment I am loving the monotone colour palette; beige and soft pinks mixed with neutrals and dove greys. People are really giving their table the detail: in the flowers, candles, crockery and cutlery, textured linens and soft florals. Its all about the tablescape!”

Kate says she’s crazy for good glassware, cutlery and crockery to give her table interest. “Again, due to my relaxed style, I love uneven ceramics, textured plates and platters. Oversized, always! And I love soft linen tablecloths with neutral colour palettes to work off and add the pop of colour or added interest. Adding some old with the new always is interesting.”

Don’t forget the other senses either. “Music is another very important part of entertaining: have a playlist organised in advance. Dinner music first, then liven it up later in the night. If guests want to dance, let it happen organically. Since Covid, no dancing has been allowed at weddings or in clubs, so be prepared!”

For more information on Katering, who also do home delivered ready-made meals.

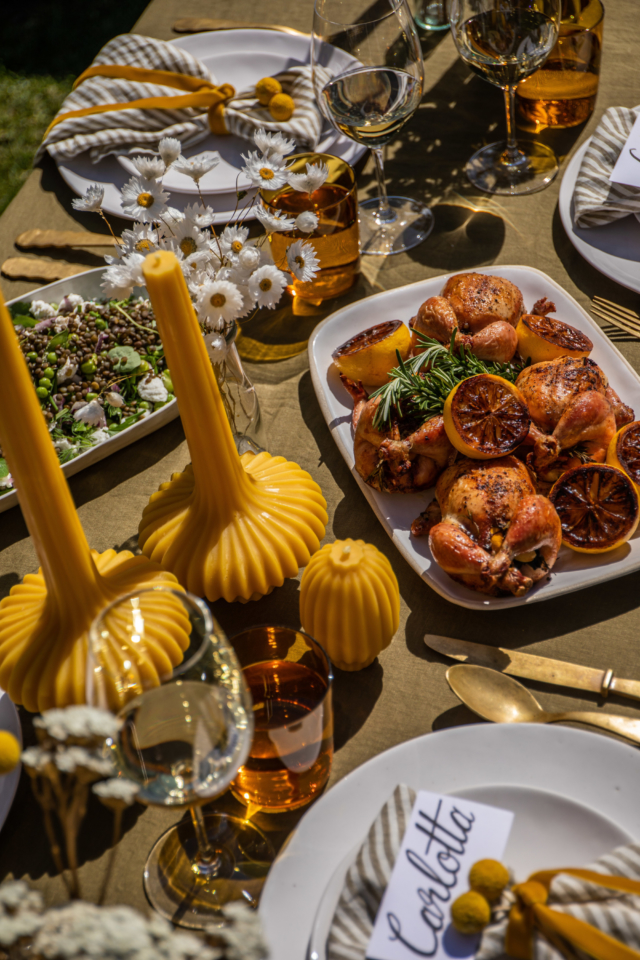
All table linen pictured by Carlotta + Gee, luxury, eco-friendly, sustainable and 100% French linen.


Categories
Recipes

Foodie Friday: Chyka Keebaugh’s rainbow cake

Foodie Friday

This week’s recipe is from TV personality Chyka Keebaugh, whose new entertaining book is out now.

This is one of my favourite cakes, both in appearance and in flavour. Any cake that is layered with cream cheese icing (frosting) will always be a hit in my eyes. Pair that with the fluffy, buttery and moist red velvet cake, and it’s just scrumptious! I love the concept of using two cakes to create a single image. It’s so simple and yet so effective, and works really well if you have a large number of guests. If you don’t want to make two rainbow cakes, simply halve the recipe.

Ingredients

Cake batter
500 g (1 lb 2 oz) unsalted butter, softened, plus extra for greasing
575 g (1 lb 4 oz/2½ cups) caster (superfine) sugar
3 teaspoons vanilla extract
6 eggs
600 g (1 lb 5 oz/4 cups) self-raising flour, sifted
85 g (3 oz/²⁄³ cup) cocoa, sifted
375 ml (12½ fl oz/1½ cups) buttermilk
125 ml (4 fl oz/½ cup) natural red food colouring

Cream cheese icing
2 × 460 g (1 lb) packets cream cheese, softened
250 g (9 oz) unsalted butter, softened
900 g (2 lb) icing (confectioners’) sugar
2 teaspoons vanilla extract
Natural food colouring in the shades of the rainbow (red, orange, yellow, green, blue, indigo and violet).

SERVES: 24 | TIME: 2.5–3 HOURS

NOTE: For this party, I wanted my cakes to be extra tall so I doubled the recipe amount and created two cakes with four layers each.

Method

Preheat the oven to 160°C (320°F). Grease and line two 20 cm (8 in) round cake tins with baking paper.

To make the cake batter, place the butter, sugar and vanilla in the bowl of a freestanding electric mixer and beat for 8–10 minutes, or until pale and creamy. Scrape down the sides of the bowl and add the eggs, one at a time, beating well after each addition.

Add the flour, cocoa, buttermilk and red food colouring, and beat on low speed until just combined.

Divide the batter between the two prepared tins and smooth the tops with a palette knife.

Bake each cake for 1.5 hours to 1 hour 40 minutes, or until a skewer inserted in the middle of the cakes comes out clean. Leave to cool in the tin for 10 minutes before turning the cakes onto a wire rack to cool completely.

While the cakes are cooling, prepare the cream cheese icing. Combine the cream cheese and butter in a large mixing bowl of an electric mixer and beat on medium speed for 1–2 minutes, or until creamy. Gradually add the icing sugar and vanilla and mix until smooth.

Trim the tops of the two cakes so that they are flat, then split them in half horizontally with a large, serrated knife to make four cake layers. Place one cake layer on a plate and spread about a quarter of the cream cheese icing on top. Place the second cake layer upside-down on top to create a nice flat surface, then press down gently. Repeat with the remaining two cake layers and another quarter of the icing to make the second cake.

Thinly spread some more cream cheese icing over the side of the cakes to crumb-coat, then spread a generous amount on top and smooth it out with a spatula.

Take one-quarter of the remaining cream cheese icing and divide it between small bowls. Shade each bowl of icing with the different food colourings and mix well. Transfer each coloured icing to separate disposable piping (icing) bags fitted with 1.5 cm (½ in) star tips. Keep the remaining cream cheese icing plain.

Working on the side of the cake, pipe a rainbow arch using each of the coloured icings. Your rainbow should wrap around roughly one-third of the cake. Repeat on the other cake.

Once you’re happy with your rainbows, fill the remaining surface area of the cake with florets of plain icing.

This is an edited extract from Chyka Celebrate by Chyka Keebaugh published by Hardie Grant Books $40.00 and is available where all good books are sold.

Categories
Recipes

Foodie Friday: Ravioli with lemon butter and greens

Foodie Friday

Who said pasta should be reserved for winter? Proving it can be enjoyed all year, this light vegetarian ravioli is perfect for summer entertaining and given it takes just seven minutes to prepare, you’ll have plenty of time to catch up with your guests. Courtesy of Maxwell & Williams, today’s recipe is served on the brand’s statement Positano range. Bon appetit!

Ravioli with lemon butter and greensPreparation time: 7 minutes
Serves: 4 people

Ingredients

500g pre-made ricotta ravioli
50g butter
2 cloves garlic
1 lemon, juiced and zested
500g baby spinach leaves, rinsed
1/4 cup baby capers
Parmesan, grated
Cracked pepper
Fresh dill, to garnish

Method

1. Fill a medium-sized saucepan halfway with water and a pinch of salt. Place over high heat and bring to boil. Gently and carefully place the ravioli in the water and boil for approximately 4-5 minutes or until cooked through. Drain through a colander and set aside.

2. Set a large saucepan over high heat and melt butter. Add garlic, lemon juice, zest and capers, stir to combine and reduce heat. Stir through spinach and cook for 2 minutes or until wilted.

3. Add in ravioli and gently toss to combine.

4. Transfer to serving platter and top with parmesan, cracked pepper and dill.

More recipes

Categories
Expert Tips

5 tips for getting your home ready for guests this Christmas

Whether your place is in need of a last minute spruce up or you want to go in hard to impress, these top tips from Madras Link will have your place feeling and looking more charming and comfortable than any restaurant, hotel or bed and breakfast.

Tip 1.        

Creating a warm welcome is as easy as throwing down a fresh new doormat for the perfect first impression.

Whether you want to say “Welcome” or “Home”, or show off your unique style with colour and prints, a fun doormat sets the scene for the love that awaits behind the door.

Tip 2.        

Switching out those old couch cushions will bring a fresh new look to your living room. Mix prints and patterns with textured block colours in woven cottons, luxuriously soft velvets and look for embellished details like fringes, tufts and tassels. Then pile them on for impact.

Tip 3.        

Guests staying over? Don’t forget the comforting details in the guest room. Create a quick transformation with a bold upholstered armchair, new bedside lamps and a pop of colour from a throw blanket (if it’s really last minute, moving a statement cushion from Tip 2 into the bedroom can still make all the difference).

Tip 4.       

Have plenty of serving boards and cheese knives on hand. Who can wait to dive in after a big market shop for cheeses and antipasto? Not us, so we make sure we keep an assortment of serveware within arm’s reach.

Tip 5.          

Don’t say goodbye to your guests without pulling out all the stops for an at-home soiree. Create a dining experience that cannot be matched by any restaurant with glamorous wine coolers, sophisticated brass or marble serveware and napery uniquely styled by you. This combined with your cooking will wow your guests and create an unforgettable night.

–Madras Link is an Australian homewares company that designs locally in Melbourne and sources globally, showcasing unique products made with care by artisans to be loved in our homes. All pictured products can be found in stores nationally or online at www.madraslinkonline.com.au

Photography: Melissa Lau Photography

Categories
Recipes

Foodie Friday: Brunch Lorraine

Easter’s approaching, which means a gloriously long weekend to look forward to! Why not take your cue from Williams-Sonoma and gather friends over a leisurely Easter brunch? Organise an egg hunt for the kids and let the adults catch up over a simple, relaxed feast. This “brunch Lorraine” is inspired by the classic flavours of a quiche Lorraine, but in an easy, rustic, free-form casserole, perfect for entertaining a crowd.

You can easily prepare this dish the night before (in fact, it’s preferable, so that the bread has time to soak), cover and refrigerate it, and then simply pop it in the oven the next morning just before your guests arrive. By preparing it in this vintage-inspired lidded casserole dish in a vibrant festive shade, it’ll be safe to go straight from fridge to oven to table, perfectly presented and warm, crisp and meltingly delicious.

Serves 12

Ingredients

  • 2 Tbsp olive oil
  • 1 onion, sliced
  • Sea salt, to taste, plus 1 tsp
  • Freshly ground pepper, to taste
  • 500 g baby spinach or coarsely chopped English spinach
  • 750 g loaf batard or ciabatta, crusts removed, bread cut into 2.5cm squares and toasted until dry (about 9 cups)
  • 250 g ham, diced
  • 185 g Gruyère, grated
  • 10 eggs
  • 2½ cups (625 ml) pouring cream

Method

In a large sauté pan over medium heat, warm 1 Tbsp of the olive oil. Add the onion, season with salt and pepper and cook, stirring occasionally, until caramelised, about 15 minutes. Transfer to a bowl.

In the same pan over medium heat, warm ½ Tbsp of the olive oil. Add half of the spinach, season with salt and pepper and cook, stirring, until wilted, 2 to 3 minutes. Transfer to a colander. Repeat with the remaining ½ Tbsp olive oil and spinach. Using a rubber spatula, press out the excess moisture.

In a large bowl, toss together the bread, the caramelised onion, spinach, ham and cheese. Transfer to a 4-litre baking dish. In a bowl, beat together the eggs, cream, the 1 tsp salt and pepper, to taste. Pour onto the bread mixture. Cover with plastic wrap and refrigerate for at least 2 hours or up to 16 hours to soak.

Preheat an oven to 180°C.

Remove the plastic wrap from the baking dish and cover with a lid or foil. Bake for 20 minutes. Uncover and continue baking until the top is browned and the casserole is cooked through, 40 to 50 minutes more. Serve warm.

–For more Easter entertaining inspiration, head to www.williams-sonoma.com.au

Categories
Interiors Addict

How to: make your own doughnut board

Surely I can’t be the only one who has been swooning over doughnut boards on Pinterest? It was only a matter of time before I had to give it a DIY go for Interiors Addict! What do you think of my efforts? The common Krispy Kreme never looked so good, right?

image

Here’s just how simple and easy it is to knock one of these bad boys up quickly…

HOW TO

Step 1: Pick up supplies

Step 2: Cut dowel rods

Cut your dowel rod to the desired lengths and sand down the edges.

Step 3: Drill holes

Mark out where you want the dowel rods to go (make sure you leave enough room between them for the doughnuts). Make sure your drill bit is the same width as your dowel rod and drill down 3/4 the depth of the serving board. Sand any rough bits around the holes you’ve just drilled.

Step 4: Glue dowels in

Put a small amount of glue into the holes you’ve drilled and push your dowels rod in. Remove any excess glue and then wait for it to dry.

image

Step 5: Eat doughnuts!

Cake by La Petite Tarte and doughnuts from Krispy Kreme

–Kathryn Bamford is a certified interiors addict and regular contributor. You can follow her DIY and design adventures on Instagram @thedesignrookie.

Categories
Homewares

We love: Charlie & Fenton’s range of watercolour print linen

Inspired by the city of Melbourne, textile studio Charlie & Fenton’s new range ‘Urban Jungle’ features a gorgeous collection of painterly designs.

_16.02.29_Charlie&Fenton_Product_0108

“It’s a collection of table linens and tea towels that centre around what it looks and feels like to live, love and entertain in Melbourne,” says Jannah Stevens of Charlie & Fenton.

_16.02.29_Charlie&Fenton_Product_0203

The bespoke prints are designed and hand-painted before being transposed into digital form and then printed onto luxe Belgian linens and natural fibre base-cloths.

_16.02.29_Charlie&Fenton_Product_0293

“We believe that entertaining should be fun, exciting and stylish and that, for a short while each day, the dining table can become an uninterrupted oasis of serenity and good times for family and friends,” says Jannah.

_16.02.29_Charlie&Fenton_Product_0255

After decade long careers in set design, textile technology and interior design, Jannah and her business partner Isabella, created their independent textile studio. “We were looking for something more in our creative lives and we knew we wanted to offer people high quality, unique soft furnishings in a market that is so saturated with throw-away poorly made goods,” says Jannah.

_16.02.29_Charlie&Fenton_Product_0221

Shop here.

Styling by Tennille Burnup |Photography by Cloe Smithett

Categories
Recipes

Foodie Friday: Tandoori chicken wings with lemon yoghurt sauce

foodie friday logo

These fun-sized chicken wings pack a serious punch of flavour. You can serve these as snacks for a party, or to round it out to a meal, serve the wings with roasted potatoes (which can be dunked into the yoghurt sauce, too) and a green salad. These wings are equally tasty at room temperature, making them a good choice for picnics too!

26 Feb 2016 - Tandoori Chicken Wings with Lemon-Yoghurt Sauce

Ingredients

  • 1.5kg chicken wings and drumettes
  • For the marinade:
  • ¾ cup plain yoghurt
  • 1 tbsp tomato paste
  • 1 tbsp fresh lemon juice
  • 2 tsp garam masala
  • 1 tsp ground turmeric
  • 1 tsp kosher salt
  • ¼ cayenne pepper
  • For the yoghurt sauce:
  • ¾ cup plain yoghurt
  • Grated zest and juice of 1 lemon
  • 1 tbsp chopped fresh coriander
  • Kosher salt and freshly ground pepper

Method

To make the marinade, stir together the yoghurt, tomato paste, lemon juice, garam masala, turmeric, salt and cayenne pepper in a large bowl. Set aside.

Add the chicken pieces to the bowl with the marinade and toss to coat well. Cover and let marinate in the fridge for 30 minutes.

Coat a baking tray lightly with cooking spray, line with aluminium foil and coat again.

Remove the chicken wings from the marinade and arrange on the prepared tray. Slip under the grill about 15cm from the heat source and grill for 8 minutes. Remember to leave the oven door open if using the grill function! Remove the tray from the oven, flip the wings over, and grill until the chicken is opaque throughout, about 8 minutes longer. Don’t worry if the wings have blackened spots on them.

To make the yoghurt sauce, combine the yoghurt, lemon juice, zest and coriander in a bowl and stir to mix well. Season with salt and pepper.

To serve, transfer the wings to a serving platter and spoon the yoghurt sauce into a serving bowl alongside. Serve immediately. Serves 4.

–For more fresh ideas about how to prepare chicken, check out Williams-Sonoma’s What’s For Dinner: Chicken Night Cookbook.

Williams Sonoma currently have 20% off all entertaining accessories.

CHECK OUT OUR FOOD SECTION

Categories
Before & Afters Expert Tips Real Renos RENO ADDICT

‘Tis the season for alfresco living!

This time of year is always a torture test for how well you’ve designed your entertaining areas at home. Whether you’re hosting the family Christmas lunch (eek, that’s me this year) or just a lazy January BBQ, you’ll find these events so much more enjoyable if you have a practical (and beautiful) area to host your guests. And in Australia, at this time of year, you simply can’t have a party indoors. Alfresco entertaining is a must.

In all our renovations, we spend much time and energy transforming dead outdoor spaces into entertaining alfresco havens. Here are some before & afters from the Three Birds’ alfresco almanac.

House 1

House 1 gas strut before
Before

House 1 gas strut after
After

Before
Before

After
After

House 2

Before
Before

After
After

House 3

Before
Before

After
After

Before
Before

After
After

Before
Before

After
After

Lana’s Pool

Pool wide shot before

After
After

Before
Before

Pool closeup after
After

Before
Before

After
After

Our alfresco crushes:

  • Gas strut window + servery– a great alternative to bi-folds, these awning windows (popular in Queensland) bring a super-relaxed vibe to the space and when teamed with an external servery it becomes the ideal connection between outside and in.
  • Decking – a no brainer in most outdoor spaces, a timber deck is hard to go past for creating the perfect outdoor zone. But sometimes a large deck can be quite costly and need council approval, so well-laid pavers are a smart substitute (see House 3).
  • French doors – it’s true we have a French door fetish but they are just so damn beautiful, practical and affordable. They’re a brilliant alternative to bi-fold doors which can cost double or triple that of Frenchies – and if the opening is quite wide we like to put four frenchies next to each other (the two middle ones open up and the two on the outside are fixed).
  • Pergola + timber screens – creating an outside room is easier than you think. It doesn’t have to be a full-on extension to the house, rather a well-placed pergola with timber screens creates the impression of an outdoor room in a flash.
  • Homewares – soft furnishings like pillows, throws and rugs add color and texture to help make an outside space feel like a welcoming room and lush green pot plants are the perfect finishing touch for a true alfresco feel.
  • Paving paint – it’s amazing how crummy-looking concrete can be transformed with a few coats of paving paint (we love Ultra Pave by White Knight). It’s so cheap, fast and effective, and you can have it tinted to any colour you want.

Got a question for the Three Birds girls? Ask it in the comments or send it to us.

Read all posts by Three Birds.

For more information about Three Birds Renovations.

Categories
Dining Recipes

Foodie Friday: A Christmas feast with seafood and sangria

foodie friday logo

Fancy mixing things up a little this Christmas? Temple & Webster have you covered. They have many festively styled tables to choose from in their Christmas one stop shop online. We love the seafood and sangria styled delight! It’s a casually elegant mix, with layered linens, organic-inspired patterns and contrasting gleaming copper and crystal. It works if your Christmas is headed outdoors, but you still want to create a special setting.

Copy of 20151111-TW-NNXmasTable34344

To complete the scene, Temple & Webster’s food expert Jono Fleming has shared his recipe for salt & pepper squid with a spicy kick, and a refreshing Prosecco cocktail that could easily work any time from breakfast onwards…

Salt and Pepper Squid

Ingredients

  • ½ bunch of mint
  • 3 shallots
  • 2 teaspoons Chinese 5 Spice
  • 2 teaspoons salt
  • 1 teaspoons white pepper
  • 100g plain flour
  • 400-500g of fresh squid, or squid tubes, (you can get your fishmonger to clean them for you)
  • 2 cups vegetable oil, or enough to fill a medium pan to around 8cm
  • 4-5 small red chillies, sliced

Method

Pick the leaves off the mint and wash them. Slice the white parts of the shallots down the middle and slice into 3cm strips. With the green parts, cut into small pieces on an angle. Place the mint and shallots into a small bowl with iced water, set aside.

In a mixing bowl, add the 5 spice, salt and pepper and flour, mix together and set aside.

With the squid, cut the hoods into triangle shapes, and score lightly in a criss cross pattern. This will help the squid curl up when fired in the oil. Pat dry with a paper towel and coat them in the spiced flour mix.

Heat the vegetable oil on the stove to about 190 degrees, and fry the squid in batches until golden brown. They will cook pretty quickly, in about 2 minutes or so. Remove from the oil with a slotted spoon and rest on paper towels. Throw the chilli slices in with the last batch and remove when they are a bit blistered, which should take about 2 minutes.

Drain the mint and shallot, toss together along with the cooked chilli and season the cooked squid to taste.

Prosecco Sangria with cucumber mint syrup

Ingredients

  • 1 bottle Prosecco, chilled
  • 1 cucumber
  • 10 mint leaves
  • 1 cup of caster sugar
  • 1 cup of water

Method

Peel and slice the cucumber, wash the mint leaves and set aside.

In a small saucepan, add the water and sugar and on a medium heat, stir until the sugar is completely dissolved. Add the cucumber and mint and continue on the heat for 2 minutes. Remove from heat and set aside for about 10 minutes. Strain and pour into a small jug and place in the fridge overnight. The longer the mixture sits the better the flavours will mix.

To serve, pour about 2 teaspoons of cucumber syrup into each flute or glass, top with Prosecco and garnish with a slice of cucumber, some mint and a few blueberries.

Categories
Recipes

Foodie Friday: Crab and cucumber canapés

foodie friday logo

Following on from last week’s summer cocktail recipes, comes the perfect accompaniment for your silly-season drinks party: this super-simple canapé. It’s refreshingly carb and dairy-free, making it about as healthy a snack as you are likely to enjoy this season. But the best part of all? It’s incredibly fast and easy to prepare, and as luxurious as you can hope for, especially when you use beautiful, freshly picked crabmeat from your local fishmonger. Just be sure to pick over the crab and remove any stray pieces of shell. The crunchy cool cucumber slices provide a nice contrast to the rich crabmeat, so these bites feel light, fresh and elegant.

WS_CTD_STARTERS_025-652x782

STYLING TIP Serve these pretty little morsels on the season’s coolest surface – marble. Not only is it beautiful, festive and luxurious, it will also help to keep the canapés naturally cool for longer. And what could be more perfect for an Aussie Christmas party than ultra-fresh seafood set against green cucumber and dusted with red paprika? So festive!

Ingredients

  • 500 g picked cooked crabmeat
  • 1/4 cup mayonnaise
  • 1 celery stalk, finely diced
  • 1 tbsp finely chopped fresh chives
  • 1 shallot, minced
  • Juice from half a lemon
  • Sea salt, to taste
  • 1 large cucumber
  • 1/4 tsp paprika
  • Dill or fennel flowers for garnish (optional)

Method

In a bowl, stir together the crabmeat, mayonnaise, celery, chives, shallot, lemon juice and salt.

Slice the cucumber thinly on the diagonal. Place a dollop of the crab mixture on top of each cucumber slice, sprinkle with the paprika and garnish with flowers. Arrange on a platter and serve immediately. Serves 4 to 6.

Head to Williams-Sonoma for lots more inspiration, or book a cooking class in their Sydney Cooking School – it makes the perfect Christmas gift for your favourite foodie.

Categories
Interiors Addict

10 days to get your home entertaining-ready for Christmas!

Feeling the pressure for your home to look stylish as the festive season approaches? Want to wow your guests or feel extra proud of your home this Christmas? The International Institute of Home Staging (IIHS) can help you with a step by step guide starting on Instagram tomorrow (1 December)! Follow along and get free top tips from stylist Naomi Findlay.

1010 INSTA

How can you take part?

Follow Naomi on Instagram and each day (Monday to Friday) for two weeks (starting 1 December) she’ll post a tip to help you start creating a styled space. Better still, each week, she’ll also email you out her cheat sheet to help you catch up if you missed any of the daily tips.

Best of all it is free! Sign up now to start creating spaces that your friends and family will be able to enjoy this holiday season.

Categories
Recipes

Foodie Friday: Fried avocado tacos with tomato-jalapeno salad

foodie friday logo

Have you ever fried an avocado? Thought not! What better time to try it than on Foodie FRIEDay? Ok so we’re feeling a little silly here today – maybe it’s the sizzling heat, or maybe it’s just this delicious-looking recipe from Williams-Sonoma.

NOV-16_Fried-Avocado-Tacos-with-Tomato-Jalapeno-Salad-652x652

Every cook worth their weight will tell you to avoid cooking avocados, as they can become bitter. But somehow, the panko coating and the fast pan-frying overcome this problem here. And seriously, how delicious do these golden-crumbed slices look? This recipe offers a great meat-free taco option, and makes the perfect summertime treat.

Australian Hass avocados are wonderful right now – look for skin that is almost purple-black, and fruit that is tender at the stem end (but not too soft all over). Panko crumbs are Japan’s answer to breadcrumbs (but crunchier and more delicious) and are readily available from most good supermarkets and Asian grocers. Of course you can use coarse dried breadcrumbs in their place.

STYLING TIP Here’s a handy tip for tacos: lay the tortillas out flat, on a large board, and top with the filling and salad, drizzle with the dressing and scatter over extra herbs and chilli slices for a beautiful, mouthwatering presentation. Then everybody can fold their own as they lift it from the board – and eat without delay (no problems there). Do you have an avocado-addict in your life? This handy tool http://www.williams-sonoma.com.au/stainless-steel-avocado-tool makes a great stocking-stuffer and is the perfect size to take to the office for those classic avo-on-toast desk breakfasts, too.

Ingredients

For the salad:

  • 3 tsp olive oil
  • 1 small jalapeño, thinly sliced
  • 2 cups (350 g) cherry tomatoes, halved
  • 2 tbsp chopped fresh coriander
  • Sea salt and freshly ground pepper

For the rest:

  • 2 eggs
  • 1/4 cup (40 g) plain flour
  • 1 cup (125 g) panko (Japanese breadcrumbs)
  • 2 firm but ripe avocados, pitted, peeled and each cut into 8 wedges
  • 1 tbsp olive oil
  • 2/3 cup (160 g) sour cream
  • 2 tbsp fresh lemon juice
  • 8 to 10 flour or corn tortillas, warmed

Method

To make the salad, in a frying pan over medium-high heat, warm 2 tsp of the olive oil. Add the jalapeño and sauté just until soft, about 2 minutes. Transfer to a bowl, add the tomatoes and drizzle in the remaining 1 tsp olive oil. Add the coriander, season with salt and pepper, and toss to mix well. Set aside at room temperature until ready to serve.

To fry the avocados, set up an assembly line: In a shallow bowl, beat the eggs. Put the flour in a second shallow bowl next to the eggs and season well with salt and pepper. Put the panko in a third bowl next to the flour. Dip an avocado wedge into the egg, letting the excess drip back into the bowl. Next, dredge the avocado in the seasoned flour, shaking off any excess. Finally, coat the avocado in the panko, making sure to cover on all sides. (Pat the coating gently to help it adhere, if needed.) Transfer to a plate. Repeat to coat the remaining avocado wedges.

In a nonstick frying pan over medium-high heat, warm the olive oil. Working in batches as needed to avoid crowding, fry the avocados, carefully turning once, until golden brown on both sides, 3 to 4 minutes total. Transfer to a plate lined with paper towel to drain.

In a bowl, stir together the sour cream and lemon juice and season with salt. To assemble, fill the tortillas with the avocados, dividing them evenly, and top with a scoop of the tomato salad. Serve immediately, passing the lemony sour cream at the table for drizzling.

Serves 4.

Head to Williams-Sonoma for lots more inspiration, or book a cooking class in their Sydney Cooking School – it makes the perfect Christmas gift for your favourite foodie.

Categories
Dining Recipes

Foodie Friday: Pancetta-Stuffed Artichokes

Beautiful, fresh green artichokes worthy of a still life painting seem to be everywhere right now. They look pretty enough to pop in a vase on the table as a centrepiece, but to actually eat them? That just seems like a lot of hard work for very little reward, right? Wrong! Fresh Australian artichokes are one of spring’s best treats and easier to prepare than you imagine.

foodie friday logo

Here, they’re simply steamed until tender, then baked with a stuffing made from pancetta and crisp panko – which are Japanese breadcrumbs available from Asian grocers and select supermarkets. The result is a flavour-filled starter or side dish with a great contrast of textures, which will add visual excitement and even a little intrigue to your meal.

WS14D0107-652x761

When selecting artichokes at the market, choose ones that feel heavy for their size. Look for tightly closed, olive green leaves and moist, healthy stems. A few purple streaks on the leaves are acceptable, but limp, brownish globes should be passed by.

STYLING TIP: The visual drama of presenting an entire artichoke head to the table means there’s not much need to dress it up. Serve in small, deep bowls that fit the artichokes snugly (such as this). To take your styling to the next level, add a folded fabric square (such as a linen napkin) under each bowl to act as a charger or placemat. That way, your artichokes will serve as both appetiser AND table decoration – until they get eaten up, that is.

Ingredients

  • 1 lemon, halved
  • 1 tbsp peppercorns
  • 5 garlic cloves, 3 smashed and 2 finely chopped
  • 4 globe artichokes
  • 4 tbsp (60 ml) olive oil
  • 1/2 onion, diced
  • 100 g pancetta, finely chopped
  • 1/4 cup (30 g) toasted pine nuts
  • 1/2 cup (60 g) panko
  • 1 tbsp chopped fresh flat-leaf parsley
  • 1/2 cup (60 g) grated Parmesan

Method

Preheat an oven to 220°C.

Fill a large pot with 5 cm of water. Add one of the lemon halves, the peppercorns and smashed garlic cloves to the water and bring to the boil over medium-high heat.

Meanwhile, working with 1 artichoke at a time, trim the stem even with the artichoke bottom. Snap off the small, tough leaves around the base of the artichoke. Cut off the top third of the artichoke; then, using kitchen shears, trim off any remaining thorny leaf tips. Gently pry the centre leaves open and, using a small spoon, scoop out the prickly choke and discard. Repeat with the remaining artichokes. Rub the cut surfaces of each artichoke with the remaining lemon half as you trim them to prevent the artichoke from discolouring.

Add the artichokes to the boiling water and cover the pot. Steam the artichokes until a knife easily pierces the bottom, 15 to 20 minutes.

While the artichokes are steaming, make the stuffing. In a sauté pan over medium-high heat, warm 2 Tbsp of the olive oil. Sauté the onion until tender and translucent, about 5 minutes. Add the chopped garlic and continue cooking 30 seconds more.

Transfer the onion mixture to a bowl and add the pancetta, pine nuts, panko, parsley, Parmesan and the remaining 2 Tbsp olive oil. Toss to combine.

When the artichokes are tender, remove from the pot. Gently spread open the centre and the rows of leaves of an artichoke and push a little of the stuffing mixture between them. Repeat with the remaining artichokes. Place the stuffed artichokes, stem side down, in a baking dish and bake until the stuffing has browned, 5 to 7 minutes. Serve immediately. Serves 4 to 6.

Click through for more simple spring artichoke recipes (and many non-artichoke recipes!) from Williams-Sonoma, or book yourself into a cooking class in their Sydney Cooking School.

Our other recipes

Categories
Recipes

Foodie Friday: The Ultimate Cheese Platter!

If cooking doesn’t come naturally to you, or you don’t feel confident in the kitchen, or are short on time, or just prefer to expend your energy on the tabletop styling instead of the stovetop, or if all of the above apply, then the sentence “come round for a little wine and cheese” was made for you. After all, cheese is always a good idea! And forget the rulebook, just go with what works for you: serve it as a starter to whet the appetite, or as a pre-dessert indulgence, or just give it the attention it warrants and make it the focus of your evening.

ws-marble-and-wood-cheese-board-imgZ-alt3

Serious aficionados will tell you that spring is the very best season for cheese – it’s when the flavours are at their most mild and delicate, thanks to the animals’ diet of tender greens. Not all of us are lucky enough to be able to buy cheese so fresh and seasonal, but you can still create a sensational cheese plate with a little guidance from Williams-Sonoma.

Which cheese to choose and how many is too many?

You can serve one carefully chosen cheese and let its extraordinary qualities shine, but in general, an assortment of three cheeses offers variety without overwhelming guests. When making your selections, diversity can be created in different ways: cheese age or type (one bloomy rind, one semi-firm, one blue); milk type (one cow’s milk, one goat’s milk, one sheep’s milk); country of origin (one French, one Spanish, one English); or even locale (such as three from the Yarra Valley). Ultimately, you’ll want a range of flavours and textures, from creamy and buttery to crumbly and salty, and a mix of shapes and colours.

Storing & Serving

Cheeses are best freshly cut from the wheel, so where possible avoid buying pre-wrapped pieces. Storage is always a balancing act; cheese must “breathe” or release moisture, but it also needs to stay moist and not dry out. Whenever possible, buy cheeses on the day of serving and keep the wedges at cool room temperature on a board or under a glass dome. When refrigerating, ditch the plastic wrap in favour of waxed paper.

Always let cheese come to room temperature before eating it. This may take up to a couple of hours. Arrange the pieces so that they are easy to cut, such as laying a wedge on its side. Consider making the first cut yourself, as a guide, slicing so that each piece will have a little bit of rind. This helps avoid an empty chunk of rind at the end of serving.

Accompaniments

Choose accompaniments to match the cheese, season, and occasion, keeping flavour and texture in mind. Chutneys, jams, or tapenades are all delicious, even served straight from their small jars. Or try sweet sides like honeycomb or fresh, dried or candied fruits; or salty bites, such as olives, salumi or nuts. Always have plenty of fresh baguette slices or rustic crackers alongside.

Styling Tips

It’s really all about great flat surfaces that encourage guests to dig in, again and again. Marble and slate keep the cheese and fruit cool during service, while wood’s natural warmth enhances the cutting experience. A mix of all three looks gorgeous, too! Leave plenty of space in and around the cheeses, accompaniments and the edge of the board so things don’t get too messy. And give each cheese its own knife: rounded knives are best for spreading luscious, creamy cheeses, and sharp knives are ideal for cutting hard aged cheeses. A cheese knife with tines is perfect for transferring slices to plates. Cheese markers are a thoughtful addition, making each variety seem that little bit more special. A final stylist’s flourish? Edible leaves and even a scattering of edible spring flowers will really bring your display to life.

Still in need of specifics? Try this inspired spring pairing.

Spring Cheese Plate with Apricots and Almonds

Ingredients

180-250 g fresh goat’s milk cheese

180-250 g hard sheep’s milk cheese such as Pecorino pepato or Truffle Pecorino

180-250 g semi-firm cow’s milk cheese such as Toma

2 apricots or peaches, thinly sliced

½ cup (90 g) natural or roasted Australian almonds

To serve:

About 2 hours before serving, remove the cheeses from the refrigerator, unwrap them, and allow them to come to room temperature. When ready to serve, arrange the cheeses, apricot slices, and almonds on a cutting board, marble slab, or platter. Include a spreader for the soft cheeses and a paring knife for each of the other cheeses. Serve with baguette rounds, thin slices of rye bread or crackers. Serves 4-6.

–Head to Williams-Sonoma for lots more foodie (and cheese-related) inspiration, or book yourself into a cooking class in their Bondi Junction Cooking School.

Categories
Dining Kitchens Recipes

Foodie Friday: Spring veggie tart recipe

foodie friday logo

Welcome to our new series, Foodie Friday! Pop in each week for our latest easy and  delicious recipe. Today’s is from our friends at Williams-Sonoma.

Free for brunch this weekend? Try this easy Spring Veggie Tart.

Why not lift your brunch game this weekend by gathering a few friends at home and celebrating the new season’s bounty? Cafés are great, but don’t overlook the virtues of entertaining at home – especially when you’ve got little ones in tow. This easy, versatile tart base is easy to load with whatever vegetables are stacked highest at the farmers’ market. Here, it’s elegant leeks and vibrant spring asparagus paired with pungent Fontina. Fontina is an Italian cheese with a delicious strong flavour that melts brilliantly. It’s available at most supermarkets and delicatessens, but if you can’t find it you could easily substitute Gruyère or provolone. Serve the tart warm from the oven with the usual brekkie sides, such as roasted baby tomatoes, mushrooms, bacon and great coffee (Champagne cocktails optional).

WS_VOD_SprVegTart_0514-652x832

Styling tip: give your tart an extra glamorous edge by presenting it the same way the best food stylists do. Bring it to the table pre-cut on a generous, rustic chopping board lined with a piece of parchment or baking paper. Simple and chic. Just beware that your guests might show up again next week!

Ingredients

  • 1 sheet frozen puff pastry, about 250 g, thawed
  • 1 cup (125 g) grated Fontina
  • 15-20 thin asparagus spears, ends trimmed (thicker spears halved lengthwise)
  • 1 small leek, white part only, halved and thinly sliced
  • 2 eggs
  • 1/4 cup (60 ml) full-cream milk
  • Salt and freshly ground pepper

Method

Preheat the oven to 200°C. Line a baking tray with parchment paper. Lay the puff pastry on the prepared tray. Fold over the sides to make a 2.5 cm rim, overlapping the pastry at the corners and pressing it lightly. Inside the rim, prick the pastry all over with a fork.

Sprinkle half of the cheese over the bottom of the pastry inside the rim. Top with the asparagus, laying the spears vertically in a row from one side of the pastry to the other. Sprinkle the leeks over the asparagus. Bake for 15 minutes.

Meanwhile, in a bowl, beat the eggs, milk, 1/2 tsp salt and several grinds of pepper until well combined. Remove the pastry from the oven. Pour the egg mixture evenly over the asparagus and leeks and sprinkle on the remaining cheese. Bake until the pastry is puffed and golden brown, about 10 minutes. Let the tart stand for 10 minutes before serving. Serves 4.

This recipe is adapted from one in the Vegetable of the Day Cookbook by Kate McMillan. Head to Williams-Sonoma for lots more recipe inspiration, or book yourself into a cooking class in the stunning marble-clad Bondi Junction Cooking School!

All our recipes