Today I’m revealing the new lease on life given to my sideboard, otherwise known as the most useful piece of furniture I own!
My new look duck egg blue buffet with brass handles
This sideboard (or buffet, whatever you prefer to call it!) and its nine drawers hold so much useful small stuff which would otherwise be lost or messy around the house. But I’d fallen out of love with its off white colour, which had become less off white and more warm cream over the years! I’ll admit I’d been looking to replace it with something new but absolutely nothing fit the spot in our hallway as perfectly or indeed had as many drawers.
Before & After
So when Jemma Wlasichuk from shed eleven, who specialise in upcycling furniture with paint and are just down the road on Sydney’s Upper North Shore, asked if I had anything that needed a makeover, it was a lightbulb moment! And just look how pretty she turned out! I’m thrilled!
Jemma and I went back on forth on what colour we should go for and I’m quite familiar with the Annie Sloan Chalk Paint colours they use. Duck Egg Blue (which is actually a green if you ask me but that’s a matter of opinion!) has always been a favourite of mine. There’s something very English about it and it’s just such a soft, subtle, beautiful colour. It’s more interesting and unique than grey and a tad warmer too. I have a lot of pink and green here already so it works perfectly. I went for a satin finish wax as I felt this was most in keeping with my home.
The transformation in progress at shed eleven
Most of you probably thought I’d choose my old favourite navy and I’ll admit it did cross my mind. But because we already have navy cabinetry in the living room TV unit, I was worried about the blues clashing and it’s also a pretty dark part of the house being a hallway, so I wanted something lighter.
What was always going to get a run though was my favourite brass! I headed straight to Kethy, where my kitchen and laundry hardware is from, to find the perfect new handles and oh my goodness, they’re divine! The previous handles were really rattly and didn’t feel nice, or substantial, to use. These new ones are solid, and also beautiful!
When the painted buffet was delivered back to me I was super excited, but once I added these new handles it all came together like a dream! Never hesitate to swap out handles on a piece of furniture because most use a universal sized screw and it’s super easy.
Handle upgrade
shed eleven, which Jemma runs alongside sister-in-law Fanny Clarsen, run workshops to teach you how to upcycle pieces yourself. They also sell a variety of products from their vintage caravan, including chalk paint, decoupage papers, brushes, stencils, waxes and lacquers.
Much as I’d love to have a go myself, I don’t really have the time, patience or undercover space to, and with two young boys running around, I feel it would be a recipe for disaster. Maybe when they’re older! If you, like me, would like shed eleven to do the work for you, prices start from $550 for a sideboard. Bedsides are approximately $225 each and chairs $160 each.
Clearly this is much cheaper than buying something new, especially something so unique, not to mention the environmental benefits and being able to keep high quality furniture in circulation for much longer. I am absolutely thrilled with this project. It enabled me to keep the perfect piece of furniture size and function wise, and give it an updated, much more interesting look, exactly to my requirements, for a fraction of the price of buying new. What’s not to love?!
Handles: Kethy Australia L861 in brushed gold. Stockists here.
Disclosure: shed eleven did not charge me for painting the sideboard but I can’t recommend them highly enough regardless and this is an honest review. I paid for the piece to be delivered from my home to shed eleven and back again.
Faking built-in joinery: how we used flatpack and VJ to create an amazing TV unit
I’ve shared our living room on here many times and I really love the space, but what people often ask…
How to: Upcycle furniture using Annie Sloan Chalk Paint
Upcycling your own, unique masterpiece from old or new pieces of furniture is a breeze with Annie Sloan Chalk Paint. Only one coat…
I shared our master bedroomon Instagram last month but I thought I’d give it a place here on the blog too as it was super popular! Read to the end for details and links for everything.
Our new, Spring-inspired master bedroom
Long time readers know our bedroom used to be moody and navy (and the story behind how wrong I got that wall colour first go!), but after a few years of this look (below) I’ll be honest with you, I just wasn’t vibing it anymore! And that’s okay! Our tastes change.
BEFORE The bedroom was dark and moody | Image by Jacqui Turk
We also got new windows which was a big deal for this room and that’s because the window in this room was the worst of all our old windows: timber, rotting and had even got to the point where it wouldn’t open anymore. Healthy, huh?! Thank goodness we could open the window in the attached en suite!
The old window
The old window was previously hidden behind plantation shutters (thank goodness as it would have really killed my aesthetic!) but they were making the already mediocre natural light even worse. Given the opportunity to get rid of the shutters when we got our new windows (they wouldn’t fit back on anyway and I gave them away on Facebook to some very happy renovators!), I was thrilled to swap to roman blinds! Hello daylight!
I bought the frames for these prints from Temple & Webster and then ordered custom size mats online
The dark and moody hotel look worked for our bedroom before because it was a bit, well, dingy! But now we’ve let the light in and I’m all about light, bright and airy! I really wanted to channel spring in this room and for it to be a little less uptight, more casual, light in all senses of the word, and fresh! We also ditched the grey carpet and replaced it with the laminate floor we have elsewhere in our home and that made a huge difference to the light in the room. It immediately felt much bigger too. And oh, how I love to be able to mop in here, especially as this room is, for whatever reason, the dustiest place in the house!
Changing the wall colour of course made a major difference. We went for another Haymes Paint colour, Chinchilla Fur, which I know well because I already have it in our kitchen on the panelling and more recently used it for the panelling in the en suite so this ties the rooms together nicely. It looks totally different in the kitchen mind you (but I love both versions!), which is why you need to always get your sample pots, or use the clever The Big Paint Sample stickers like I do. Don’t think you’ve picked a dark navy off the fan deck and then come home to find the painters have turned your room bright primary blue! Yes, that was me!
The wall colour and timber accents tie in with our ensuite
I hoped my custom made fuchsia velvet bedhead might still work in here but it just didn’t. I left it for a few weeks before making the decision to swap it out (and again, it has gone to a new home where it will be very loved!). Long term readers will remember that we finally worked out this was the best orientation for this room despite a bed under the window not being the ideal. No off the shelf bedhead fits under this huge, low window, but I had a clever idea to hack the super affordable Kmart rattan one by cutting the bottom off the legs. I’m so happy with this. The bedhead isn’t super obvious because of all the pillows and because there’s not much height there, but I didn’t want to have nothing either! I was really trying not to spend too much on this room.
The bargain Kmart bedhead with the legs cut down to size
The linen is just divine. I mean I’m lucky to have been gifted a lot of gorgeous linen in my time, but when LinenMe let me choose from their collection, I picked these sheets and quilt cover for our guest bedroom but then had to steal them for the master! They were just perfect and I cannot enthuse enough about how good this stuff feels too. You can see the quality and I know they will be on high rotation.
I feel like good bedsides (much like entertainment units) are really hard to find so when I found the perfect ones at Life Interiors I had to have them. The oak and marble combo was perfect, and I’ve worked out one drawer is essential for all those bits and bobs, but two leads to them being full of rubbish! The previous navy ones were gorgeous but a bad combo with all the dust we get in this room. The marble is another light surface to reflect light too. I like that they’re not solid which adds to the feeling of space and light.
The timber floating shelf on the right was originally destined for the office but was too long for that room and one day it hit me it would be the perfect thing under the mirror (a wedding gift many years ago). It just works! And I love another timber accent for a bit of warmth.
The wardrobe doors got an upgrade with new satin brass handles from Gainsborough to replace the standard chrome ones and we had recently upgraded all our internal handles with beautiful new ones from their Avant range too. It’s amazing how these little changes add up. Pops of pink and gold elements are dotted everywhere, which is a bit of a Jen signature and ties it all together.
A reality of sharing this room with my husband is that we cannot survive and keep a reasonably tidy room without what I call a ‘chairdrobe’ and this boucle one is a work of art! With its timber and brass elements it was the perfect choice.
Our bedroom isn’t perfect. It’s not that big for a master (3.5 x 4m) and it’s a bit of an awkward shape, not least because the only way to make it work is to have the bed under the window. It doesn’t have a walk-in as this house was built in the sixties, but do you know what, for all its imperfections, it looks and feels pretty great now! And aside from how it looks, with functioning windows that open, air con and a hygienic hard floor, it it is so much healthier too, and for somewhere you spend so much time, that’s a big plus!
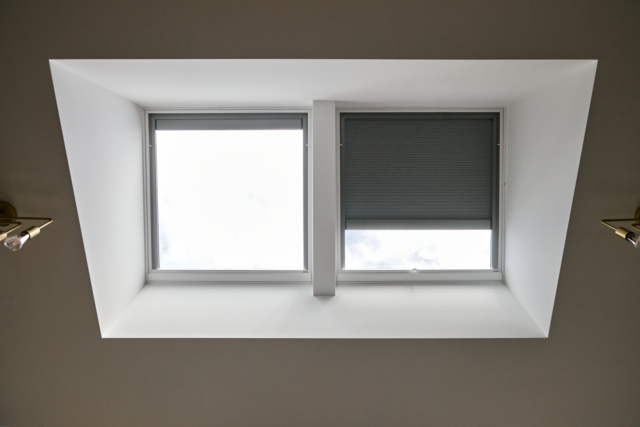
I’m still dreaming of adding a skylight (with an automatic blind of course). We shall see!
Saving money by using VJ panels instead of tiles in our new en suite reno
Welcome to the third and final Monday in a row (for a while, anyway!) of sharing a project from my…
Room reveal: our master bedroom, take two!
Photography: Jacqui Turk Some rooms are more challenging than others. Our master bedroom has been one of them. Big time!…
The easy, mess-free way to choose new paint for your home
With all the effort that goes into painting your walls, you want to make sure that the paint you’re using…
I recently shared this DIY polkadot wall project I did in the boys’ new shared bedroom on socials but I thought I’d include here with a step by step too. It was so super easy and as a non-crafty/creative person, I was quite proud and smug with myself afterwards. If I can do it, anyone can!
Charlie and Seb loved it and thought Mum was really clever!
I do like to keep the boys’ bedrooms quite classic and calm as they have all the colour and all the toys in their playroom (where would this neat freak mum be without that?!) but I loved the idea of this fun paint feature on one wall, especially as it’s the one they see from their beds, and the one you don’t see as you’re walking down the hallway. Everyone wins!
All you need is some paper plates, a couple of big sponges (I got mine from Bunnings), scissors or a craft knife and as many sample pots of paint as you want different colours (I chose three).
Simply cut circles out of the sponge/s with scissors or use a craft knife. I drew around a glass with a Sharpie but you could choose anything from the kitchen that works for the size you want. It’s also up to you if you do all your circles the same size like I did, or mix it up!
I chose a white as one of my colours to contrast against the mid grey wall
The boys thought they were helping me choose colours at Bunnings but the truth is, I already had a pretty good idea of what we’d get (I’m keeping it real here, folks!).
I’m all for living life on the edge so I didn’t over think the placement of my spots. I took my time and did one colour at a time. Then at the end I stood back a lot, considered the wall as a whole and added extras here and there until it was just right!
These brass hooks for hanging school bags on are from Temple & Webster
I found carefully twisting back and forth with the sponge onto the wall helped with coverage. The edges of my circles were definitely not perfect but I think that looks deliberate and works well for a kids’ room. Another tip is to have a few paper plates available to experiment with how much to load the sponge up (or not) with paint.
The finished feature added some fun to the boys’ bedroom
I hope this easy DIY project inspires you to have a go yourself. I’d love to see what you create if you do! If you have any questions, pop them in the comments. And before you ask, the bunks are the Myer from B2C Furniture and we love them!
This idea came from British Paints and you check out their how-to here.
Baby number two’s modern and unisex nursery reveal
Photography by Sam McAdam-Cooper There’s a new room in our house which is calm, serene and incredibly tidy… because nobody…
Stylish bunk beds: The best options for kids’ rooms
Whether a space-saver for a multi-child family, another way of squeezing an extra mattress into a small room, or a…
A COVID-led renovation wave gripped the nation in 2020 (as we all spent more time at home) and this trend was certainly reflected in our most popular posts. From an affordable bench top reno solution to the ideal kitchen dimensions and a post that details just how long it takes to renovate a bathroom, our most popular stories had a strong renovation focus. On a related note, our most popular category for 2020 was the before and after – again, unsurprising given the current climate!
Australian kitchen dimensions: standard sizes for every last detail – The Interiors Addict
When renovating your kitchen, working towards the standard Australian dimensions is a great idea for optimum ergonomics and functionality. Sydney interior designer and colour consultant Martina Hayes, shares this expert…
2. The best places to buy Australian bed linen online: A perennial reader favourite, it seems that our appetite for gorgeous Aussie bed linen is insatiable. This post tells you where to find the best on the market.
The best places to buy Australian bed linen online
Get our FREE eBook: 10 tips to fall back in love with your home This very popular post has been updated for 2021. L&M Home Previously known as Linen &…
3. How long does a bathroom reno REALLY take and why?: Another practical reno post, this one gives an honest breakout down of just how long it takes to renovate a bathroom along with all the nitty gritty details.
How long does a bathroom reno REALLY take and why? – The Interiors Addict
By Sarah Nolen I, like anyone, am a true fan of a great before & after makeover. And that’s exactly what reality TV has harnessed. The fact that you’re reading…
4. Interiors Addict bathroom reno 2: what I chose and why: Unsurprisingly, many of you were interested to see what Jen did in her own home. From tile selection to the vanity and bath, Jen unpacks the design decisions for her main bathroom in detail in this post.
Image: Jacqui Turk
Interiors Addict bathroom reno 2: what I chose and why – The Interiors Addict
There is so much to share about my recent bathroom reno and I couldn’t possibly fit it all into the reveal post, so I’m sharing a little more detail today,…
5. 3 ways to transform your benchtop for a few hundred dollars: With kitchen bench tops a big ticket item, the popularity of this post comes as no surprise. Cherie Barber talks you through how to overhaul a bench top without breaking the bank.
3 ways to transform your benchtop for a few hundred dollars – The Interiors Addict
By Cherie Barber Kitchen renovating can be wildly expensive, so instead of scrapping the original and starting from scratch, it’s always good to consider if you can apply one of…
6. Why biophilic design is increasingly important right now: With all that time spent inside (thanks COVID!) the biophilic design trend has never seemed more appropriate. In this post, renovator Ozge Fettahlioglu explains why connecting our homes with nature is more important than ever.
Hotel Brooklyn Bridge Park by INC Architecture & Design | Photo by Eric Laignel
Why biophilic design is increasingly important right now – The Interiors Addict
Renovator Ozge Fettahlioglu shares her recent experience and views on biophilic design. She explains why connecting our homes with nature is more important than ever following a lockdown and in…
Painted brick houses: 3 readers share before & afters – The Interiors Addict
Having recently taken the plunge and had our sixties red brick house painted grey (Haymes Paint Rockslide if you’re interested!), I’m a bigger fan than ever of the transformative effect this…
Jen’s own painted brick before & after
8. IKEA hacks Australia: DIY built-in HEMNES cabinetry how-to: In this post, renovator extraordinaire Naomi Findlay explains how she used IKEA flat packs to create a custom built-in cabinet in one of her renos. The end result was pretty special and looked far from budget!
9. DIY wainscoting just got really easy!: Wall panelling was always something that had to be left to the professionals but in this popular post we show you how to do it yourself!
DIY wainscoting just got really easy! – The Interiors Addict
If there’s something that’s stayed consistently popular in interiors in the last few years, it’s wall paneling. Whether it’s whole walls of VJ or half walls of a more traditional…
Charlie Albone and Juliet Love share a first look at their new home – The Interiors Addict
With two sons, it didn’t take long for Aussie landscape designer and TV host Charlie Albone and his interior stylist wife Juliet Love, to outgrow their two-bedroom home. After going…
We recently got almost all new windows at home which left me needing to find new window coverings and fast! We had less than a week’s notice that the new windows were coming and we knew we wouldn’t be able to put our plantation shutters back on afterwards because they simply wouldn’t fit.
Our new roman blinds which we measured and installed ourselves
Roman blinds are a great way to let in maximum light in the daytime
Now I absolutely love the look of shutters and five years ago, when we first bought this house (which looked a lot different!), they were the perfect update and, frankly, a great way to disguise our crappy old windows). However, in time we came to realise that our house isn’t blessed with great natural light in the bedrooms and the living room (although we now have skylights, yay!) so we often had to have the lights on in the daytime. Shutters do block quite a lot of natural light so if it’s in short supply in your home, I wouldn’t necessarily recommend them. Looks wise alone? Love ’em!
The same blinds, shown half closed, in the boys’ shared bedroom. The blockout lining is very effective!
We love seeing the greenery out of the window now which was hidden by the previous shutters
Close-up of the blinds in Cotswold Soft Grey with blockout lining
So while I was sad we couldn’t reuse the shutters, it was also a blessing in disguise as it meant we could choose something else to let in not only more light but also the lovely garden and green hedge views we have from many rooms. I gave them away on Facebook Marketplace to some very grateful renovators so they haven’t gone to waste or landfill.
Now I am a big sheer curtains lover too but they weren’t going to work in our living room for several practical and layout reasons (it’s not always easy is it?!) and in our bedrooms we have huge wide windows with beds too close to them for curtains to work in them either. Onto my next favourite: roman blinds! I do genuinely think these are an underrated options these days! While I went for a safe grey for mine (because I have a lot of colour in my home already and I like to have fun with that on a neutral base), there are so many options to add colour and pattern which can make a big statement for not a lot of money.
I ordered lots of free fabric samples, even considering patterns for the boys’ rooms and a pale pink for the master bedroom! This really helps you narrow it down.
Once I decided on romans, I got a quote from a custom blind company which ran into several thousand dollars for just four windows, and having just paid for some rather big reno jobs (like a new driveway!) I decided to go with Tuiss Blinds Online (formerly just Blinds Online) instead. I’d used them before for the navy romans in my kitchen. I remembered the price was ridiculously good and I’ve had so many compliments on them since, many from people who hadn’t considered romans before. Another important factor was that the measuring was easy (I managed not to stuff it up) as was the install (you all know my long suffering husband isn’t the handiest!).
This do it yourself blinds option, combined with the great value, really does seem a bit too good to be true and I get it if you’re skeptical. But do you know what, it ain’t rocket science, and having now used them twice, I’m very confident to honestly recommend the process.
Tuiss Blinds Online also have an insane amount of fabrics to choose from (they also do S-fold and classic curtains, roller blinds, outdoor blinds, honeycomb blinds, plantation shutters and much more, by the way). Their designer textiles include William Morris in collaboration with the V&A, Clarissa Hulse, Emma Bridgewater, Scion, Sanderson Home and Harlequin Additions. But yeah, sorry but I went for a pale grey textured choice! Mine was called Cotswold Soft Grey (fitting for someone who grew up near The Cotswolds in England, no?!).
TUISS Blinds Online roman blinds in a customer’s home
You can order multiple fabric samples online for free which really helps, and they arrive in a few days.
Another example of Tuiss’ patterned fabrics
When it comes to measuring yourself, they give great step by step instructions on the site but there really is no trick to this. You then choose between blockout and light-filtering lining (same price) and recess or face-fitting (again, this is all explained in plain English). I went for blockout in the bedrooms and let me tell you, they do their job! I’m a light sleeper and the shutters didn’t block out as much light as these do, so that’s a welcome benefit too. I didn’t choose a blockout lining for the other rooms as it really wasn’t necessary when nobody sleeps in them. This also keeps down the ‘bulk’ of the fabric when the romans are pulled up (concertina-like).
Then you can choose a manual chain system or electric smart raise (for an extra $139 per blind). The latter is powered by an integrated rechargeable battery pack. While I loved the idea of it, I know what our family is like at losing remote controls (as well as how much my kids would try and play with the blinds!) so decided to keep it simple! Incidentally, the install process of the blinds is just the same either way.
What I love about the website is that you get instant quotes by entering your width height and fabric choice etc, so you know exactly what you’re in for.
The four blinds for the living room and playroom came to just over $1,000 and blinds for our three huge (2.5m long) bedroom windows with blockout lining came to just over $1,200. This is so much cheaper than many other places and I’m thrilled with ours. That’s blinds for more than half the windows in our four-bedroom home for $2,200. Amazing, right?! And most people’s windows are smaller than our bedroom ones so that’s probably on the higher end of your average cost.
As for install, it honestly isn’t hard and Damian would back me up here! You literally need a drill and a screwdriver and you install brackets which the blinds then click into. The bedroom windows were a little trickier being so long, but the ‘normal’ sized windows were an absolute piece of cake!
We are thrilled with the look of our blinds and they fit just perfectly. They were, after all, made to measure!
Apart from shutters and Venetian blinds, the Christmas cutoff for all other products hasn’t happened yet so you still have time to order yours in time for the festive season. I’m still deciding what we will do in a few of our rooms as we are tossing up swapping playroom and office which will affect which room is the guest bedroom (it never ends here!) and the boys are currently enjoying sharing a bedroom having previously had one each (why did we move to a four-bedroom house in the burbs again?!). I like the fact I can just order the rest when I’m ready. They’re dispatched within 10-to-14 days for most of Australia.
The company has been around for 15 years (but much longer offline) and I’d encourage you to check out their online reviews which are excellent. This post isn’t sponsored although Tuiss did gift me the blinds. My views are 100% honest and like I say, I have used them before, independently, at my own cost. Delivery is free on orders over $499 with a few exceptions and there’s a free extended five-year warranty on everything.
If you have any questions or want to check on delivery times of certain products to your area of Australia, you can call customer service on 1300 761 179 or email [email protected]
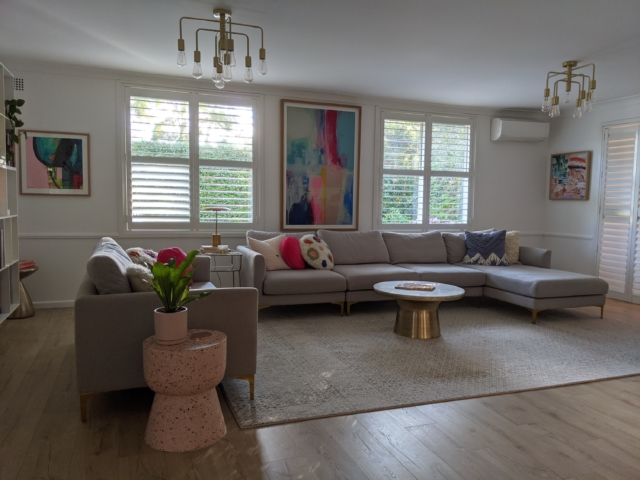
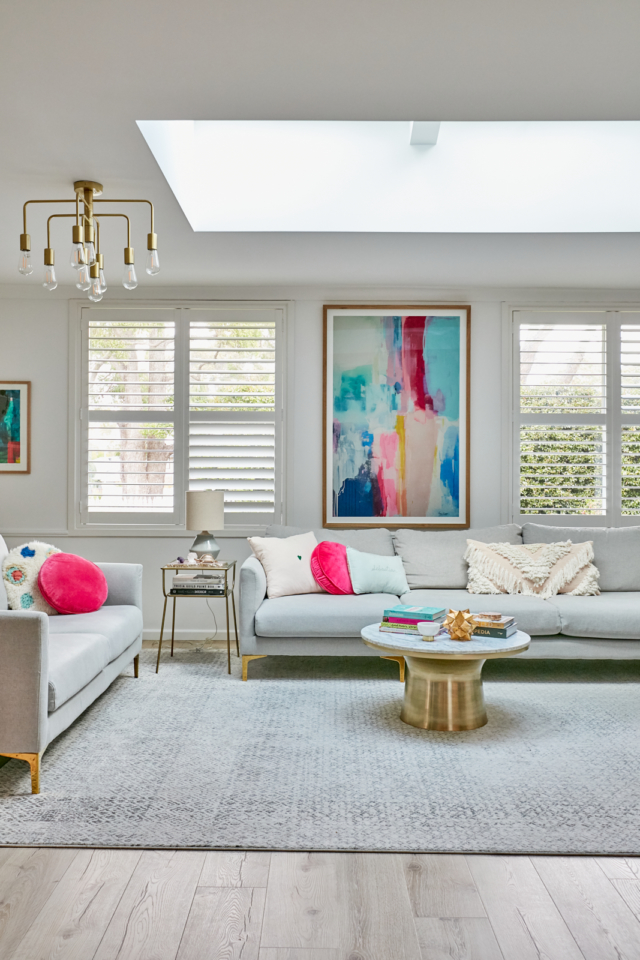
Skylights have transformed our living room: here’s all the details
Never underestimate the importance of natural light. You should never buy a house with poor natural light because once you’re in, you can’t do anything about it. Only you can.…
I know it doesn’t sound it, but in contrast to my recent pantry makeover (goals!) the broom cupboard transformation I then embarked on with Tansel was very nearly as exciting!
I was already quite proud of this clever extra storage in the kitchen. When we renovated the room four years ago, my handyman suggested we could fit a slim, full height pantry cabinet in dead space behind the fridge freezer for the mop and ironing board. I jumped at the chance for this bonus storage I’d not thought of myself. It’s been a great spot for the ironing board, mop and broom and not a lot else, but super useful for that tall stuff nonetheless.
But I had no idea it could be THIS good with clever pullout storage. Oh my goodness. It’s gone next level, don’t you think?
Hallelujah! All these products now fit in here!
The tall things on the left used to occupy the whole cabinet
For reference, the broom cupboard is tucked behind the fridge freezer!
As usual, the experts at Tansel have all the best ideas for how to maximise a space with their products. Owner Tanya Selever suggested dividing the skinny cupboard vertically (as we did with my pantry), keeping one half for the tall stuff (surprisingly, less than 20cm width was all that was needed) and using the other half for pullout storage for my frankly ridiculous collection of cleaning products and hand washes (I get sent a lot since word got out I’m a clean freak!).
Their installer Mark then popped in an extra fixed shelf to create the perfect spot for my iron and handheld steamer.
I particularly like how the baskets are adjustable so I can move them up or down or remove one if I want to store something taller for example, like champagne (wishful thinking)!
“Most people think small spaces are a wasted space (because they can’t fit much) but with the right storage solutions, you can create a storage gold mine!” says Tanya. “Adding a vertical partition into this 360mm wide cabinet created two zones – one for storing tall items like the ironing board and mop and the other for storing cleaning and general laundry items. We also kept the upper shelf which is an ideal place to store items rarely used.”
The extra small shelf above (where the aqua green bottle is) is perfect for the iron and steamer
She adds: “We included non-slip bases to stabilise tall bottles and make cleaning very easy. All racks are made of stainless wire so perfect storing cleaning agents that can cause corrosion.”
I find this cupboard so much more useful and fit three times more in it these days. It’s actually amazing that something just 36cm wide can hold so much stuff! Magic! Anyone with a small kitchen or laundry should really investigate these kind of solutions to maximise their storage without having to add anything to their floorplan.
The baskets slide out in a bottom and top section and they’re easily removable and adjustable
And to think I was originally going to have that dead space closed in with an end panel!
Of course, you all want to know the cost: around $550 for two slide-out frames and five stainless steel adjustable racks and non-slip bases (with lifetime guarantees), and another $300 for install and additional materials. All up, around $850.
You can get 10% off Tansel products by mentioning Interiors Addict when you contact them.
My amazing pantry makeover with pullout storage drawers
Today, I’m excited to bring you the long overdue rundown of exactly what we did in my recent pantry makeover with TANSEL and just how happy that bit of home…
Natural cleaning products: DIY these options!
I don’t know about you, but having two kids home all day, every day, and the constant in and out, means my home has never needed more cleaning! But also,…
My new navy and gold laundry revealed: before and after
Our kitchen was the very first room we renovated in this house, almost four years ago. It was a case of “I’m not buying the house unless we can afford…
Today, I’m excited to bring you the long overduerundown of exactly what we did in my recent pantry makeover with TANSEL and just how happy that bit of home organisation heaven has made me. I mean, just look at her now! Sigh…
I remember when we put this kitchen in four years ago and how excited I was to have a full height and 900mm wide pantry, after surviving with a veritably teensy one for the short amount of time we lived with the old (sixties) kitchen. I mean, it looked massive. In reality though, it was full of dead space at the backs of the shelves and in between them. I just kept adding basket after box to try and group things together but in true Jen style, it soon became a case of ‘if it’s behind closed doors and nobody else sees it, who cares?’ and things got pretty ugly at times!
BEFORE: Top half of the pantry (you bet I tidied it up a little for the photo!)
BEFORE: Bottom half of the pantry
Enter Tanya Selever, the founder of TANSEL, whose pull-out solutions I’d been watching with awe and envy on Instagram for months. When she offered to help double my useable storage and make my pantry pretty (which, let’s face it, is satisfying too!), I didn’t need asking twice!
So, what did we do? With the help of her trusty installer Mark, we removed three adjustable shelves, added a vertical division in the upper part of the pantry and added pull-out storage. There are three full width drawers at the bottom, a whole bank of them on the lefthand side and on the righthand side, where I’d had a power socket put in to enable me to hide the toaster away (I have issues), we created a fun breakfast nook with some small shelves above for teas, jams and the like.
The challenges
“This pantry had loads of wasted space, access issues in the lower sections and a power point with a toaster,” Tanya explains. “To make this space functional (and not creating a fire hazard with the shelves being too close to the toaster, required some ‘creative solutions’ (which the TANSEL team does like no other!).
“The spacing between the shelves created a whole lot of “air”, which really is an opportunity to create more useable storage. In a typical pantry like this, this “air” is common because you need to reach into the back but (more commonly) people just clutter the space by stacking items on top of each other. As a result you buy more of what you already have but just can’t see it. In short – the shelves become a haven for stuff that you can’t access.
“The other challenge we had (but really just another great opportunity) was the toaster and powerpoint. With a little thinking outside the square” this space could be transformed into a functional zone.”
Our objectives with this makeover were to create more useable storage, maximise the functionality of the space and create family friendly organisation. I was keen to have somewhere to organise the kids’ many individual snack items. they may not look the prettiest, but a pantry needs to really work for you as well as looking great and feeling organised. And the snack grid system Tanya suggested is actually one of my favourite parts!
How we organised it all
The pantry is now split into three distinct zones:
Lower pantry
Taking out one shelf and adding three stainless steel TANSEL drawers (with removable non-slip bases) created 25% more usable space. “The bottom part of a pantry is always the most difficult to access so pull out storage is a must have,” Tanya says. “The great thing is you can add drawers as you need, when you need, and within your budget. We used the Drawer Organisation inserts to organise kids’ snacks and smaller items.” TANSEL created this system to provide maximum flexibility – you change and reconfigure it as you need.
Righthand upper pantry – toaster nook
We split the upper pantry so we could have the best of both worlds; the hiding place for the toaster (with enough space to ensure a fire hazard was not created when using it and still having storage above using shallow shelves. The open shelving also looks colourful and interesting as a bonus!
Lefthand upper pantry – slide out storage
“This solution really made the best of all available space. We kept the upper fixed shelf so Jen can store items not used on a regular basis, but everything else on the left was converted into pull out storage,” Tanya says. “We double the useable space between the upper and mid fixed shelves. The additional storage is now easy to access and with a little organisation, this pantry is now a winner!”
Tanya says all pantries with shelves have similar issues of dead space. “Most people are not aware that there are many ways to create functional zones and organise the space, which we did in Jen’s pantry. This makeover ticked many boxes because we used a wide range of solutions to store and organise. Decluttering and decanting is also another important “to do” if you want to take organisation to the next level.”
I must say I am really enjoying the decanting life (and we must mention the OXO POP Containers from Howards Storage World because they’re the best and the quality is evident) and filling things up after a trip to the shops. Most of all though, it makes it easy to see what I have so I don’t buy more until I need it. No more piles of bags of pasta in a corner!
So while many people think a butler’s pantry is the Ferrari of pantries, a regular, bog standard 900mm one can achieve greatness too, see! And some people just don’t have the space for a butler’s, especially if they’ve renovated an older home, as we have.
The TANSEL system is available via their website and through Howards Storage World and can be retro-fitted into any kind of kitchen. It can even be installed by a handy DIY-er. “People often need help finding the perfect solution for their space. Our range is extensive, which is great because so many things are possible, but we encourage people to contact our team for advice. We know that measuring and installing is not everyone’s cup of tea, or they are just simply too busy. We therefore offer a measurement and install service across Australia.”
They can even advise you how to minimise holes inside the cabinet if you’re renting. “Our products are made using stainless steel wire and come with a lifetime warranty so if you move house, there are many ways our products can be re-purposed!”
And the cost?
Transforming an existing cabinet is much more cost-effective than starting from scratch. What we did in my pantry would cost around $1700 including installation and additional materials. This includes a whopping seven stainless steel pullout baskets with opal bases and a lifetime warranty.
Thanks to my friends at The Wholefoods Refillery for helping fill my new canisters with pretty (and delicious!) food. Readers can get 20% off their first online order with the code JEN20.
A few months ago, we decided it was time for Charlie to move from a cot to a big boy bed and I have to say, he has never slept better. His baby room was gorgeous and very calming but it didn’t really reflect the big cheeky toddler he is now, at two-and-a-half!
I didn’t want to buy a whole load of new stuff though, and I like to keep the boys’ bedrooms pretty simple and calm, for sleeping and reading and little else. That’s because we’re lucky enough to have a bomb site (I mean playroom!) where the fun stuff happens. All the colour, toys and mess are in there.
I sold the cot and dresser we had as a pair as they matched and it made sense. So I needed a new dresser and decided that would be the new statement piece to add some colour and punch to the room. I’ve loved bone inlay for a while and once I found out a bit more about Melbourne business Mahlia Interiors and their obsession for this craft, as well as sourcing it ethically, they were the obvious choice! I love the teal blue of this piece and it really makes a statement.
Talking of packing a punch with colour, the C artwork from Alphaberts does exactly the same. I absolutely love it, its particular ‘blueberry’ shade, and the fact it’s from another small business.
The bed isn’t from a small business, it’s from IKEA, and there are certain things you just can’t go wrong with from the Swedish giant (meatballs, for example!), including kid’s stuff. I feel like I outgrew the IKEA look for my big pieces a while back (after many years of buying everything there!), but it’s still my go-to for the playroom and kid’s furniture. At $99 for a simple, solid timber bed, you can’t go wrong!
The Noa Home mattress is crazy comfy. It’s so deep it’s probably a tad too high for the style of bed but hey, it works, and he obviously loves it because he sleeps so well on it. We went for their mid range The Noa Mattress; a hybrid of latex, memory foam and pocket springs. I still don’t know how they get these things in a box but there we go!
I absolutely love a classic stripe and the linen is IKEA’s BLAVINDA. I love that it’s reversible and chambray on the other side, made of cotton, and has a zip closure. Why don’t more quilt covers have this?! The well loved, hand embroidered Charlie pillow is from Little Willow Vintage and I often buy their name pillows for baby gifts. The cute marble side table is from REDDIE, who were kind enough to let me design my own customised piece. The blue powercoated legs look fab.
We haven’t changed heaps or bought a lot of new stuff. The brass Juno + Ace mobile is the same one that hung above his cot and the Milton & King wallpaper still works really well, as does the cream wool west elm rug, which despite being highly impractical, has survived unscathed thus far!
Books are definitely allowed in here and I love IKEA’s FLISAT timber shelves for those. We already had them in the playroom and they are a total bargain at $22 each. We also have a whole bank of TROFAST units in the playroom and I grabbed an extra one for in here because he does keep a few toys in his bedroom (blocks and soft toys). It’s also great nappy and wipes storage for now. The baby deer print is another leftover from the baby room and is from The Print Emporium.
I love thse nesting birds from Marmalade Lion
The cute Mr Maria polar bear nightlight is from Bubster Store and it’s dimmable via remote which is great. The neon name light from Custom Neon is a cool decor piece whether it’s on or not. I’m a sucker for personalisation!
The navy velvet Brosa swivel chair gets played on a lot more than it gets sat on, but that’s okay!
I’m really happy with this room. It’s still very simple and calm but it’s a lot more Charlie than his baby room.
Playroom ideas: revealing a room I’ve never shown you!
Welcome to our new and improved playroom! I’m finally proud of this room, but let me tell you how we got to this point! It’s almost three years since we…
Playroom storage ideas: what we used in ours and why
As promised in yesterday’s playroom reveal post, today I’m giving you a closer look at exactly what we used to get the storage sorted and why it works so well.…
Baby number two’s modern and unisex nursery reveal
Photography by Sam McAdam-Cooper There’s a new room in our house which is calm, serene and incredibly tidy… because nobody uses it yet! I like to leave the door open…
I’ve recently used VJ boards in my home in two different rooms, and two different ways, so I thought it would be fun to share some more inspiration about using this very popular type of wall panelling and what to bear in mind!
But hang on, what is it?!
First off, what is VJ? A lot of people give me a blank look when I casually throw this term into conversation! VJ stands for vertical joints (also commonly known as tongue and groove), and it’s a kind of timber or MDF wall panelling with vertical panels, equally spaced. That said, some people use it horizontally too.
It has become very popular as a way to add character to bare walls (and ceilings!) and is also being used to pull together things such as a TV wall, bedhead or office nook. It can be used full height or half height (or anywhere in between!) as wainscoting, usually with some type of chair rail at the top and skirting at the bottom. Large boards of MDF VJ, such as Intrim’s VJ Boards Pro are quick, easy and affordable to install and suitable for most interior applications. In rooms where there is moisture however, like a bathroom, a timber lining board is more appropriate and practical.
One of my favourite things about VJ panels is you can paint them whatever colour you like and you can use a little or a lot, depending on the look you’re going for. Plus, when you’re after a new look, you can simply paint them a fresh colour! They also look great in traditional homes (of course you’ll find them everywhere in old Queenslanders!) and modern ones, with their clean lines.
Let’s look at some ways to use VJ that are a little less obvious…
TV wall
TV walls are notoriously hard to get right due to the mess of cables. And unless you have a Samsung Frame TV that looks like art when it’s not in use, those big black rectangles aren’t often our favourite feature in a room! Adding VJ behind your wall mounted TV and entertainment unit is a great way to pull the whole look together. You can even make your TV ‘disappear’ by painting a dark coloured VJ wall behind it. I recently used Intrim’s VJ Boards Pro behind our new built-in TV unit and it was the thing that brought the whole look together. I don’t think it would have been half as aesthetically pleasing had it been a bare painted wall instead.
Images: Jacqui Turk
The VJ Board Pro is an MDF sheet with the grooves cut into it, which comes pre-primed and ready to paint. So easy! My carpenter simply glued this onto the wall with a few nails for extra strength.
In a hallway/entry
Hallways and entries by their very nature get a lot of action and lining their walls with VJ can be a great way to make them a bit tougher against all the knocks and scuffs! Mounting wall hooks on top of VJ, like in this image below, is a great way to create a mudroom look without having an entire room dedicated to your coats and hats!
Image via https://www.instagram.com/this_old_house52
Lining your entry with VJ is a low cost way to really improve the first impression of your home and to get an idea if you like it before using it in larger areas.
In a bathroom
I love the look of VJ in bathrooms, a room where we often don’t think beyond tiles (which are gorgeous and waterproof but expensive, especially when you factor in the tiler). In my recent en suite reno I had the brainwave to cover over existing old (but solid) wall tiles with VJ panelling but the VJ Board Pro wouldn’t be the best choice here because MDF and moisture aren’t a good match. My dream wasn’t over however, as Intrim advised I could get the same look using their timber lining boards.
Images: Jacqui Turk
These are individual boards which simply click together and they’re available in a choice of MDF or FJ Pine, the latter being the best choice for a bathroom or laundry. Althought they take a bit longer to install because they don’t come in a sheet, the other benefit is that they’re flexible and can fit easier around tricky spots such as roof rafters.
Don’t be afraid to think beyond walls! You can just as easily use VJ on your ceilings alone, or carry it on from your walls across your ceiling.
Image via https://www.instagram.com/this_old_house52
Around built-in joinery like a bench seat or cabinetry
Below, the VJ has been used on the whole of the wall in this gorgeous room, but it could just as easily be used to highlight the window seat only. If you’ve thought about creating banquette-type seating in a dining nook for example, VJ could be the perfect finishing touch.
Pic via https://www.instagram.com/this_old_house52
Inspired?
I hope this post has shown you there are so many ways you can use VJ, large or small, in your home. I warn you though: once you start, it’s hard to stop!
Timber mouldings totally transform small 70s apartment
Sponsored by: Intrim Mouldings Located inside a 1970’s apartment building in Sydney’s inner-west, this petite abode underwent an incredible makeover recently and its success can be largely attributed to the…
Roxy Jacenko’s new house: a kitchen to die for!
When your life’s as crazy as Roxy Jacenko’s, it’s perhaps no surprise the PR queen likes things to be calm and minimal at home, and the renovation of her new…
Today, I’m sharing our en suite, which probably involved the most thought, planning, work and money, of the three projects we completed just before Christmas. Funnily enough, this room was the most modern (I’m guessing an 80s/90s extension) of them all when we moved in. Which is pretty funny when you consider the before pictures below! Hello, beige and brown!
Bathrooms are, by their very nature, bloody expensive rooms! And while we did a complete rip out and re-do with our main bathroom, we didn’t have the funds (nor did we consider them worth spending) to do the same for our en suite. But after almost four years, we really wanted to finally finish off the two remaining very dated rooms of this “nanna house,” this and the laundry. They were definitely a couple of pimples on an otherwise pretty face!
Where the shower wall tiles meet the wall panelling
We all know tiles and particularly tiling, add up in a bathroom reno. In a bid to avoid some of this cost, as well as the time and mess involved in a “real” bathroom reno (I have limited patience!), we decided to tile over the existing tiles (which is perfectly fine to do if your tiles are sound), and we did that with the floor tiles. The new floor tiles from TileCloud are as similar as we could find to the ones we used in the main bathroom.
We never considered DIY-ing this part and left it to a professional tiler. And yes, we waterproofed underneath, especially as we also took the opportunity to remove the hob around the shower! It was reassuring to find a quality copper fold shower tray underneath! The tilers did our laundry and front porch at the same time which cost less than doing the three jobs separately.
These tiles are very similar to those in our main bathroom and I adore the texture
Despite this whole tile-on-tile situation making me stress out a bit over how it would come together, it all worked out really well. We also tiled over the tiles within the shower itself. Again, we chose tiles as similar as we could to what we used in the main bathroom, again from TileCloud, for some continuity, keeping it all very simple and clean.
No fancy in-wall cistern here, just a new, slimline toilet to save money!
Where we really saved money (and also got a great look aesthetically), was in going over the remaining wall tiles with VJ panelling (which we painted the same blue/grey as the other VJ in our kitchen, dining and living rooms). While floor to ceiling tiles always look great, they’re really not that necessary unless you plan on throwing water around your room in a big way! And of course the cost of the tiles, and the tiler, adds up.
I initially planned for this paneling to be painted the same navy as our bedroom in order to achieve a nice flow from one room to the other, but I made a last minute call to go grey instead because I felt the dark blue would overpower the small room. I think this was a good call. The lesson learned here was not to feel you have to stick rigidly to your plan! Although we already had the navy paint and it feels a waste (I’ll find somewhere to use it with my love of navy!), we had leftover grey paint so thankfully it didn’t cost us any more.
We used clear silicone around the sink
We didn’t use Intrim’s VJ Board Pro in here (like we used in the living room) because MDF and wet rooms are not a match made in heaven. Intrim advised that a much more sensible option was their timber lining boards (their LB03 lining board in 185mm wide panels) which click together and come pre-primed and ready to paint any colour you like.
We kept everything in the same spot, just replacing with new, to save time and money.
The trickiest part of this entire room was working out how to attach the lining boards safely to the wall, covering the tiles, and how and where the shower tiles would meet the panelling without looking clunky. Lucky I had my superstar tradesman Trent Ayton from Pure Renovation Group on hand to come up with the solution because I sure didn’t have a clue! He didn’t feel that simply gluing the panels onto the wall tiles and adding a chair rail was secure enough.
In progress
He explains: “We made sure the existing tiles were sound and cleaned them well. Then we used a U-shaped metal tile trim that was both glued and screwed onto the existing tiled walls, then fit the VJ using quality adhesive. We used the same trim top and bottom and painted this the same as the timber so it all blends in well and you don’t even notice it’s metal.”
Trent looked after everything except the tiling, plumbing and electrical (really just replacing light switches and sockets with new, disconnecting the old mirror light and connecting the new, under-vanity LED light. Trent also gave me very helpful direction on which trades I needed and when in the process, allowing me to confidently project manage the job myself and save a lot of money.
We had hoped to use a Bunnings off the shelf shower screen (we replaced what was there when we moved in with one of these because the door kept getting stuck!) but after tiling over tiles on the wall and floor, things were not plumb enough! So that cost us more than we hoped ($800) but having semi-frameless does look much more streamlined.
The LED light adds a touch of luxury in an otherwise quite basic en suite
The look and feel of this bathroom is very clean, light and modern (but also quite classic!). I really love the look of the VJ panels and I feel we added some important warmth and a bit of wow-factor with the beautiful vanity and mirror cabinet (thanks to Matt Michel for suggesting this size and style and letting me bounce ideas!) from The Blue Space. I loved that we were able to customise these Timberline products online, choosing options like the LED lighting (which is perfect for going to the bathroom in the middle of the night!), a white ceramic waste (which we also have in the main) and the timber veneer colour, which I’m thrilled with. I also love how the timber veneer is the same on the outside of the mirror cabinet to match the vanity below. It’s a very similar look to our more expensive solid timber vanity in the main bathroom.
I much prefer the view from our bedroom now!
We decided to use chrome tapware rather than matching the brass in the main bathroom, mainly to save money on having to replace the shower, and gold shower options are limited. We also avoided moving any plumbing unless we really had to (we had to move the plumbing up behind the vanity because we replaced a floor standing one with a floating option). We chose Meir tapware though, as we have for our kitchen, laundry and main bathroom, because we love the look and quality and it provided continuity in style if not colour. The wall hooks, towel rail and toilet roll holder are also from them.
I am delighted to say someone took the old vanity off our hands via Freecycle (who doesn’t hate landfill?) although the same cannot be said for the old toilet with the padded seat!
To avoid drilling into two layers of tiles (nerve-racking much? Plus, maintaining the integrity of the waterproofing), I researched the suction options and this Fusion-Loc brand from Bunnings (about $40) gets rave reviews, actually stays on, doesn’t rust and looks pretty good for a stick on option!
Every decision we made with this bathroom was a careful weigh-up between aesthetics and cost. This bathroom is not the showstopper the main bathroom is, but it wasn’t intended to be and frankly, we didn’t need it to be. We do really love it though, and the colour palette means it’s really light and bright, a far cry from the beige and brown!
However, as it didn’t end up being a navy bathroom to tie in with the navy master bedroom, I’m now thinking about re-painting the bedroom the same blue-grey to tie it back in with the bathroom (It never ends in this house!)! I have loved having a dark and moody bedroom but maybe I’m ready for a change! Dark walls also show up dust!
We finished off with a few accessories from my favourites Oliver Thom, including the navy Zone bin, Skandinavisk toiletries and Norm toilet brush. The Angus & Celeste pink jelly planter was a Christmas gift from my dad and adds a nice pop of colour.
We are replacing our old windows later this year and I’m looking forward to swapping the older sliding window (nicely hidden behind the shutters) with louvres. At this point, I’ll probably ditch the shutters as privacy and keeping light out aren’t considerations and louvres and shutters would be a bit much. What do you think?
I hope you get some ideas from our semi-budget en suite reno! Feel free to ask any questions in the comments!
My new navy and gold laundry revealed: before and after
Our kitchen was the very first room we renovated in this house, almost four years ago. It was a case of “I’m not buying the house unless we can afford…
Interiors Addict bathroom reveal: before & after
You know that old cliché about saving the best until last? I think we may have just done that with our family bathroom! This was the last major (indoor) project in our…
Designer toilet brushes and bins the new must-haves for a stylish bathroom
While Australia’s homewares scene has continued to dramatically improve over the years, when it comes to bathrooms it can still be a little tricky to find stylish wares to put…
The best-looking pump handwashes for your bathroom
Give it a few weeks and a bar of soap can quickly become an off-colour, grimey mess (and their hygiene factor has to be a bit questionable, right?!). But the right…
I’ve shared our living room on here many times and I really love the space, but what people often ask me is: “but where’s the TV?” Well, there’s a reason I never showed the room from that particular angle because it was never ever quite right and I hate messy cables on show and the often cluttered look of an entertainment unit. That’s all changed now with this amazing built-in, which we did on relative budget.
Is it a TV unit? Is it a credenza? Is it built-in joinery? Who knows, or cares? It just looks and functions great! And this room is finally good from all angles. Not to mention, that navy!
That gorgeous navy cabinetry? It’s flatpack Kaboodle from Bunnings, like we used in the laundry recently, and the doors are one of the regular colour options (Bluepea) rather than being painted by us.
I feel what really takes it next level is the Caesarstone top. It’s White Attica, which I’ve always loved (since I saw it in one of The Block houses years ago) but wasn’t quite right for out kitchen (which is Noble Grey). I felt it was the perfect contrast for the navy in the living room and I really didn’t want to matchy-match with the kitchen because really, who matches their separate living room to their kitchen?! At the same time, there’s an element of continuity and flow there, thanks to the paint colour and the navy cabinetry being the same as the laundry. Not to mention we now have shaker profile doors in the living room, kitchen and laundry.
One of the things I struggle with most with TVs in general, and all the stuff that comes with them (speakers, cables, Foxtel box etc) is the generally messy or cluttered look. I knew that I needed to go one further to really pull together this cabinetry and this was with the use of VJ Board Pro board from Intrim on the wall behind. It’s painted in the same blue as the other VJ in our kitchen and dining (Chinchilla Fur by Haymes Paint).
So, how did we do it? First, we needed to chat with our electrician about getting all the cables in the wall and marking that out before Trent from Pure Renovation Group fixed the VJ Board Pro onto the wall. It’s a great affordable MDF product which is easy to install and comes pre-primed in sheets and ready to paint. I’d been on the Kaboodle 3D planner online to work out which combination of cabinets would fit the 3-metre wall as neatly as possible to create that custom look. Luckily for me, this worked out so so well using two different cabinet sizes! We did think about using less deep wall cabinets instead but as we had plenty of space here, we decided to use the deeper cabinets and create maximum storage.
To avoid them looking too ‘kitcheny’ we decided not to use a kick board, to make them lower, and we chose push to open hinges and no handles or knobs. Like planning the laundry, this process was very intuitive and easy, even for an amateur!
I really love the look and the contrast of the navy in this room. The stone finishes it off beautifully and stops it from being too dark. The paneling behind just pulls it all together. And overall, we have a very custom look for a lot less than custom joinery (which absolutely has its place but this isn’t the house or the room I want to invest in that for).
My husband was delighted that this set-up meant I agreed to us buying shiny new speakers for his hi-fi setup (he’s old school like that) on the basis that they were white, even if they are a bit bigger than I was led to expect but that’s another story… I drew the line at a new TV because there’s really nothing wrong with this one (and care factor: zero!).
Almost every ugly black box (Foxtel, amplifier, CD players and the like) is in the far left cabinet so there’s actually heaps of storage too, for things like CDs (I told you my husband was old school) and other completely non-TV and audio-related things that need a home. I mean, can you ever have too much storage? I think not!
I’m so thrilled with the end result and the only thing that could make it better would be a Samsung The Frame TV! The only downside? We can’t take this setup with us if we ever move!
I thoroughly recommend considering using flatpack to achieve a built-in look like this, or even to create your dream buffet, for example. I hope this how-to gives you some inspiration!
My new navy and gold laundry revealed: before and after
Our kitchen was the very first room we renovated in this house, almost four years ago. It was a case of “I’m not buying the house unless we can afford…
Charlie Albone and Juliet Love share a first look at their new home
With two sons, it didn’t take long for Aussie landscape designer and TV host Charlie Albone and his interior stylist wife Juliet Love, to outgrow their two-bedroom home. After going…
Kaboodle get a handle on jewellery for your cabinetry
Sponsored by Kaboodle I’ve often said that elements like handles, knobs and tapware are the jewellery for your kitchen; the finishing touches where you add a bit of personality and…
Our kitchen was the very first room we renovated in this house, almost four years ago. It was a case of “I’m not buying the house unless we can afford to do that right now,” because it was pretty gross! I still love the kitchen just as much today, but lurking behind its famous blue barn door has been an extremely grotty laundry which has finally had its makeover! And boy, am I excited to share it with you today!
Many assumed there was a butler’s pantry behind that door but, because of the state of it, you’d never know because that door remained firmly shut! My friend James Treble, the TV interior designer, once had a look before I had chance to stop him and I was mortified! Here’s a photo from just before we moved in, to give you an idea.
No room to swing a cat, right?
I have been known to exaggerate on occasion but this time? No, it really was awful! And not only awful but also tiny (about 2.5 x 1.5m). Because of that floor to ceiling cupboard on the right, when we brought in our own separate washing machine and dryer we had one to the left in front of the never-used sink, and well, it was messy and squashed to say the least. In the spirit of keeping it real (not representative of everyday life but it was so bad I just had to share!), the following photo will give you an idea! We later switched to a washer/dryer to save space but it wasn’t ideal.
It’s a good job Damian does the laundry in our house because this room was definitely not sparking any joy. That said, due to it being hidden away and never seen by guests, it fell to the back of the reno queue while we got the rest of the house shipshape. But you can only live like that for so long and I embarked on a way to fix it on a relative budget, mixing high end and more affordable products and making an impact with colour, pattern, and my favourite brass accents. Et voila!
The new laundry is small but she is mighty! I absolutely love the look but it’s also super practical for such a small space.
Let’s start with those navy cabinets, which are Kaboodle from Bunnings. I was going to use their paint-your-own range and then spray paint them navy, but when I saw a sample of these Bluepea doors in store, in the perfect hue and ready to go, I leapt at the chance to save myself that job (or paying someone else to do it!). I really am thrilled with the colour. And I chose their Alpine shaker profile door to complement our kitchen cabinets.
Planning the layout using their online 3D kitchen planner was a breeze, even for an amateur like me! The biggest call I made was in not having wall cabinetry right the way across because a) I didn’t want to block light from the window and b) I was keen to incorporate a hanging rail for Damian’s shirts. Although we only have two cabinets in total (one on the wall and one under the sink), it’s plenty of storage for laundry detergent and other cleaning materials I need to keep up high, away from Charlie.
The doors were a special order from Bunnings and took a few weeks but boy, were they worth it! My amazing carpenter Trent from Pure Renovation Group, made everything look much more custom by using end panels in the same colour as the doors in between the washer and dryer and at the far right against the wall. I’m thrilled with the cabinetry! The Cornet brass handles from Kathy are the same as we have in the kitchen and aren’t they just a match made in heaven?!
Using a navy end panel here and between the machines gives the cabinetry a more custom look
I had my eye on the floor tiles from Tile Cloud (whose tiles we used in our main bathroom and on our front porch last year) for a long time. They’re the Palm Beach in blue and the tone works so perfectly with the blue-grey of our panelling and barn door in the kitchen (Haymes Paint Chinchilla Fur). We tiled over the existing brown and beige floor tiles to save money here too, as well as getting the tilers to do the en suite (coming soon!) and porch at the same time to get a better deal.
Another element bringing consistency from the kitchen is the tiger bronze mixer tap from Meir. I also chose the perfectly matching gold sink from their sister brand Lavello, which is definitely much better quality then the kitchen one we bought at Bunnings (and is no longer sold by them). The quality literally shines through!
We’ve also used the same Caesarstone Noble Grey from the kitchen, for the bench and splash back. The day that went in was a very exciting one! It really brought everything together, it looks so luxurious in such a utilitarian space, and of course it’s super practical too. Just having a benchtop at all is a major improvement, but to have one that’s so easy to care for and looks amazing, is the icing on the cake. We went for the 20mm profile which I’ve never regretted for a second in the kitchen. We made the bench 50mm deeper than the standard 600mm (a tip I picked up from Zephyr + Stone) so the machines barely protrude at all. Top tip: you can take your own samples to the Caesarstone Flatlay Studio to get a better idea on how everything works together.
The girls also told me I could pick up that brass plated hanging rail (actually designed for wardrobes) from Hafele. There was a bit of a wait on it due to Covid but it was so worth it because it finishes the room off perfectly and I couldn’t find something similar anywhere else, particularly as I wanted to fix it to the window architrave on one side and the wall cabinet at the other, rather than underneath a cabinet.
Last but not least, with all this prettiness, we couldn’t lose sight of the practicalities, and it was time to upgrade our washing and drying machines. As a family of four now (including a school kid with uniforms), our previous washer/dryer combo just wasn’t cutting it. While it was a great washer, the dryer capacity wasn’t big enough (less than the washing capacity) and we often had to dry things twice. It also wasn’t as energy efficient as a heat pump dryer and having had one of those in our previous home, we knew how amazing they were, especially in the cheap to run stakes. Opting for two separate machines meant a decision to stack them or put them side by side under a bench and that was a bit of a no-brainer given the option.
Having done our research, these new Fisher & Paykel machines came up as the favourites and we’re pretty much in love with them, not to mention they’re so smart they do half the job for you (or Damian, I should say).
The 12kg (woohoo!) front loader washing machine is programmed to sense the size of the load and soil level, allowing it to automatically dispense the right amount of detergent and select the optimal wash time. The drum is the largest ever capacity launched by the brand, making it perfect for bulky items like bedspreads and duvets (which I have a horrible habit of spilling my morning coffee on).
The 9kg heat pump dryer was created to gently and effectively dry clothes at low temperatures, to preserve the lifetime of fabrics. It ensures moisture is condensed so no venting is required, ideal in our tiny space. We just empty the water down the sink every few uses. Not needing to vent the dryer means you can pretty much put this anywhere you like in your home, which might make it the choice for your Euro style laundry behind cabinetry.
Suffice to say, being able to wash and dry large loads successfully in an energy efficient way, has been a game changer for our family.
In terms of plumbing, we kept the sink where it was but had the washing machine taps moved down behind the machines (no more visible pipes, thank goodness!). We also had our electrician move the powerpoint down below bench height. (I decided not to have any powerpoints above the bench and avoid having a cutout in the stone splashback. It’s such a small room, we really don’t use it for ironing or anything like that so it wasn’t necessary.) These are small jobs by the professionals that make a big difference. While we thought we could get away without a plasterer, we really couldn’t, so we had someone come in to patch up all the rough parts where the old cupboard was pulled out (leaving its orange and green floral wallpaper behind it!).
An idea of the space before. Yes, I did keep a bit of that wallpaper for posterity!
Even though it’s a small room, I wanted it to be as functional as possible, hence adding not one but three robe hooks (they’re Meir tiger bronze to match the tap). They’re great to hang something on a hanger, or goggles from the swimming bag or something that needs to air dry. I truly believe hooks are underrated for keeping things tidy. I fit them in wherever I can!
With all the heroes in this room (I sure did break the rule of having only one hero, but I truly believe it all works and isn’t too much), we kept the walls white (Haymes Light Frost) and we painted ourselves to save a little money here too.
Trent from Pure Renovation Group did most of the labour and was my saviour!
Sebastian lends a hand with demo and a glimpse at the stick-on floor I attempted earlier to hide the brown and beige tiles!
The barn door is now left open all the time because I love that pop of navy and how it contrasts with the pale blue/grey of the kitchen. I joke that if I were a laundry this is exactly what I’d be! It’s true! We’re absolutely thrilled with the smallest room in the house now. I might even start doing some of the laundry…
If you’re in north shore Sydney and need a great carpenter and all round tradesman who works with other tried and trusted trades, please contact me for an introduction to Pure Renovation Group.
The big kitchen reveal
Photography by Jacqui Turk I am so excited to finally share my new kitchen with you today! Seeing these beautiful pictures makes the last two months of mess and chaos…
Interiors Addict bathroom reveal: before & after
You know that old cliché about saving the best until last? I think we may have just done that with our family bathroom! This was the last major (indoor) project in our…
Interiors Addict bathroom reno 2: what I chose and why
There is so much to share about my recent bathroom reno and I couldn’t possibly fit it all into the reveal post, so I’m sharing a little more detail today,…
You know they say you should live in a new home for a while before you do anything major? Because it’s only by living in it day to day and seeing how you use the space and how it works for you, that you’ll be informed to make the best decisions. And it’s so true, but let’s face it, we are impatient. Well, I certainly am!
Our L-shaped kitchen/dining has been a sticking point for us for the 3.5 years we’ve lived here. The kitchen part (renovated shortly after we moved in) is possibly my favourite space in the house so that side of the L, we had covered! The dining part however, was tricky! We’ve tried the dining table in two spots: right opposite the kitchen (let’s call that A!) and also further away by the French doors to the deck (let’s call that B!). When the dining table was in spot A, we had a credenza in spot B and vice versa. We finally realised the spot B by the back door was the best dining spot (and three tables later we have the right one!), but the credenza thing wasn’t quite right and mainly because it became a dumping ground for everything without a proper home. And having clutter opposite my beautiful, minimal kitchen? Not cool!
One day I just realised we needed a sofa there. I was thinking about how everyone naturally gravitates to this room when they come over. It has lovely light, the kitchen’s a nice space to be, it’s where the coffee is made and the drinks are poured and, as they say, the kitchen really is the heart of the home these days. But I couldn’t find quite the right one.
Enter Crafted Furniture, who make custom sofas right here in Sydney, and in only six-to-eight weeks, which is amazingly quick for a sofa these days, especially one made to your requirements.
We fell in love with the Slade Slipcover Sofa after having a good browse of their newest showroom in Paddington’s Oxford Street. Its clean lines (love that arm profile!) just made sense to me for the space, it not being a traditional living room. But the plump back cushions mean it’s still super comfy and frankly, the ideal spot for a nap! So, the sofa choice was pretty easy. The trickiest part was the colour because we could really have whatever we wanted.
I’m so glad that I went against my ‘play it safe’ tendancies to choose this gorgeous blue, because I would normally go for grey or my favourite navy (but I felt the latter would dominate the space too much). Speaking of which, I didn’t want the sofa to protrude out into the space, which is a thoroughfare to the dining table, too much, and I’m talking about the way the space felt, as well as the actual physical space. So we asked for ours to be made 10cm shallower than this model would usually be. It still looks beautifully generous but it fits the space perfectly. We had more space to play with but I feel it would have felt too overbearing had we not made this small change. The length was easy: I just wanted about 30cm of breathing space at either end.
Another prerequisite was removable covers, like we have in the living room and have proven to be a godsend, especially in a room where food is allowed (by default!). This linen and cotton slipcover lifts clean off and can be machine washed on cool but personally, I’ll be getting it dry cleaned when I need to.
The showroom experience was really enjoyable and helpful. They didn’t even mind our two little terrors running around! I think when you’re investing in a quality sofa it is a good idea to go and sit on it, and when you have the opportunity to make it any size to fit perfectly, and hundreds of fabrics to choose from, it’s great to get some expert advice. We saw lots of fabric samples in store but they then sent us our favourites in the mail so we could see them in the context of our room, against the paint colours etc.
Our kitchen opposite the sofa with laundry beyond
I knew I wanted a large artwork above the new sofa and couldn’t resist a new one from Melbourne artist Kirsten Jackson. We have one of her much more vibrant works in our living room which takes centre stage and always gets so many comments! This is a lot more subtle and I’ve tied it in with the lounge and broken up the blue by adding a couple of soft pink Eadie Lifestyle linen cushions. Then I decided the pink terrazzo stump in the living room looked just perfect here so brought it in. Do you ever do that? ‘Shop’ from what’s already in your home? I highly recommend it!
We are so thrilled with this new seating area in our home. What was just a spot for the credenza (which is now in the hallway so we haven’t lost the drawer storage) now feels like a whole additional room! It is already very well used and many sticky fingerprints have already been spot cleaned off it without any drama. Phew! This area also looks so damn pretty and the colours work so nicely with the kitchen and the art. I also feel so smug that we have finally worked out how to best use this slightly awkward space for our family and visitors!
Now please excuse me while I go and listen to a podcast with a cuppa on my new favourite couch…
Crafted Furniture have a 15% off sale on until the end of the month if you’re in the market for a sofa. Check them out online or visit their showrooms in Paddington, Crows Nest or Castle Hill.You can even arrange a consultation via FaceTime, Skype or Zoom.
The owners of Crafted have over 20 years experience in the furniture business and they proudly make everything here in Australia. An additional benefit of this is you only wait an average six-to-eight weeks for your custom sofa. Crafted also work with The Sofa Project charity to help re-home your old sofa to someone in need.
Disclosure: We received a trade discount on our sofa.
Skylights have transformed our living room: here’s all the details – The Interiors Addict
Never underestimate the importance of natural light. You should never buy a house with poor natural light because once you’re in, you can’t do anything about it. Only you can.…
The big kitchen reveal – The Interiors Addict
Photography by Jacqui Turk I am so excited to finally share my new kitchen with you today! Seeing these beautiful pictures makes the last two months of mess and chaos…
Interiors Addict bathroom reveal: before & after – The Interiors Addict
You know that old cliché about saving the best until last? I think we may have just done that with our family bathroom! This was the last major (indoor) project in our…
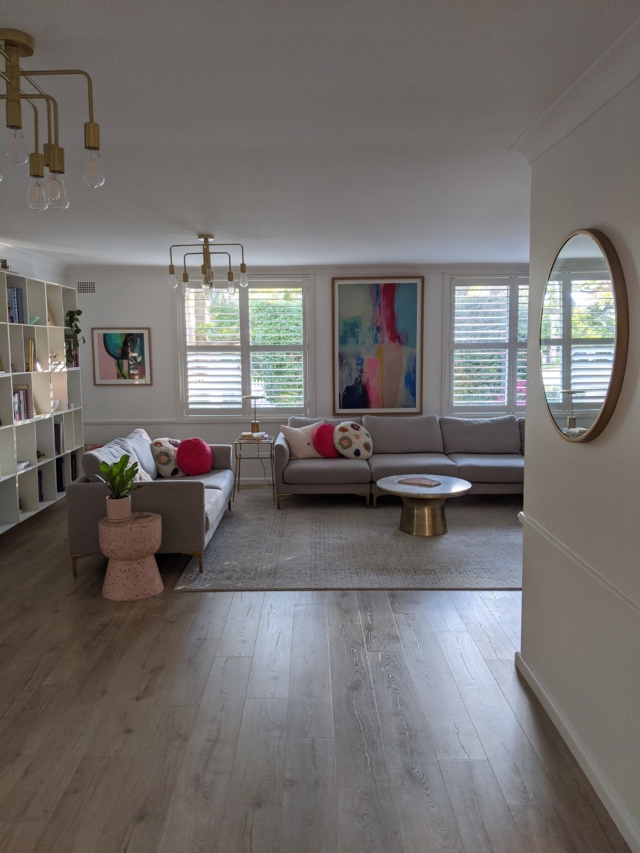
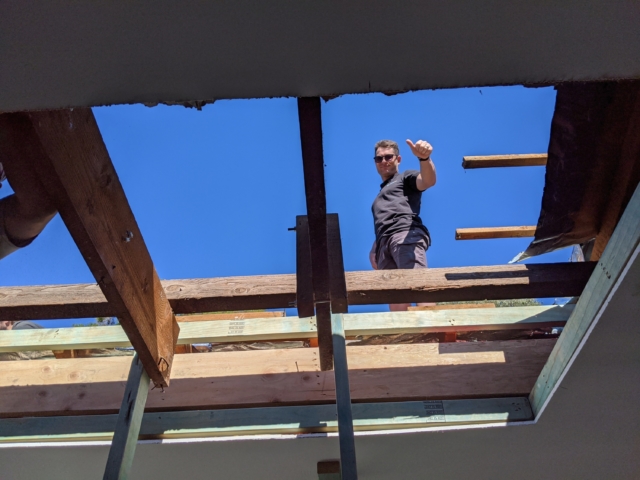
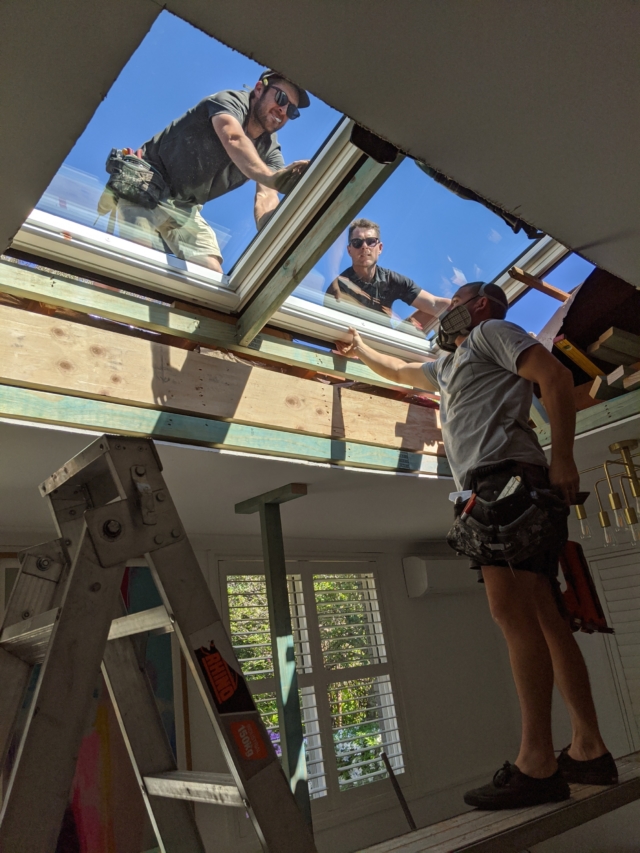
Never underestimate the importance of natural light. You should never buy a house with poor natural light because once you’re in, you can’t do anything about it. Only you can. You can cut a big hole in your ceiling and whack in a skylight or two! That’s what we’ve done recently and the transformation has been so big I still can’t get over it. We are thrilled with the outcome and I’m wondering if I should change my job to skylight saleswoman!
This is what I’m talking about! Now this was always a lovely big room and we were pretty happy with it in here. Apart from the natural light which was horrendous! We have lovely light in the kitchen/dining area but in here? We had those chandeliers on all day every day and believe me, we needed all 18 globes! Much as I love those pendant lights, I didn’t love having permanent warm yellow electric light in the daytime. But without it, it was dingy. And if there’s another thing I hate it’s dinginess! So I just left those lights on all the time. The following before photo make it look better than it actually was but you get the picture.
Before
Seriously though, it was really getting me down. In our discussions of how long we would stay in this house, it always came up as one of the things that still made me want to move. We talked about skylights on and off for years. If only we had done it sooner!
I didn’t realise how many added bonuses there would be to these skylights though. It’s so much more than just letting more light in. The feeling of increased height and openness in the room is undeniable, not to mention it’s also a great new design feature in our biggest room.
All the colours (and there’s a lot in here!) now pop and the light feels so clean and bright and well, natural! And seeing the sky and the clouds, and the tall trees across the road is lovely. Not to mention the sound of the rain on them!
Before and after
Because these VELUX skylights open (one is automatic and solar powered and the second manual), they let in a fantastic breeze which cools the room down on a hot day and is great for ventilation. Get the right window open at the back of the house and it creates great airflow. I never considered what a bonus this would be until we had it.
We also have blinds on them and this was strongly encouraged by our installers, Shire Skylights, mainly to prevent the potential for glare on the TV (opposite the modular) on a sunny day. You can obviously also use them to prevent it getting too hot or bright at any time. The blinds are automatic and solar-powered and you can close them partially or fully. And of course there’s flyscreens, which really don’t look obvious, but do the job of keeping dreaded flies out!
One of the blinds partially open
Let’s get to the really clever stuff though: VELUX Active and its app! Smart sensors continuously monitor the temperature, humidity and CO2 levels in your home and open or close your electric or solar-powered VELUX skylights to create a healthier indoor climate. Now we can use the app on our phones to open or close the window and/or blinds and we can personalise the settings too. For example, ours is set to open every three hours throughout the day for airing. If it rains, don’t worry, the skylight will automatically close! Get too bright? The blinds will automatically close. This all blows my mind! This is an optional extra with your skylight.
Another great surprise was the ease and speed of the install. For anyone who missed it on my Stories, I strongly encourage you to watch the entire process which I saved in my highlights, in just a few minutes.
It was incredible to watch; at first a little nerve-wracking as they cut a huge hole in my ceiling and I could see the sky, but it then became fascinating and super impressive! I didn’t get much work done that morning. I say morning because the whole thing happened in just over four hours, including sheeting! The plasterers then came in the afternoon, came back a day later to sand, and then I waited a bit longer for my painter to be available. Incredibly fast!
So, the question you all want to know: how much does something like this cost? The answer is around $10,000 including install, blinds, the VELUX Active setup, the solar power and the electrician. This is obviously an all-singing, all-dancing scenario and the costs are considerably less if you choose for them to be fixed for example (non-opening). Shire Skylights offer entry level VELUX skylights installed for around the $2,000 mark.
If all this has you wanting to cut a big hole in your roof too, the good news is that The Skylight Warehouse have a competition over on their Instagram feed where you could win a $1,000 voucher so head on over and enter by this Friday 23 October 2020, it’s super simple. The Skylight Warehouse is an online store selling skylights. They’re a premium VELUX dealer and they are their preferred product. They also manufacture and supply custom flashings for every roof type.
Their sister company, Shire Skylights, installed our skylights at lightening fast speed! They service Southern and Eastern Sydney and if they don’t service your area, they can still sell you the skylight and recommend a local installer.
All the latest on the renovation of Jen’s own “nanna house” on Sydney’s Upper North Shore.
The big kitchen reveal
Photography by Jacqui Turk I am so excited to finally share my new kitchen with you today! Seeing these beautiful pictures makes the last two months of mess and chaos…
Interiors Addict bathroom reno 2: what I chose and why
There is so much to share about my recent bathroom reno and I couldn’t possibly fit it all into the reveal post, so I’m sharing a little more detail today,…
As promised in yesterday’s playroom reveal post, today I’m giving you a closer look at exactly what we used to get the storage sorted and why it works so well. It really is a storage dream now!
The heroes of this room are the IKEA TROFAST units. We have used both the regular version and the wall-mounted version. I opted for all-white units and all-white plastic boxes you buy separately, but there are many combinations, colours and options available.
The units themselves come in either white (like ours), black or light stained solid pine. I like the look of the pine ones too, but ultimately, the white version was more suited to our home. Because I knew there’d be plenty of colour from toys, rugs and art, I also wanted to keep the base as simple as possible to avoid it being too visually busy. There are several shapes and sizes of TROFAST units available so it’s a very flexible system.
The boxes (or drawers) are plastic and come in loads of colourful options but again, I knew there’d be enough colour from everything else and I’m still glad I chose all-white. They come in three different sizes. All the units come with the same plastic guide rails (or drawer runners) and the beauty is that you can choose which size boxes work for you. You’ll see we have got some with three large boxes each and some with three medium and three small boxes each. Should your storage needs change later, you can simply go and buy different boxes (from $4). Or you can change colours for a completely different look. I took great satisfaction in using a DYMO labeller to dictate what each one was for! This makes packing away so much easier and quicker!
I am IN LOVE with these affordable units ($126 each in this combination including the boxes). The plastic boxes are hardy and they’re easy for the boys to pull out (and for Sebastian, if not Charlie, to put back in). You can bring the box to the toys, which makes tidying up a lot quicker than if you were having to take all the toys (knowing kids, one by painfully slow one) to a fixed drawer. The units are hardy (they’ve already been given a workout by the boys, who aren’t the most graceful) and I can confirm that colouring pencil wipes off the top with Windex. They’re at just the right height for the kids to be able to put their own stuff away (sometimes!) and to also play with toys on the top of them. I’ve started leaving different toys out on the top every day to invite them to play with them.
You’ll see we have also used two of the wall-mounted versions of the TROFAST and this is to keep things out of Charlie’s reach, specifically paint, craft supplies and Lego! As an added bonus, we can display some of Sebastian’s favourite Lego trains rather than have to hide them all away.
We chose to put books up high in the FLISAT shelves (which look so lovely in solid timber) because Charlie has zero respect (yet boundless enthusiasm) for books and they were all getting ripped and scribbled on! It’s great that they’re still facing cover-out and easy to pick from. And they’re nice decoration as an added bonus. We store Charlie’s less vulnerable board books in the play kitchen (from Pottery Barn Kids).
IKEA have a great range of kids’ tables and chairs and the FLISAT table and stools appealed firstly for their aesthetics, and then for the table’s extra (and fun) storage inside. Underneath we have the wipe-clean Grace & Maggie Baby Driver Boho memory foam mat, which is reversible and has a road on the flip side. This means they can eat at this table or sit on the mat having a snack.
One mat is never enough for kids, and our other favourite is this incredible IVI Interactive Play Rug from Urban Baby. The boys have not stopped driving cars around it, creating airports and mini cities, since we got it.
Something we always had trouble with hiding (I mean storing!) were our extra large vehicles (think Tonka garbage trucks!) and I found a great solution for these in the STUVA/FRITIDS bench. The drawer part is on castors and pulls out really easily and safely for the kids.
Both our boys love music, and telling Google what songs to play (via Spotify) so we love our new SYMFONISK WiFi speaker (a collab between IKEA and Sonos) which is wall-mounted below their TV. It’s also designed to sit neatly on a bookshelf without the bracket, or you can even mount it by your bedside and use it as somewhere to pop your book, glasses and other essentials! I love this kind of smart and practical design and it’s a great price too, from $149 (also comes in black).
So, that’;s my roundup of the main elements in this room and why they work so well for us. I hope you found it useful if you’re struggling with toy storage too.
Our new top tip for flatpack assembly without risk of divorce is to get an Allen key attachment (also known as hex bit) for your drill. SO MUCH QUICKER. You’re welcome!
If you have any questions about any of the products in our playroom, please drop a question in the comments below!
Disclosure: Items in this post were gifted by IKEA.
Welcome to our new and improved playroom! I’m finally proud of this room, but let me tell you how we got to this point!
It’s almost three years since we bought our “nanna house” and as we’ve ticked off transforming it bit by bit, I’ve never really shared the playroom with you and there’s a reason why! Before I tell you why I came to loathe it, let me first tell you how much I also love the fact we have one!
Having a playroom is the ultimate luxury for a mum of two boys who is also a bit of a neatfreak (that’s me, if you hadn’t guessed). I love my home to be tidy at all times (just don’t go into the master bedroom unannounced as that’s where it all comes undone!). I also have two energetic boys with lots of toys and I want them to have fun and to be able to pull things out and not get all antsy about it because life’s too short and I’m not going to be that mum.
When we saw this house, with its “family room” off the living room, we didn’t hesitate to earmark it as the playroom, and that was when we only had one toddler! Another huge bonus is that the boys’ bedrooms are only for getting dressed, reading and sleeping and, as such, they stay really tidy! So at least I am dealing with just one messy room, not three!
Fast forward to now having two kids and there are even more toys and a 16-month-old who loves to pull everything out and is too young to know how (or want to) tidy up his mess. Things were reaching a peak level of chaos in the playroom, with nightly tidy-ups a battle with the eldest and me only being able to cope because we have doors between the living room and toy town crazy, which meant I could at least hide it!
But the reality of our home is that those doors are always open so we can keep an eye on the boys and interact with them while they do their thing and we do ours, frequently crossing back and forth into each other’s spaces. And we love that we can do that.
We can now leave these shutter doors from the living room to the playroom open a lot more!
But the mess. Oh, it was an eyesore! We had a lot of baskets with stuff chucked in them. We had one large inherited (from Damian’s room at his parents’ house!) IKEA Expedit (now Kallax) unit full of felt boxes. We started off with different boxes for specific things, but as they weren’t easily identifiable or labelled, we soon ended up in a position where any old thing ended up anywhere, just to get it off the floor. And the toys need regularly removing from the floor so I can deal with the crumbs. Don’t get me started on wandering children with snacks! Every few months I’d say “enough!” and have a declutter and sort out. But it never lasted long.
Adding Charlie to the mix (particularly when he started walking a few months ago) made everything so much worse. Everyone told me you couldn’t have a nice or tidy playroom and that there was no point trying to improve it. And I probably listened for a while, which is unusual for me because I believe everything can look nice (if not perfect) and you can have nice things, even with kids. And I suppose there’s part of me that felt bad about wanting their room to be pleasing to me as well as them, like that was a bit selfish.
But do you know what, it’s okay to want organisation which makes tidying up and keeping things tidy easier. It’s way less stressful having a room that doesn’t look a right mess from your living room all the time. And Sebastian (Charlie’s too young to care!) really loves how his new room looks and feels and how easy it is to find what he wants to play with. I’m actually surprised at quite how much of a difference this new playroom has made to our stress levels, and that includes things like the nightly nag to put the toys away before bed.
The room also looks so much bigger and nicer. Having all the storage at the same, kid-friendly height along the back wall, gives the impression of more space. An unexpected bonus of the IKEA TROFAST units is that they’re the perfect height for the boys to play cars or draw at, which I’d never considered.
There’s so much more to say about the playroom that I’ve decided to split this into two posts, and, in part 2, I tell you exactly what we picked for the room and why it works so well for the kids (and us!).
Thanks to IKEA, who collaborated with me to finally get the storage and organisation under control in this room!
I’m actually really excited to share this with you because I think it’s going to be a game changer for our home and I hope you’ll love them too. My builder recommended the illume Skylight Alternative to me when we were in the planning stages of our new bathroom. We were getting rid of its dated old skylight and installing a new ceiling where we knocked the WC and bathroom together. So we lost a lot of beautiful natural light, which was, frankly, the only good thing the old bathroom had going for it!
The illume in our new bathroom made a big difference but the real magic happened in our hallway!
With our budget already stretched, we couldn’t afford a new skylight and the old one would have totally ruined the look of the shiny new bathroom, so a “faux” skylight, as I call it, was an option! We also have the dingiest hallway in the world, so it seemed a good time to try and fix the issue of always having lights on along there too.
Enter: illume! Not a skylight, but the simplest way I can sum it up is a solar-powered diffused light that will cost you nothing to run! Before I get into the specifics, take a look at the before and after from our hallway. Because we chose to install an isolation switch so it could be turned on and off (probably unnecessary in hindsight but I was worried it would be so bright it could wake Sebastian in the mornings because he sleeps with his bedroom door open onto the hallway), you can see what it looks like on and off.
Even with the bedroom door open at the end and the big glass door to the garden beyond, it was still so dark down here.
Let there be light!
illume is the original product of its kind with a patented technology. Unlike a traditional skylight, you can even install an illume to lower levels, basements and attics — the possibilities are endless! illume’s innovative design cuts the cost of your electricity, with no running costs or batteries. Installation is easy and non intrusive. You can even buy the product off the shelf and do it yourself. And because there’s no electrical, you don’t need an an electrician. You don’t need a big hole in your roof either, which people often worry will result in a leaky roof.
Here’s how it works…
Solar Panel: illume is powered by a solar panel positioned on the roof, cutting the cost of your power bill, by reducing the need for electrical lighting or batteries in your home’s dark rooms or spaces.
Transfer Cable: The solar power is transferred to the light panel via a cable, simulating the lighting conditions outside. illume automatically comes to life at sunrise, and its intensity varies during the day depending on sun exposure and cloud cover outside.
illume Light Panel (these come in different sizes, round, rectangular or square): The lighting panel uses Ambient Light Technology (A.L.T), bringing light into the dark areas of your home, creating the feeling of harmony between external and internal lighting conditions.
They’re perfect for rooms with no windows, built-in robes, walk-in pantries and really anywhere with bad natural light. They’re a fraction of the cost of a traditional skylight, you can install them yourself (or contact one of their trusted installers near you), and they cost nothing to run.
I’ll admit I was a little sceptical and worried it would look, well, tacky or too fake! Or that the light would be like what I call hospital light! But I genuinely think they look really good and am planning to get them in our bedrooms now too. We want a traditional skylight in our living room and I do think there are some rooms where it is worth spending the extra money and being able too see the sky, not to mention the benefits of real daylight! For other rooms however, the illumes are ideal and I really do recommend you look into them.
Disclaimer: We were gifted our illume in return for an authentic review.
There is so much to share about my recent bathroom reno and I couldn’t possibly fit it all into the reveal post, so I’m sharing a little more detail today, with why I chose the things I did and how those decisions have (thankfully!) worked out really well. Phew!
TILES: In some ways, this is the starting point; the blank canvas! In the 2.5 years of saving up and waiting to do the bathroom, I was sure I’d go for a feature patterned floor, therefore keeping the walls simple. And feature floors certainly only got more popular during that time. But when it came to it, because we were knocking the WC and bathroom together and trying to get so much (i.e. separate shower and 1700mm bath) into a still quite small space, I decided it wouldn’t be the best idea. A simpler floor has, I’m sure, given the illusion of more space. And with the other choices I made, I was very conscious of not having too many heroes (hello gold tapware and hardware, solid timber vanity and big tub!).
In my last bathroom, we used subways but I wanted something a bit different as subways are definitely everywhere! I loved the smaller and uneven look of the tiles we chose and the size makes them a bit different to the more popular larger format wall tiles. So although we went for white tiles with white grout, I felt there was enough texture there for it to still look interesting. And I couldn’t love the end result more! Until the grout went in I was a little worried it was looking like a public toilet, and I did question and re-question the decision to have them stacked rather than laid in a brick pattern. But all’s well that ends well! I also almost went for a feature tile in the niche (probably a pastel coloured version of the same tile) but with the brass trim on those, I felt that was enough. Restraint is hard though, let me tell you!
I knew I wanted something matte and simple for the floor and I love these (they’re more greige than grey although the name of them is grey). So far, they’re hiding dirt and a variety of hair colours very well! They also dry quickly which is a consideration with an open shower.
TILE TRIM: Probably one of the cheapest things in the bathroom, but one that gets a heap of comments and compliments, is the brass tile trim, which I found online. It caused me a fair bit of angst because although chrome would never have worked, it was quite a brave choice and I knew it wouldn’t match perfectly with the tapware. But white wouldn’t have looked half as good! And without a feature tile in the niches, they needed this little je ne sais quoi!
I’m totally okay with the two golds not being exactly the same too!
BATH: I cannot rave enough about this bath! I have always been against squashing a freestanding bath into a small space because I don’t think it looks great visually, not to mention the issue of cleaning behind it. So when I started to see a few of these back-to-wall or D-shape baths on the market I knew straightaway this was my perfect solution! So while it is technically freestanding, it is right up against the wall on one side.
We had a hob bath in my last bathroom which we tiled up the side of and I didn’t like how many right angles there were! Here I love that we have the curve of a freestanding tub without it really being one. It definitely adds to the sense of space as well. And a curve is always a good thing in a room full of squares and rectangles, which a bathroom usually is by default.
So there’s technically still a gap at this end to clean around, but you can’t have it all when you’re working with a tight space!
Regular readers will know I love my baths and have a soak almost every single night, summer or winter! I really wanted to have a decent sized bath if we could manage to fit it. And this one is so deep and amazing! The good thing about a deep bath is that you can lie back against it, without your head being above the top of it. It’s like a bedhead in the bath, if that makes sense! We switched out the waste it came with for a tiger bronze one from Meir to match the taps and shower.
VANITY: After getting custom blackbutt solid timber vanities from Ingrain Designs in our last bathroom, I didn’t even consider getting the vanity for this room from anywhere else! But while blackbutt is quite a statement, knotty timber, I wanted something more subtle here so we went for reclaimed Tassie oak (more on this in a future blog post).
The clever and stunning handle-free design of the vanity was a very easy choice! And the matching shaving cabinet above is a larger version of what we had in the old place and has so much storage (seriously, we must have increased our storage ten-fold from the old bathroom) it makes me very happy! And yes, all our regular toiletries live in here while only the fancy stuff is allowed in the bath and shoer niches. We’ll see how long this rule lasts…
I knew the timber would warm up the all-white space and work beautifully with the warm tones of the tapware and other hardware. It’s a real showstopper!
TAPWARE & SHOWER: This was one of the easier choices because I’d already used a Meir tiger bronze tap in my kitchen and I love it! And as well as wanting to make the bathroom somewhat consistent with the kitchen, I was always going to choose gold! If you’ve seen the rest of our home, that will be obvious!
My selections:
Meir Tiger Bronze round wall mixers, round combination shower rail, round curved spouts, round toilet roll holder, bath popup waste, square floor grate and robe hooks (instead of towel rails).
TOILET: I’ve never cared much for fancy toilets or putting much thought into which one I’d like, but that changed with this bathroom. Bringing the WC and bathroom together meant, obviously, having a loo in the bathroom. and because space was tight it ended up right next to the bath and there was no space for a nib wall or anything like that to disguise it (although it is behind the door, so when the door’s open and you walk past, you don’t see the toilet).
This wall hung one not only adds to the sense of space, but it is so simple and compact, it just blends in. And you don’t really want to make a feature of your toilet! The white glass flush plate also adds to the streamlined and subtle look. I can’t believe how excited I got about this toilet with its in-wall cistern! Who knew?! And it’s a Philippe Starck collaboration. What more can I say?!
BASIN: I love a lot about this basin, from its generous size to its white ceramic waste (so sleek) to its beautiful and simple curved shape (see above under bath choice regarding curves!). I also learnt from my last bathroom reno that it would be best to right align rather than centre it, giving more useable space to the left side. It’s a large sink (600mm wide) but it works perfectly on the 1200mm vanity. You can’t go wrong with an established brand like Duravit and once I told the staff at Bathe what I was after, they helpfully shortlisted a few for me and it was love at first sight!
I have so much more to share about choosing and working with our builder, our electrical choices (mostly fancy lighting!), getting the floorplan right from the start, but I’ll leave it here for today! I hope you find this useful!