Categories
Design Designers Furniture Homewares Interviews Styling

Modern heirloom furnishing and clever storage transform Newtown terrace

Tucked behind the bustling main drag of Sydney’s vibrant Newtown, this small 1980’s era terrace was transformed into an urban sanctuary recently by the talented interior stylist Jessi Eve. “The owner is a female entrepreneur that was looking to create a home that suited her social, laid-back lifestyle and mindful values,” says Jessi who deftly guided the transformation.

Lounge room
Lounge room

In keeping with the owner’s eco-conscious values, Jessi selected quality investment furniture and homeware pieces that are built to last; selections that shouldn’t end up in landfill as trends change. “We favoured ethically sourced, natural materials and supported local artisans and businesses along the way,” says Jessi of the quality Australian wares that pepper the home.

The master bedroom’s minimal timber furniture suite was handcrafted by surf coast duo Al & Imo Handmade. It sits atop a textured wool rug by Melbourne’s Armadillo & Co. whose rugs are also featured in the living area.  The lounge room’s stylish linen sofa is by the talented Aussie-based designer Sarah Ellison.

Master bedroom
Master bedroom

The dining table setting is by Aussie father and son duo, Icon by Design. “They have a strong focus on creating quality-crafted, timeless, designer-calibre furniture made with natural, ethnically-sourced materials, minus the high-end price tag,” says Jessi.

Dining room
Dining room

More local flags fly in the guest bedroom where planter pots and the guest bedside table/stool are by Pop & Scott, and the bed linen is by Cultiver and I Love Linen. “There’s a lot of local talent producing quality pieces that will stand the test of time, that were used in the making of this home,” says Jessi.

The lounge room looks out onto a lovely courtyard

When it comes to the materials palette, the cohesive selection includes timber, marble, linen, wool and pops of velvet. Jessi also disproved the old adage that ‘blue and green should never be seen’ with the colour combination proving a hit in the lounge room.

“I don’t agree with most of those rules. In fact, I also love a playful combo of orange and pink when the space calls for it! It’s all about balancing out those ‘louder’ elements with calmer ones,” says Jessi who paired deeper moodier jewel tones such as navy, emerald, maroon and mustard with pops of natural timber, warm white and soft grey.

Gorgeous coffee table details

Eco-conscious considerations aside, maximising the home’s small footprint was the other main focus of Jessi’s design brief. “Custom joinery was added throughout to ensure everything was absolutely fit-for-purpose,” says Jessi.

The entry way features a piece of built-in joinery that includes a mirrored coat-closet, shoe cabinet and storage bench surrounded by high open shelving that acts as a library. Talk about multi-tasking!

Entry
The entry features clever multi-purpose joinery

“In the guest bedroom, the bedside table doubles as a stool for the built-in dressing bench which can also be used as a laptop nook. The attic-style storage space, off the master bedroom, was transformed into a custom walk in robe with all the clothing, shoe and accessory storage required.”

Guest bedroom
Guest bedroom study nook

Another home highlight is the charming outdoor area that runs off the living room. “Ultimately, the vibe is casual yet considered, cosy and comfortable with a courtyard fit for an ambient dinner party with friends.”

Courtyard
Courtyard

Photography: The Palm Co.

For more

Categories
Architecture Design Designers House Tours Interviews Real Renos RENO ADDICT

North Bondi 80’s semi undergoes robust & timeless renovation

Home to a professional couple, their three young children and two lively dogs, this North Bondi semi-detached home was originally built in the 1980’s. Purchased almost exclusively for its location, the home has since undergone a highly considered renovation courtesy of architect Josephine Hurley. “When the client bought the home, it was all about the location as they knew they could work with an architect to remodel it and make it perfect,” says Josephine.

The kitchen and dining flows out to the rear garden

Key considerations included expanding the home’s liveable footprint, and improving its natural light and ventilation while making the spaces elegant, robust and timeless. “They spend a lot of time at home with their young family and they ultimately wanted a home that felt calm and relaxed,” says Josephine.

Bathroom
Shower recess: “The curved wall in the bathroom was a way of introducing something special into what is quite a restrained space,” says Josephine.

Key to the feeling of tranquillity is the neutral and consistent materials palette; white ‘kitkat’ mosaics, soft grey Italian terrazzo tiles, oak and v-groove joinery all bring gorgeous textural and tactile qualities to the home. “The tiling is consistent throughout the house. The white ‘kitkat’ mosaics from Surface Gallery feature not only in the bathrooms but also in the laundry and kitchen.”

Living room
Living room

Creating more liveable space was another key part of the brief to which Josephine responded by enclosing both rear balconies. “I reimagined the interiors to utilise every available space in what is a compact floor plan,” says Josephine. In another clever redesign, the first-floor hallway was transformed into a walk-in robe for the owner who had always wanted one, but didn’t have the space.

Master bedroom
Master bedroom
Child's bedroom
Child’s bedroom
Child's room
Child’s bedroom

The Qasair overhead extraction fans draw the eye in the kitchen; the matte black finish ties in with the black appliances. “The client enjoys cooking and was after a statement piece that also had great functionality,” says Josephine. And with so many family members, minimising clutter was essential; everything from wine to dog food has a designated storage space. 

Kitchen
Kitchen
Appliances hide behind v-groove joinery in the kitchen

The kitchen and dining spaces are elevated, allowing for full visibility and a strong connection to the outdoors. Retractable glass doors and timber bleacher steps overlook the garden and let the children and dogs run free.

“It’s always hard to select a favourite part of a property, however the combined kitchen and dining room is particularly successful as there is plenty of storage and natural light. It is a clutter-free, bright and naturally ventilated space where the family enjoys gathering together to cook, enjoy a meal and entertain with family and friends.”

One last look at that lovely inside/outside flow

For more

Photography: Tom Ferguson | Styling: Holly Irvine

Categories
Architecture Design Designers House Tours Interviews Real Renos RENO ADDICT

Monochrome heaven: a low maintenance luxury family home

Designed by architect Madeleine Blanchfield and constructed by One Up Building, this Sydney renovation is one of the most beautiful projects we’ve come across. Monochromatic in scheme, it’s elevated by brass and timber accents while polished concrete and specialty plasters seamlessly blend the original Arts and Crafts era home with its new extension. 

Lounge room
Fireplace
The fireplace is something else!

Located in Sydney’s beachside suburb of Coogee, the house is home to Brett and Libby Newman and their three teenage children, who were looking to create a home that was beautiful but functional too. “It has spaces and places we can come together as a family, and with large groups of friends, but we can also find our own space in the house as well,” says Brett.

The front of the home
Lounge
Sitting room

The home is a seamless blend of old and new; its monochrome palette working to unite the spaces. “We realised we needed some form of expression between old and new, so we provided a colour application to the new concrete stairs and the entire wall and ceiling which created a portal-like effect,” says Rick Simmons, co-founder of One Up Building, of the home’s sumptuous Portuguese plaster detailing. Offset with a brass wall sconce, the finish really emphasises the light’s beauty.

The stunning Portuguese plaster

With five family members, each with varying needs, the home’s spatial flexibility is highly prized. Everything from the children’s study needs to parental work commitments and parties can be accommodated easily, making for a very liveable home.

“We wanted a place that was beautiful, well designed, comfortable to live in but not high maintenance, over engineered or over designed. We didn’t want something that we didn’t feel comfortable living in,” says Brett, touching on the home’s understated, easy luxury.

Pool

“Nothing looks forced or purposely added without consideration. It is a simple thing – walking through a space feeling like it has been considered and was always meant to be. That’s how I feel when I walk through this home,” adds Rick.

Creating an air of casual sophistication wasn’t always easy though; the home’s staircase design proved a significant challenge. Originally designed as a steel spine, the heritage section of the home couldn’t hold the weight so Rick and his team had to improvise. “To realise the architect’s design intent, we modified the structure to create the same effect. Anything can be done; you just have to approach working with heritage and renovations with an open mind,” says Rick.

Staircase
Staircase

The design dedication certainly paid off with the family genuinely loving their home. “I’m proud of it, and we enjoy living in it immensely. This is a place I can see us living in for many years and enjoying as the kids go from teens to adulthood and then hopefully coming home!”

Master bedroom
Ensuite
Ensuite

For more on One Up Building

Photography: Anson Smart

Categories
Design DIY Expert Tips Interviews RENO ADDICT

IKEA hacks Australia: DIY built-in HEMNES cabinetry how-to

Would you love built-in cabinetry in your living room but balk at the cost? Well, you know we love an IKEA hack and this one, part of Naomi Findlay’s Carrington House reno, got us excited! So we asked her to share all the details!

Armed with some IKEA HEMNES glass door cabinets ($499 each), some trusty trades, pretty floral wallpaper and a whole lot of creativity, Naomi created a very expensive looking built-in cabinet in her design studio space for a fraction of the price of custom joinery. Here, she walks us through just how she did it (with a little help from her friends!).

The room before
Before
During
After
Naomi walks us through it with her builder Josh Ferris

Naomi’s detailed step-by-step:

1. First up you need to measure and then measure again. What is the width, height and depth of the space in which you want to install the cabinetry?

2. Find cabinetry you want to use and then look at how many units you can fit across the space. In my case, I didn’t have walls in place so had to account for all the extra centimetres that would be created before I could install the cabinetry.

3. Make sure to include a small amount of space (an extra 2cm onto the width of each unit) as you can always pack it out, but you cannot shrink your cabinets!

4. Prepare your walls. In this property, one wall was framed out and then gyprock was installed. For the wall on the other side, I had compressed cement sheeting direct stuck to the exposed brick. Why you ask? Well, I wanted four cabinets across the wall but wasn’t sure I had enough width. By direct sticking one of the walls it gave me the extra 30mm that I needed to get what I wanted. A great reminder that, when it comes to renovating, there is always a way around things.

Naomi with her builder

5. Get it wired. Light gives life to everything! And these cabinets were always going to be beautiful but functional too. So, I had our electrician wire up four library lights to sit above the top shelves and illuminate the cabinets.

I also wanted to minimise clutter in the rooms, so I had GPOS wires put into the locations where the bottom shelves are sitting.  When the cabinets were installed, I was then able to pull these through the back wall of the cabinets. This is a great way to have charging docs and devices tucked away from sight, along with all the cords and mess.

6. Build the cabinets and set them in place along the wall.

7. Frame down the bulkhead from the ceiling to provide the support and opening needed for open shelves above the cabinets. Make sure you chat with your builder to check if you need a central support across the opening. You want to make sure that the shelves can support lots of your favourite heavy books and magazines.

8. Block out in between the legs of the cabinets (if they are on legs), with some simple framing timber to make sure you have something solid to fix your skirting board to.

9. Get the plasterers back to gyprock, set and sand the open shelving above the cabinets.

10. Attach the skirting board to the front of the cabinets and fix it into the framing timber blocks inserted as above. I used Intrim Primed FJ Pine 135mm x 18mm SK498 profile skirting board for this job.

11. Putty up the nail holes in the skirting to ready it for sanding and painting.

12. Get some gold metallic spray paint and spray each of the handles gold. Once they are dry fix them in place on the cabinets.

14. Next step is to deal with the small gaps between each of the units. To do this you have to make sure that whatever you use does not impede the doors opening and closing. I chose a simple D mould that was glued and tacked in place.

15. Paint, paint and paint! I used a low sheen option to match the walls on all the shelving, except for the timber trims where I used a semi-gloss oil-based paint. I find the latter takes the wear and tear of heavy use that little bit better.

16. Adding wallpaper is the final touch that will give that real wow factor and a truly personalised feel. Remove all the shelves from the inside of the unit, then following manufacturer’s instructions, apply your favourite wallpaper to the back surface of the glass door section. Replace the shelves and you are done!

For more on Naomi’s Carrington House reno

Categories
Design Designers House Tours Interviews Kitchens Real Renos RENO ADDICT

A stunning sculptural blue kitchen on Sydney’s Upper North Shore

Located inside a grand three-storey home on Sydney’s Upper North Shore, this newly renovated kitchen certainly looks right at home in such a salubrious setting. Featuring sculptural curves and multiple luxe finishes, plus two sophisticated shades of blue, the kitchen’s talented designer Lynne Bradley has really excelled herself this time. 

Lynne Bradley kitchen renovation
Just, wow!

“I used two contrasting blue colours for the purpose of creating scale, depth and design interest,” says Lynne who balanced the colours (Dulux’s Oxford and Prestige Blue) with two bench surfaces; New York Marble from WK Quantum Quartz and Dekton Sirius in black.

Lynne Bradley kitchen
Curved marble detailing mirrors the curve of the nearby island bench. The door hardware is from Style Finish.

“The use of luxury materials, sculptural forms, curated appliances, beautiful lighting and generous storage with brass hardware, all combine to create a uniquely designed kitchen tailored perfectly to this home,” says Lynne. Standout fixtures include a pair of stunning Lee Broom pendant lights that hang over the island bench; they provide ambient and task lighting and contrast beautifully with the dark blue overhead cupboards.

We love the pops of brass

With two adult children still living at home, and grandchildren often visiting, the home’s owners love to entertain with the kitchen at the heart. And given the kitchen’s location in an open plan living area, Lynne was careful to conceal as many appliances as she could with a dedicated appliance cupboard. 

Lynne Bradley kitchen
Look at that gorgeous dedicated appliance cupboard on the left

“It’s a highly considered cupboard with pocket doors and LED lighting. Also, being fully lined in stone and Dekton, it provides easy maintenance as well as visual impact when opened,” says Lynne.

Grazia & Co stools and sculptural homewares really complement the space

The kitchen also boasts a highly practical breakfast bar area complete with discrete electrical equipment charging space plus two ovens; one for baking and one for savoury creations. “Ultimately I’m most proud of balancing the materials and colour palette as well as creating a sculptural and highly functional kitchen that my clients adore.”

Photography: Anson Smart

For more on Lynne Bradley Interiors 

Categories
Bathrooms Bedrooms Design House Tours Interviews Real Renos RENO ADDICT The Block

From laundry to studio: A former Blockhead’s impressive small space reno

“We got really inspired by small space living trends and how people all over the world have downsized and created sustainable spaces where you have what you need, but not in excess,” says Ash Vos, wife of former Blockhead Simon, when discussing the couple’s latest project, a studio created out of a laundry and existing small bathroom at their Coffs Harbour home.

The new studio

“We lived in the attached house for two years as we designed and planned the renovation and lived in the renovated laundry-to-studio while we did the demo and structural renovations upstairs in the main house,” says Ash.

Lounge room

With increasing house prices, it seems everyone is looking to get the most out of their square meterage without investing too much, and this project is a great example of that. “Most people want to add extra value to a home, or increase its liveable footprint, without making too many structural changes,” says Ash who worked within the laundry’s existing shell to create a highly functional, useful addition to her home.

Kitchen
Kitchen

As for the studio’s initial design vision, it was conceived when the couple first bought the home. Very large in size for a laundry, and with an existing bathroom plumbed in, it was an obvious space to add value. From additional income to a fabulous guest area for family, the small but gorgeous space shows just what can be achieved if you maximise a home’s existing features effectively through renovation.

Our building designer Dan Bowland came up with the idea to build the bed off the frame and that was a little ‘aha’ moment in the design process,” says Ash.
“Our building designer Dan Bowland came up with the idea to build the bed (at rear) off the frame and that was a little ‘aha’ moment in the design process,” says Ash. 

As for the aesthetic, Ash describes it as an Australian take on Palm Springs. “Sort of mid-century modern with lots of colours,” she adds. Intrinsic to the overall feel is the gorgeous solid timber joinery that features throughout; a nod to the hardwood timber floors that came with the original home.

Vanity
The ensuite’s custom timber vanity is beautifully offset by those gorgeous sage green tiles.

“For us, timber is both beautiful and timeless. It’s a natural finish that adds character and stands the test of time,” says Ash who engaged Loughlin Furniture to create the studio’s custom vanity which, with more than adequate storage, makes the most out of the small bathroom space.

Ensuite

Constructed out of spotted gum, the timber finish underpins the natural palette and modern Australian feel the couple were going for. “The spotted gum had the right colours to complement the green tiles, and we were able to customise the size to fit the small studio area.”

Shower

Photography: Ben Adams at Blank Ave Studio

Categories
Kitchens RENO ADDICT

Almost half of Aussie homeowners renovated last year, survey shows

Median spend for home renovation projects stabilised at $20,000 in 2019, according to the annual Houzz & Home Australia survey of more than 4,500 Australian respondents. At the higher end of the market, 10% percent of homeowners spent $150,000 or more on their home renovations.

Danny Broe Architect. Image: Mark Wilson

Nearly half of homeowners reported a renovating project in 2019, (48 percent), tackling nearly three interior rooms on average. When the study was fielded in early 2020, planned activity for the year remained consistent with the previous year, however, the impact of the coronavirus pandemic on planned renovation activity remains to be seen.

Baby Boomers (ages 55-74) accounted for nearly half of renovating homeowners in 2019 (45 percent), an increase from 2018 (40 percent). Gen Xers and Millennials follow in renovation activity with nearly 39 percent and 14 percent of home renovators, respectively. Gen Xers and Baby Boomers reported the highest median renovation spend in 2019 at $20,000 and $18,500 each. Millennials followed, with a median spend of $12,000. Kitchens commanded the highest median spend at $15,000, a decline from previous years, followed by master bathrooms ($13,000) and guest bathrooms ($10,000), which both experienced increases in median spend compared with the previous year.

“Following significant growth in home renovation activity over the past few years, we’re seeing the market settle somewhat in terms of activity,” said Marine Sargsyan, Houzz senior economist. “That said, project scope and spend have remained stable and we’re seeing Baby Boomers continue to bring consistency to the market as they pursue projects that will allow them to age in place.”

More than half of renovating Baby Boomers do not have plans to move out of their homes within the next decade. Baby Boomers and Gen Xers were motivated to pursue a home renovation project because they’ve wanted to do it all along and finally had the time (39% and 30%, respectively) and financial means (42% and 39%, respectively). The biggest motivation for Millennials was to customise a recently purchased home (38%).

Image: Renotech Building

COVID-19 impacts home improvement

The Houzz & Home survey was fielded prior to the declaration of the coronavirus pandemic, between February and March, 2020. At that time, nearly half of homeowners planned to continue or start renovations this year (48%), and nearly one-third of homeowners planned to make repairs (29%).

Subsequent surveys have shown that four in five homeowners who were in the midst of a project at the start of the pandemic were able to continue with renovations. That said, some homeowners have opted to delay certain elective renovations due to implications related to social contact, labour and material availability and personal discretionary spending,” said Marine. “Deferred maintenance will accrue during this period, setting the stage for a renewed burst of activity following the pandemic.”

The Den Interiors. Image: Suzi Appel Photography

Planning takes time

Preparing for a renovation in 2019 took homeowners longer than it did to actually renovate, on average. While construction took between 2.4 and 5.7 months on average for different types of projects, the planning phase took roughly twice as long. Kitchens require lengthy planning, averaging 11.1 months, compared with bathrooms (9.2 months). Surprisingly, entry, foyer or mudrooms, which typically command a smaller square footage, took nearly eight months on average to plan.

Homeowners look to professionals for help

Nearly nine in 10 homeowners hired a home professional for renovation projects in 2019. Baby Boomers and Gen Xers were most likely to hire a pro for their project (89% each), followed closely by Millennials (88%) who experienced a five percentage point growth in pro hiring compared to the previous year. Electricians and plumbers were the most common renovation professionals hired by renovating homeowners (60% and 45%, respectively).

Home offices get to work

While kitchens, living rooms, bathrooms and laundries continue to be the most popular rooms to renovate (23, 20, 17 and 17 percent, respectively), home offices were added or upgraded by more than one in ten homeowners in 2019 (11%). Millennials were more likely to pursue a home office project (15%) than Baby Boomers (9%).

Projects funded by savings

Cash from savings was by far the most common form of home renovation payment (80%). The next most common source of funding was credit cards (20%), which were more commonly used by Gen Xers than the other generations.

The Houzz & Home Survey

The annual Houzz & Home survey is the largest survey of residential renovating, building and decorating activity published. The survey covers a wide range of renovation projects in 2019, from interior renovations and additions to home systems, exterior upgrades and outdoor projects. Data gathered includes historical and planned spends, professional involvement, motivations and challenges behind building, renovation and decorating projects, as well as planned activities for 2020. The 2020 study includes more than 4,500 respondents in Australia alone, providing insights into the home improvement activity of the millions of users of the Houzz site and mobile apps.

The Australian Houzz & Home Survey was sent to registered users of Houzz and fielded February-to-March 2020.

Read the full report

Houzz is the leading platform for home renovation and design, providing people with everything they need to improve their homes from start to finish. On Houzz, people can find design inspiration, research and hire home professionals, and get advice for their projects. For home professionals, Houzz Pro ( houzz.com.au/pro ) provides an all-in-one software solution that empowers industry pros to stand out, win clients and manage their projects efficiently and profitably.

Categories
Real Renos RENO ADDICT

Carrington House: room reveal 3!

We’ve been following the jaw-dropping renovation of Naomi Findlay’s stone cottage, Carrington House, for a few months now. Today, she shares our favourite room yet: the living room! Over to you, Naomi…

Welcome to the living room at Carrington House. It is finally done and I have to claim it right now, as the hardest room to date, without doubt. This room has been such a challenge. I mean, we had a swamp under the floor. We had a fireplace that was leaning, a mantle that was falling over, walls that were falling apart, and we had the challenges of bringing in those big doors that everybody is talking about.

To bring this together, I needed a really strong team. And to be honest with you, it was a huge challenge in that there were times that our team had to come back and forth, back and forth. The fireplace wall especially, was such a team effort; intricate detail with the plasterers, the builders, the painters, the tilers. You name it, everyone had a hand in it!

The finishes in here are much more neutral than in room one or room two (links at the end of this post). I’ve definitely brought some of the blues in here so that they all talk to one another, however, this room is all about layers.

For starters, we have the vinyl planks floors that are so textured, and then we have the beautiful Intrim trims: skirts, chair rails and picture rails. And then, to give that really warm detail at a low level, I’ve got grasscloth wallpaper, which I picked up from my local Bristol store.

I have so many favourite things in this room; everything from the beautiful white Tribeca tiles which adorn the chimney, and let’s face it, between the sealer and the render underneath those tiles, and then the tiles around the chimney, it’s actually holding it together! The fireplace is flanked by unbelievably large format slab tiles from Beaumont Tiles.

For me, this isn’t only about creating something beautiful, it’s also unbelievably practical. It means no matter who sits at those bench seats either side of the fireplace, I don’t have to worry about oil from their hair, makeup, or dirty hands, spoiling it! It’s going to be so hard-wearing and magnificent to look at.

My next favorite thing is the giant doors. I just love the scale that they play with. I love the fact that the room’s quite small (it’s actually a traditional 1880s living room size, nowhere near as big as our current living room sizes) so I’ve played with the scale by making these absolutely huge doors. Between the huge doors and the massive pendant light, it’s a great example of playing with scale in a space. A small space doesn’t mean that everything in it has to be tiny.

I adore the lounges. One of the challenges that we often have when we’re furnishing older homes is that real juxtaposition where a lot of the furniture that is available on the market is either too old fashioned and not practical, or it’s too modern and just looks silly in a really old home. But I lucked out when I found these from Brosa and ordered them online, which is so convenient.

I got a Diana three-seater and two Diana armchairs in a contrasting colour. I love the level of detail, the studding on them, and the textured linen, which is going to be so forgiving when it comes to marks and scuffs. And I adore the fact that there’s there’s a nod to yesteryear, yet they’re super comfy and they fit in with this traditional home perfectly.

Another favourite in here is the custom fabric I designed from a William Morris design. I had it printed and got some cushions made. It’s really lovely, when you have a space, to have a touch of history or a touch of you. It’s beautiful to be able to include you and the things you love in a space.

The three biggest challenges, without a doubt, were the swamp, the floor and walls, and the fireplace. A huge shout out to my team that worked on the fireplace with me: Ferris Building, Newy Painting Crew, Hunter Lining Projects and Pachira Tiling. Check them out. They were all so considerate of one another working on this.

The icing on the cake in this room is that I’ve actually been able to reinstate a form of fireplace. It’s not an open fireplace, but with the help of the team from Kalora, I have an inbuilt solution that is going to keep this room and the rest of the house toasty for the coldest winters to come. I chose to install an inbuilt system because I didn’t want the mess of an open fire, I wanted the beautiful feeling of being able to see fire, and the ease of installation into an existing chimney, which meant that I didn’t have to go about repairing the really old one.

The one thing I would have changed is I would have been ultra prepared and I would have ordered my rug seven months ago, pre-COVID, which would have meant that it arrived. Instead, I’ve had to make do with one that I had. It’s not perfect, which upsets me a little, but it still looks great!

Well, that’s it. The living room is a wrap. I hope you’ve really enjoyed the journey of this room with me and with my team. It’s certainly been one! We’ve had lots of ups and lots of downs. The next stop in this house is the design studio I’m creating to work from, and then we have some exciting times ahead of us when we start phase two of Carrington House, the extension. Thanks for joining me.

For all the supplier details and more behind the scenes!

Categories
Expert Tips RENO ADDICT

Move out during renovation or live through it? That is the question!

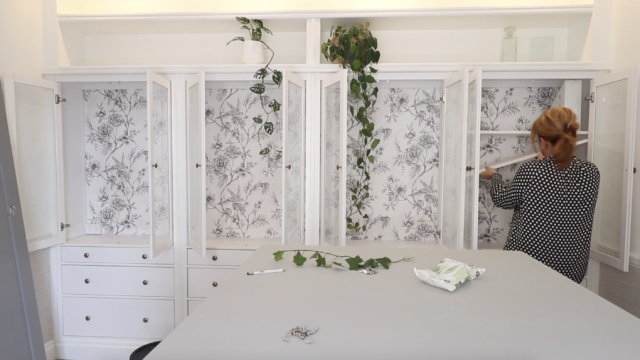
To move out or stay living in? That is the question when renovating. Stay and navigate your way around a barrage of builders walking through your home (risking dust and unintended privacy breaches – eep!), or do you move out – take the extra expense of rent, and be pleasantly out of the picture while the work gets done?

Anna Williams, founder of Your Beautiful Home, says her clients ask her this all the time! “If you ask the builder, the answer will be a resounding yes! But this is a significant financial decision so let’s review the pros and cons.

“Why does the builder want you to move out? If a family lives in during a renovation there is a lot more for the builder to consider. The site needs to be perfectly safe when the builders pack up and leave each day – even more so if there are children around.

“This means every stray nail and piece of sharp timber needs to be tidied away every day. Builders need to dedicate half an hour at the end of each day to do this when families live in, and half an hour again in the morning to unpack tools and set up again. This takes out 2.5 work hours out of every week when they could be building your house. Across a six-month build that’s a loss of productivity of almost nine days.”

Anna suggests asking yourself these questions when deciding what to do:

Can you afford to rent?
As much as most people would prefer to move out and avoid the chaos this may not be an option financially. Six to 12 months’ rent adds tens of thousands to your renovation cost.

What is your level of tolerance for dust/noise/tradies in the house from 7am?
No matter how well you seal up the areas you’re living in, the fine building dust gets everywhere. Tradies will be right there when you roll out of bed looking less than fabulous and are busy trying to wrangle the kids to school on time – and there’s nothing quite like a hammer drill in the room next door when you’re trying to get a toddler to sleep.

Will you be able to have basic cooking facilities/a working bathroom/enough space with the children?

Is it really realistic for you all to live in one room with just a microwave, taking showers at a friend’s house or the local surf club?! Some people relish the challenge of ‘camping’ in the living room – others will struggle. The financial consideration is major, but you also need to keep your sanity through the renovation.

If you do decide to stay, these are Anna’s top tips for living on site:

You really need to be separated off from the construction zone – ideally you and the builders would have separate entrances to the house so you’re not getting in each other’s way.

Try not to chat to the builders for hours at a time! This can be awkward for them – everyone loves to talk about what’s happening with their house and see how it’s being constructed, but don’t get in the way of progress. It’s better to arrange a set time for a weekly site meeting and ask all your questions then.

I have lived through three renovations on site and moved out for two. For us, moving out was a great option when we were still living close to school/work and the building site. It’s much more civilised and you can still invite friends over on the weekends.

Living on site with young children and pets was certainly an adventure! Sleep times were challenging and we couldn’t even use our backyard to sit outside for lunch as the builders were there cutting timbers etc. These days, with all the children at school, it’s easier as the boys are out at school all day, then the builders leave around 3.30pm, just when the boys arrive home. Given the choice though, I’d move out every time if budget permitted – it makes for a happier home life!

CASE STUDIES

1. Living in – Michelle from Allambie Heights, Sydney (couple, no kids)

Why did you choose to stay in the house?
100% budget. Well actually, probably 90% budget and 10% aversion to spending Saturdays looking for a rental property and then moving! I feel that, even though we are inconvenienced slightly during the build, it’s far less disruptive to our lives staying in our home.

What was the overall experience like?
We have just moved into the camping phase, as in we no longer have a kitchen, and so far it’s been totally fine. Our builders have been respectful and communicated well about when to expect people on site, which is generally after we have left for work anyway. They haven’t done too many Saturdays so most of our weekends have been uninterrupted and they run a very tidy work site so dust and dirt is at a tolerable level. It helps that my partner has developed an obsession with sweeping… who knew!

Would you recommend it?
100% would recommend and would absolutely do it again. We’re lucky to be in a position where we have no children in the home though and, I’m not going to lie, it would have been a lot more fun during summer.

Any surprises?
COVID-19 was a big one! We were overseas when the pandemic hit and had to self-isolate when we arrived home. The builders were very accommodating and worked around our situation. It was extremely odd and uncomfortable but we kept reminding ourselves that it was just a moment in time and it quickly passed.

Positives?
I love coming home from work and seeing progress, especially when it’s something big like windows going in or walls being removed. It’s super exciting. It also enables us more frequent on-site communication with the builder. Additionally, because we aren’t under any financial pressure from paying rent, we feel totally relaxed about the completion date.

Negatives?
Sometimes when they are busy on parts of the house you can’t really see, like the roof, or they are held up with weather, it feels like everything is on a go-slow which can be a bit frustrating. Being that up close and personal if the builders run into unexpected problems can also be a bit stressful. Sometimes out of sight out of mind can be a good thing!

Any tips for those contemplating living in?
Just live with the essentials and get rid of as much stuff out of the house before you start so you aren’t constantly moving things around. Tarps and blankets: have plenty of both. Make sure your builder has a good plan and well defined timeframes laid out for when each stage will happen so you are well prepared (mentally and logistically).

2. Moved out, Amanda from North Balgowlah, Sydney (family with two young children)

Why did you choose to move out during your renovation?
Our builder said we’d have to move out for at least some of the build and if we stayed there throughout, it would slow things down. Also, with small children, staying during a major renovation wasn’t really an option with the amount of work we had planned.

What was the overall experience like?
Not having to live through the mess and chaos (along with all of the other stress involved in renovating) was a lifesaver. We lived in a smaller townhouse and we actually loved it – less cleaning and maintenance! Moving twice in a short period wasn’t fun and it did put extra pressure on financially, but it was worth it overall.

Would you recommend it?
With major work and small children, I would definitely suggest moving out, if at all possible. If we were doing smaller-scale work, we would try to live through it.

Any surprises?
Loving the smaller space (depends who in our household you’re talking to on this one)! We also made amazing new friends in our neighbours where we were renting.

Negatives?
Not being on site meant things fell through the cracks that wouldn’t have done if we were living through it.

Any tips for those contemplating moving out?
Ensure you’ve budgeted for it (and added on a few additional months, which seem to be inevitable). Try to find a rental close to your renovation so that traveling back and forth isn’t an issue. Consider proximity also to school/daycare/work – sometimes a little extra distance can have a big impact on your day-to-day.

3. Moved out – (lived with relatives) Jacqui from Roseville, Sydney (family with two teenagers)

Which rooms were being renovated?
We are renovating our kitchen dining/family room, three bathrooms and landscaping the yard.

Why did you choose to move out during your renovation?
We have renovated before and knew that if we got out of the way the builders would be able to get more done quickly rather than work around us. The prospect of not having a kitchen during the winter months as well as having to share bathroooms with teens was also enough motivation to move out! We were fortunate to be able to stay with my husband’s father who lives close by.

What was the overall experience like?
So far so good! Our renovation is not yet complete and we are still living with my father-in-law. Fortunately the home is large enough to accomodate us comfortably. We have a large living room space to ourselves where we have set up work from home desks and our own TV that we brought with us. Covid has made things a little stressful, especially living with elderly, more susceptible people. We have had to be extremely vigilant with hand sanitiser and washing hands!

Would you recommend it?
Yes I would absolutely recommend moving out if you can work it into the budget. Not living amongst builders, dust and the various smells on a building site has made our renovating experience a lot more pleasant!

Any surprises?
That we all get along really well!

Positives?
The kids have been able to spend more time with their Grandad.

Negatives?
It’s always tricky cooking in someone else’s kitchen! Not only do you not know where things are, but you’re in their space.

Any tips for those contemplating moving out?
If you are moving in with family I’d recommend bringing your own fridge (if there is somewhere to put it!). I find this makes shopping a lot easier for me and for the kids to go and grab food without me worrying that my teens are eating my father-in-law out of house and home! Given it’s been during the height of a pandemic, I think we are having as good an experience as we can possibly have, but I am definitely excited to get back home and have my own space again!

For more on Your Beautiful Home

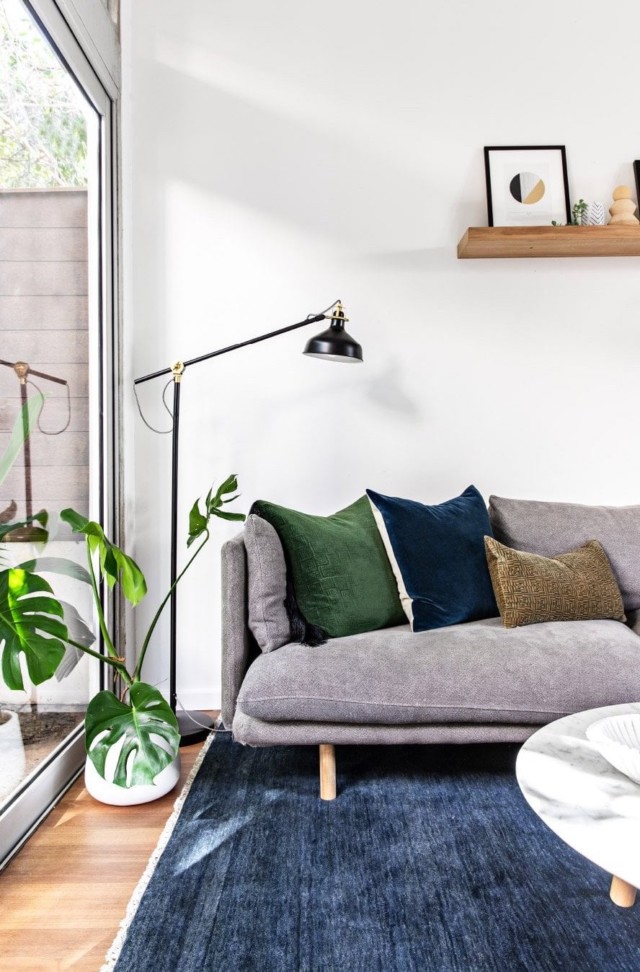
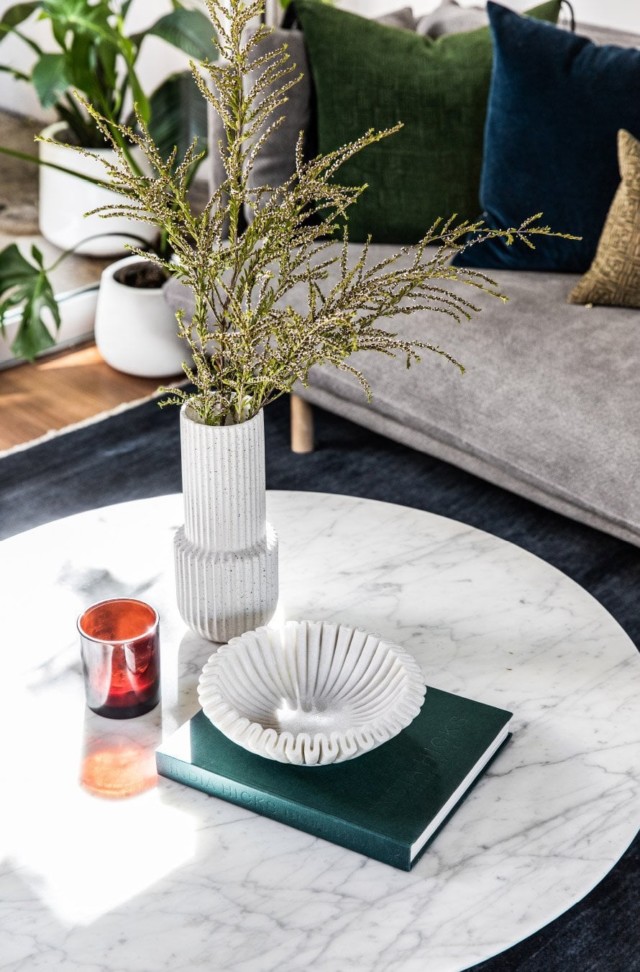
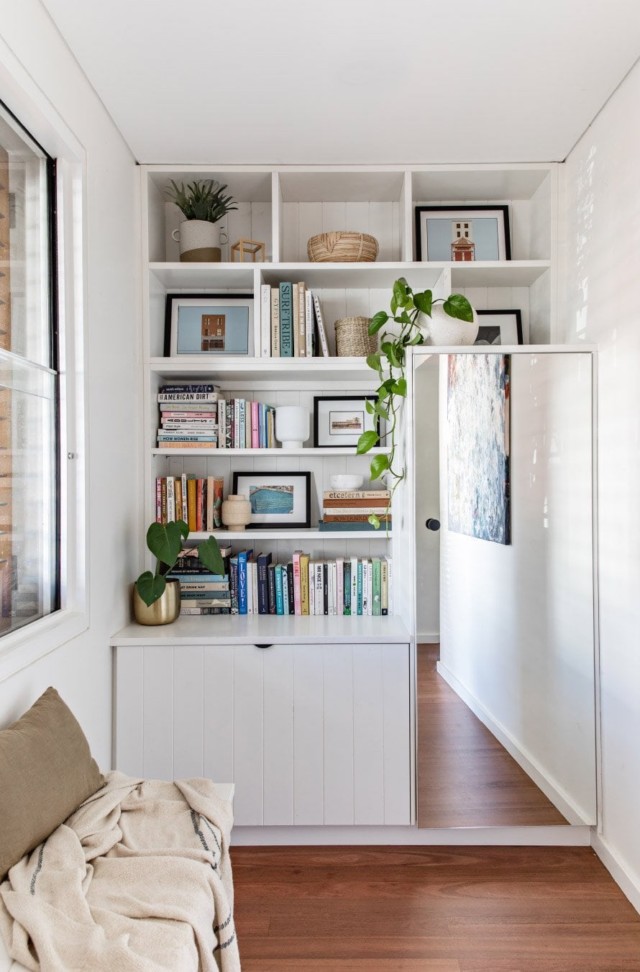
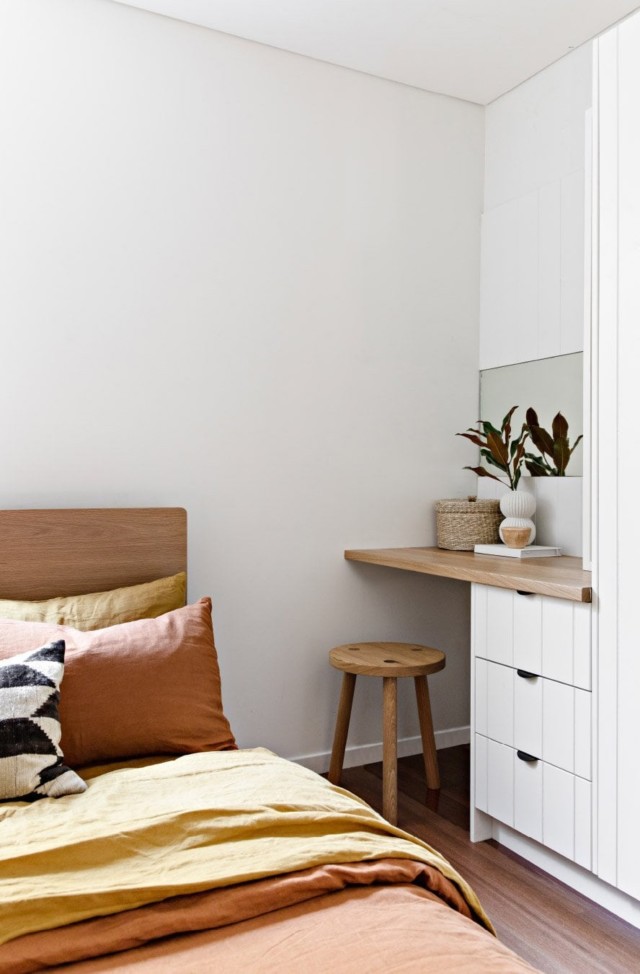
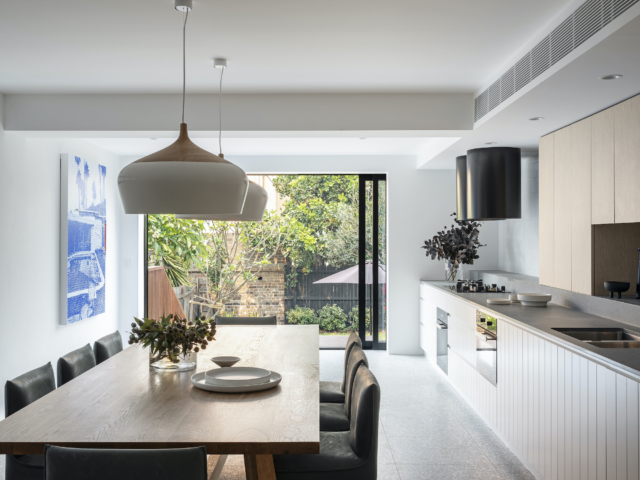
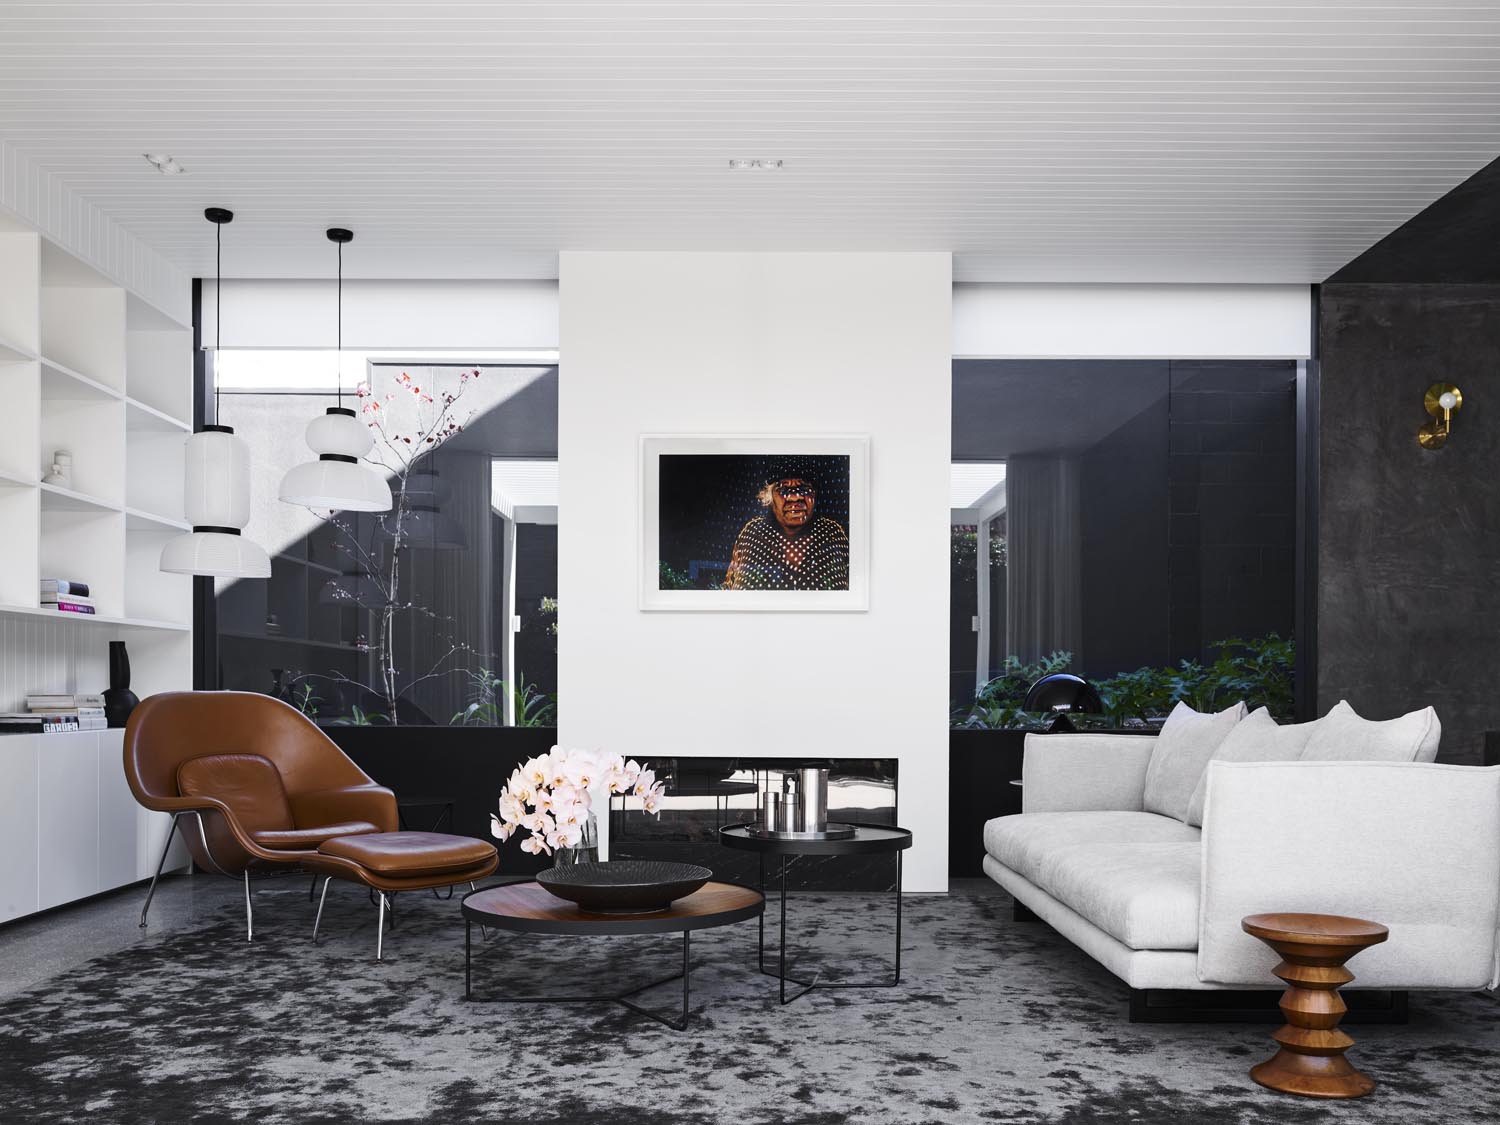
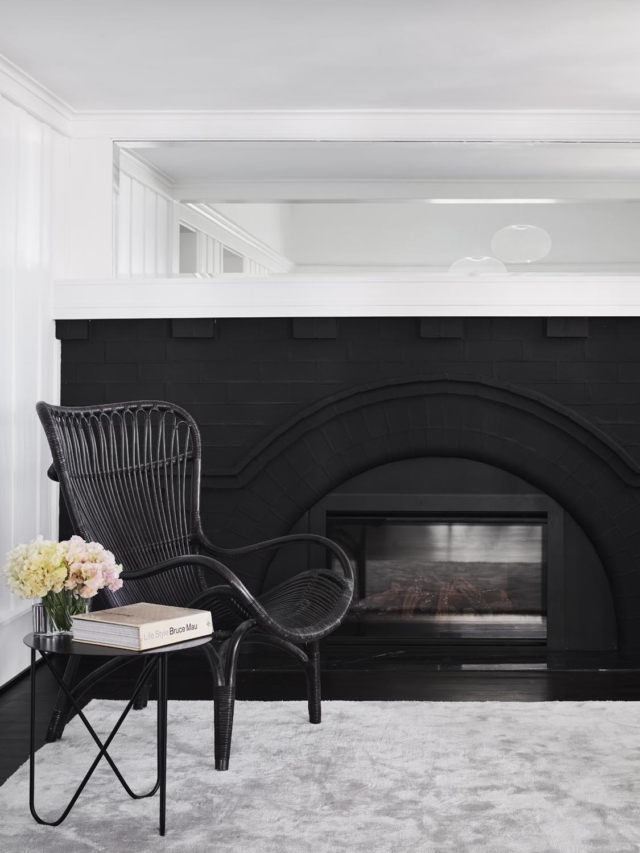
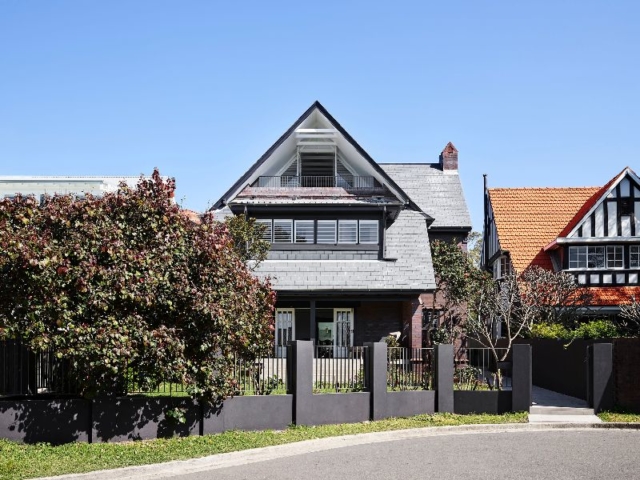
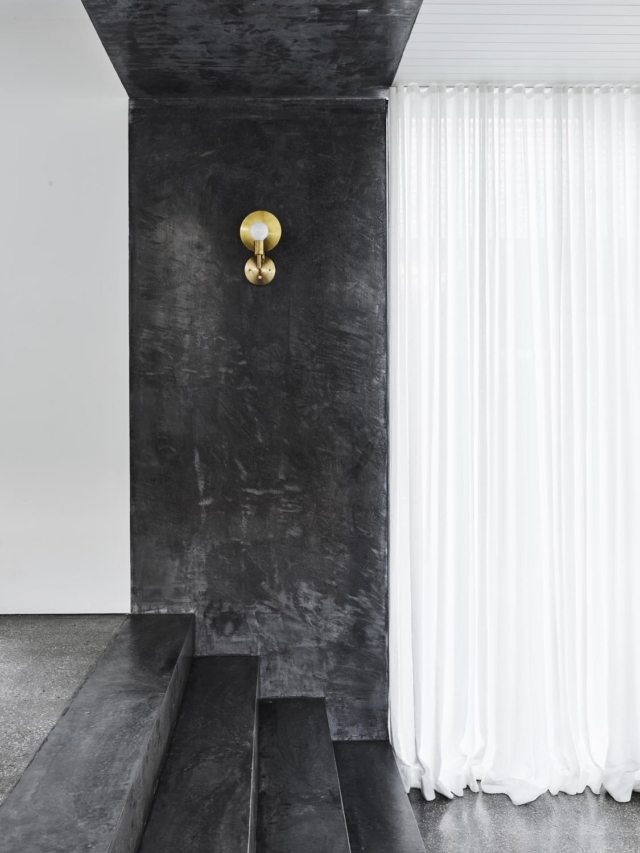
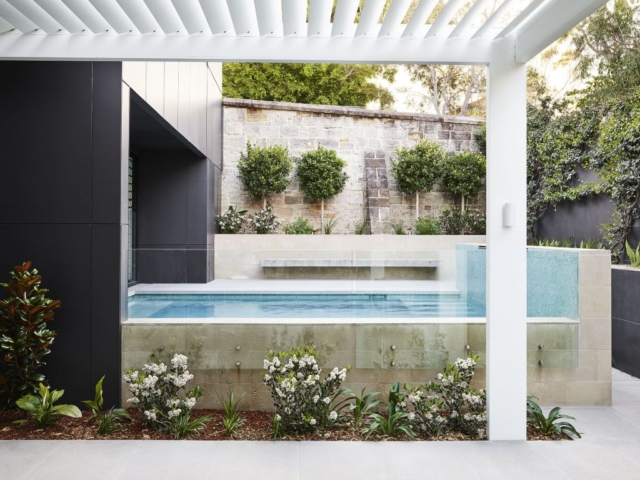
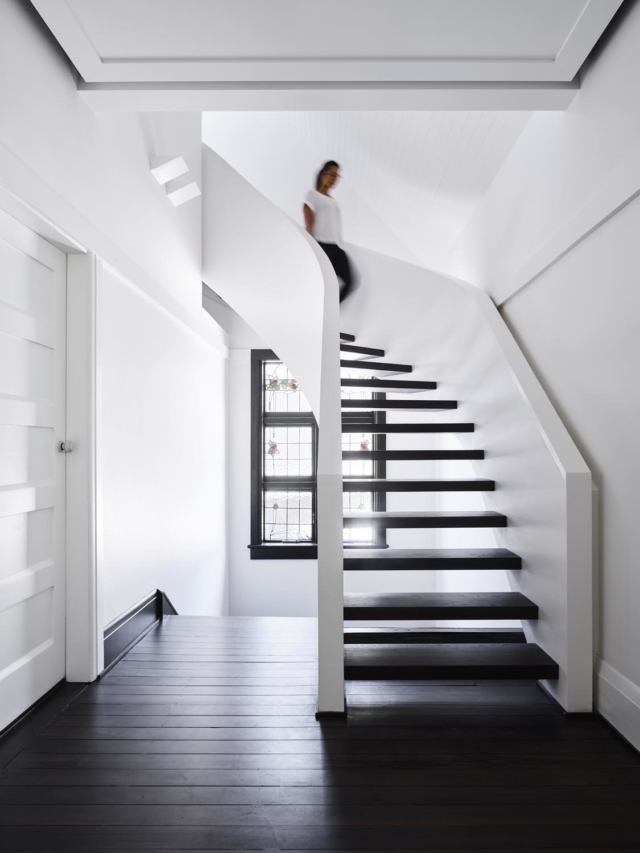
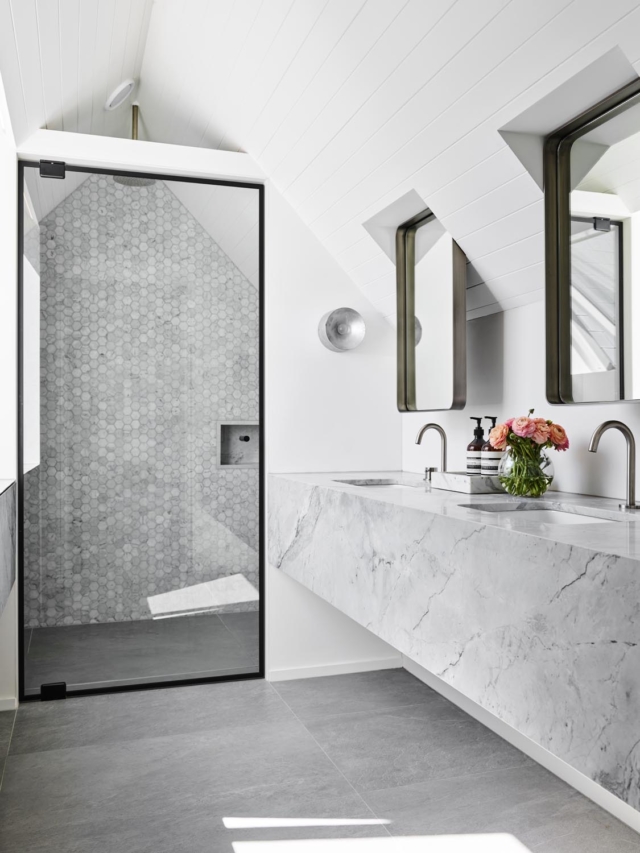
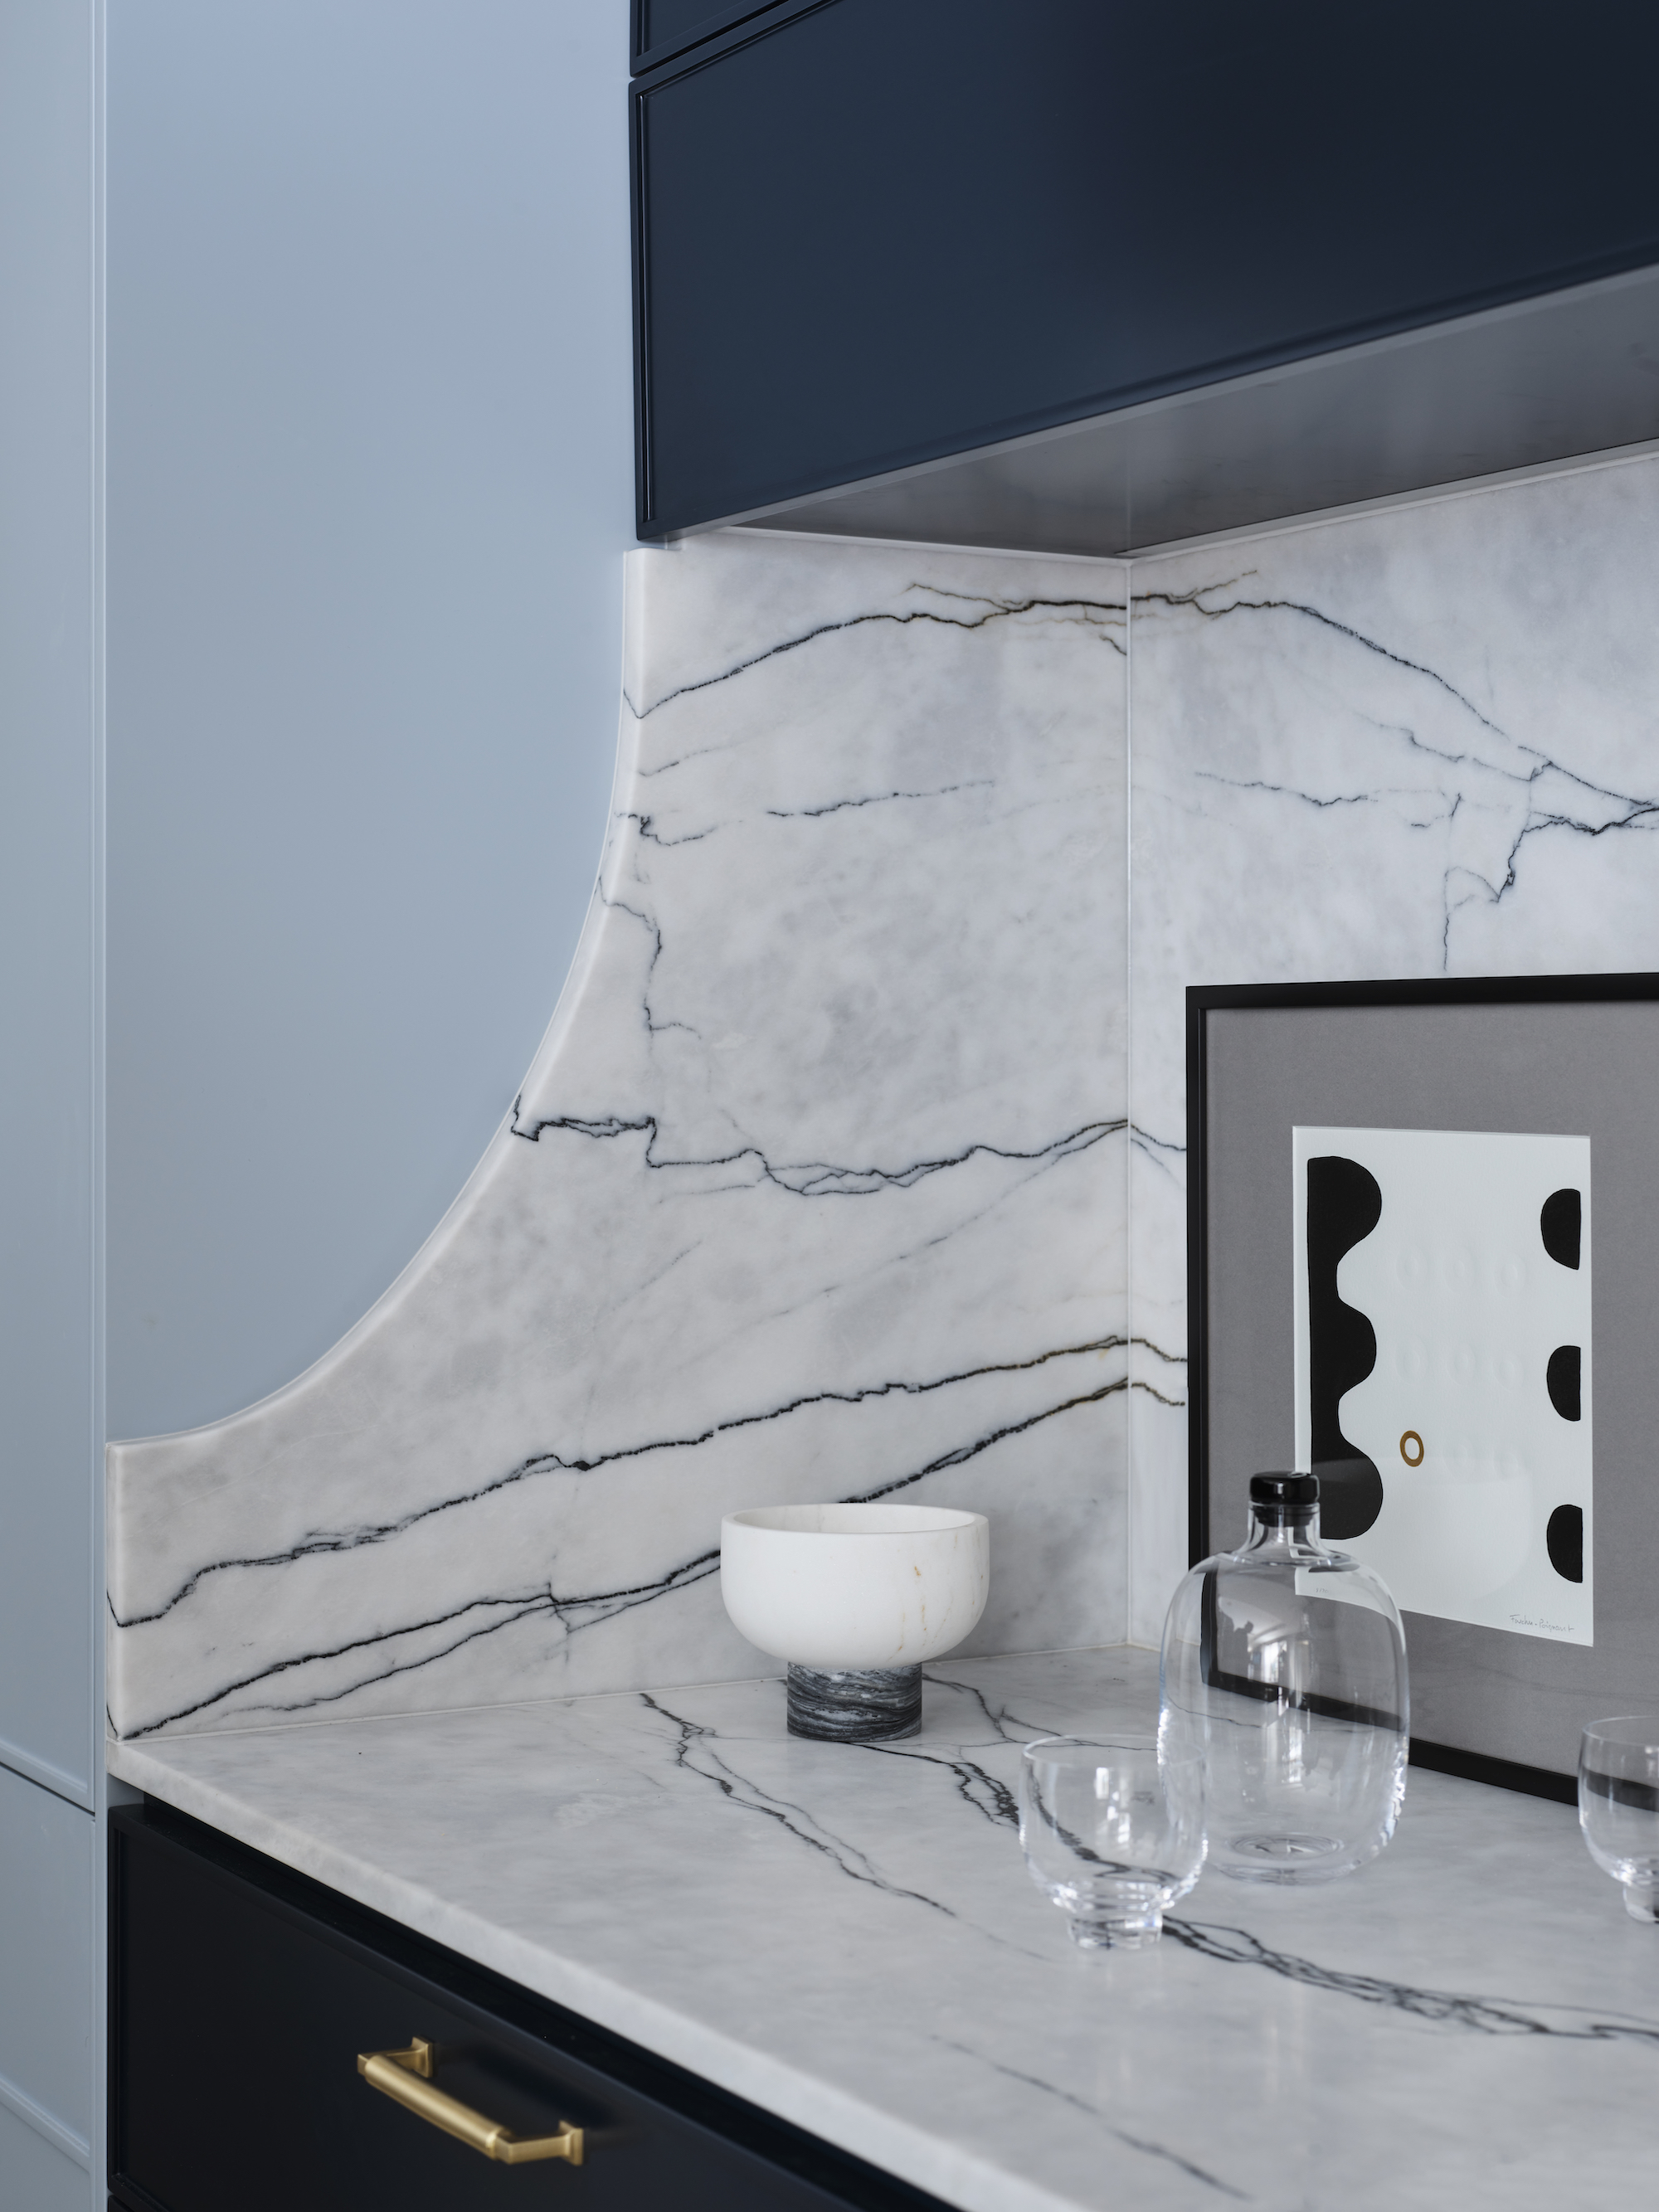
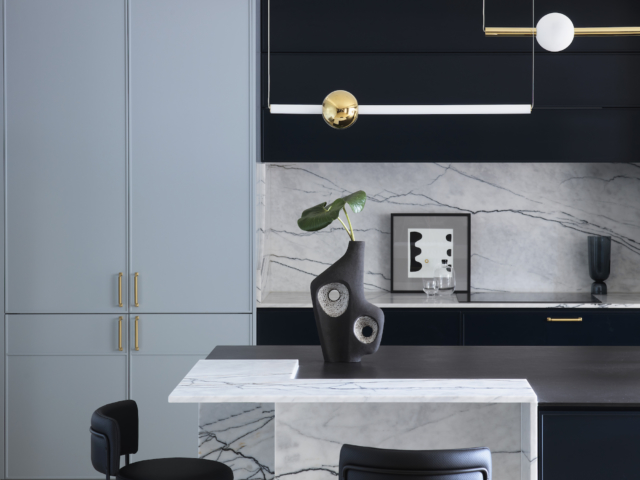
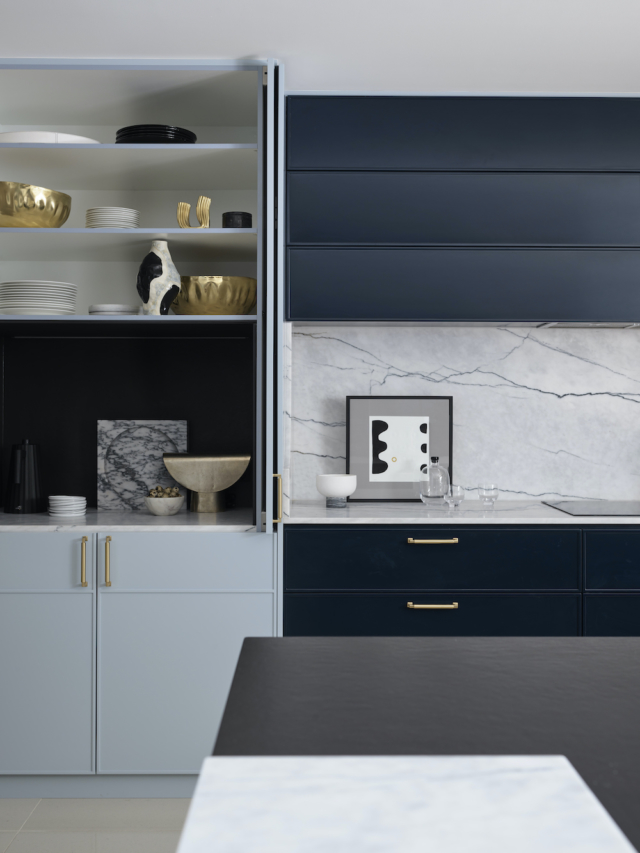
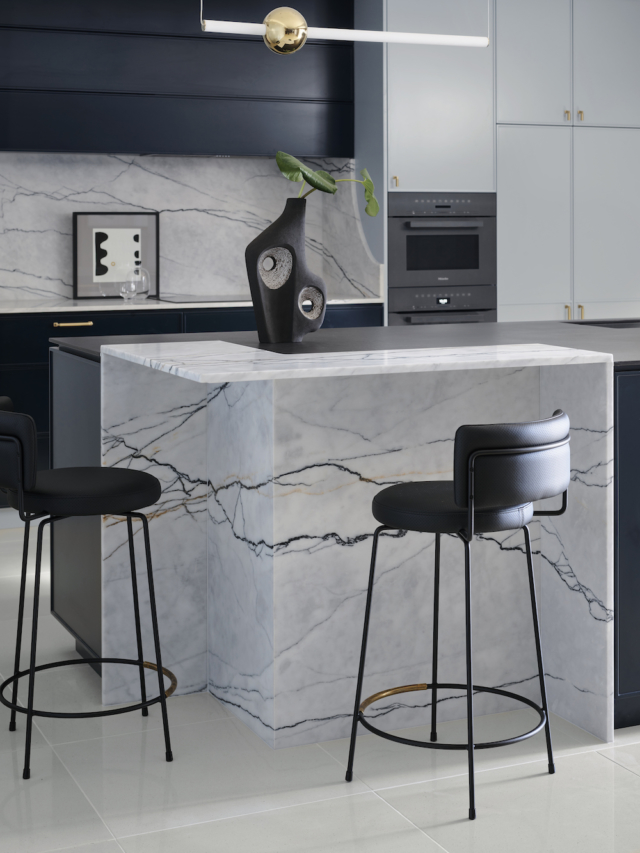
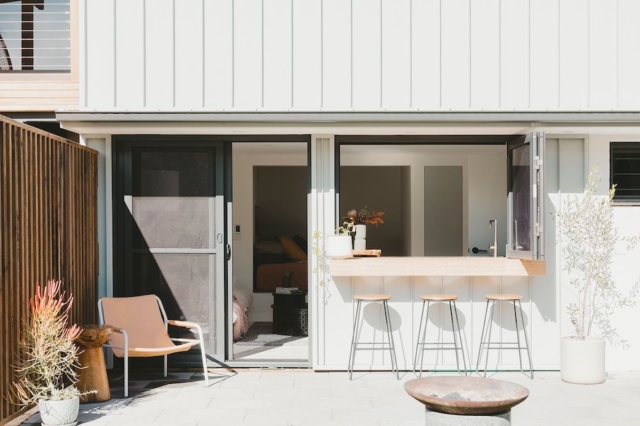
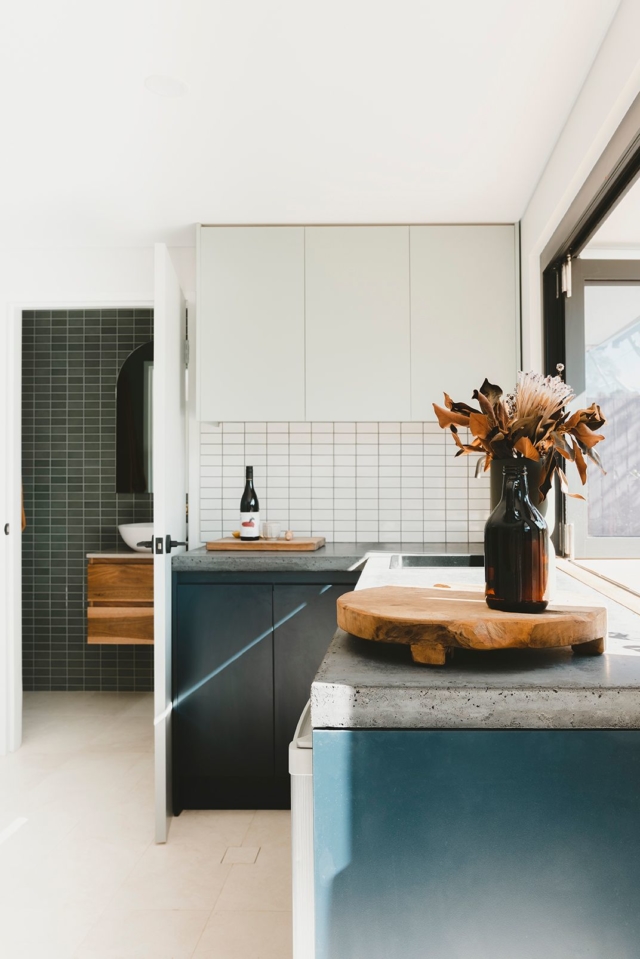
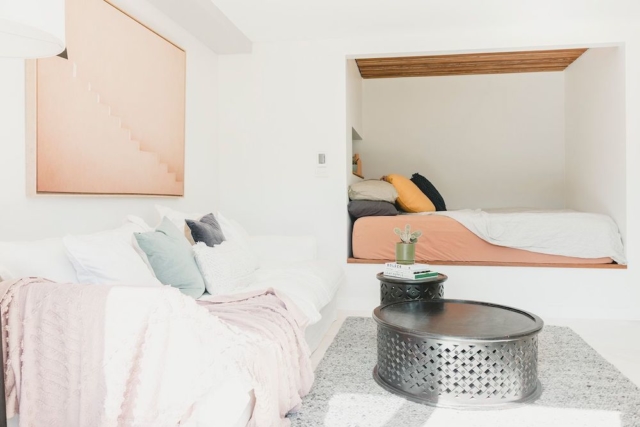
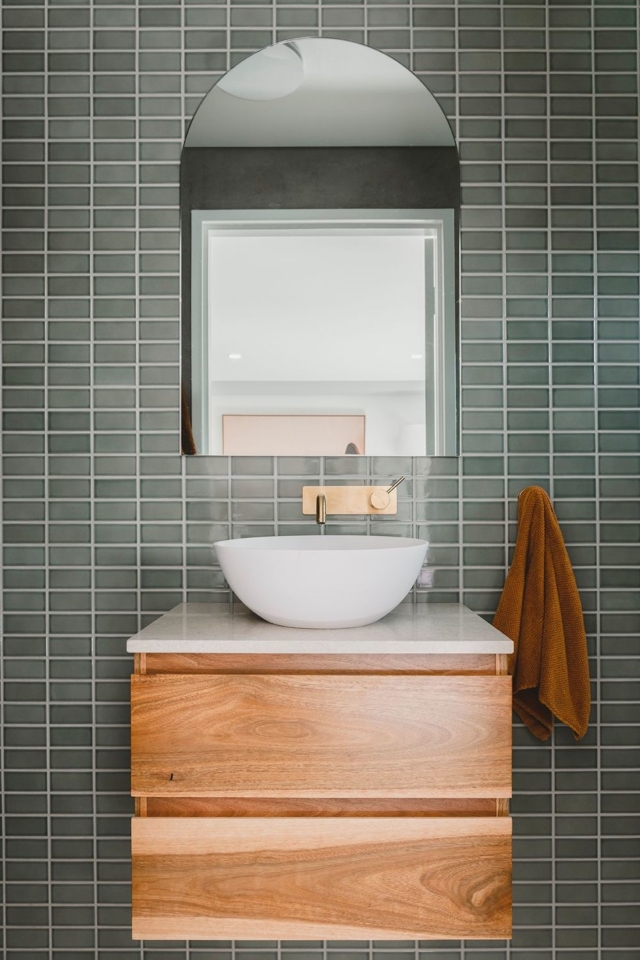
Photos by Jacqui Turk

Categories
Before & Afters RENO ADDICT

Depressing kids’ room becomes nurturing, dreamy space.

This week, Naomi Findlay shares the second finished room in the rundown 1880s stone cottage she is renovating. If you missed room one, check it out here. Over to you, Naomi…

I don’t really know where to begin with how I feel about this room. It’s been quite an emotional journey. I was definitely super stressed at the thought there’d been some kids here that had experienced some trauma. So it’s quite humbling to look around and see the way the house has accepted what I’ve wanted to gift it.

These walls used to be adorned with such horror, and now they are just shining and fresh and they’ve been really welcoming to the treatments that I’ve wanted to apply.

There’s a couple of key things I love in this space from a functionality perspective, and they’re really similar to the things that I loved about room one. First up, the front doors. Without doubt the amount of ventilation, security, and privacy that these Invisi-Gard French doors give me is out of control.

I specifically love the fact that I was able to customise the colour of the handles. So, no longer do these doors look like they belong on the outside, or on a garage, or in an outdoor area. They fit perfectly into this really, really elegant bedroom space. And while we’re on the door front, not only do I love the profiles of the Hume door that I’ve used in this bedroom, but that colour, it is absolutely gorgeous!

When I look around this finished room for the first time, probably in my life, I’m actually a bit stuck for words! It’s really comforting in here. It’s really nurturing. And I think part of that comes from the other layers that we have.

We have beautiful near-realistic timber-look vinyl planks on the floor. Those who know me, know I’m a tomboy and pretty clumsy. So I like the fact that these have a specific surface treatment that makes them super easy to clean and they’re low-VOC, which is great for allergies, especially for a bedroom.

I am blown away at the details in the trims and the timber work in this room; the skirting boards and the wainscot panelling and the chair rail. And naturally, I love the functionality of the picture rails, which mean no holes ever in the beautiful wallpaper that adorns the walls.

When I was styling the room, there were quite a few different layouts I could have gone with, but this one is definitely a winner for me. It allows for maximum view of the bed when you enter through the door and also allows for beautiful cross ventilation across from it. My biggest challenge renovating this room, without doubt, was battening out to put brand new gyprock on all these walls. There wasn’t a baton or a screw that stuck first time, it was a real challenge.

My favourite part of this room is the wainscoting, the panelling, and all of the trim work. From a visual perspective, whatever happened in this room previously or whatever it looked like before, is now a distant memory. This is now a dreamy, nurturing, layered and quite elegant space.

Getting the curtain rail to stay in place was another challenge because the bricks underneath the gyprock were so fragile. The easiest part was the French doors from Hume and the Invisi-Gard screens from Alspec, and the reason why is that they were all custom made, so they were perfect. That was a hands-off experience for me. They came, they measured, they made, they fitted, dream!

If I had my time over again, I would have loved to have the front facade of the house done first because it certainly was a challenge keeping the crud and muck out of the room as there was such a mess.

I must admit I’m pumped. It’s come up beautifully and I’ve chosen elements that are well-wearing and quite classic. So not only will it stand the test of time in regard to the products I’ve used in here, but this room is also going to be fit for purpose and beautiful for at least a couple of decades.

Find all the suppliers and products used in room 2 as well as behind the scenes videos here.

Learn to renovate with Naomi: FREE masterclass

Our RENO ADDICT section.

Categories
Before & Afters DIY House Tours

Sixties homage to RSL becomes breezy family home


With two kids, Ben and Letisha Clare were fast outgrowing their weatherboard cottage in Lilyfield, and couldn’t wait to get into a bigger house, yearning to be closer to the beach.

AFTER: A light, bright and stylish family home kitchen

Admittedly, they weren’t looking for quite as much of a fixer-upper as this one, in Allambie Heights, on Sydney’s Northern Beaches, but the block size and northerly aspect were big draw cards. Luckily they could see its potential, unlike many others, which saw it sit on the market for nine long months!

BEFORE

“The distinct lack of street appeal meant our savings could be put to good use on the renovations rather than the upfront price tag,” Ben says. “We knew we could add so much value to the property, but were definitely worried about the amount of work required, Tish more so than me. I was ready to get started!”

BEFORE: This space became the kitchen

Having renovated their previous home they were (somewhat) confident they could one day turn it into their dream home. It’s still a work in progress, with much of the house still requiring a facelift, but the bedrooms, kitchen and living areas have been given a much-needed overhaul.

“We have well and truly taken over the place and put our stamp on it so it feels like home,” says Ben, who is creative director at an advertising agency. “The house is much more family friendly now and open-plan which is what we love. It’s a light, bright, happy space and, whilst we have a tonne of work to continue with for the years to come, we are loving the space, the characterful touches and of course, the proximity to the beach.”

It’s a red brick 1960s bungalow hand built by a concrete-loving character known only as Herbie. Ben explains: “Having passed away in the 1990s, we discovered from the neighbours that Herbie left his house to his grandkids who, unfortunately, didn’t quite take the same level of care of it as he presumably did. It was in a dire state when we first moved in late last year.

“Dark, dank and dingy, to say it looked and felt like an RSL Club is no exaggeration. Herbie was at one time the President of Forestville RSL Club, and had appropriated much of the Club’s furnishings for his house when it underwent renovations in the 1980s. I kid you not, much of the carpet and wood panelling were from the Club itself. The pokie-room lounge doors and carpet still line the downstairs garage!”

BEFORE

The house is designed on a large L-shape, but the previous owners had created a rabbit warren of sorts. “There were partition walls set up in the living area (to create a fourth bedroom), and a seemingly endless maze of rooms that defied logic and purpose. We ended up pulling down several walls.”
 
While the bedrooms and bathrooms have remained where they were, the hardworking couple reconfigured the entire floor plan to open up the space, ultimately creating a large living area and kitchen, with a dining area that spills off the living room. “Moving the kitchen it to the other side of the house resulted in a much larger kitchen than either of us have ever known,” says Ben.

Ben and Tish, a paramedic, have done most of the work themselves, and the progress they’ve made in just nine months is impressive! There were weeks (if not months!) of prep work, sanding and cleaning original windows, pulling up carpet (and lino!) to reveal spotted gum floorboards (hoorah!), which were then restored to their former glory. But after a month of trying to scrape the old paint off the ceiling and repair it, they gave up and committed to replacing all 50sqm!

Having moved from a dark, cramped cottage in the inner west, Ben and Claire wanted to make the most of space and light here. This saw them replace a window in the living room with a generous, bifold door and add two skylights above the kitchen benchtop.

“The result is a marked improvement, but still somewhat characterful,” Ben says, explaining they wanted to retain a lot of the original features, like the floors, generously-sized sunroom, and Hopper windows.

And there’s a lot more to do with the exterior, the pool and a granny flat reno among the projects still on the list.

“It will take us forever to get through it all, especially as we attempt to do so much of the work ourselves. It takes up weekends, but is immensely satisfying, and has saved us thousands in the process,” Ben says. “But we are happy to put all of our ideas and energy into this property to watch it turn into our dream home.”

But for now, it’s time to sit back and enjoy with with daughters Maxie and Daisy as they await the arrival of their third child next month!

Categories
Expert Tips House Tours RENO ADDICT

Stone cottage renovation that’ll blow your mind!

Most people would have run for the hills on seeing the rundown state of this 1880s stone cottage, but not our favourite renovator Naomi Findlay! Her years of experience and can-do attitude, meant she saw the potential to rescue and restore ‘Carrington House’ to her former glory, and she’ll be sharing the step-by-step process with us over the next few weeks and months. Over to you, Naomi…

From this…
…to this!

Carrington House is a little old house on Carrington Street in the Hunter region of NSW. What first attracted me to this property was not just the obvious need for it to be rescued, but the property felt like it was hurting. It felt like it had a story to tell, and no one to help tell it. And once I visited it once, regardless of how graphic and disturbing the property was, I couldn’t not have it as mine.

Step-by-step, I’m showing you everything I do, room by room, to transform this 1880s stone cottage that has been butchered and cut up over decades, and completely neglected, into a modern country, comfortable, classic, cosy cottage for me to work from.

Today I am pumped to be able to share with you the first finished room. I could go on forever about all of the things that were wrong with this room. There were rotted waling plates, destroyed bearers and joists, unstable floors, damaged multiply-lined walls, no character, water smells, mould and a dropping ceiling!

Oh gosh, the list goes on and on and on! Let alone not being weathertight, waterproof, insect-proof, or even secure. If you want to see more, you can here with behind the scenes videos of every single step in that journey.

My inspiration for room one was a strong, feminine, classic feel. 

You’ll notice that even though the walls are adorned with the most audacious floral wallpaper, it is in a very deep navy blue which gives it such strength. I’ve ensured that space medicine is integrated as the light and outdoors are brought inside with amazing French doors and side lights. These doors are then made super practical for the Australian environment with French security doors layered internally, meaning privacy and security as well as no flies!

To add that next level of detail, I’ve installed broad trims, bulky cornices, picture rails, chair rails and custom wainscoting. It’s like jewellery on the walls.

I totally get that many people love spray painting everything white nowadays, but for me colour can be so therapeutic and so nurturing when it’s used correctly. So I used this wallpaper as my jumping off point for all of the colours in the room. From the wallpaper, I pulled the deep blue for the door and the playful soft blue for the wainscoting, as well as a crisp but warm white on the rest of the walls and the ceiling.

So the floor that was here was in disrepair but never fear, I have renewed and recycled that and taken it to another project, it’s certainly not in the skip bin. Given this may become my office, I needed to make sure that the floor was really hardy and so I’ve actually gone for a wide plank on the floor. Wider boards were often used in years gone by and were certainly what was underneath this existing floor. Here I have chosen to go on with a very, very hard-wearing, very wide, vinyl plank, which is laid with a heavy adhesive. This means it’s waterproof, dust proof, scratch proof, you name it, I can do pretty much anything to these floors and they will tolerate it.

My biggest challenges in this space were the subfloor (it was non-existent) and the repairing of the existing gyprock. It was my choice to keep the gyprock on the walls and not strip it. But in doing that, it was a really tough job for the gyprockers to repair the walls.

My favourite part of this room varies day by day as I sit in the space. However, the door is still a winner. The finish on the door and the colour of the door blow my mind.

I hope you enjoy seeing the transformation, and if you would like to know more about any of the specs or products that you’ve seen, you can find them here.

Learn to renovate with Naomi: FREE masterclass

Categories
Before & Afters House Tours RENO ADDICT

Hard to sell house transformed into forever home

A savvy husband and wife real estate agent and interior decorator duo picked the street before they picked this home. And although they planned to flip it, once they started renovating, they soon knew it was going to become their forever family home.

AFTER Living room with dining behind
BEFORE Living room
AFTER Dining room
BEFORE Dining room

“We picked the street before we picked the house, after inspecting a house for sale in a nearby street,” says Amanda Smythe. “We liked the feel of this street so my husband called on some real estate contacts to see how often homes came on the market. They told him that one had been on the market for nine months and not sold and that if we knocked on the door the owner might be receptive.

“We looked and whilst it was very dated (think original California bungalow at the front with a nineties extension at the back) I knew I could do something exceptional with it. It is elevated, north-facing, and flooded with light. After a previous buyer resurfaced and a bidding war ensued, the house was ours.”

AFTER Kitchen
BEFORE Kitchen

It was easy to see why the home on Sydney’s popular Lower North Shore had stayed on the market for so long with its dark timber, blue walls, floral curtains, and a large previous reno, which wasn’t appealing to today’s buyers.

“It also had no parking and the main bathroom (that all five of us used for five years) is now the powder room,” said Amanda, who has three children aged eight to 16.

AFTER A stunning girl’s bedroom

“Our initial thoughts were that we would renovate and flip it in a relatively short period of time. However, over the five years we ended up living in it pre-renovation, we fell in love with the block, the street and the area.

“It’s a leafy cul-de-sac where everyone knows each other, we are in and out of each other’s houses and the kids are best friends and spend their weekends running from house to house. So, by the time we were ready to undertake the reno, we knew we were going nowhere!”

AFTER A boy’s bedroom

Only one room in the house remained structurally untouched in the 18-month renovation project. The couple drew on their extensive knowledge of property and decorating when choosing the finishes.

Amanda adds: “We knew we wanted a classic style that would stand the test of time, that was slightly coastal in feel (though no shells in sight); what I like to call contemporary Australian coastal. Drawing on light timbers (engineered oak floors), white walls and natural textures to complete the look and feel of a laidback, airy abode.

“It also had to be practical and hardwearing for a busy family of five. I implemented the advice I often give to my clients, in that you can have a beautiful house with young children that is still functional and liveable.”

They wanted the house to reflect their taste and style with light colours and natural textures, and, in an increasingly technology-driven world, they wanted a large focus on nature within the house as well as outside.

AFTER Master bedroom
AFTER Balcony off the master bedroom

“We wanted the feel to be light and airy and provide as much as exposure to nature as possible. This can be seen especially at the updated rear of the house, which is north-facing, with floor to ceiling windows that look out onto an elevated leafy district view and receive an abundance of natural light all day long. We also invested in the highest quality double glazed glass for improved energy consumption, requiring less heating and cooling.”

BEFORE Facade

There are plenty of open spaces so the family can enjoy the outdoors without being in the backyard all the time, and the transition between indoor and outdoor living is seamless, with them doing plenty of entertaining during the summer months.

AFTER Front porch

“What other buyers saw as old and tired and too much hard work was my inspiration, ” Amanda says. “The result is a contemporary Australian family home that is much loved and a joy to live in.”

For more on Amanda Smythe Design

Get more inspiration in our dedicated renovating section

Photography by The Palm Co and Emmy Etie Photography

Categories
House Tours RENO ADDICT

A 70s house reno that’s still very much 70s!

Not everyone who buys an older home wants to modernise it. In fact, some people, like interior designer Tania Bell, have every intention of keeping their Melbourne home’s retro vibe while replacing the ageing and impractical parts in a very sympathetic way.

A new kitchen that absolutely suits its 70s house home

It has taken almost a decade for Tania and builder husband Andrew to finish their reno, so they certainly spent enough time living in it as it was, to know what they really wanted from the end result!

“When we were searching for our first home together 10 years ago, we wanted somewhere that hadn’t had too many dodgy renos done to it that we had to undo! We wanted something that we only really had to superficially renovate; something that had good bones and didn’t need an extension,” Tania said.

A big block, a big garage and a spare room for her home office were also top of the wishlist. “As soon as we walked in the front door at the open for inspection, we both looked at each other and knew this was our house!” Its flat roof, Besser block walls and exposed beams made it a bit quirky and probably put a lot of people off. “I think most people thought, ‘no, too hard and too expensive  to work on’. Fortunately, we both had a similar vision for the place and Andrew being a builder doesn’t scoff at hard work, so we went about renovating.”

The couple have done a lot of the work themselves and with the help of industry friends. And they definitely suffered from doing their clients’ homes first, ahead of theirs. “I quite often tell my clients to live in their home and experience it before they make any changes, but I fear I may have followed my advice to the nth degree!” Being exposed to so many products and so much inspiration through her design work, meant Tania also changed her mind. A lot! “In the end I just had to make a decision and get on with it!”

The couple clearly love the 1970s style and Tania says it can actually fit in with a contemporary scheme very easily. “The bright, acid-like and clashing colours attract me to the era, as well as the textures and patterns in the soft furnishings. I also think that the dark timber and moody brick features in my home add some character to the space. The overall feel of the 70s is warmth and comfort, which makes a house more homely and cocooning.”

While she initially loved the original dark terracotta floor tiles, after a few years, she was sick of them showing every bit of dirt, and discovered were also cold and noisy. They were replaced with solid, rustic blackbutt timber. “It has made such a difference to the home and really lightens up the space and is warmer underfoot too.”

The kitchen however, was hated from the outset! “It was a daggy old 70s kitchen that the builder built himself out of plywood and didn’t have a kicker, so I would always bang my feet on the bottom of the cupboards. When we finally demolished the old kitchen over 18 months ago, that was a day for celebration!”

She was always keen to keep the brick feature wall along the fireplace, which provides much warmth and texture and sets the tone for the overall colour scheme. “I chose the colour for the timber beams from the bricks as well as the wall paint. We also continued that timber beam colour (Dulux Bronze Fig) outside to the new render cladding.

They’ve taken a lot of the cues from the existing original features of the home in order to keep its original feel. “Instead of going with a standard white kitchen, we used a rustic timber laminate benchtop and graphite coloured joinery with a vibrant orange handmade Portugese tile on the splashback.” They continued the orange tile into the bathroom, teamed up with charcoal tiles on the wall and floor.

Tania thinks the 70s look has come back into favour and she’s certainly not its only devotee. “I believe that the push back to warmer and more earthy tones in interiors, especially with paint colours, timber furniture and textiles, is why we are seeing it being reinvented for a contemporary setting. I also I think that a lot of the homes in our suburbs that are being renovated and not knocked down were built in the 1970s, so people are wanting to embrace a bit of the nostalgia of a time gone by.”

For more on Tania’s business, Green Room Interiors

Another 70s house reno that didn’t keep its retro feel

Images: Kate Hansen Photography

Categories
Design DIY Expert Tips RENO ADDICT

Should I cancel my renovation since Covid-19?

Throughout the country, people are pulling the plug on planned renovations and for those mid-project, the panic is real. But is it wise to continue in some circumstances and can we be using this time at home to plan, plan, plan?

Anna Williams is the owner of Your Beautiful Home in Sydney’s Northern Beaches. Her and her team help people with every aspect of their reno from drafting, building design and management of council DAs to interior design, project management and decorating. She says the decision for many depends on what stage they’re at.

Mid demo? Keep going…

“For many people, their house has been fully or partially demolished already, so at this point you are 100% committed. You need to ensure your builders are practising social distancing and then we all hope that the Government will allow construction to continue as long as safe practices are in place for your building team.

“To these people I would suggest being as organised as you can with all your fixtures and fittings. Have everything specified and ordered as we are starting to experience delays in some areas such as tapware and appliances. One of our projects is waiting on a shipment of tiles out of Italy and now the docks are closed there for four weeks. The sooner you get everything chosen and delivered the better.”

Photo: Nat Spada

Make savings on things you can easily upgrade later

If your income is reduced and you need to cut back, Anna suggests trying to save on items that can be easily replaced down the track. Taps and door hardware for example, can be more easily changed down the track for something more expensive, than basins, toilets and lighting. “Built-in joinery can be put off and replaced with temporary cheaper storage solutions from IKEA or similar. Air conditioning can be provisioned for but not fully installed until a later date.

“Your flooring, kitchen and windows are all items that cannot be easily changed later and if possible I would recommend that you try to still preserve a level of quality there as these directly impact on your home’s value in the future.”

Some renos can be paused

If you haven’t already started planning a renovation or new build, but it was on the cards, now could be a good time to start planning and talking about it.

If you’re in the midst of a smaller renovation to a part of your house (like converting a guest room to a living area or removing a wall to open up a space), Anna says it may be wise to halt this if your income looks uncertain.

“If the builders have started work already, they will have to pack down the site and re-set up again at a later date. This may incur a bit of a premium over the contract price you’d agreed on, however my experience at the moment is that builders are being as flexible as they can, understanding that these are unprecedented circumstances. For some, the inconvenience of not being able to use that part of your home will be outweighed by the need to stop expenditure.”

Use the time to get through council

If you are in the early stages of planning a renovation, she suggests that, if budget permits, you still move ahead with getting your plans submitted as there can be considerable time in getting approval from the certifier or council.

“We will come out of this Covid-19 crisis at some point, and then if money is still cheap to borrow, I believe the building industry will be very busy due to so many people putting back their plans. Councils will likely have a huge backlog of plans to review too. At that point, I believe it will be a huge advantage to be armed with approved plans, completed specifications and be in a position to start building straight away.”

Bear in mind that once you have approval on a DA (development application) or CDC (complying development certificate), you have five years to start work before the approval lapses. You only have to start the work in this time (i.e. commence demolition or similar) and once works have commenced, the approval will not lapse at all.

The Your Beautiful Home team at work

No shortage of Aussie materials

“Many people have been concerned about supply of materials,” says Anna, but so far this hasn’t been too limiting. “We have had to change the spec on certain items for clients but nothing too drastic. Most of our key building materials – bricks, gyprock, metal roofing – are manufactured here in Australia so supply has been fairly consistent to date.”

A key concern for most is whether the builders will be made to stay home and construction will have to halt. “We’ve been communicating this to all our trades to ensure they are vigilant about the social distancing, as this is what the Government is keeping a close eye on. We are doing all we can to avoid the ‘Bondi Beach’ of construction!”

What can you tackle yourself?

With all this time at home, is it a good idea for people to proceed with DIY jobs themselves? “If you’re legitimately handy then by all means I’d recommend getting on with smaller upgrades around home such as repainting, upcycling a piece of furniture, landscaping or construction of a small deck, for example. I would caution against taking on more complex DIY projects that you’re not really qualified to carry out. Please avoid anything electrical!”

With all the extra time at home, Anna believes many will be frustrated with issues around the house that they’ve been meaning to get to for a while. “This may well be a good time to get to them, either yourself or by employing an expert. Handyman services are still operating at this stage and it may well be cheaper to get a qualified person to address these problems quickly and efficiently, rather than tackling them yourself and then potentially paying to undo that work later.”

But think long term too

If you do decide to take on minor renovations while stuck at home though, Anna says make sure you have considered the end plan for your house. “It may make sense to do up a bathroom now but in a couple of years, when you want to extend the house, that bathroom may be in the wrong spot and then your investment has been wasted. We see this all the time. If you are considering interim works or renovating your house in stages, then it is essential to have the end plan worked out first – even if this plan will be completed over several stages and a long timeframe. This avoids you making mistakes along the way that need to be undone later; a frustrating waste of money.”

There’s still a lot of positivity

She adds it’s still early days for us in Australia to know how the design and building industries will manage through this. “At this stage, we are getting a great sense of positivity from our clients that they will continue for as long as they can. Across the board we have people still buying and selling properties and keen to move forward with plans as soon as possible.

“I hope, like we all do, that this crisis ends up challenging us as designers rather than bringing us to a complete halt. As many others have done, we have now quickly adapted to working from home, dropping samples on doorsteps, visiting sites outside of building hours, looking around clients’ homes via Facetime, and presenting to clients on video calls.”

Compared to others in many industries, Anna maintains they are lucky. “We provide a service that can be completed from almost anywhere, and people’s home comforts are becoming more important to them than ever. At this stage, we’re taking it day by day as things continue to evolve but we remain positive that we will get through this, and learn a lot from it too.”

–Anna Williams is the owner of Your Beautiful Home in Sydney’s Northern Beaches. They create your house plans, arrange the approval, design the interior detail and project manage. Now you can work with one team on all aspects of your build. They’re currently fully operational and conducting all their work online.

Categories
Architecture Design House Tours Interviews Real Renos RENO ADDICT

Chic Perth heritage reno a seamless blend of old & new

The heritage home with modern extension, is certainly not a new concept. Regardless of heritage restrictions, many a run-down old character home has been lovingly restored simply because people love a slice of history. From solid timber floors to architraves and unique ceiling details, a heritage home simply cannot be recreated with modern materials; something that was acknowledged by the designers of this gorgeous renovation, located in the well-heeled Perth suburb of Mosman Park.

Front elevation
Front elevation

Owned by the co-founders of Perth architectural and design company MAEK, the home was renovated recently after being purchased in less than ideal condition. And while it would have been easier (and possibly cheaper) to demolish the original abode and build something new, the MAEK team couldn’t resist the old bones of the once-loved home.

“It seemed sad to let the historical façade, and the history within it, disappear from the streetscape. People have since remarked at how glad they are that we had kept the old house and brought it back to life. We feel like we’ve made a real contribution to the neighbourhood and the value of our street,” says the co-founder of MAEK and one of the home’s owners Sophie McComish.

Kitchen
Kitchen

Lounge
Lounge

“We believe there is something very authentic and beautiful about a heritage home; something that is hard to replicate new. We get an immediate sense of quality and solidness; a sense that great care has been taken to craft it. This was another driving factor for us to bring the old home back to life – not losing all that beautiful detailing and workmanship,” says Sophie who rebuilt the front façade (the chimneys were strengthened and repaired) and repaired the home’s original six-metre-long jarrah floorboards too.

MAEK indoor/outdoor

And when it comes to the home’s stunning rear extension, a commitment to ‘beautiful details and workmanship’ is evident where MAEK settled on a unique blend of old and new. “Whilst we have not imitated the old, we would never do this, it’s difficult to know where the old house ends and the new addition begins,” says Sophie.

For example, the living room (a highly contemporary addition) features heritage sash windows, plus detailed skirting and cornices; and it’s one of Sophie’s favourite places to inhabit. “From an aesthetic perspective, the kitchen and living area is a delightful space to be in. You feel as though you are nestled in your own secret garden with its lush green outlook. It’s beautiful all year round,” says Sophie.

Sash windows feature in the home's new extension
Sash windows (right) feature in the home’s new extension

The bathrooms, with their generous proportions of marble and stone, are some of the home’s standout spaces. One of them is situated in an original bedroom, and now sports a vintage freestanding bath in front of an original black and white fireplace. “The heritage features are complemented by a generous ceiling height, large proportions of statuario marble, limestone floors and supersized mirrors. The result is grand and luxurious, but also calming,” says Sophie.

Guest bathroom
The gorgeous guest bathroom

Ensuite
Ensuite

The beautiful garden features a few large boulders, nestled beneath trees among plants and rocks, giving the garden a lovely organic feel. “From kids’ playdates to grown up barbeques and lazing about on a Saturday morning, the house works perfectly for us. The kitchen, living area and alfresco are surrounded by an oasis of lush green gardens and pool, which makes for a very tranquil space to enjoy.”

Alfresco
Alfresco

Pool
The unique pool fence appears to be floating on grass. “It hardly requires any cleaning!” says Sophie.

Photography: Joel Barbitta & Jack Lovell

For more on MAEK | A landscape designer’s green oasis in Perth

Categories
Before & Afters Design House Tours Interviews Outdoor & Exteriors Real Renos RENO ADDICT

Brisbane makeover: Amazing backyard resort in burbs

Originally built in 1967, and located in the Brisbane suburb of Mansfield, this five-bedroom, three-bathroom, two storey home underwent an incredible overhaul recently, courtesy of the team at Zou Build. “We wanted to pay homage to the original mid-century style of the home with a little bit of a coastal feel,” says Zou Build’s interior designer Christal Fysentzou, who used a palette of clean white, timber and brass in realising her vision.

“I love the simplicity of the final look. When flipping, you always need to keep the end buyer in mind, so it’s important to not put too much of your own personal style into design,” says Christal.

BEFORE front
BEFORE front

AFTER front
AFTER front. A lesson in the power of white!

One of the main challenges with the property was its 1960’s ceiling heights; they were lower than the minimum 2.4 metres required today. “Buying the property was a huge gamble for us. We didn’t know if we could make the lower level legal height, which was essential to creating the open plan space. It was really going to make or break the project,” says Christal.

Thankfully the engineering approval came through, giving the Zou Build team permission to raise the ceiling height on both the ground, and upper floors.

BEFORE kitchen
BEFORE kitchen

AFTER kitchen
AFTER kitchen. The raised ceiling makes all the difference.

AFTER lounge
AFTER lounge

The property was designed with a growing family in mind; it now has a large kitchen, two living areas, a home office, and garden with a large gated swimming pool. “It’s got a space for everyone. We gave a lot of thought to what we wanted as a family and translated that into this home,” says Christal.

BEFORE upstairs living
BEFORE upstairs living room and balcony

AFTER upstairs living room
AFTER upstairs living room and balcony

The master bedroom, unrecognisable from before, features a deluxe, custom Stegbar Galleria wardrobe in Nataio Walnut finish. “Wardrobes can be so much more than just somewhere to store clothes. Our walk-in wardrobe includes its own HAFEL speaker system to add a bit of fun to getting ready,” says Christal.

BEFORE bedroom
BEFORE master bedroom

AFTER bedroom
AFTER master bedroom

The robe also features incorporated lighting that flows into the ensuite and a custom Stegbar curved backlit mirror completes the look. The lighting choices were the perfect solution for the spaces, which are low in natural light.

AFTER The stunning robe in the master bedroom
AFTER The stunning robe in the master bedroom, looking through to the ensuite.

The ensuite’s curved mirror is the perfect foil for the angular cabinetry and tiles that feature elsewhere in the space. The simple, clean aesthetic is continued with custom made Stegbar frameless shower screens and Meir brass shower fittings.

BEFORE bathroom
BEFORE ensuite

AFTER ensuite
AFTER ensuite. Meir tapware in Tiger Bronze features throughout the home.

AFTER shower
AFTER shower

But arguably the most show-stopping part of the renovation is the backyard – it’s a stylish urban oasis that is ideally suited to the outdoorsy Queensland lifestyle. “The outdoor area is really quite amazing and it’s a bit like having a resort in the burbs,” says Christal.

BEFORE pool
BEFORE pool

AFTER pool
AFTER pool

While it’s an older Brisbane suburb, Mansfield is proving increasingly popular for young families, something that drew Zou Build to the area. “The majority of the houses in the area are dated and need some love, so it is the perfect time to start a renovation trend, to generate a new wave of emerging home buyers.”

One last look at that gorgeous pool area

For more on Zou Build | Before & after: A spacious modern farmhouse in Brisbane

Categories
Design House Tours Interviews

Boutique holiday home SOUL of Gerringong up for sale

Ridiculously photogenic, with Insta-worthy moments in every corner, we’ve featured the gorgeous SOUL of Gerringong holiday home many times. The work of interior designer Simone Matthews, of SOUL Home, and her husband Ben, the property has been in hot demand since it opened to guests three years ago. And given it’s just hit the property market; one lucky person will get to call it home soon. Envious, much?

The farmhouse of dreams

Kitchen
Kitchen

Comprised of a four-bedroom ‘farmhouse,’ two-bedroom pool-side cabana, one-bedroom studio barn and separate three-bedroom cottage, the home sits across two titles on 1525 square metres of land on the NSW South Coast, and can sleep up to 22 people.

Lounge
Lounge

Located in the heart of Gerringong, the home is only 1.5 hours south of Sydney and is within walking distance to an array of cafes, beaches and the photogenic Boat Harbour Rock Pool. And for those looking for a unique business opportunity, the property is being sold with the SOUL of Gerringong business attached.

Dining
Dining

“It was about blurring the line between a holiday house and a boutique hotel,” says Simone Matthews of creating what was essentially a new style of accommodation for the region. Originally a coastal farmhouse, the Cronulla-based husband and wife team bought the property in October 2015 before working their particular brand of fresh magic on it.

Barn
The barn

“We opened on Melbourne Cup Day in 2017 and we were booked out one year in advance straight away. The properties have been very well received with a lot of repeat family and friend groups, plus a lot of well-known companies using Soul for their off-site retreats.  After we were featured in Qantas magazine we had people contacting us straight from their flight to book in.”

Bathroom
Bathroom

Cabana
Cabana

The property goes to auction on site on Tuesday April 7, 2020, with a buyer’s price guide of $4 million.

Check out the real estate listing | SOUL of Gerringong owner shares secrets of her success